

Quick Search
Digital Drawing Tablet
Drawing Monitor
3D Printer
Accessories
Support
Language
Please select your country/region
North America
South America
Oceania
Europe
Quick Search
Digital Drawing Tablet
Drawing Monitor
3D Printer
Accessories
Support
Please select your country/region
North America
South America
Oceania
Europe
Funbox 3D Printer
01/Product Overview
02/Getting Started
03/Software Product Overview
04/Mobile Software (ugee Ufun) Introduction
05/Tablet Software (ugee Ufun HD) Introduction
06/Desktop Software (ugee Ufun) Introduction
07/Slicing Software (U-PRiNT) Introduction
This ugee Funbox 3D Printer User Manual (hereinafter referred to as "this Manual") covers an overview of the printer and all usage and operation-related information.
01/Product Overview
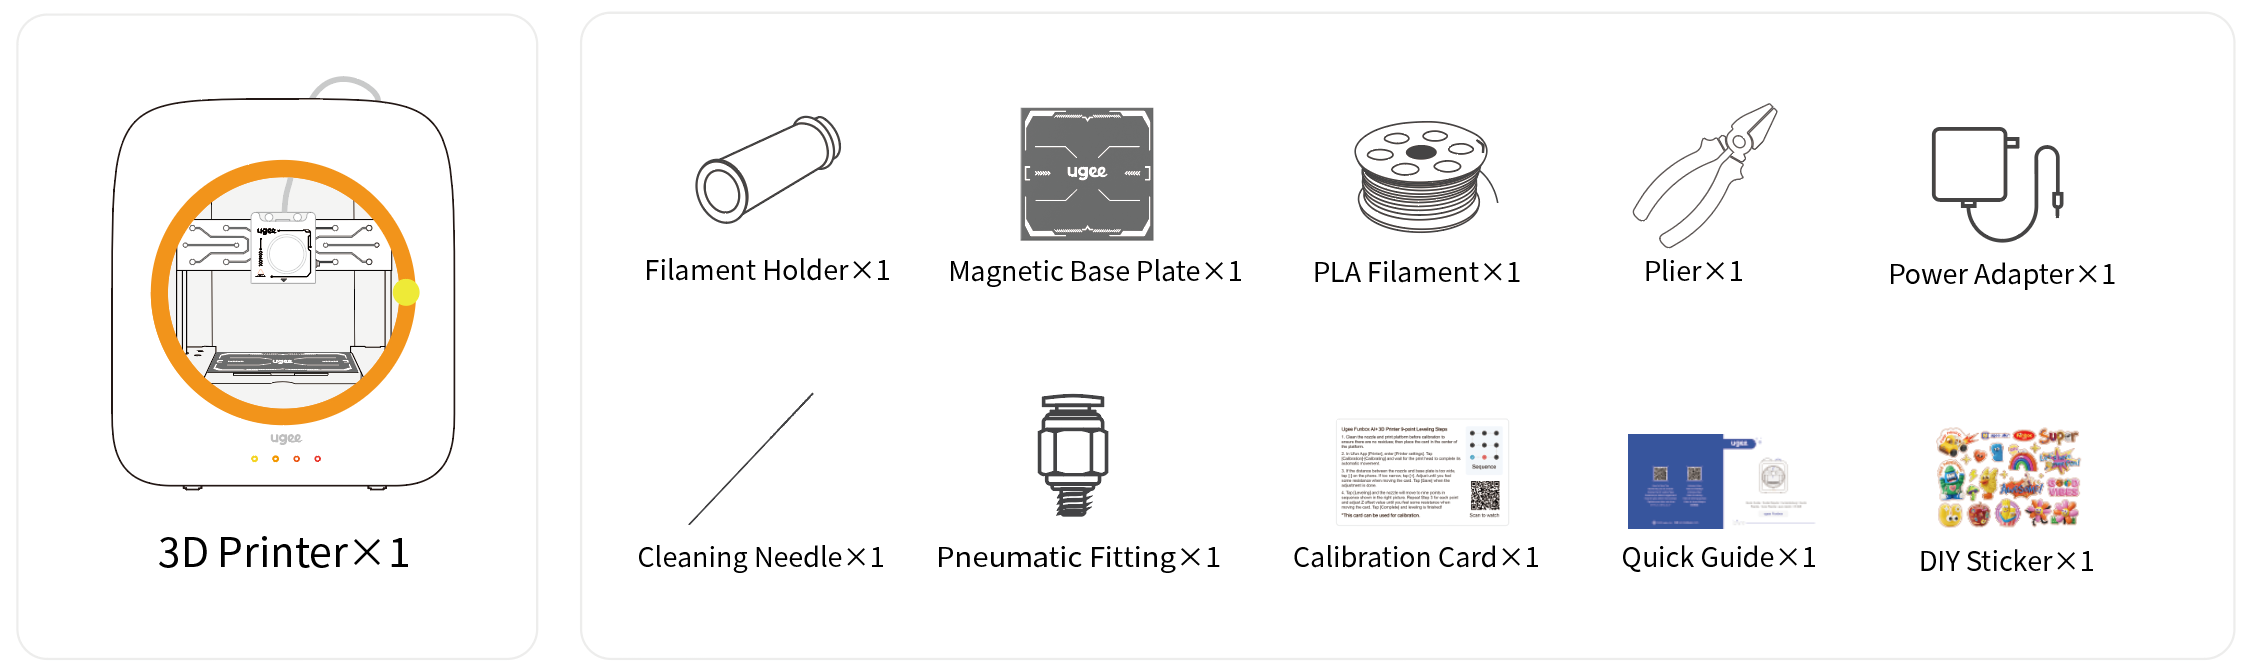
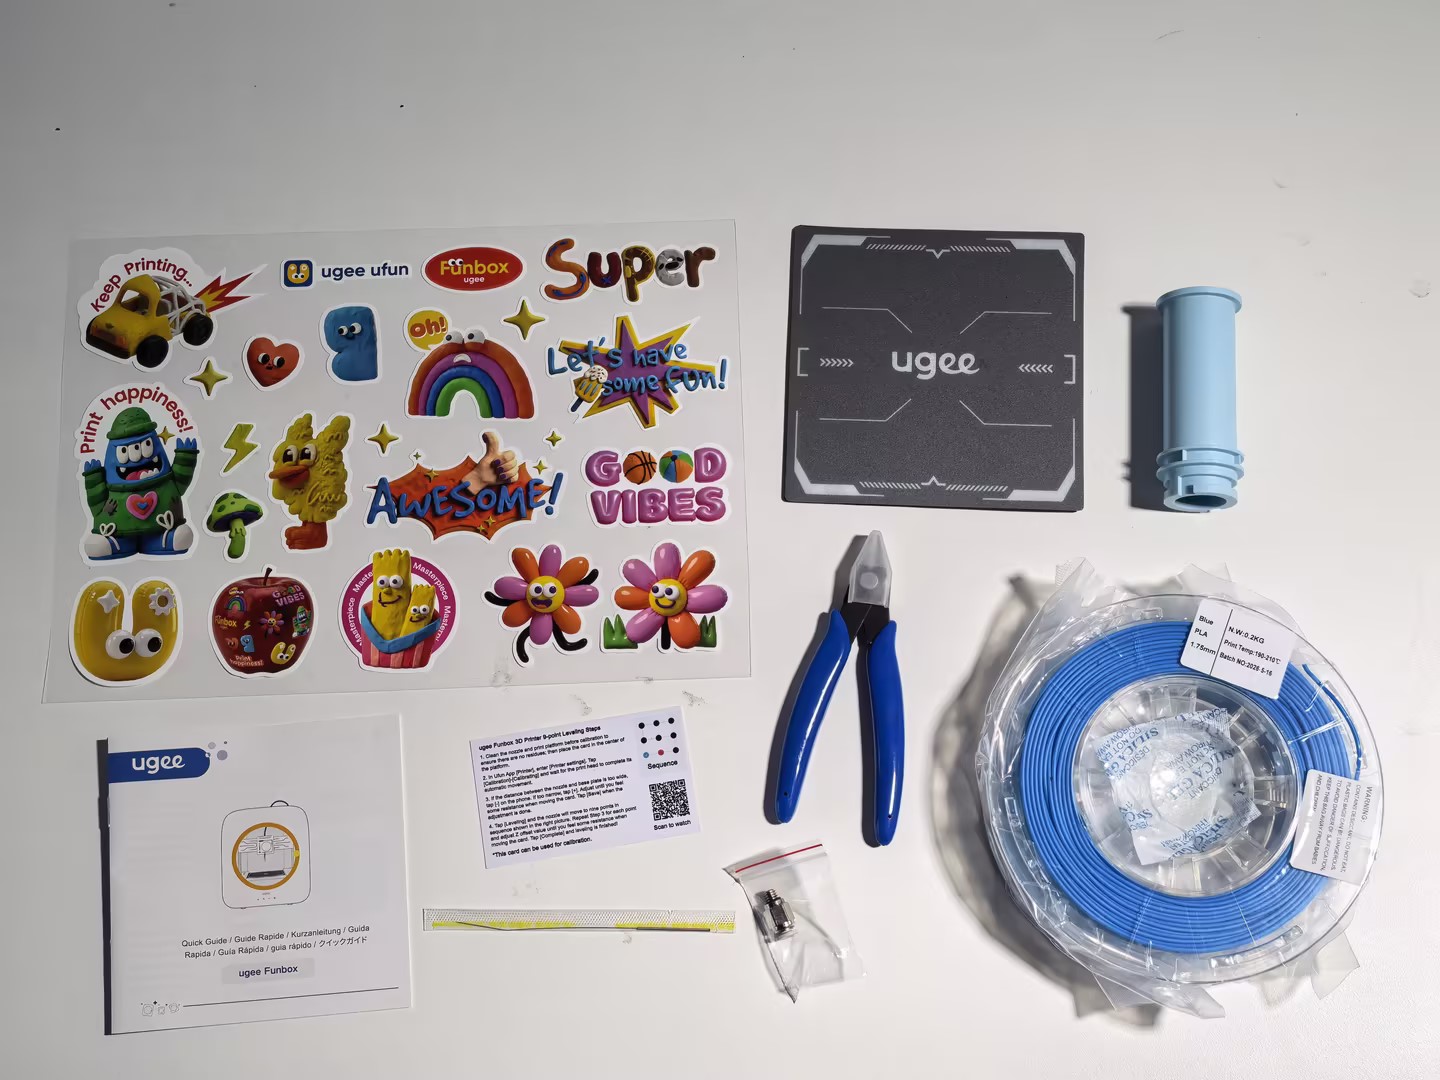
1.1 Package Contents
1.2 Product Information
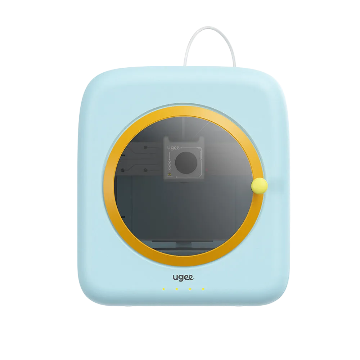
1.2.1 Product Overview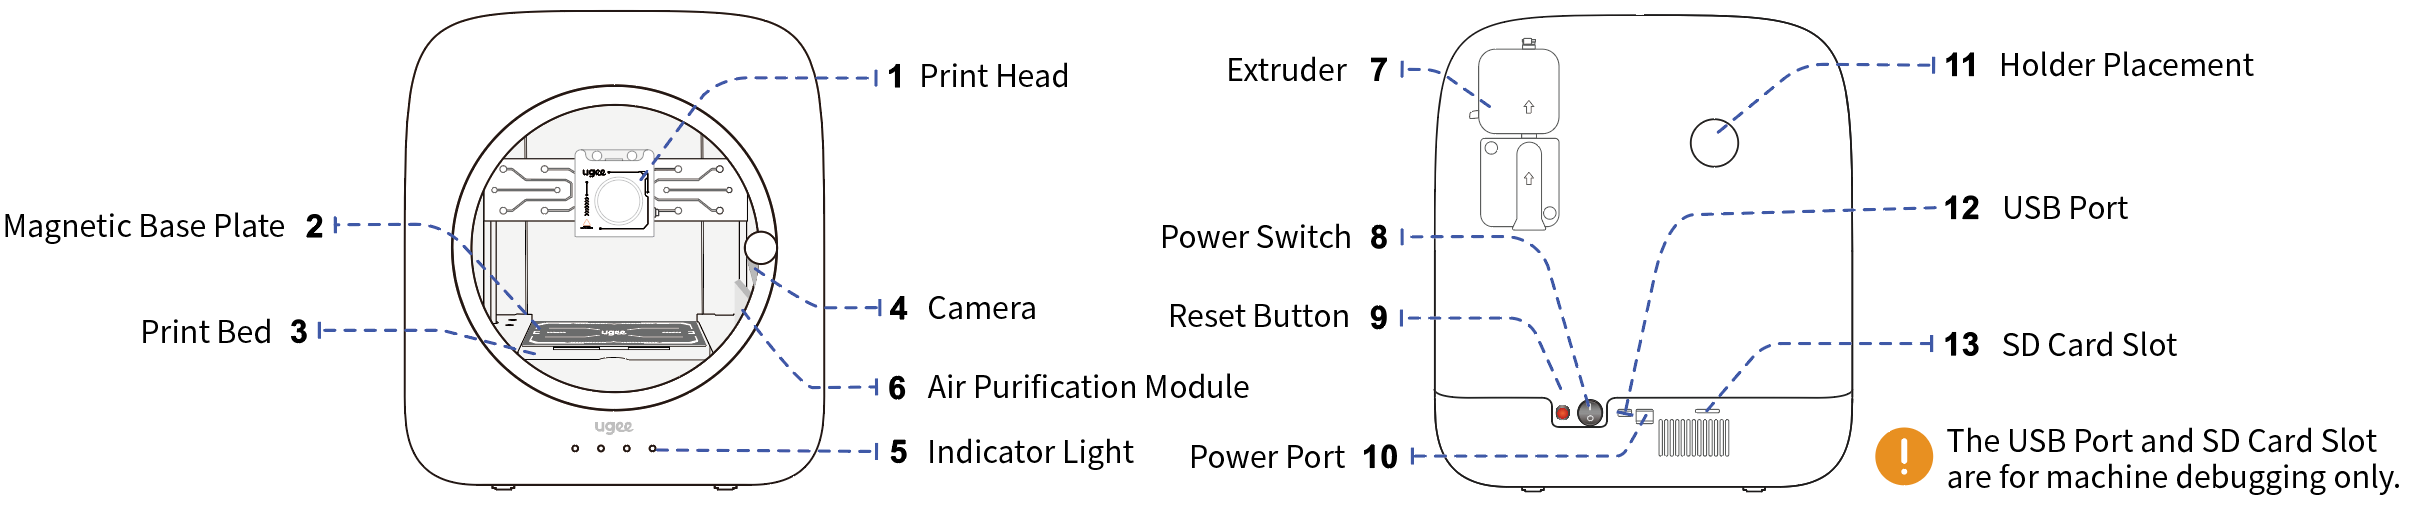 1.2.2 Product Specifications
Printing Technology
Fused Deposition Modeling (FDM)
Frame Structure
Plastic chassis
Build Volume
120×120×120 mm
Max Printing Speed
500 mm/s
Min Layer Height
0.05 mm
Recommended Age
Above 8 years old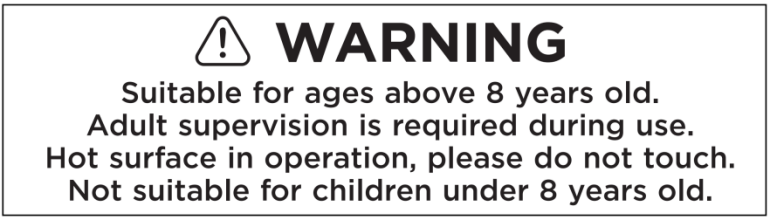
Max Extrusion Temperature
260°C
Print Material
PLA (Polylactic Acid)
Print plate
Flexible plate, easy to remove prints
Bed Temperature
Room temperature (no heated bed)
Print Nozzle
Tool-free quick-release nozzle
Camera
Built-in 2MP camera, supports time-lapse photography
Data Transfer
Wi-Fi
File Formats
OBJ, STL, Gcode
Packaging Size
335×347×385 mm
Machine Size
270×308×322 mm
Machine Weight
4.04 kg
Special Features
Power-resume printing, filament tangle detection, auto-leveling printing
Power Consumption
60 W
Air Filtration
6010 fan, HEPA filter + activated carbon filter
Operating Temperature
0–35°C
1.3 Software Download
1.3.1 Compatibility

ugee Ufun
Android 11 and above
iOS 16 and above
iPadOS 16 and above
Windows 10 and above
U-PRiNT
Windows 10 and above
1.3.2 Download from Official Website
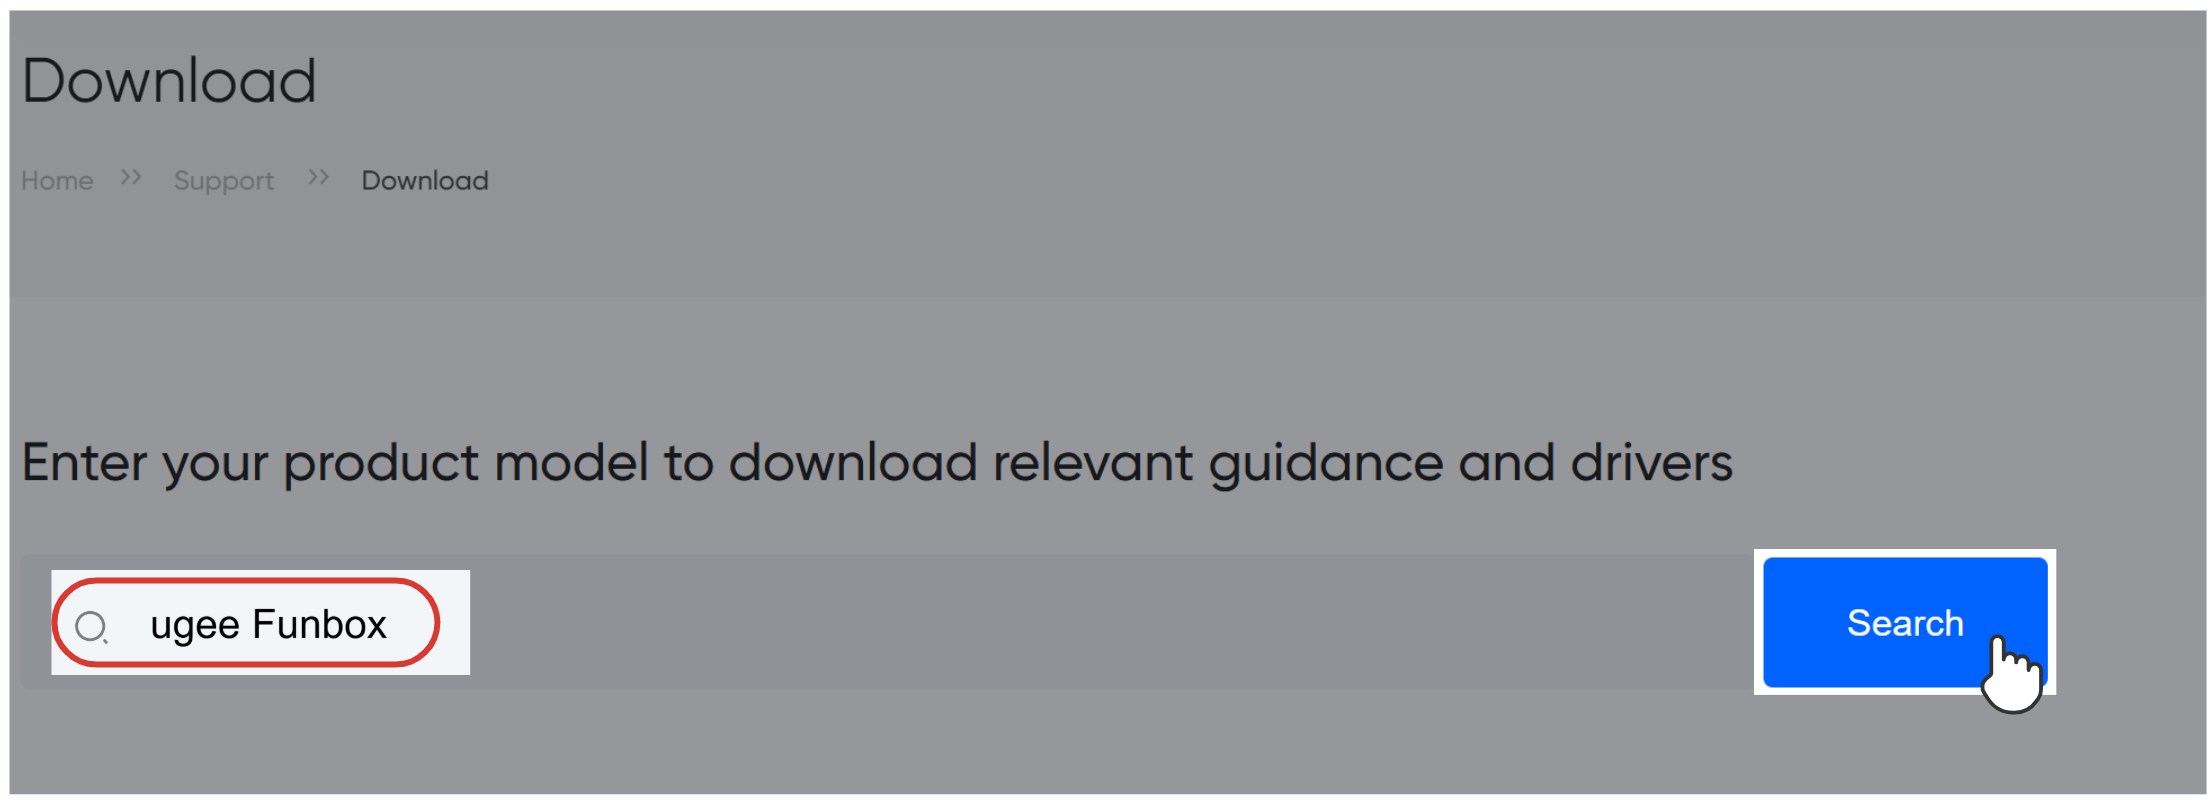
1. Visit the ugee official website and navigate to "Support" → "Downloads".
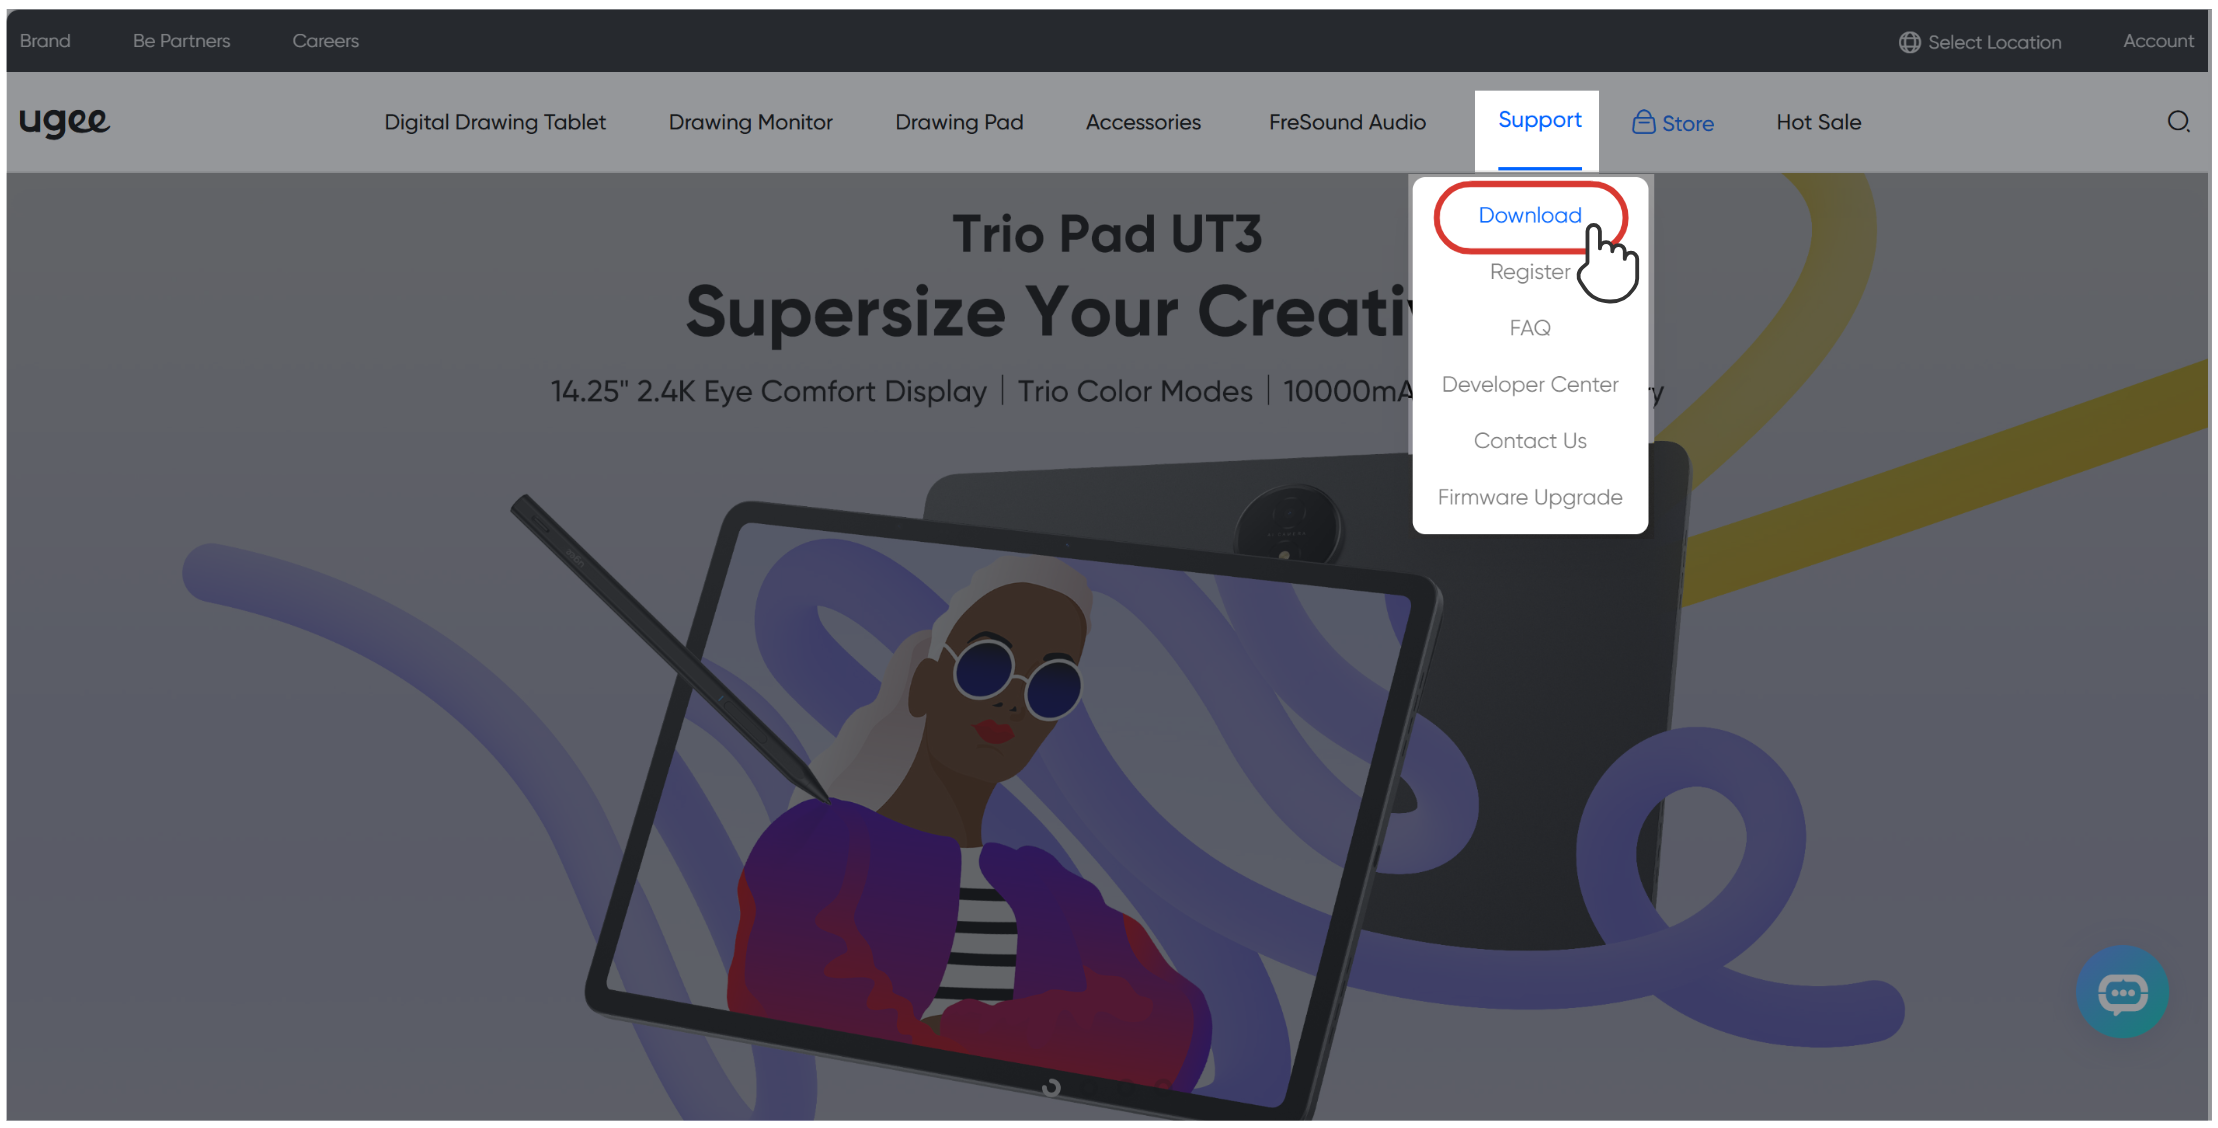
2. Enter your product model "ugee Funbox" to download the corresponding app and software.
1.3.3 Scan QR Code to Download
Scan the QR code with your phone to access download resources.
02/Getting Started
This section covers the unboxing, network setup, and quick print process for the ugee Funbox 3D Printer.
1. We recommend viewing the PDF tutorial for a better reading experience.
2. At the end of this chapter, 02/Getting Started, there are detailed video tutorials with step-by-step instructions.
2.1 Unboxing and Setup
Due to version updates and product improvements, the accessories included in the actual packaging (such as protective films, foam padding, cleaning needle, etc.) may differ slightly from what is shown during unboxing. Rest assured, these differences will not affect product performance. This manual is intended to guide you through how to use the product; the actual accessories received shall prevail.
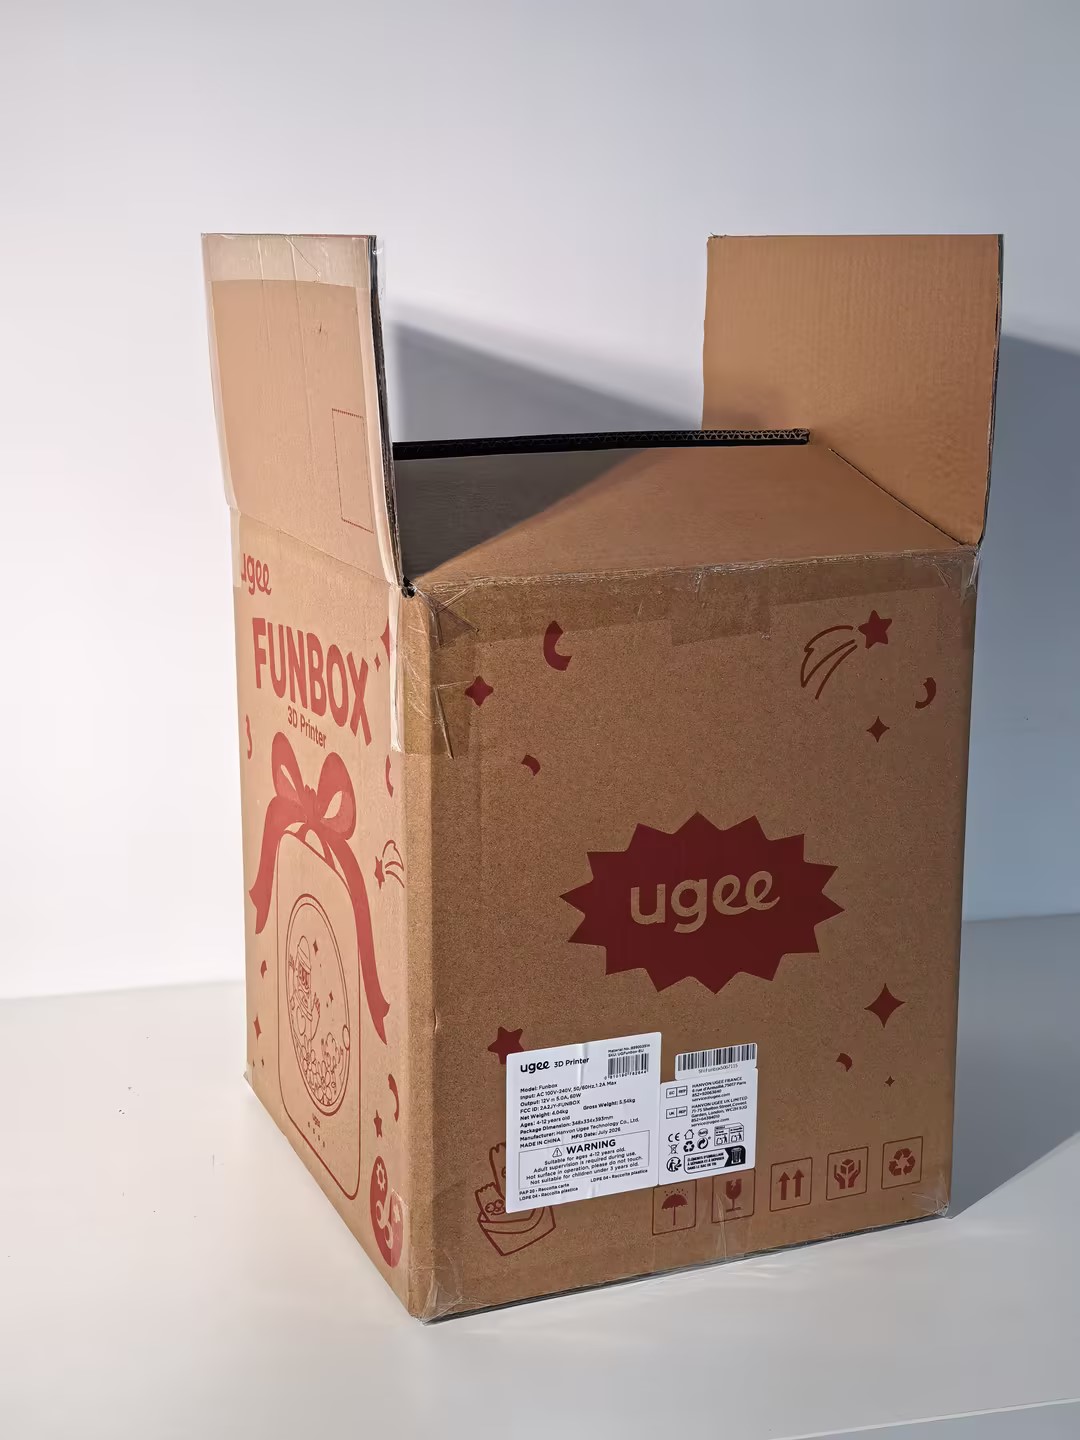
1. Open the top of the packaging box and remove the printer and accessories.
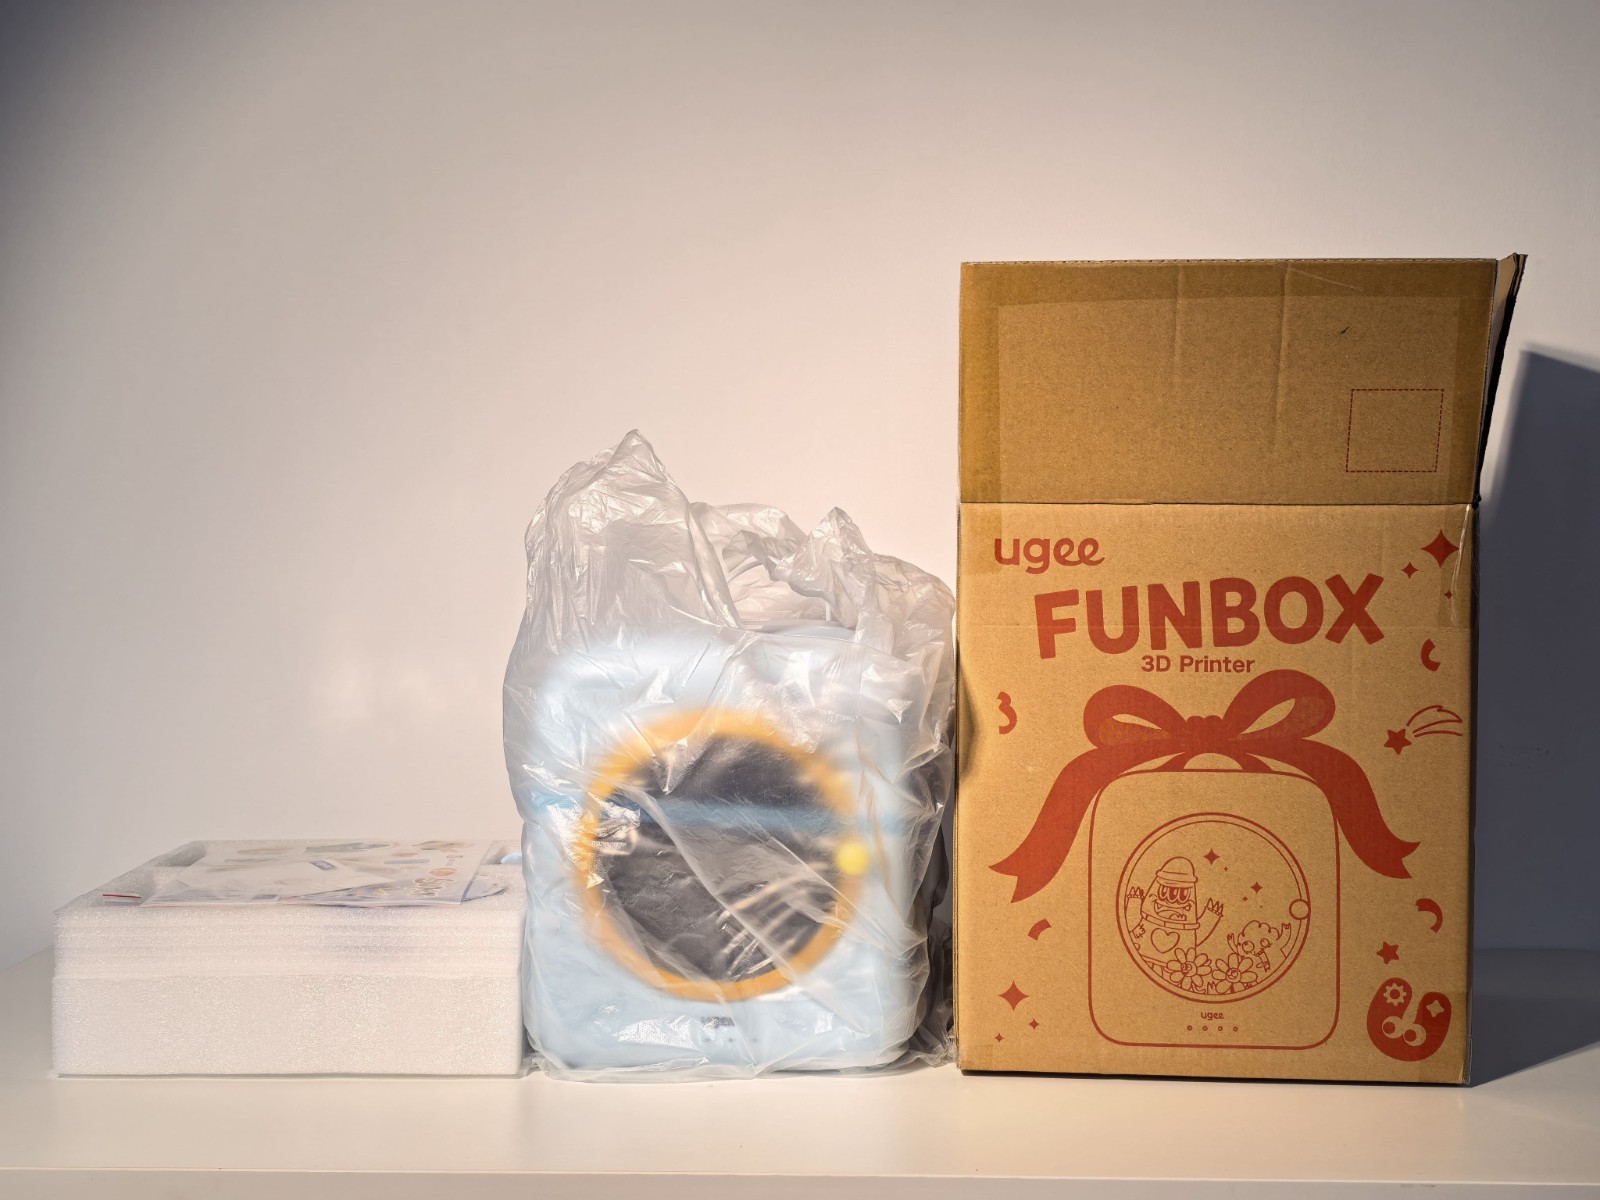
2. Check the contents: Quick Start Guide, 200g filament, DIY stickers, plier, filament spool holder, leveling card, and magnetic print plate.
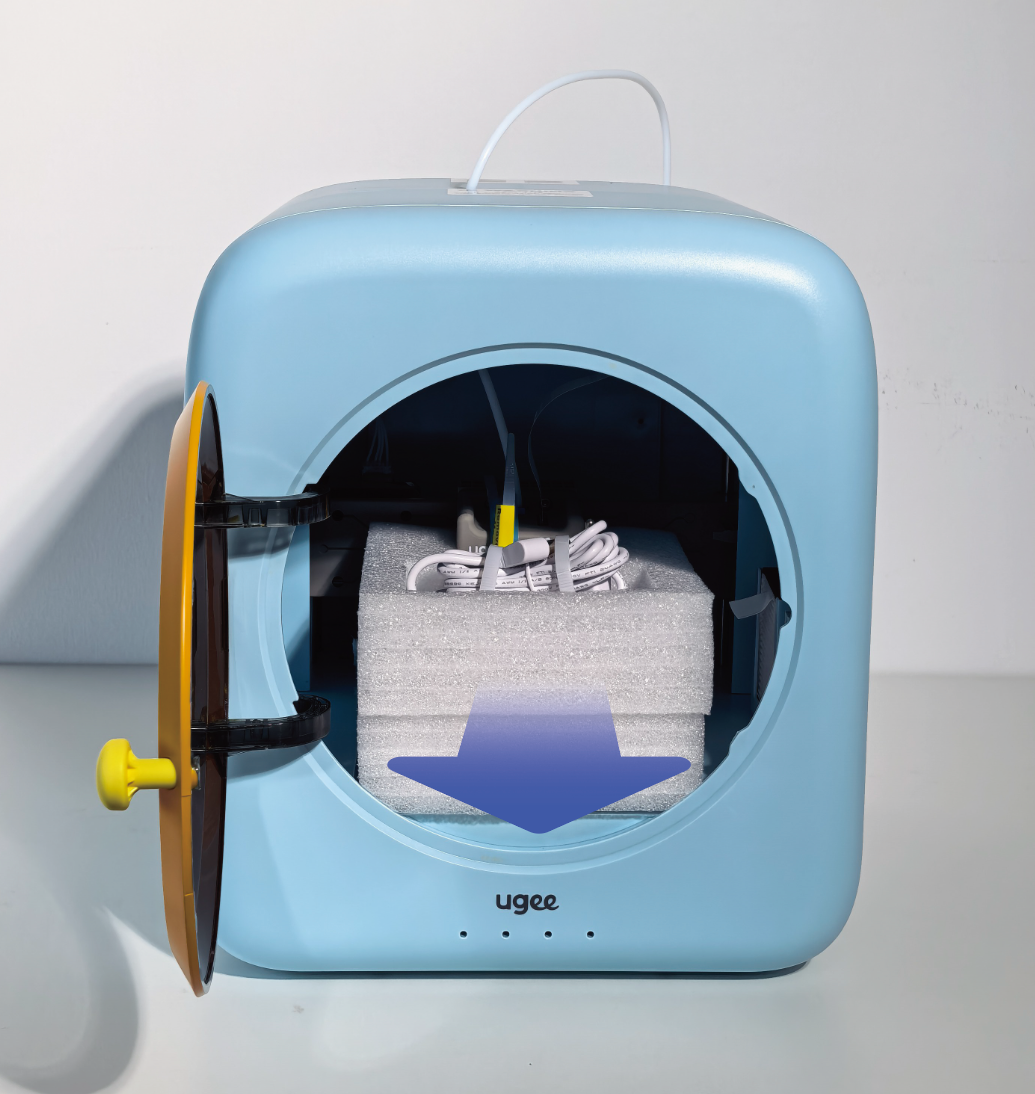
3. Open the chamber door and remove the protective foam inside. Take out the power adapter from within the foam.
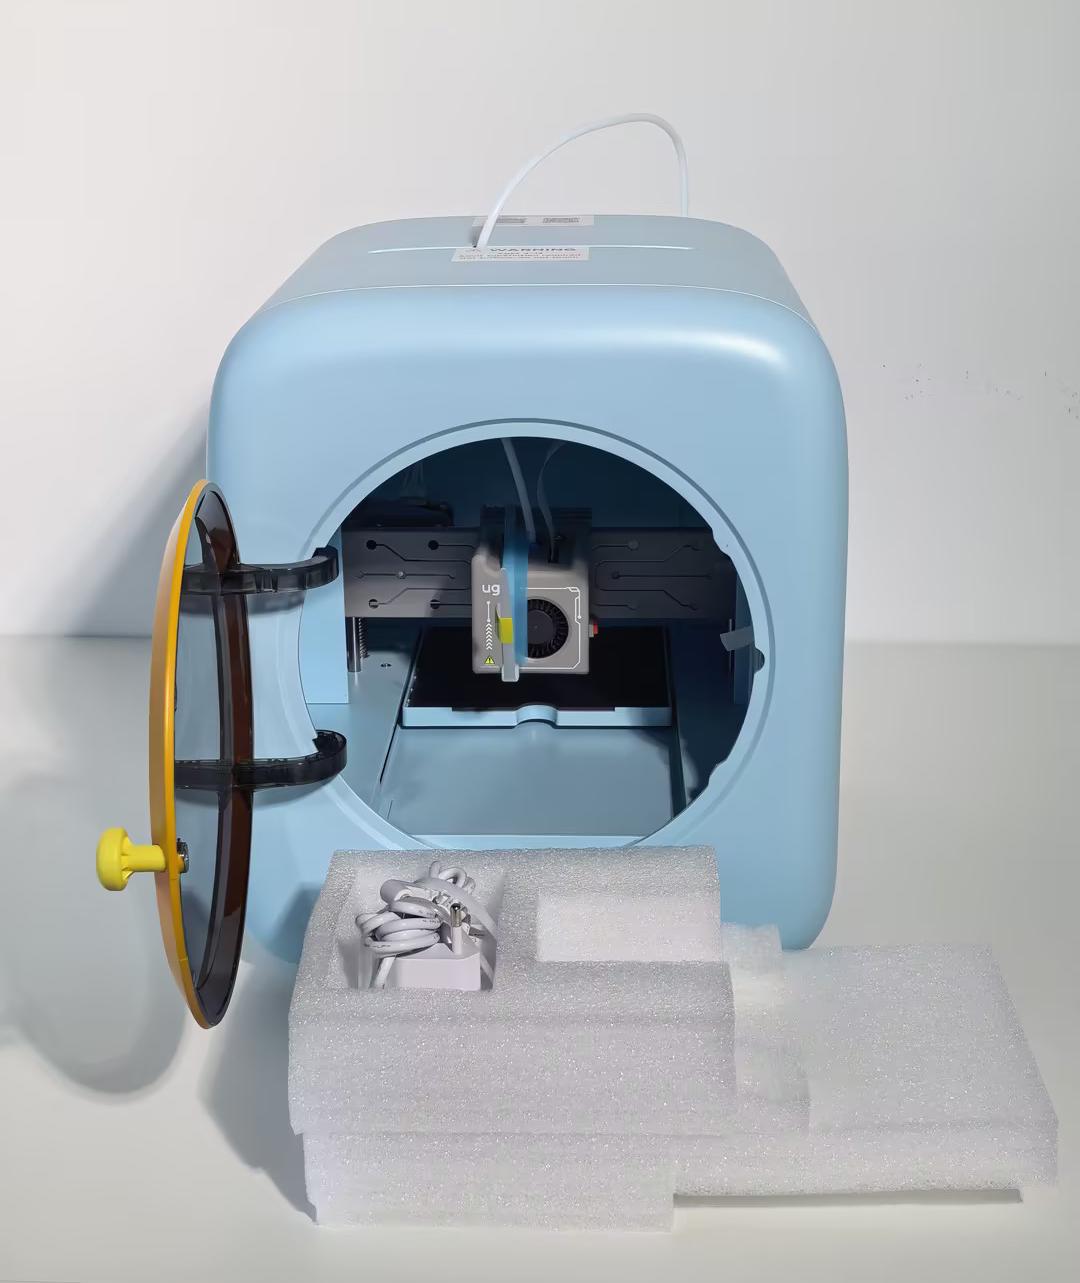
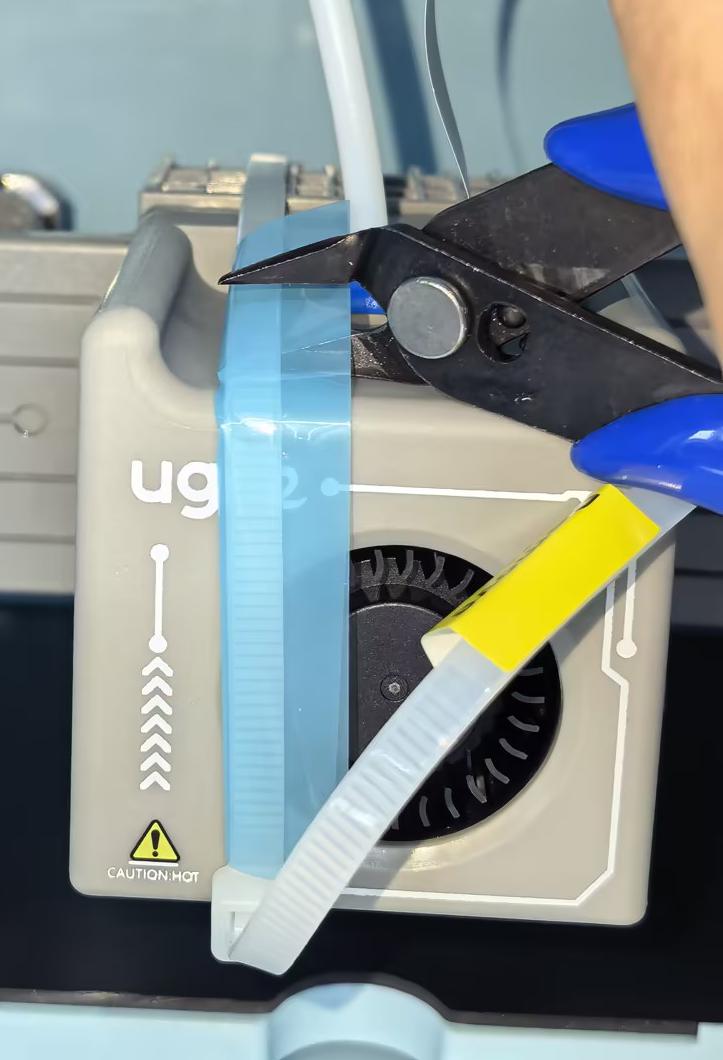
4. Use the plier to cut and remove the cable tie securing the print head.
5. Pull the print bed outward.
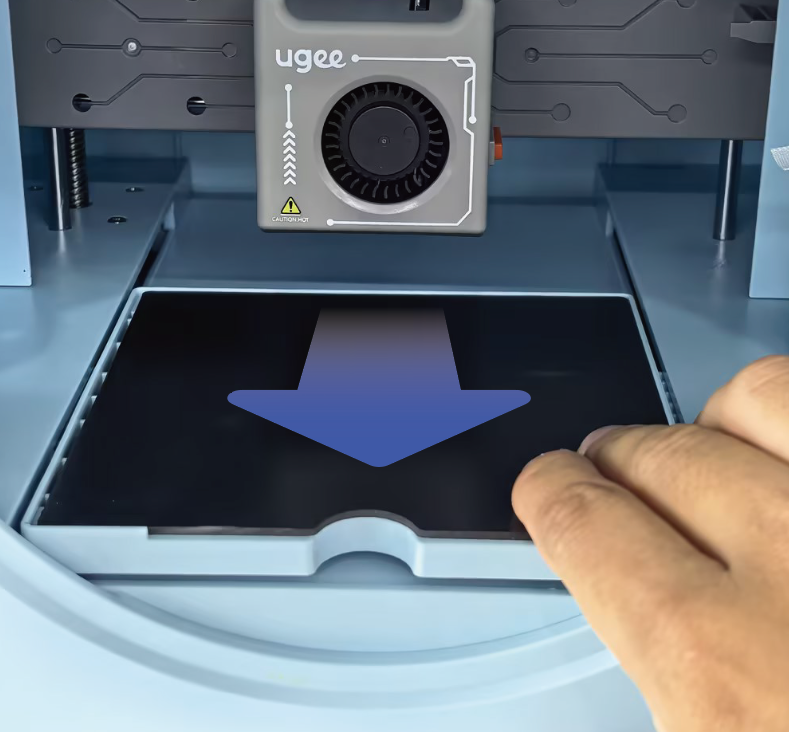
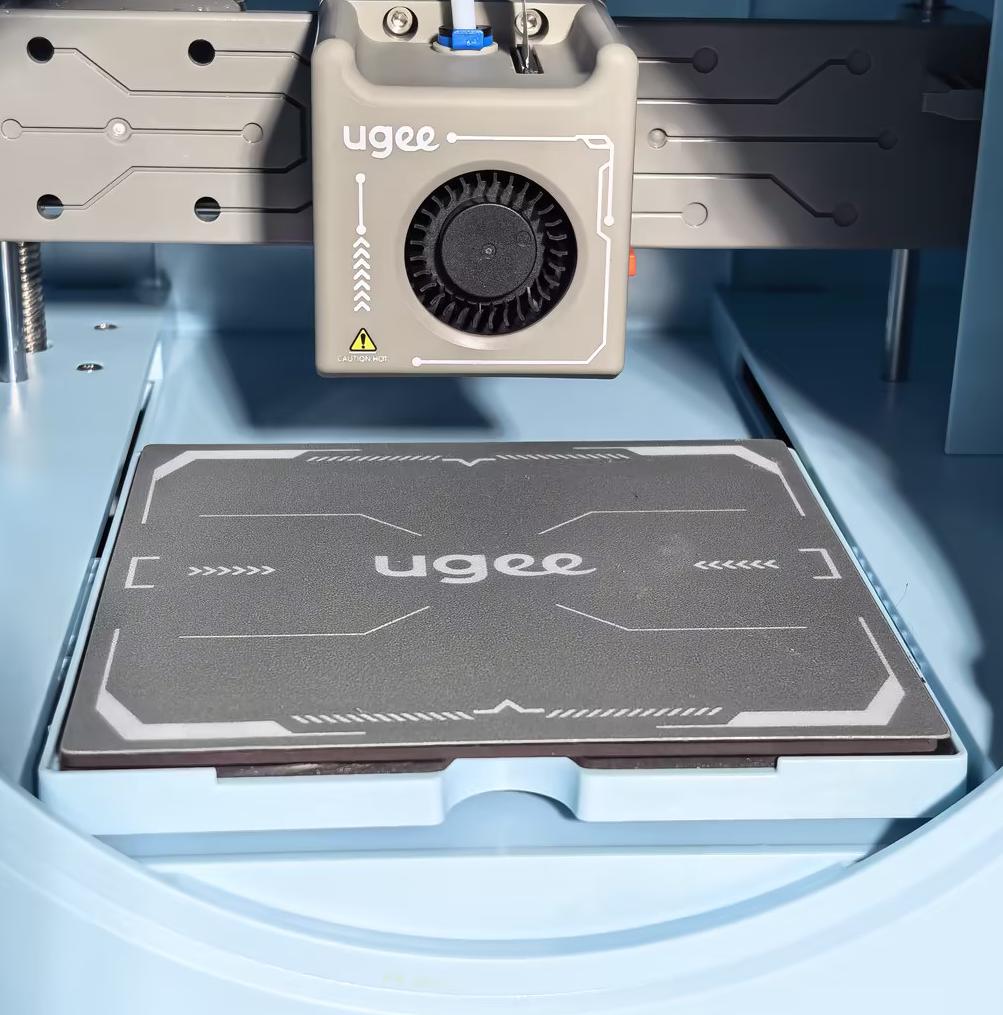
6. Align the print bed and place the magnetic plate on it.
7. Insert the spool holder into the mounting hole and rotate to secure.
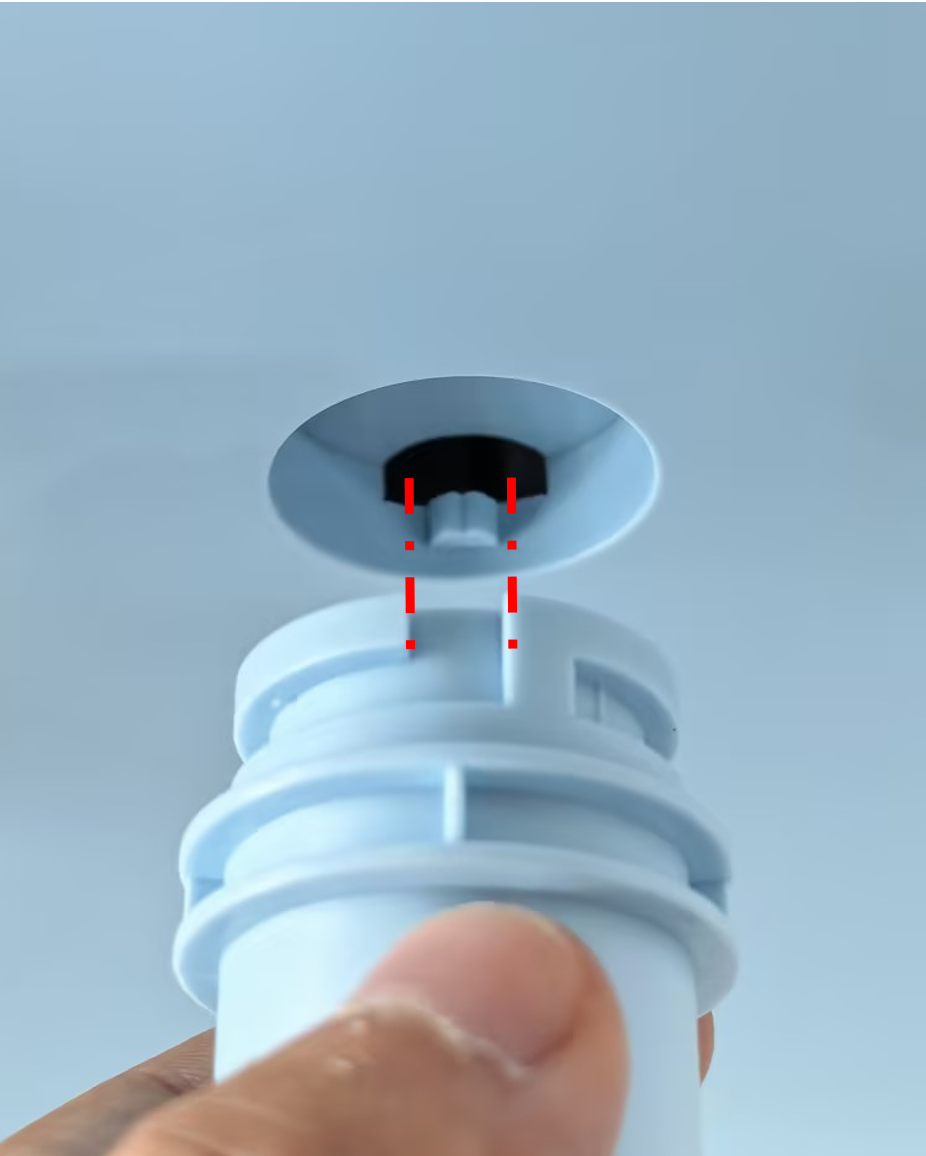
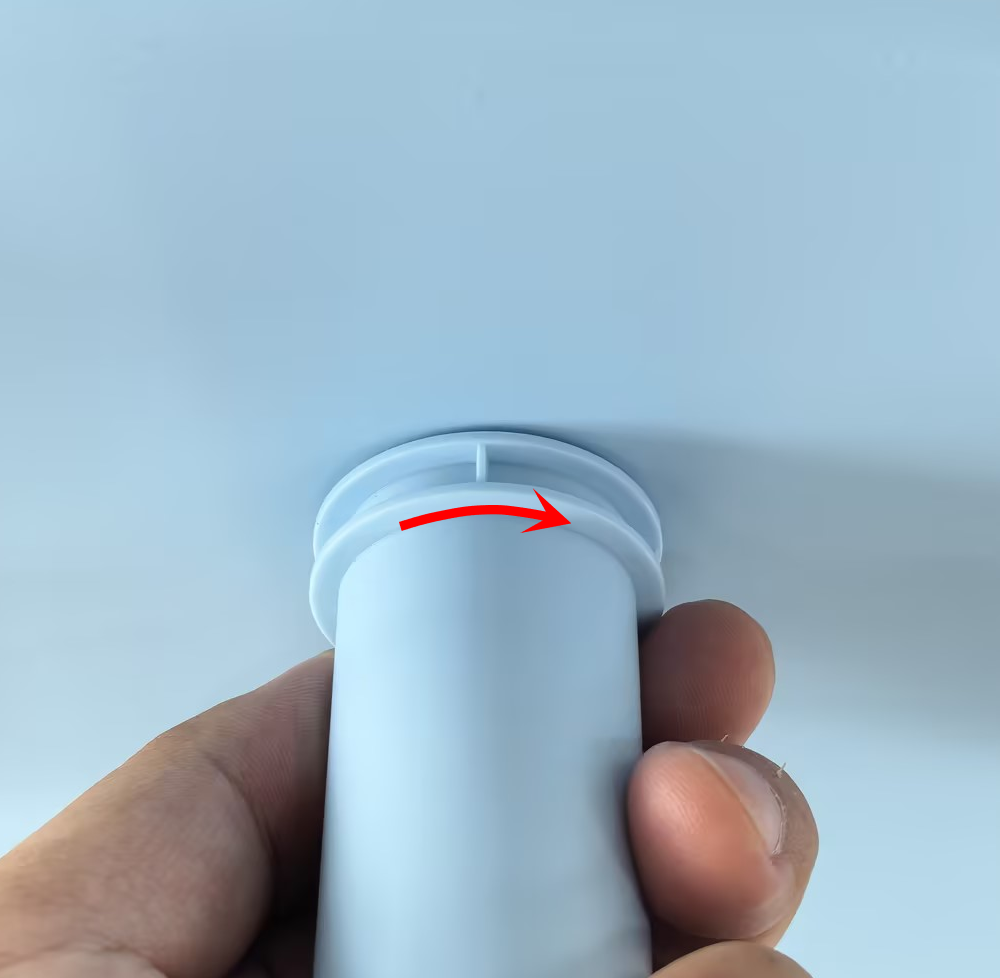
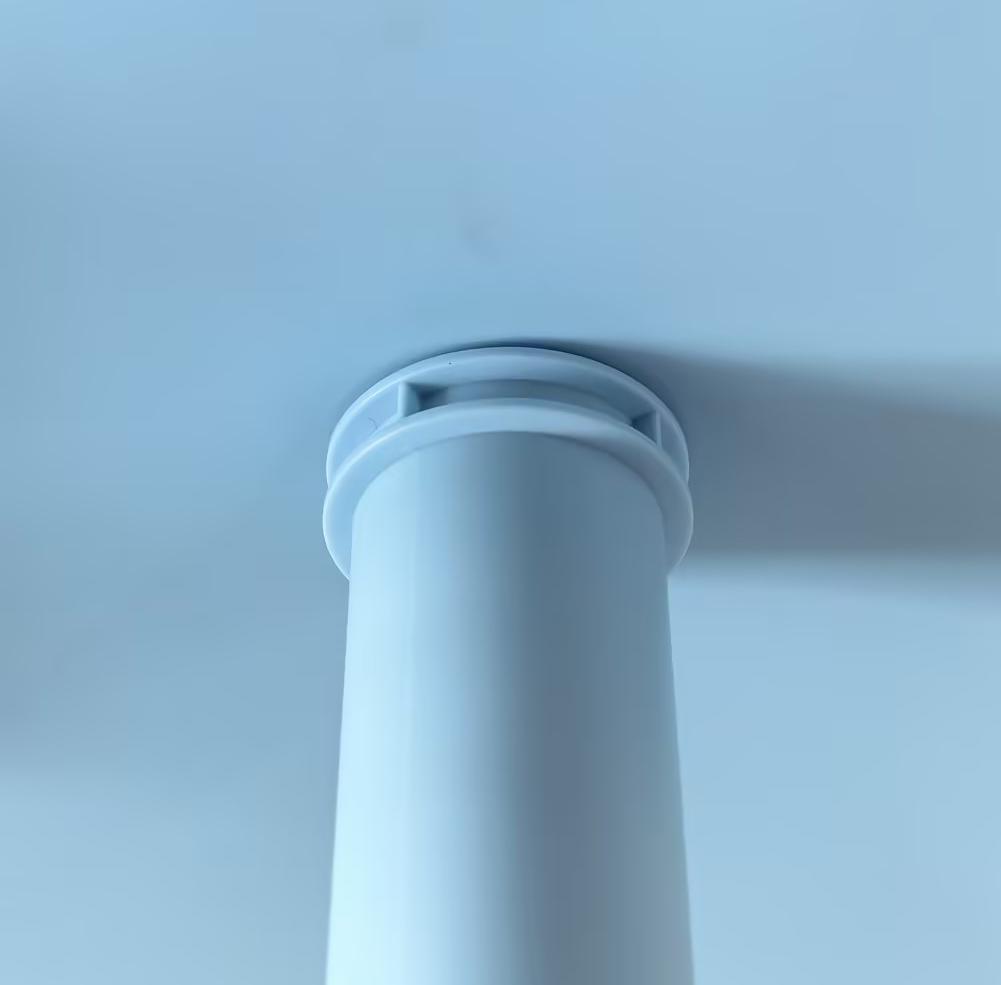
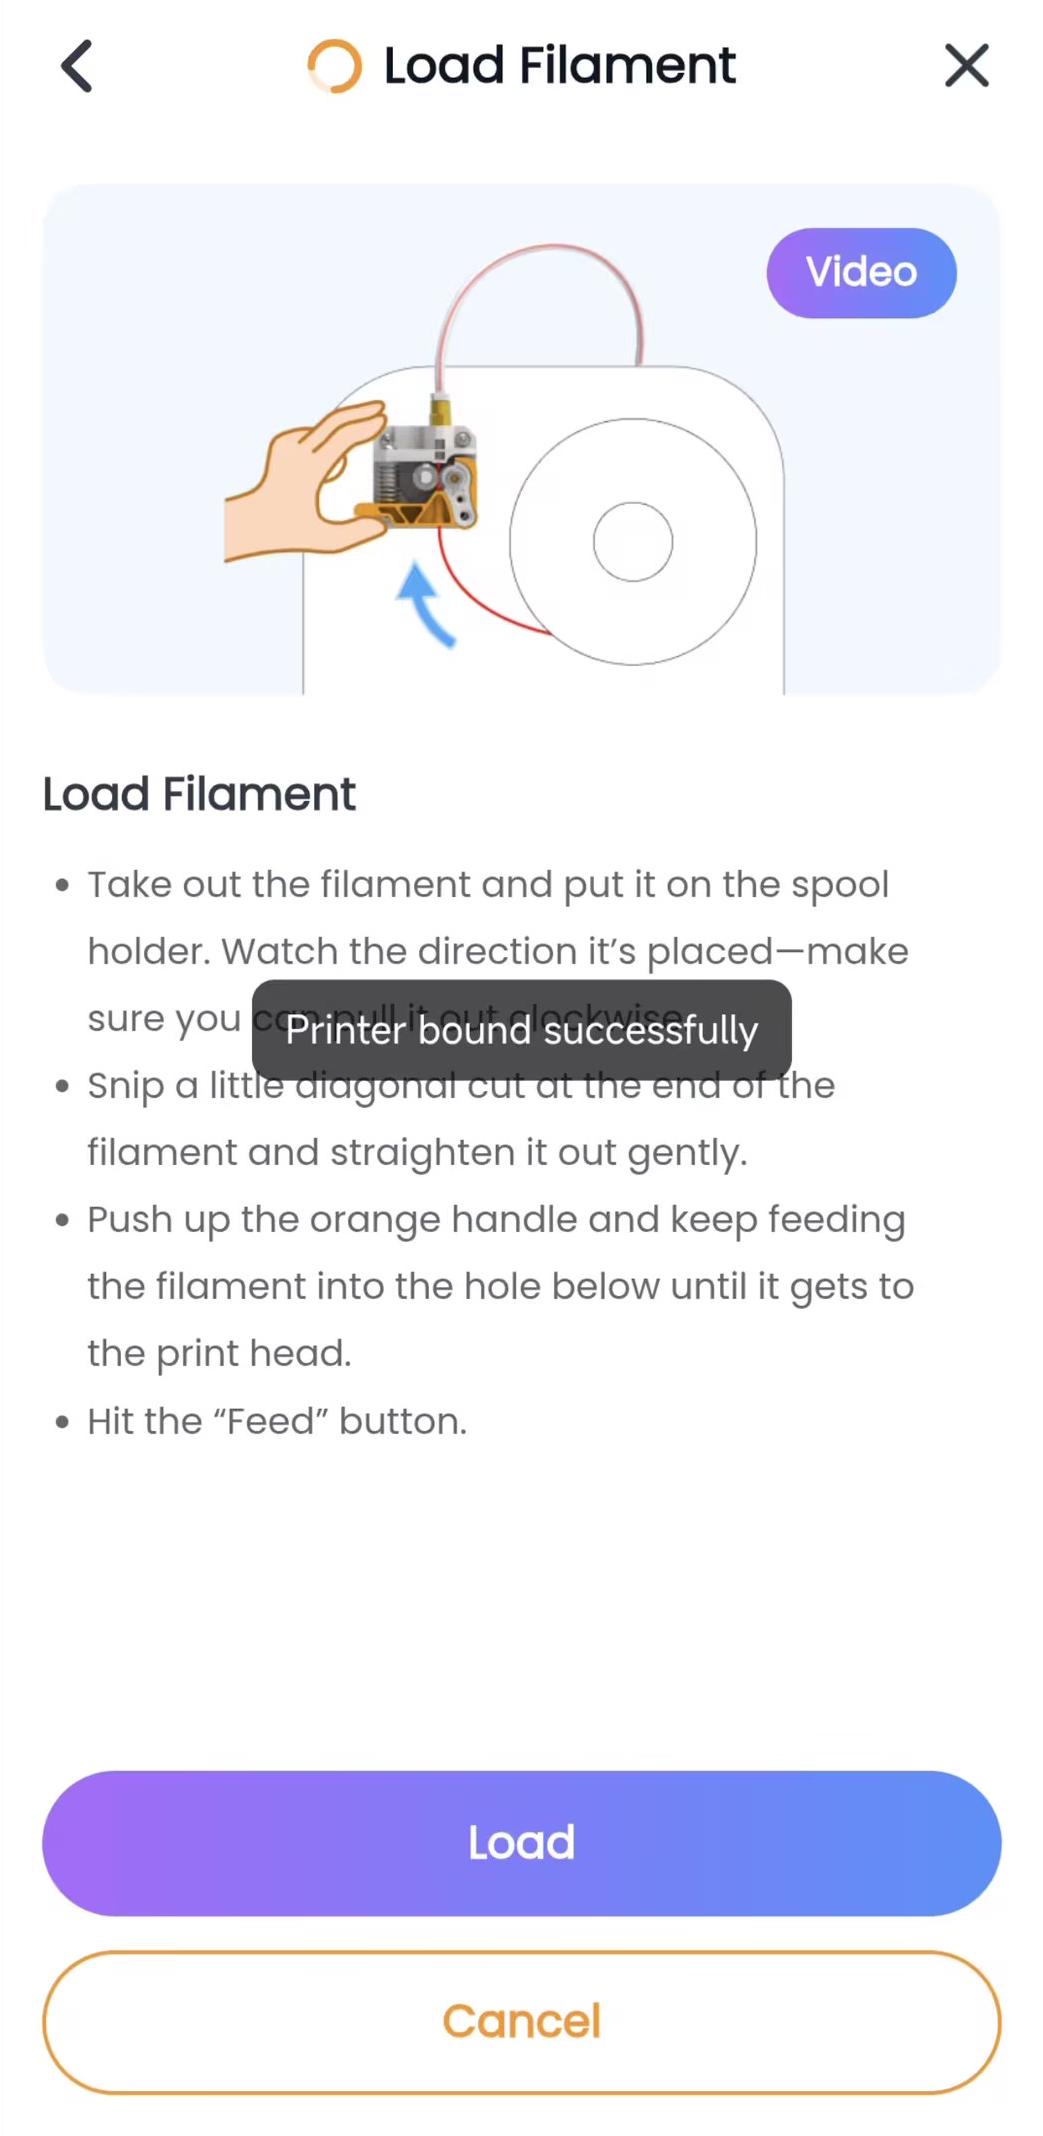
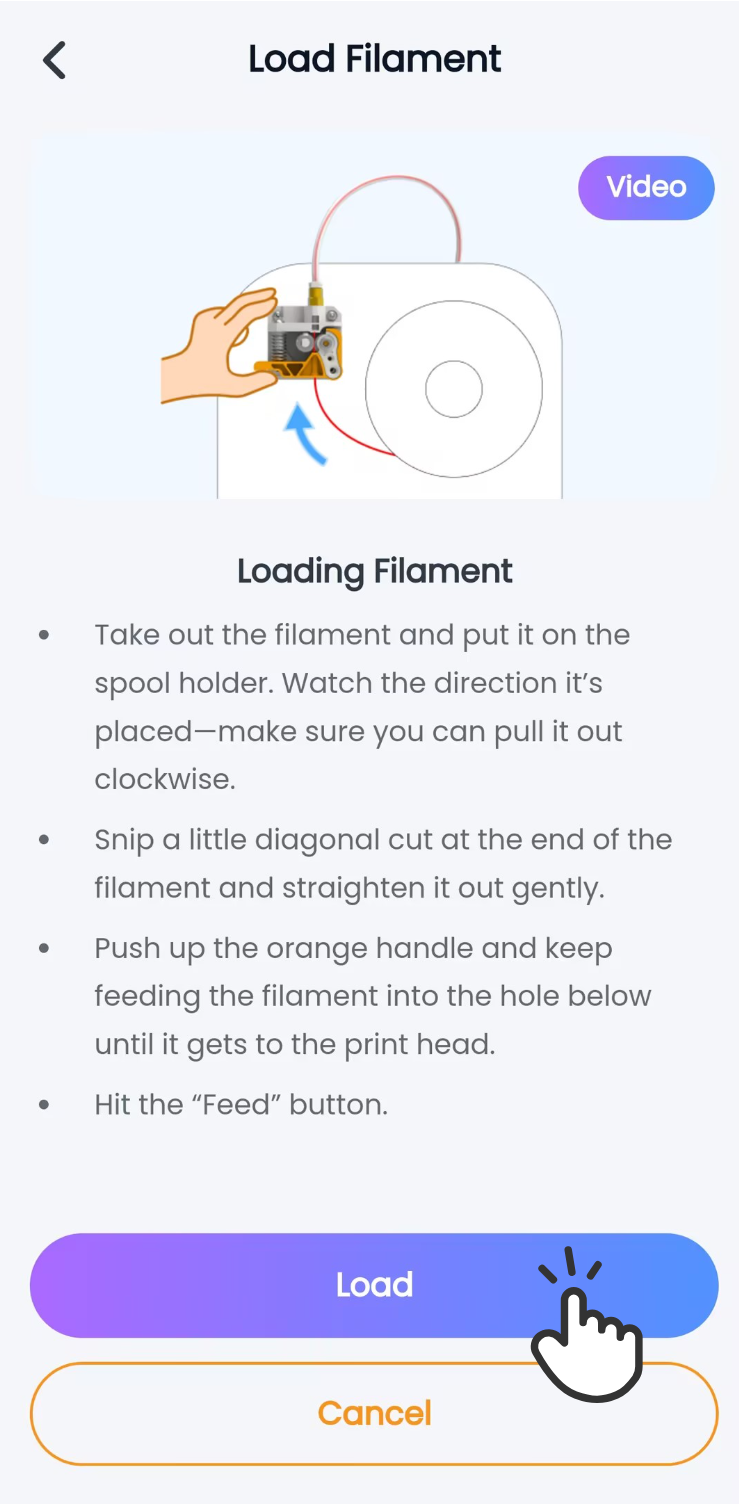
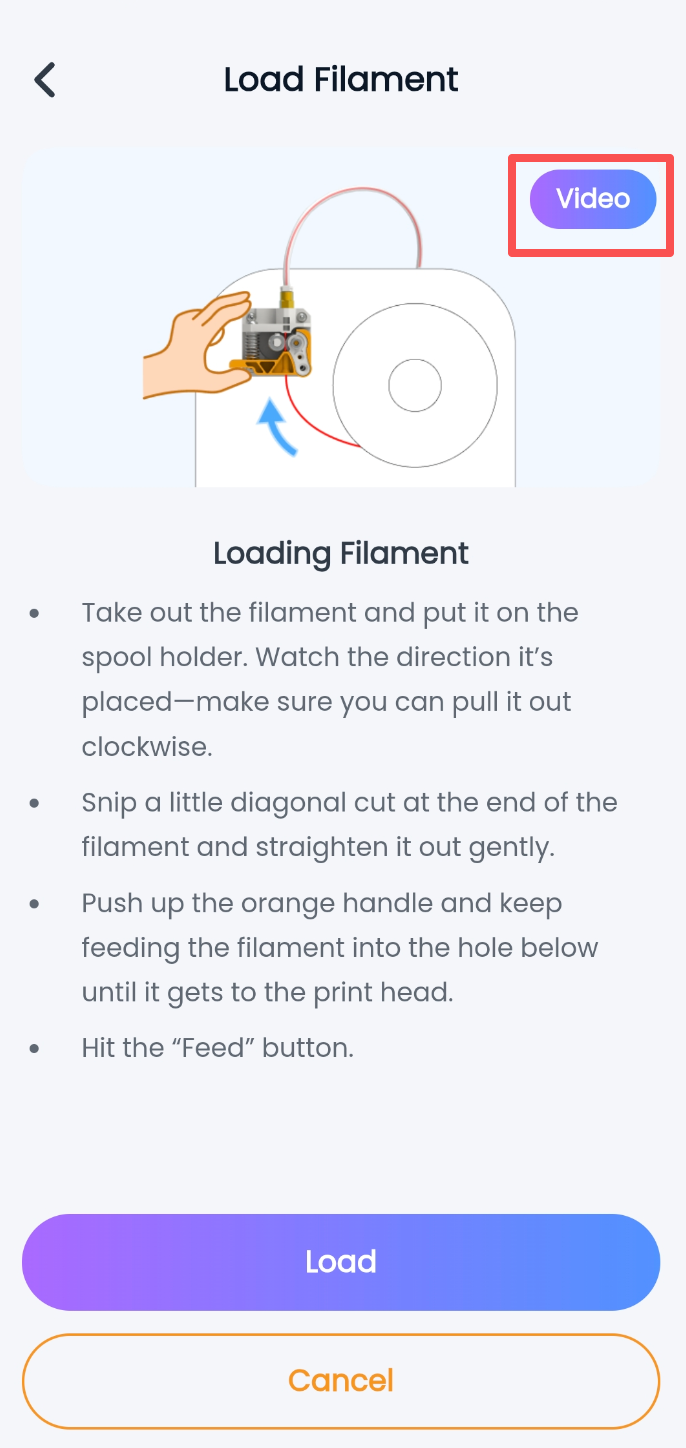
8. Take out the filament and place it on the filament holder. Note the orientation — ensure the filament unwinds in a clockwise direction.
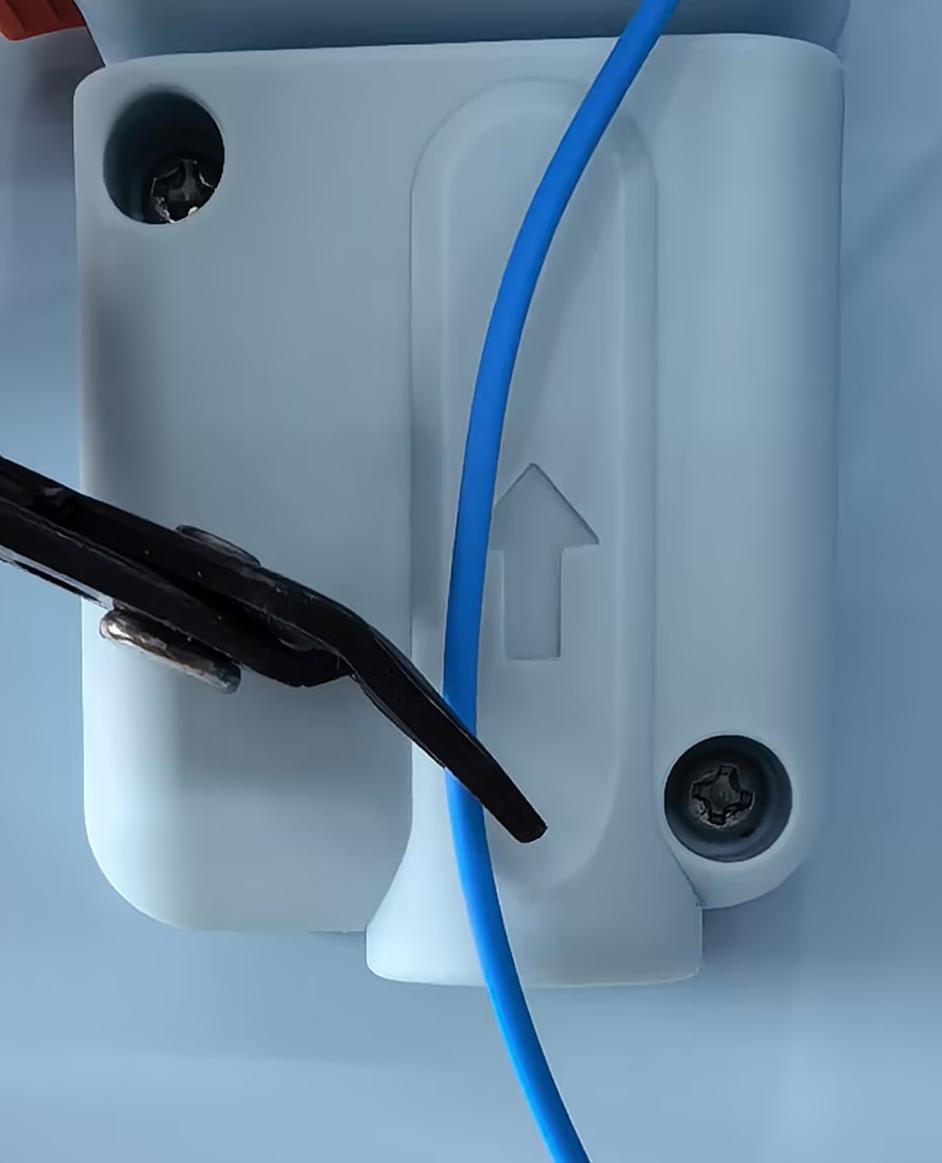
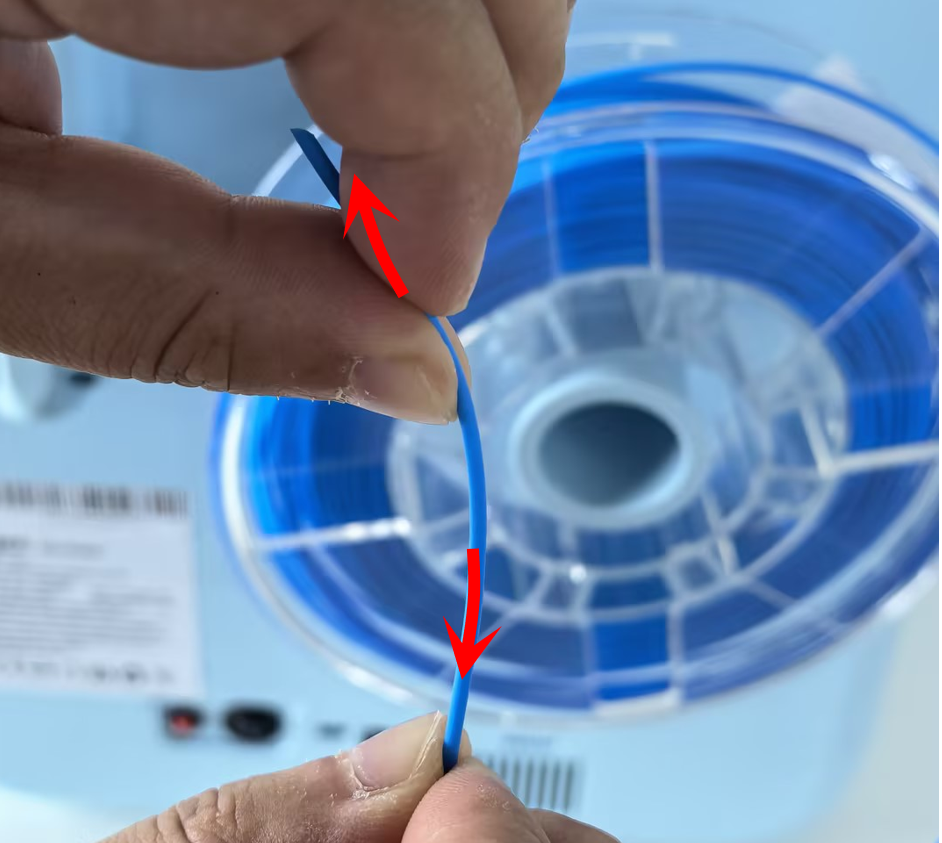
9. Cut the tip of the filament at an angle and gently straighten it.
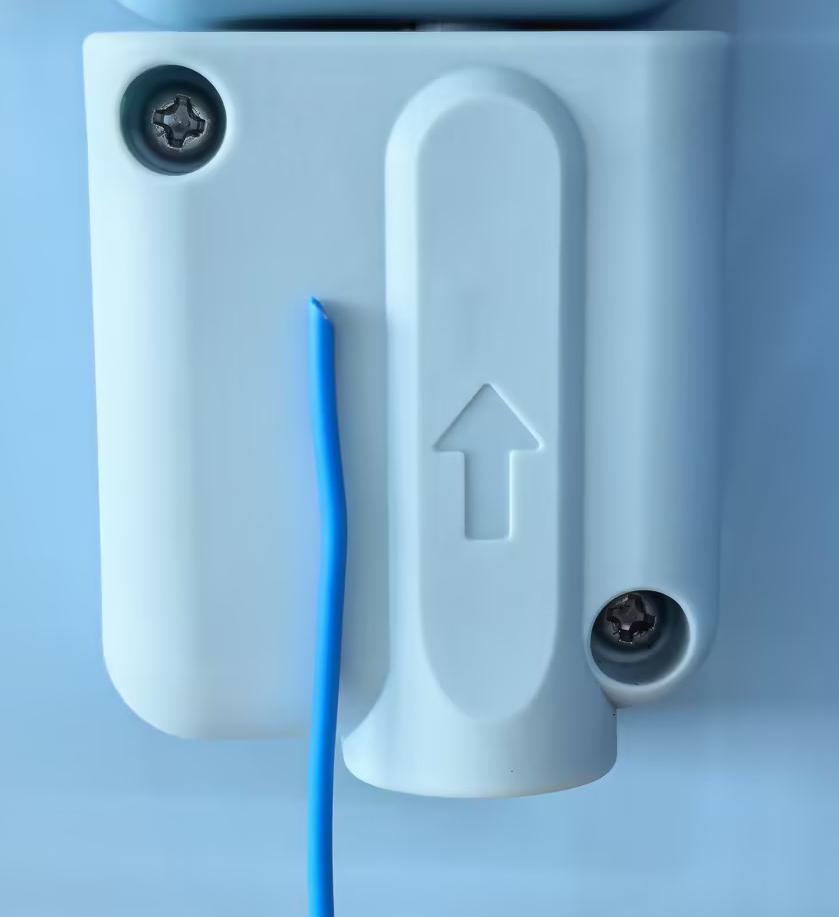
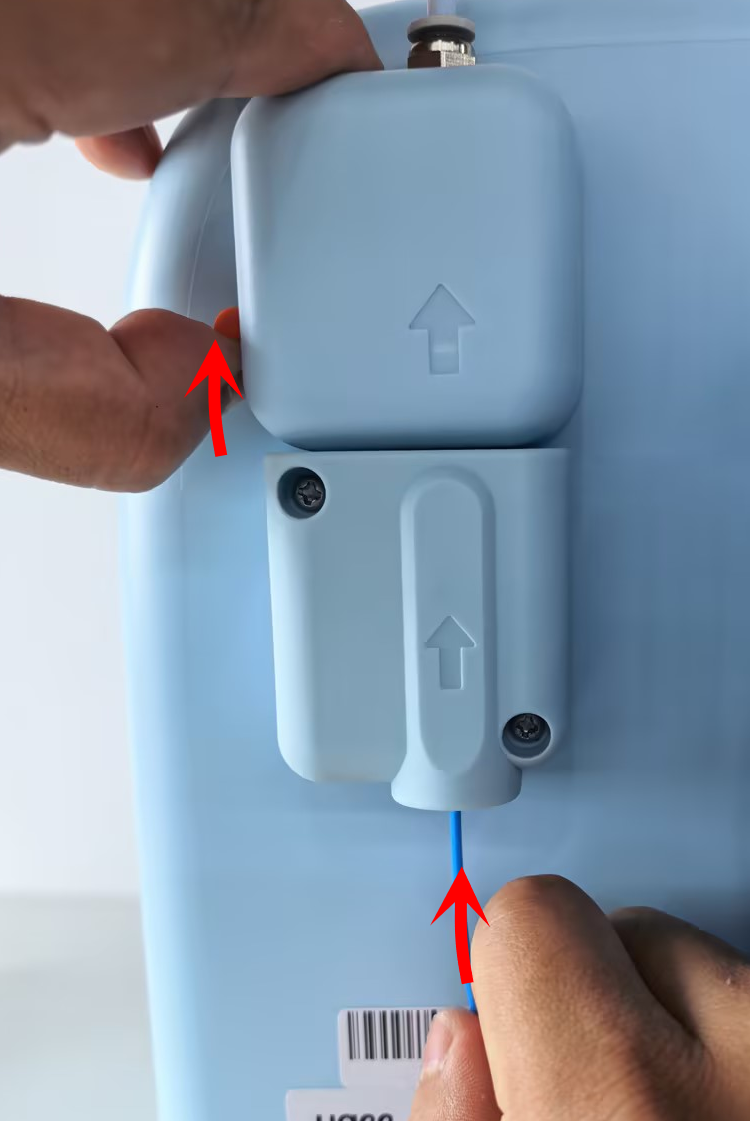
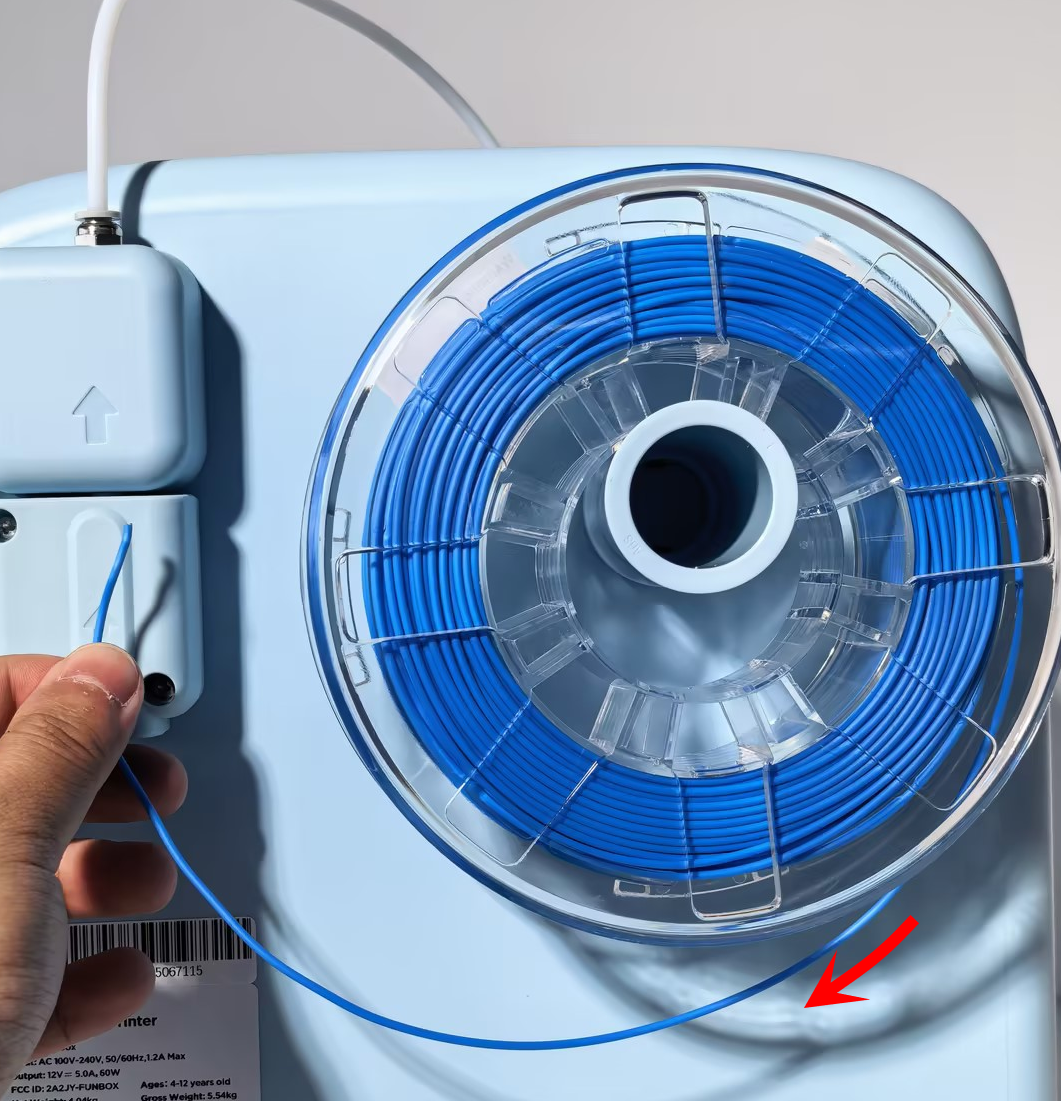
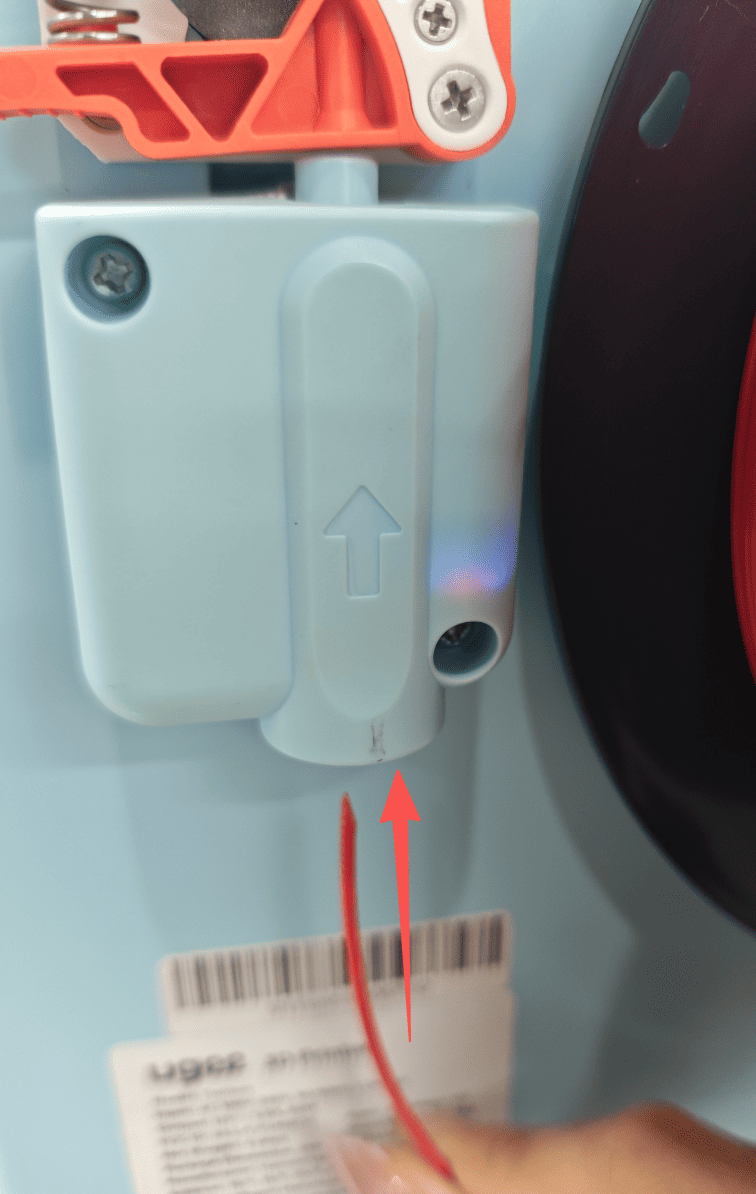
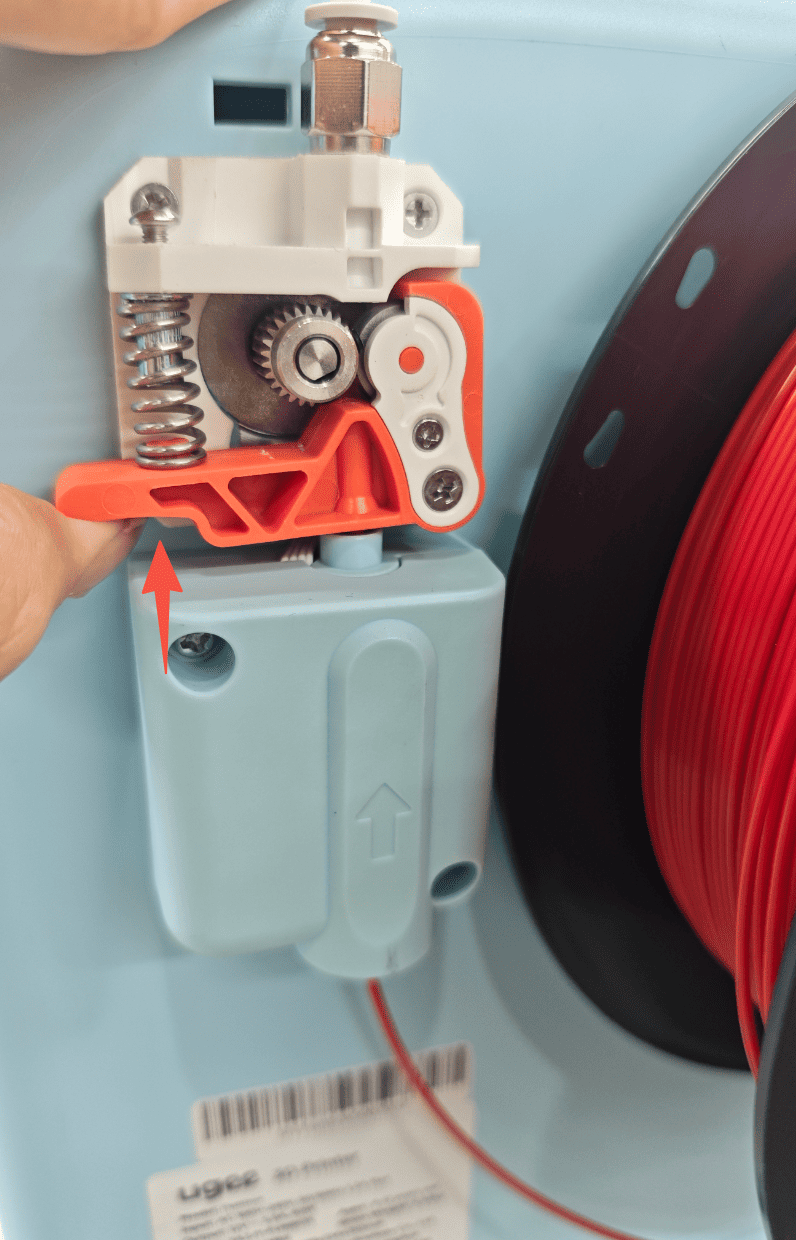
10. Squeeze the orange handle on the extruder upward while continuously pushing the filament into the hole below until it reaches the print head.
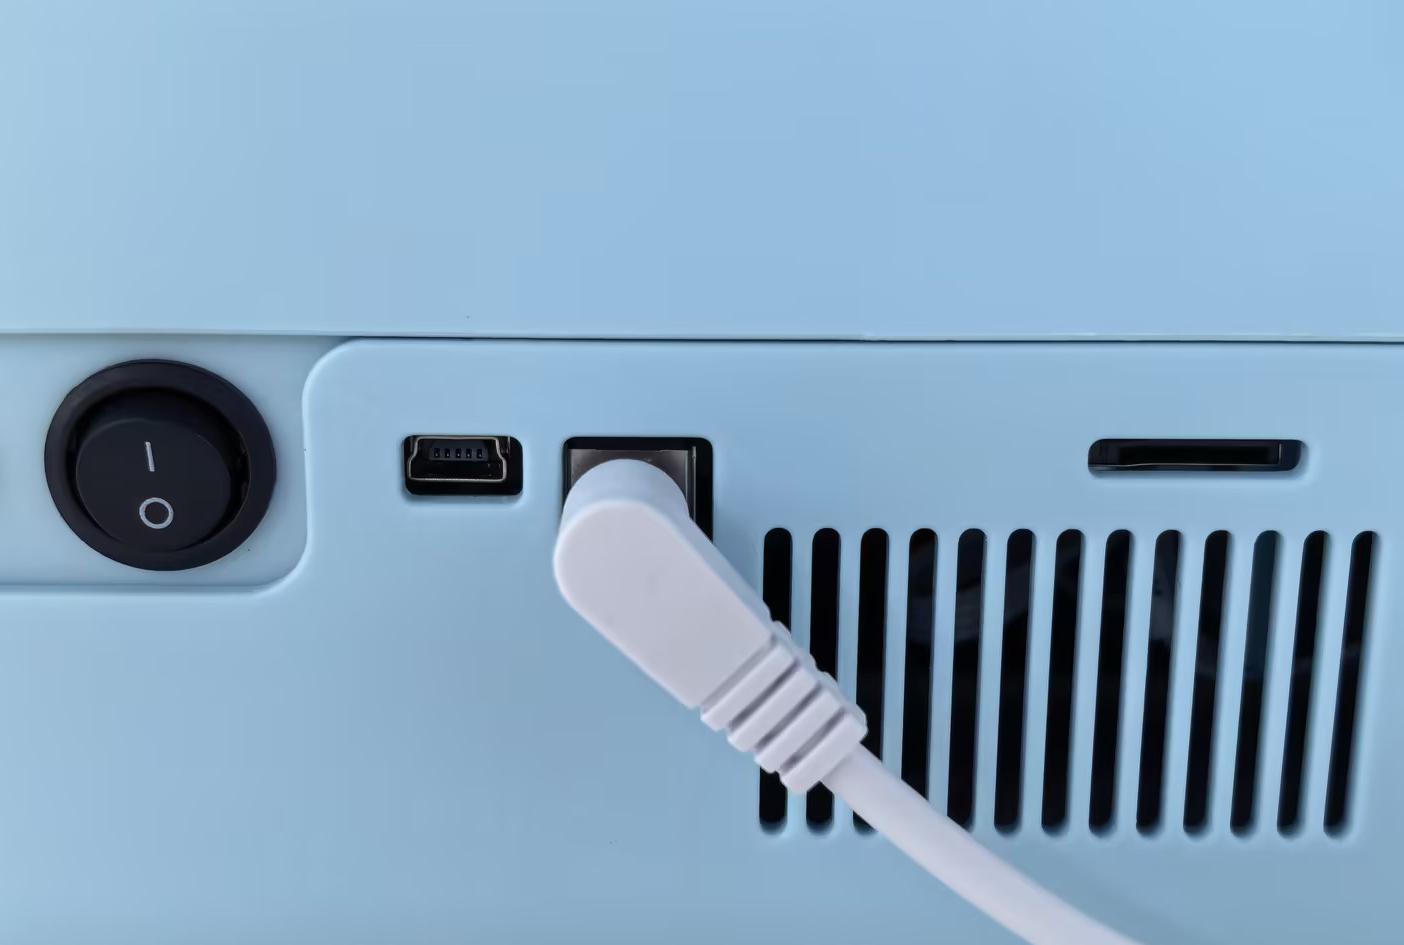
11. Connect the printer to the power adapter to complete the setup.
2.2 Device Connection
Follow the steps below to quickly complete the network setup for your ugee Funbox 3D Printer and connect it to your network.
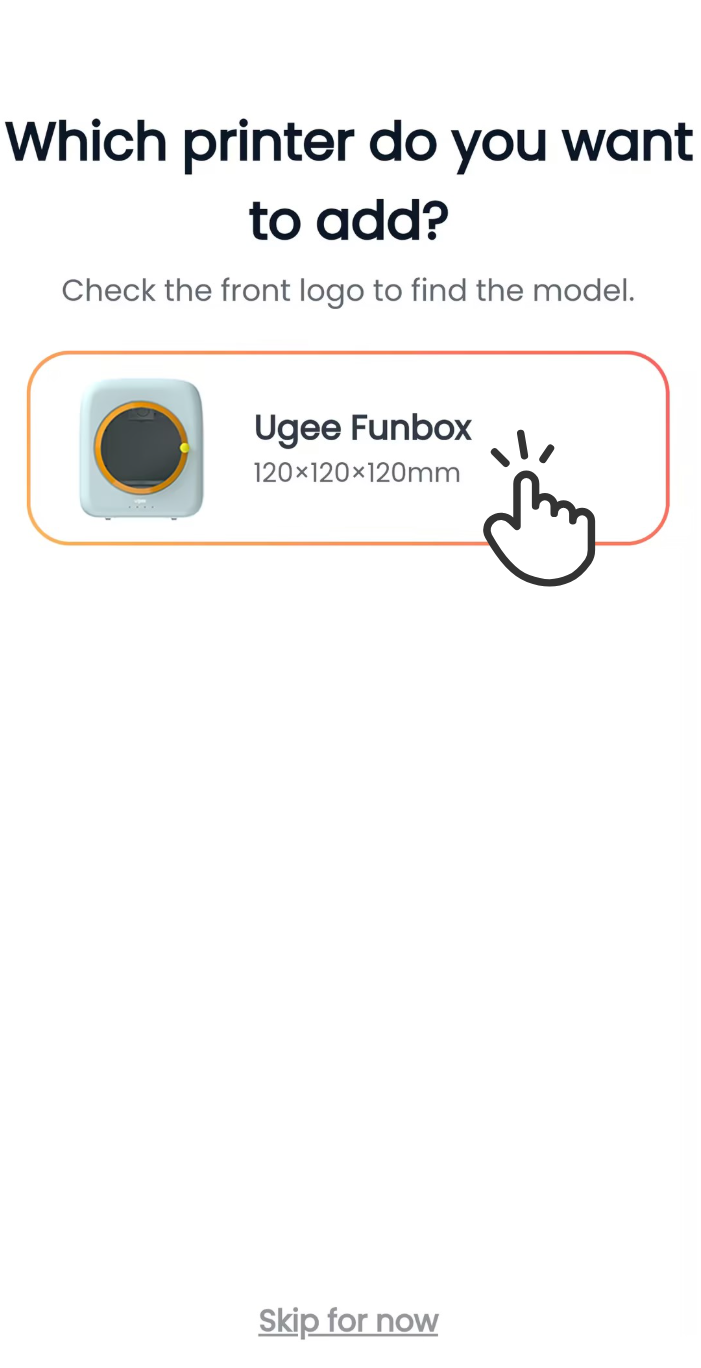
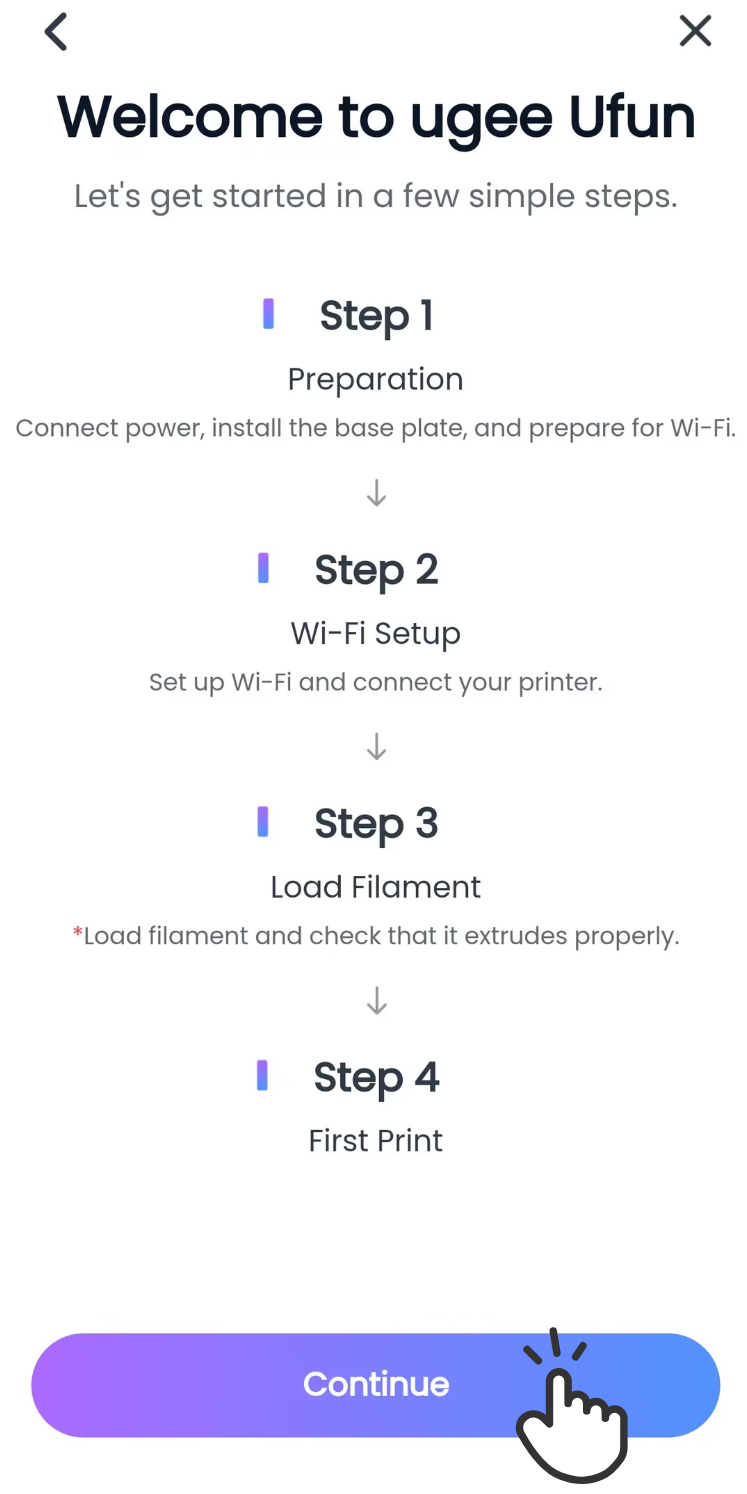
1. Open the app and select the ugee Funbox printer on the setup guide page, then tap "Continue"
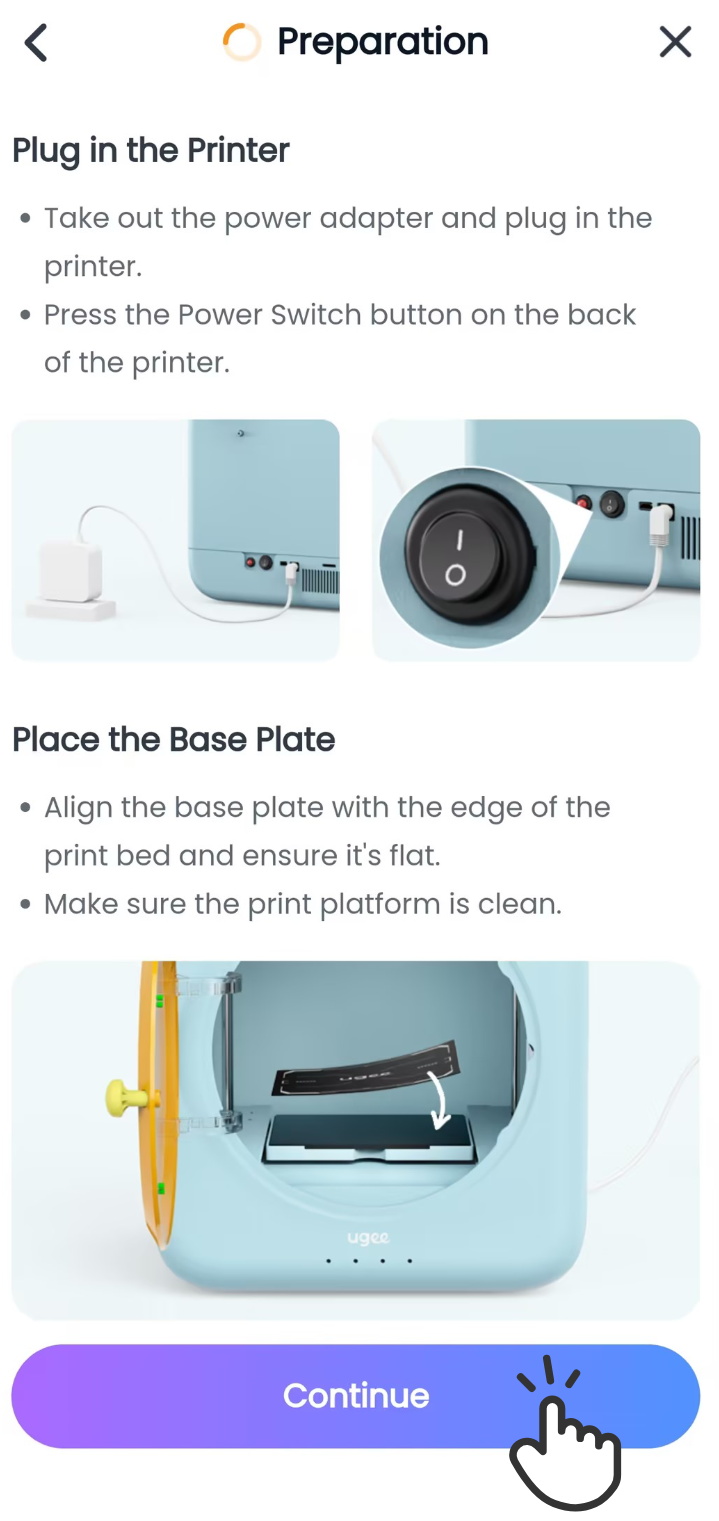
2. Confirm the power cable is connected and turn on the power switch, confirm the plate is placed correctly, then tap "Continue".
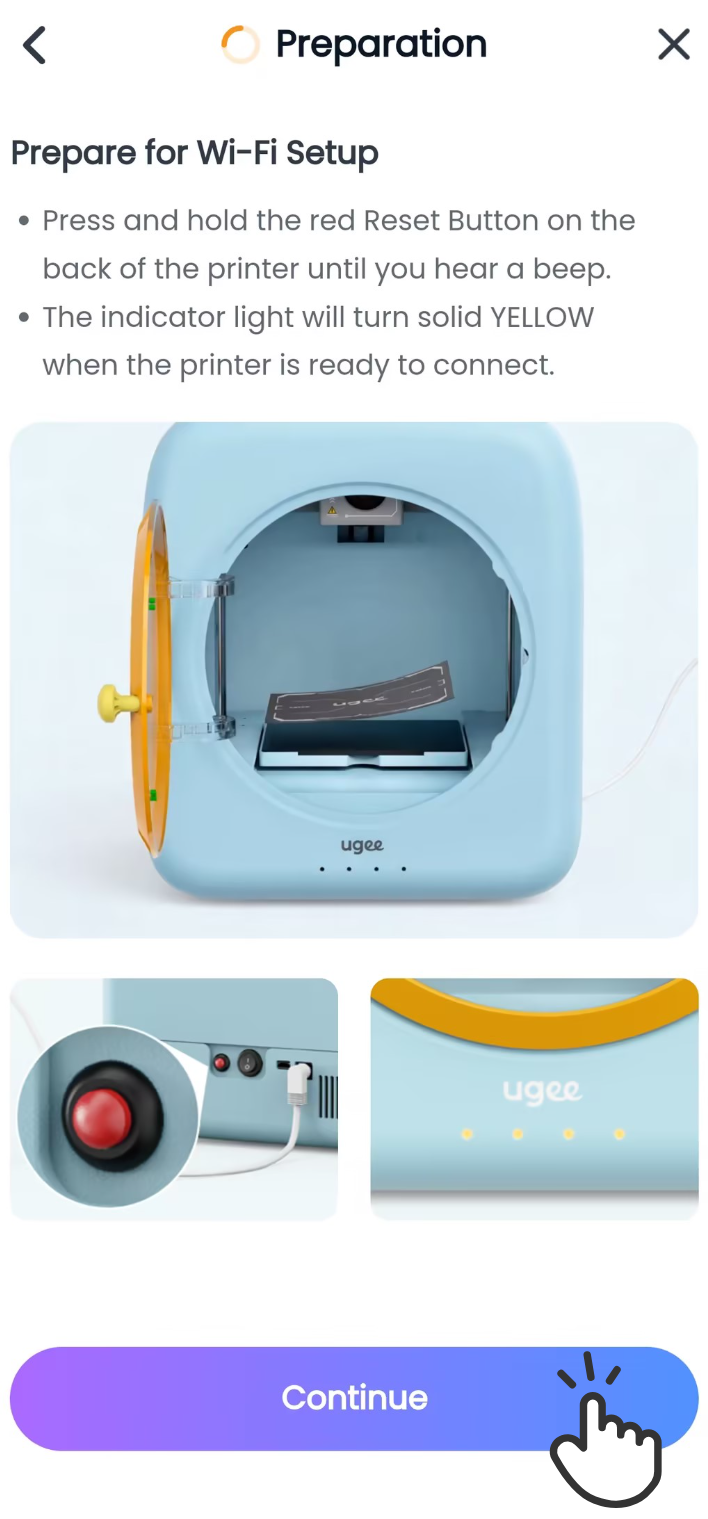
3. Reset the printer as instructed by the app: press and hold the reset button until you hear a "beep," then release. When the indicator light turns solid yellow, tap "Continue" to enter the network setup page.
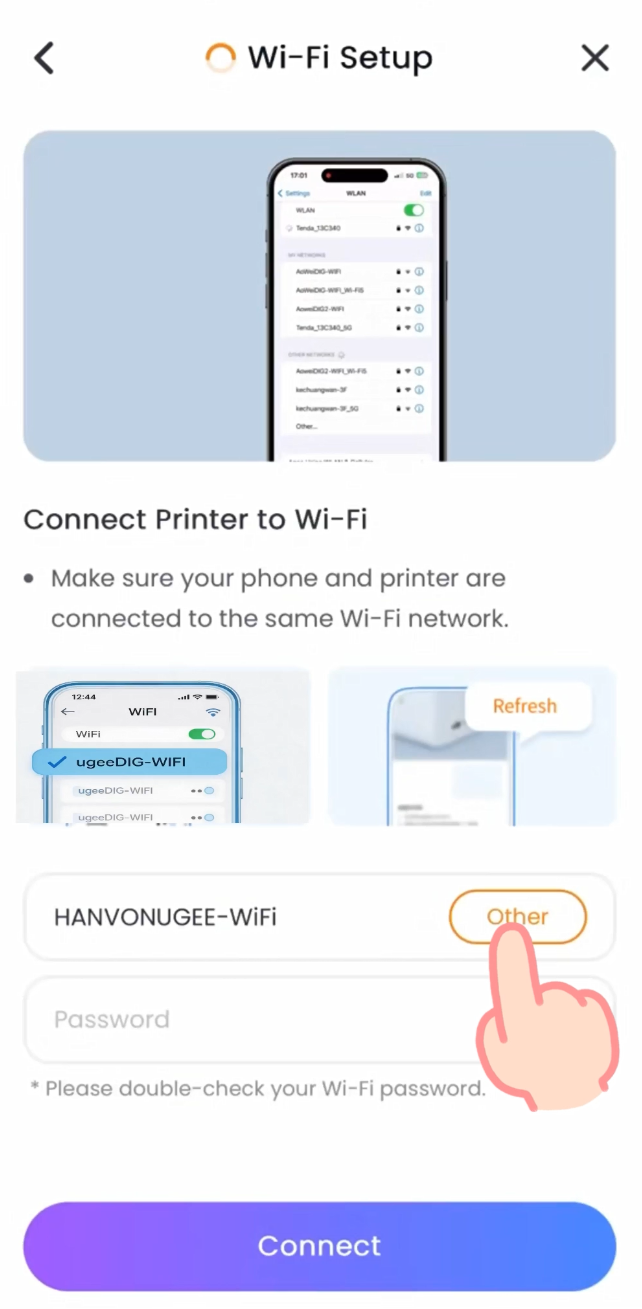
4. Select your Wi-Fi network, enter the password. Ensure your phone and printer are connected to the same network, then tap to connect and confirm.
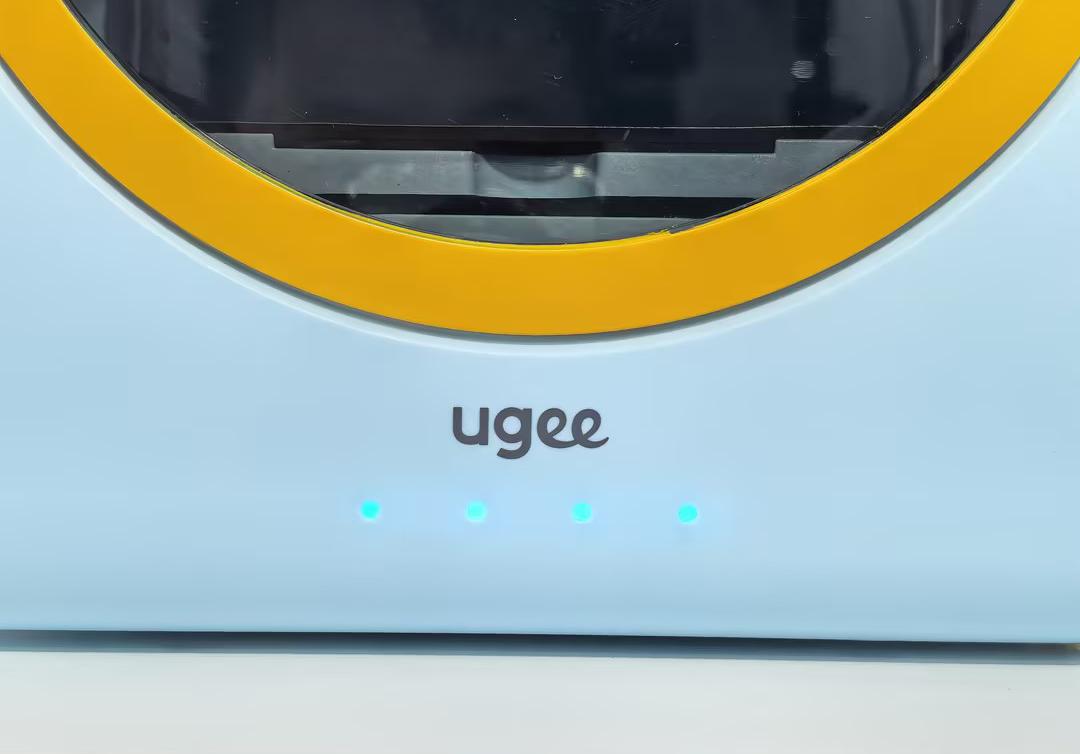
5. Once connected, the app will automatically jump to the filament loading page. The indicator light turns solid blue — the printer is ready.
2.3 First Print
After completing the unboxing and network setup, follow these steps to start your first print.
2.3.1 Loading Filament
Once the network is connected successfully, you will load filament for the first time. This step ensures smooth printing. Please follow the instructions below to properly load filament.
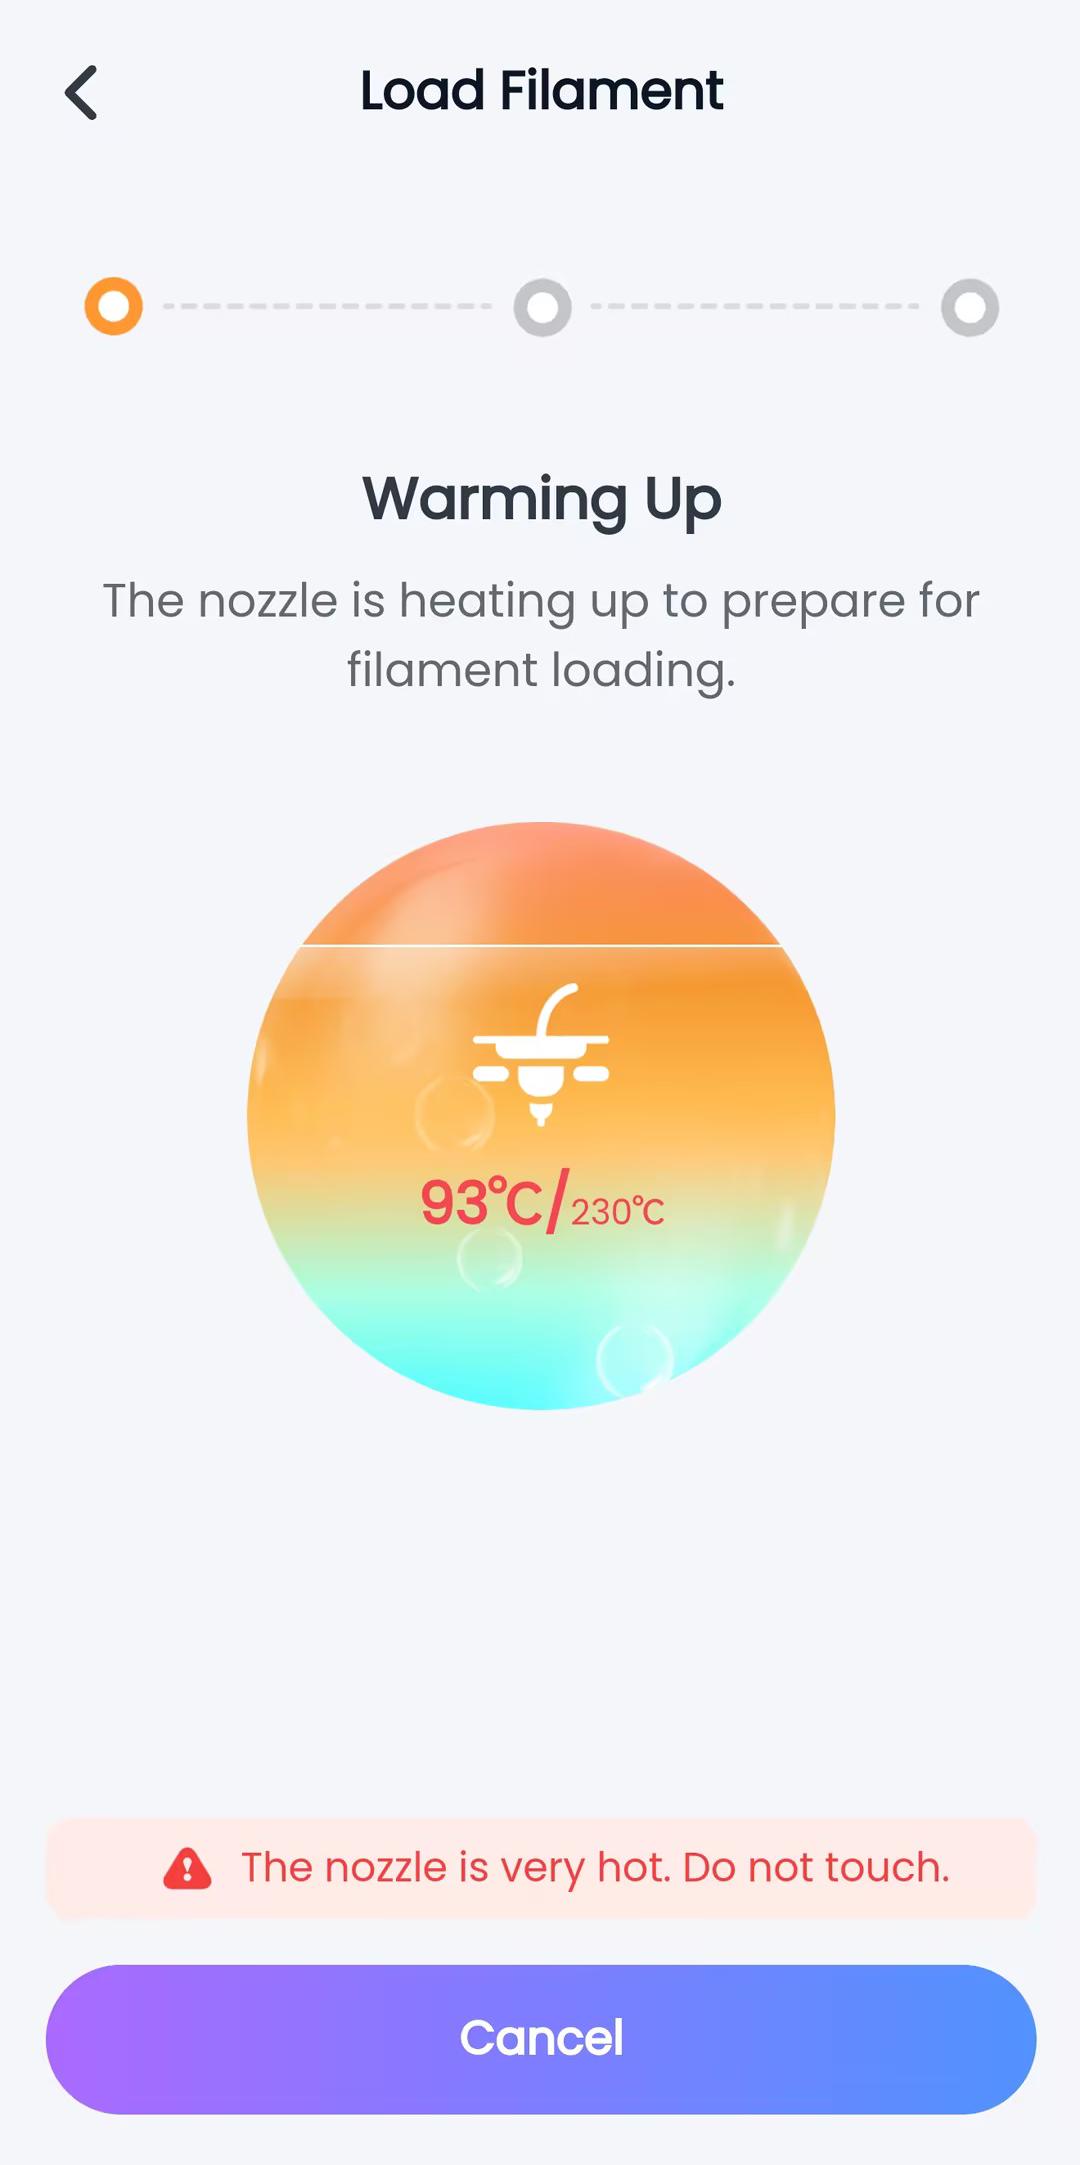
1. Tap "Load" — the nozzle begins to heat up. The app displays the real-time nozzle temperature; the printer indicator light shows the heating status, lighting up from blue to red in sequence.
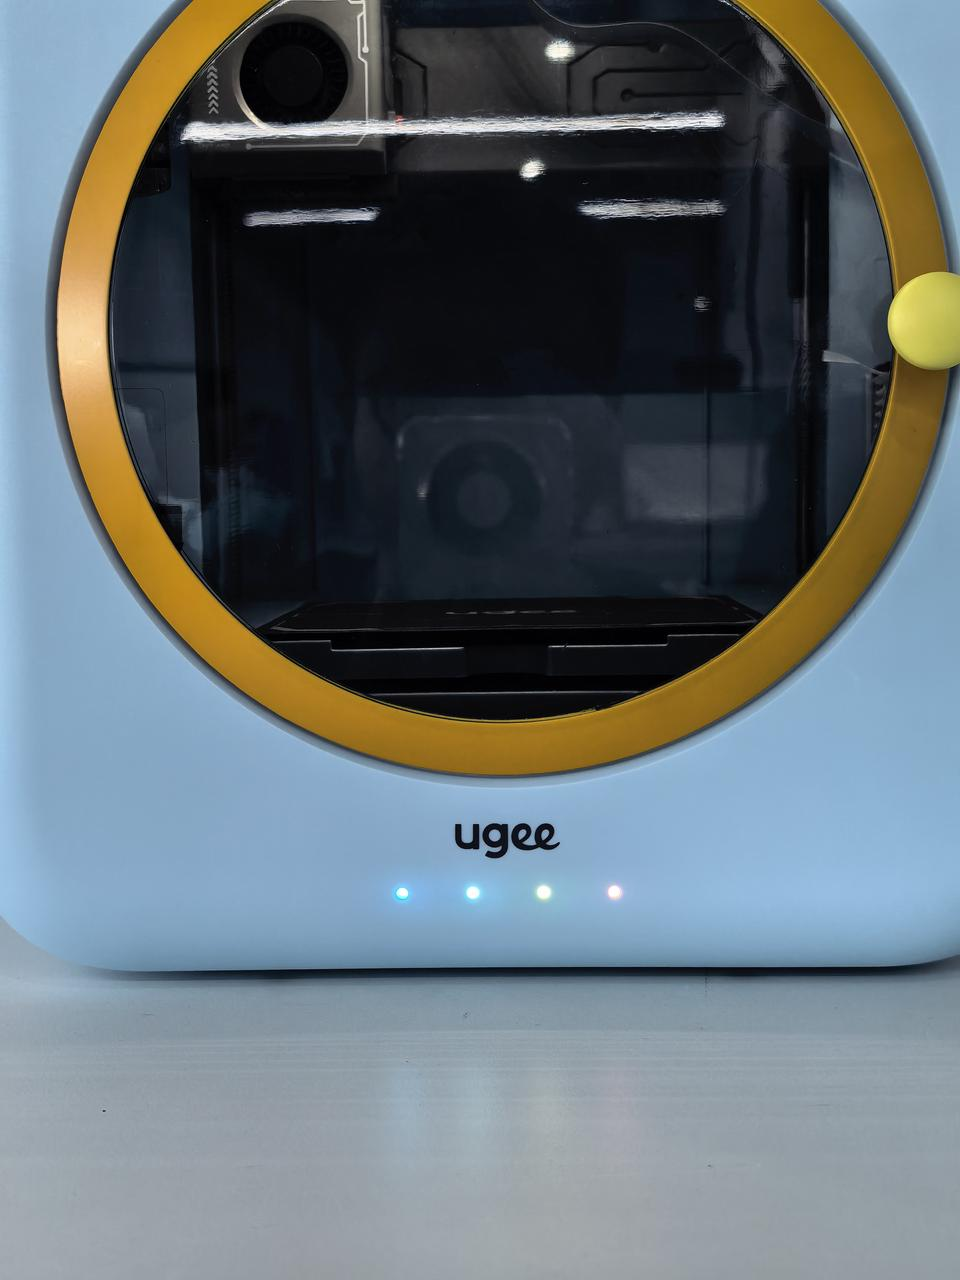
2. Once heated, the printer automatically feeds the filament. The app displays the loading progress; the printer indicator light shows working status, lighting up in blue sequence and flashing.
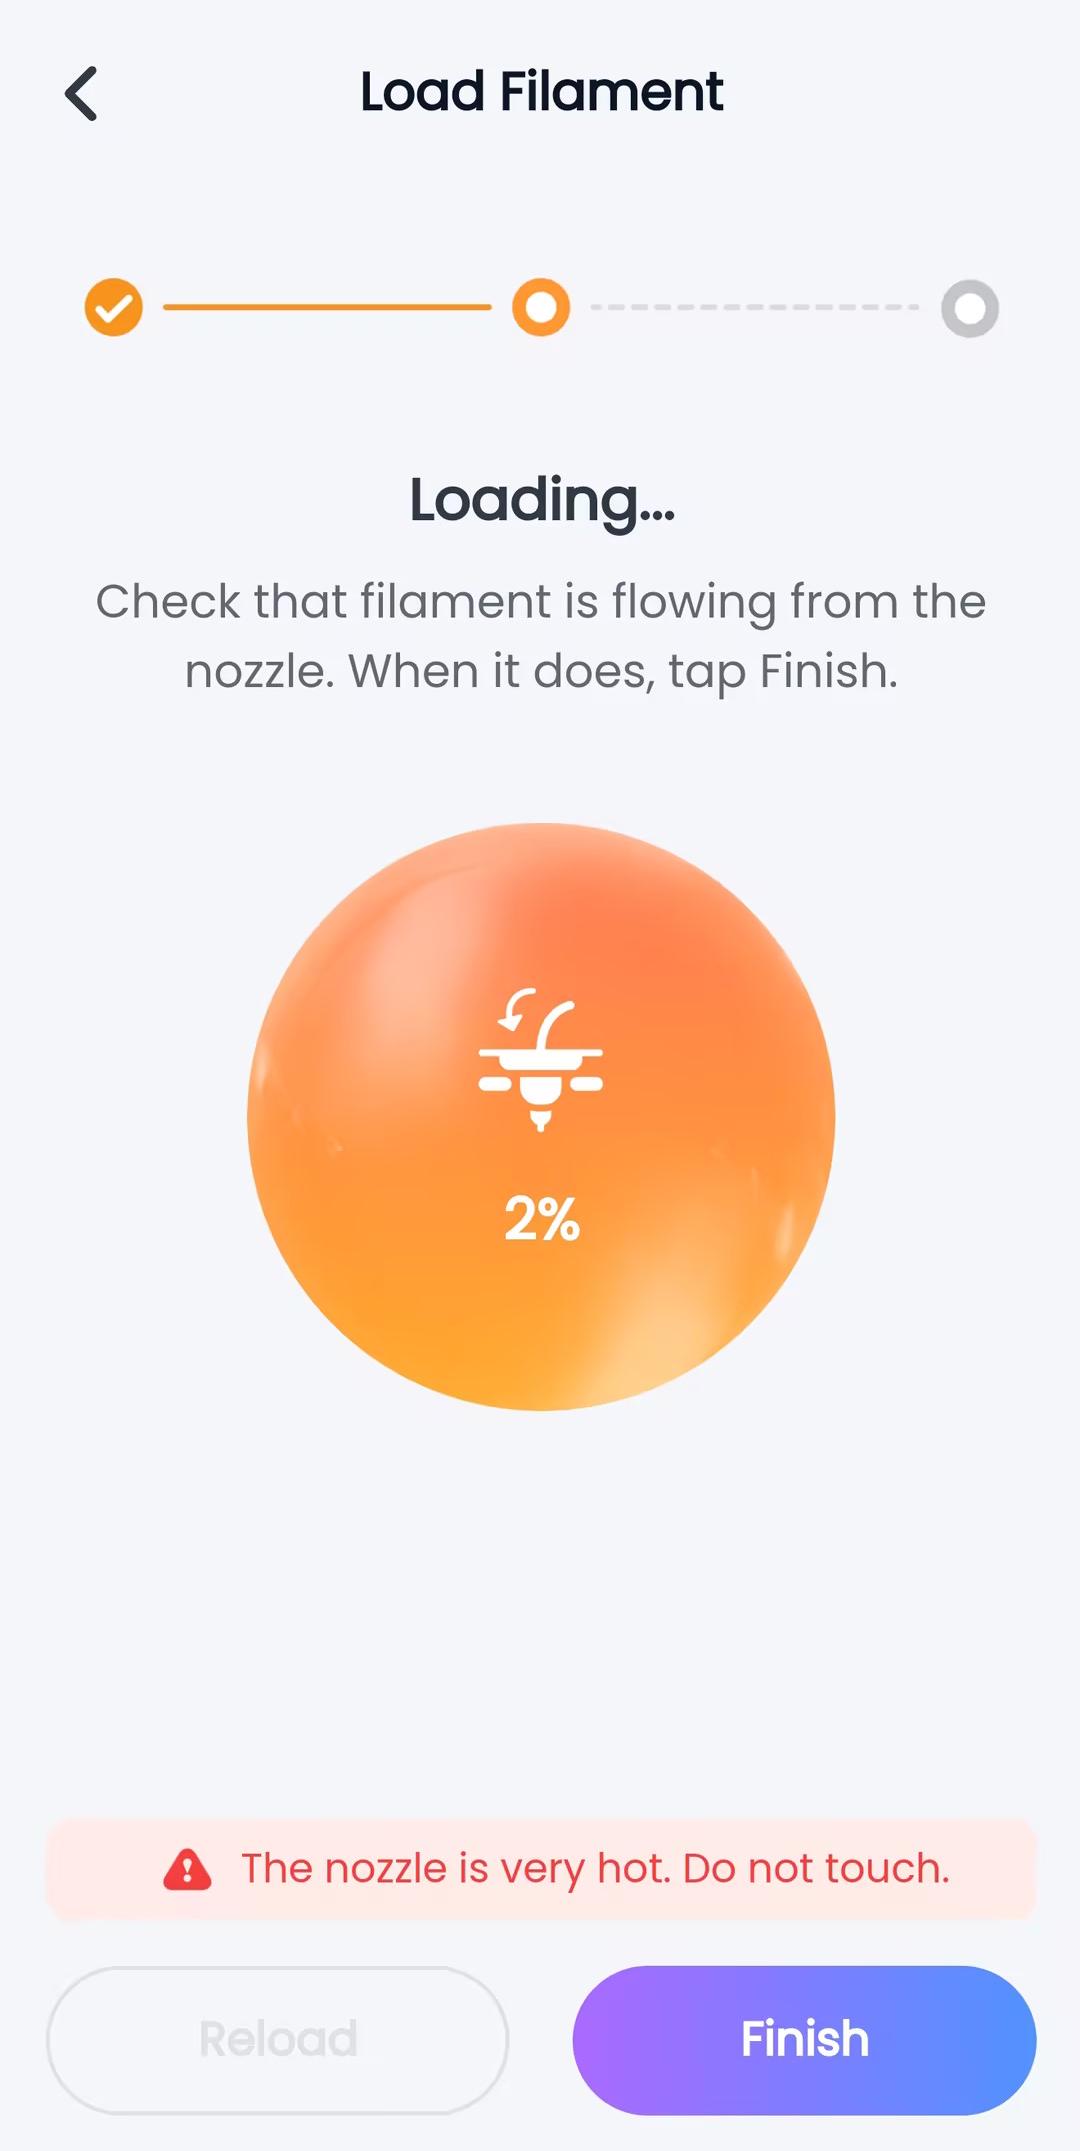
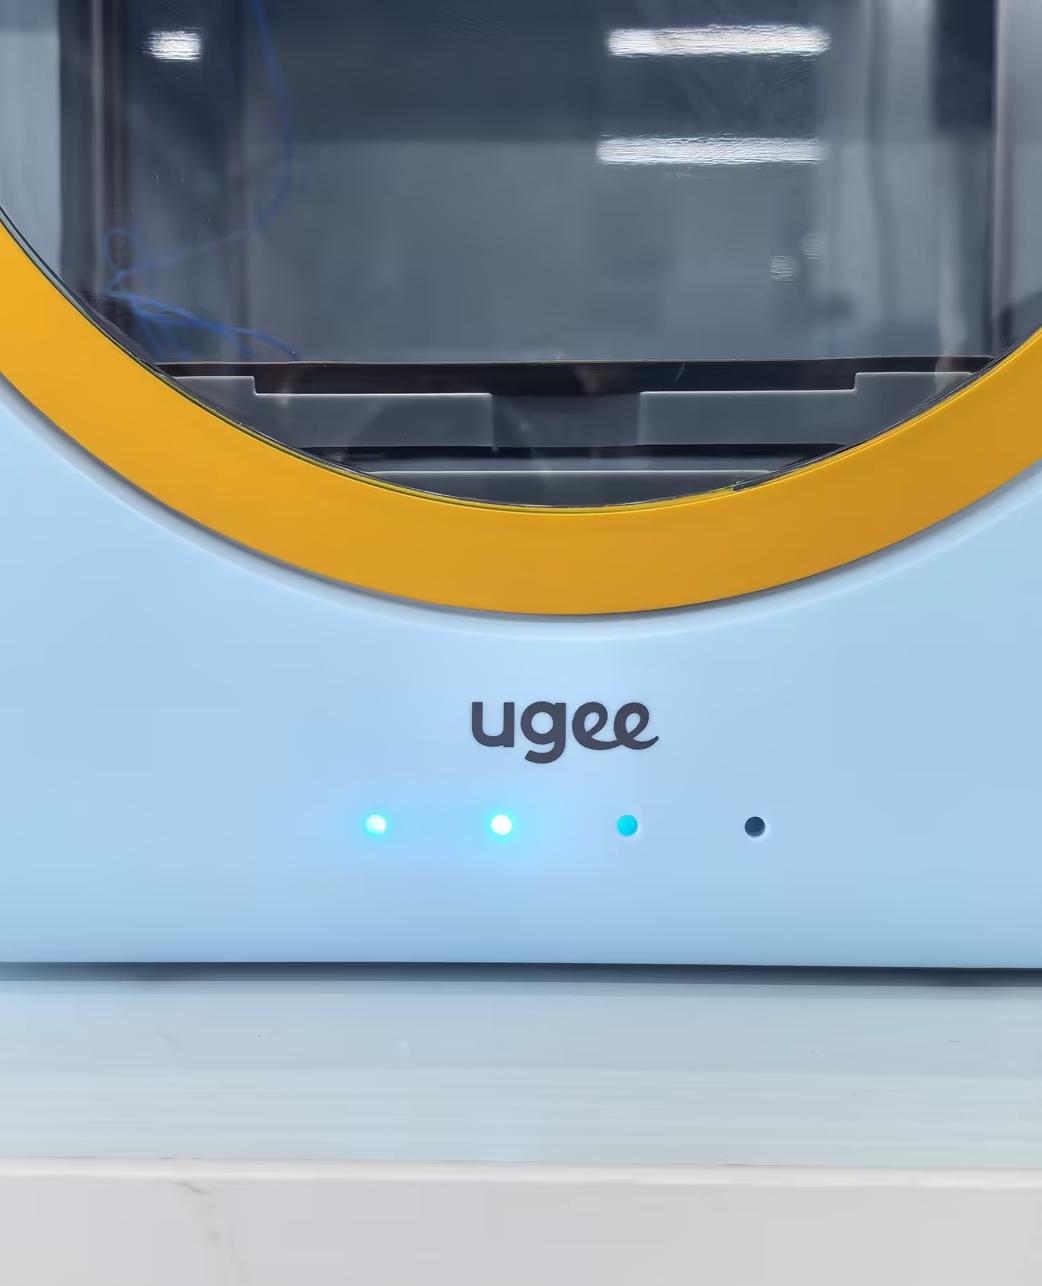
3. Watch the print head — if filament flows out, loading succeeds. Tap “Finish”. The indicator light now shows the cooling status, lighting up from red to blue in sequence.
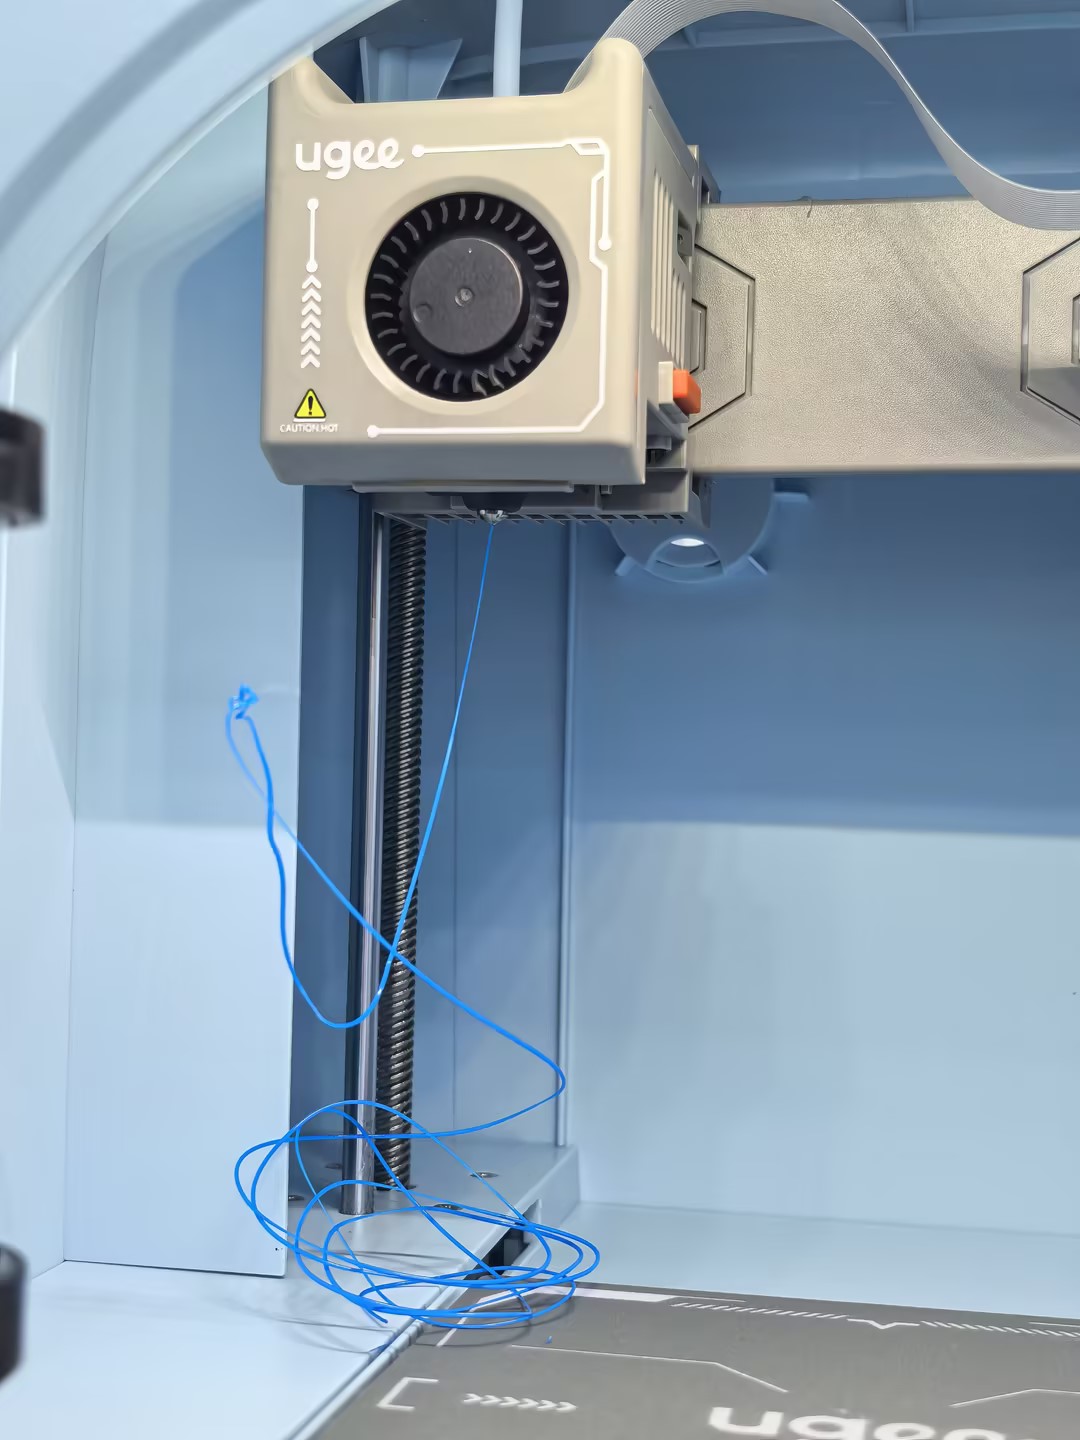
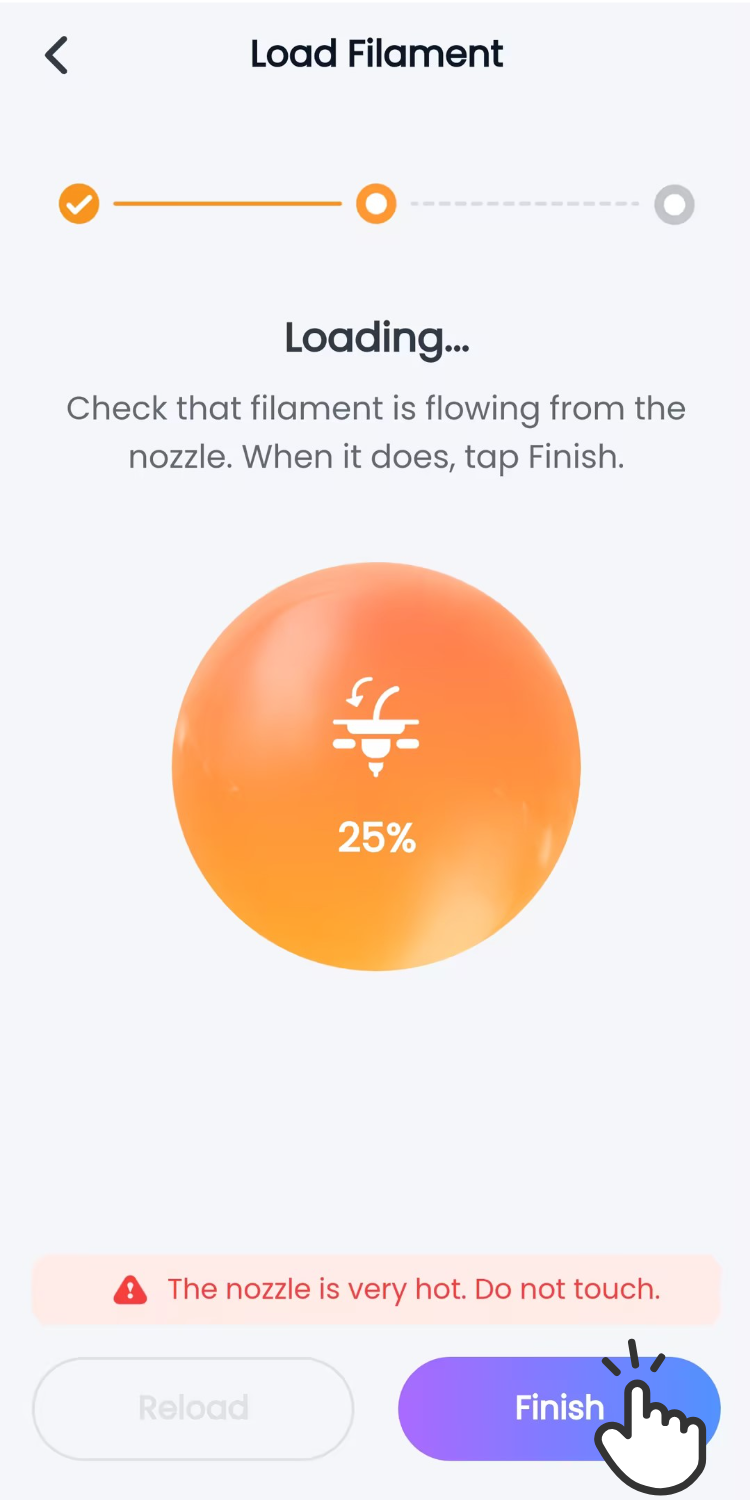
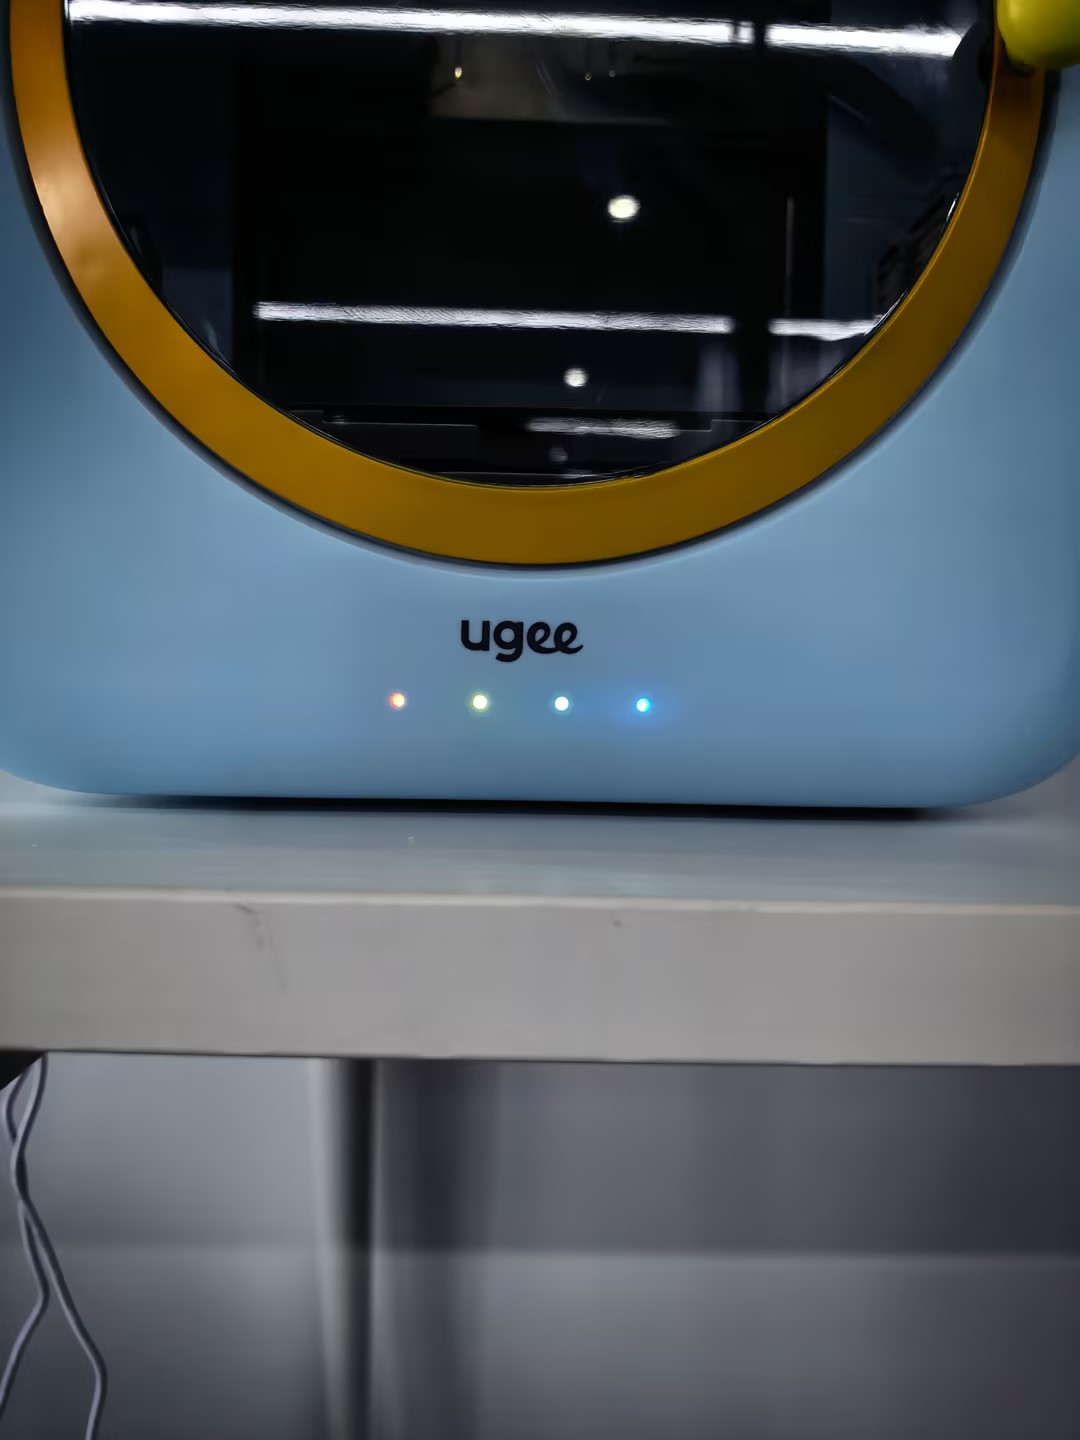
4. After 3 minutes of cooling, remove the filament that flowed from the nozzle. Filament loading is complete. Tap "Next Step" to proceed to the first print page.
2.3.2 First Print
Congratulations on completing all the preparation steps! Follow the guide below to enjoy your first print!
1. On the first print page, select 1 model and tap "Print" to enter the upload page. The indicator light is solid blue — the printer is ready.
2. Tap "Start" — the app automatically uploads the print file. The printer indicator light shows working status, lighting up in blue sequence.
3. After upload is complete, the app automatically jumps to the device page. The nozzle heats up; the indicator light shows heating status, lighting up from blue to red in sequence.
4. Once the nozzle reaches temperature, the print job begins. The indicator light shows working status (blue sequence), and the device page updates the remaining time and print progress in real time. Tap the camera switch to view the live feed.
5. When the print job is complete, the print head automatically homes. The indicator light shows cooling status, lighting up from red to blue.
6. Open the chamber door and remove the magnetic plate and model. Note: the nozzle temperature is still high at this point — do not touch the nozzle.
7. Gently flex the magnetic plate to release the model, then set the plate aside.
8. Gently flex the base to separate the model from the base. If the model has supports, use plier to remove them.
Here are detailed video tutorials.
Changing Filament
Fixing a Broken Filament
Changing Nozzle
Clearing a Clogged Nozzle
Leveling the Bed
How to Import a 3D Model
03/Software Product Overview
The ugee Funbox companion software covers four platforms, with naming and system requirements as follows:
Platform
Software Name
Supported Systems
Mobile
ugee Ufun
iOS 16 and above, Android 11 and above
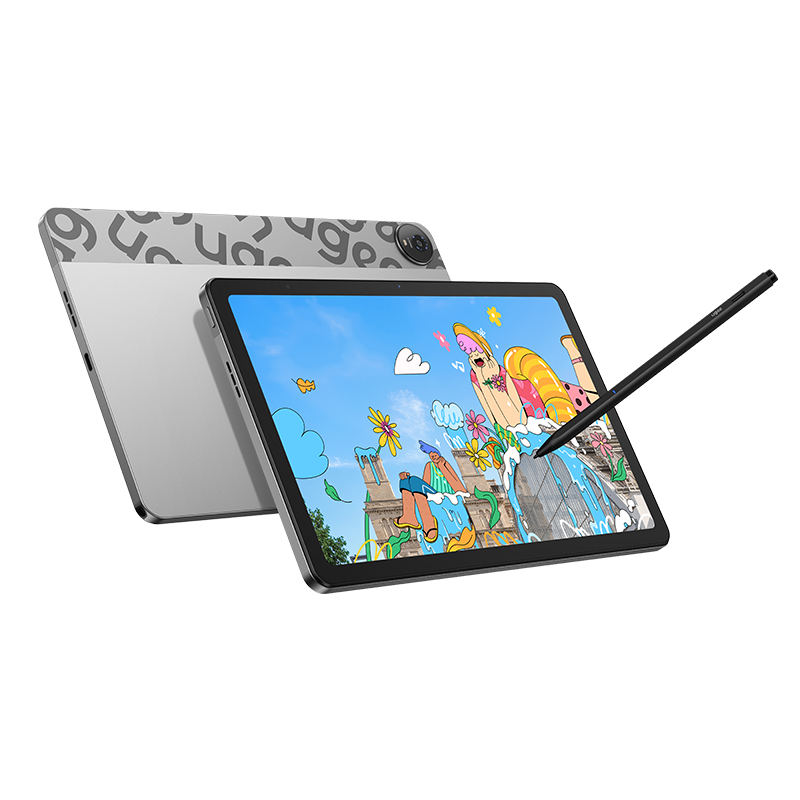
Tablet
ugee Ufun HD
iOS 16 and above, Android 11 and above
PC
ugee Ufun
Windows 10 and above
Slicing Software
U‑PRiNT
Windows 10 and above
04/Mobile Software (ugee Ufun) Introduction
4.1 Mobile Download Methods
Download Method
Details
Overseas Version – Keyword Search
Search for "ugee Ufun" on the App Store or Google Play to download.
Official Website Link
https://www.ugee.com/funbox-app-download
App QR Code Scan
iOS version: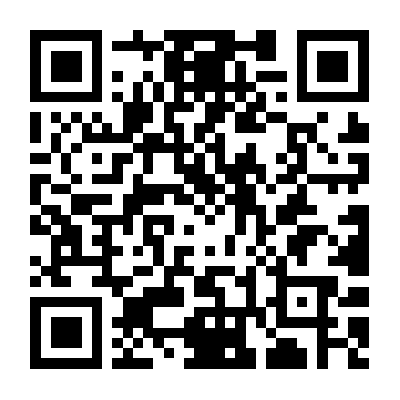
Android version: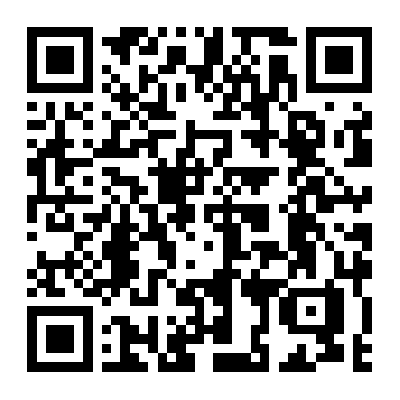
4.2 Four Functional Modules (Homepage)
The homepage is divided into four core sections:
Module
Name
Core Functions
TOY
Toys
1. A vast collection of child‑friendly models (multiple categories: toys, animals, robots, buildings, festivals, education, etc.).
2. Search for models (keyword search, voice input), sort (random / popular / latest), and filter (print time, number of printable parts).
3. Select a model and enter the one‑click printing process.
PRINTER
Device
1. Printer pairing and connection.
2. Print job management (printer selection, fine‑tuning parameters, real‑time monitoring, resume, pause, stop, load filament, unload filament, print queue).
3. Printer settings (printer information settings, printer configuration, printer control settings, delete printer).
CREATE
Creation
1. Import external models for printing (limited to 20 MB, STL format).
2. Ai Craft: Generate 3D models from voice, drawings, photos, or text input for printing.
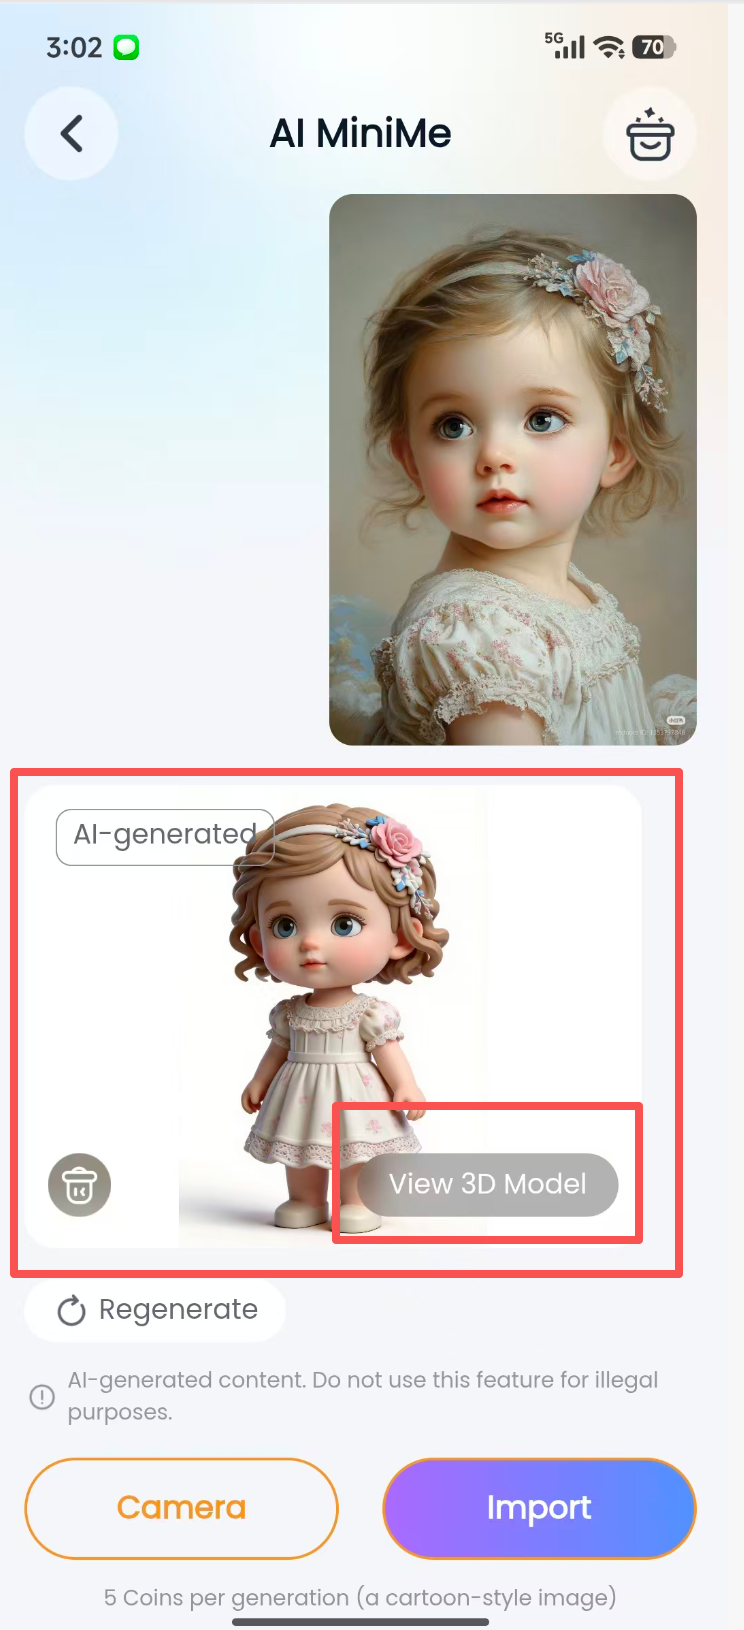
3. Ai MiniMe: Generate a 3D portrait model from a photo (or take a new photo) for printing.
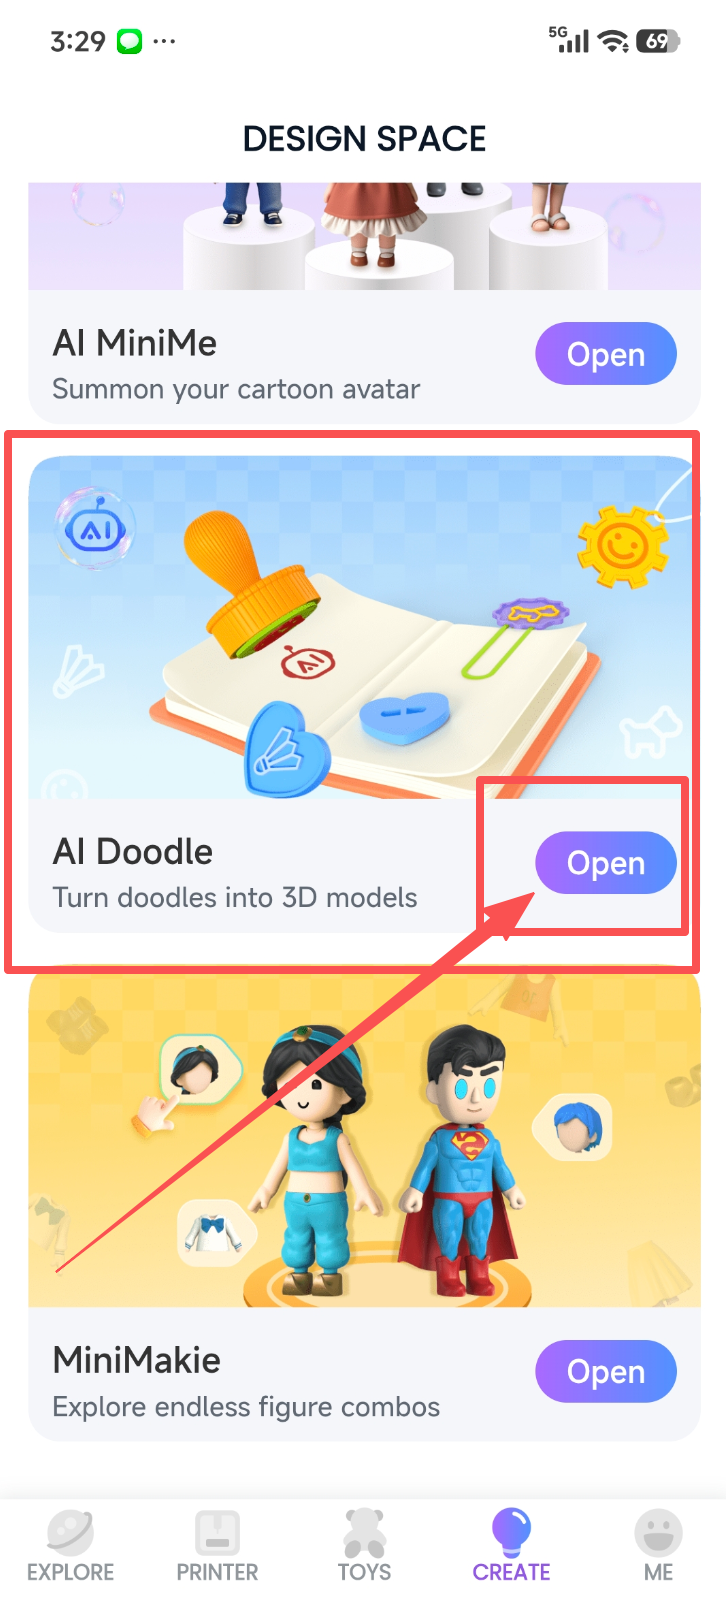
4. Ai Doodle: Generate models for stamps, bookmarks, necklaces, or brooches from text, voice, or existing patterns for printing.
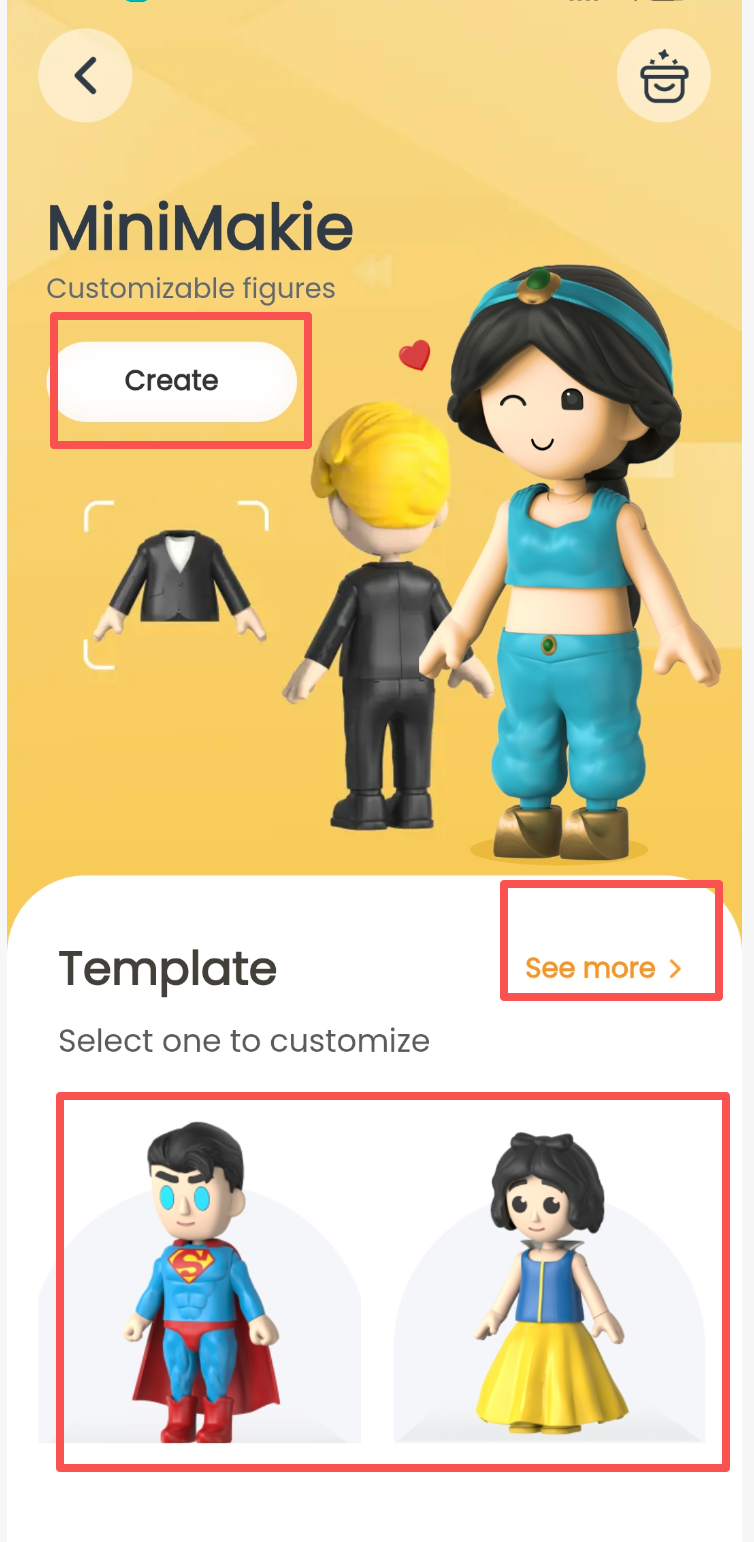
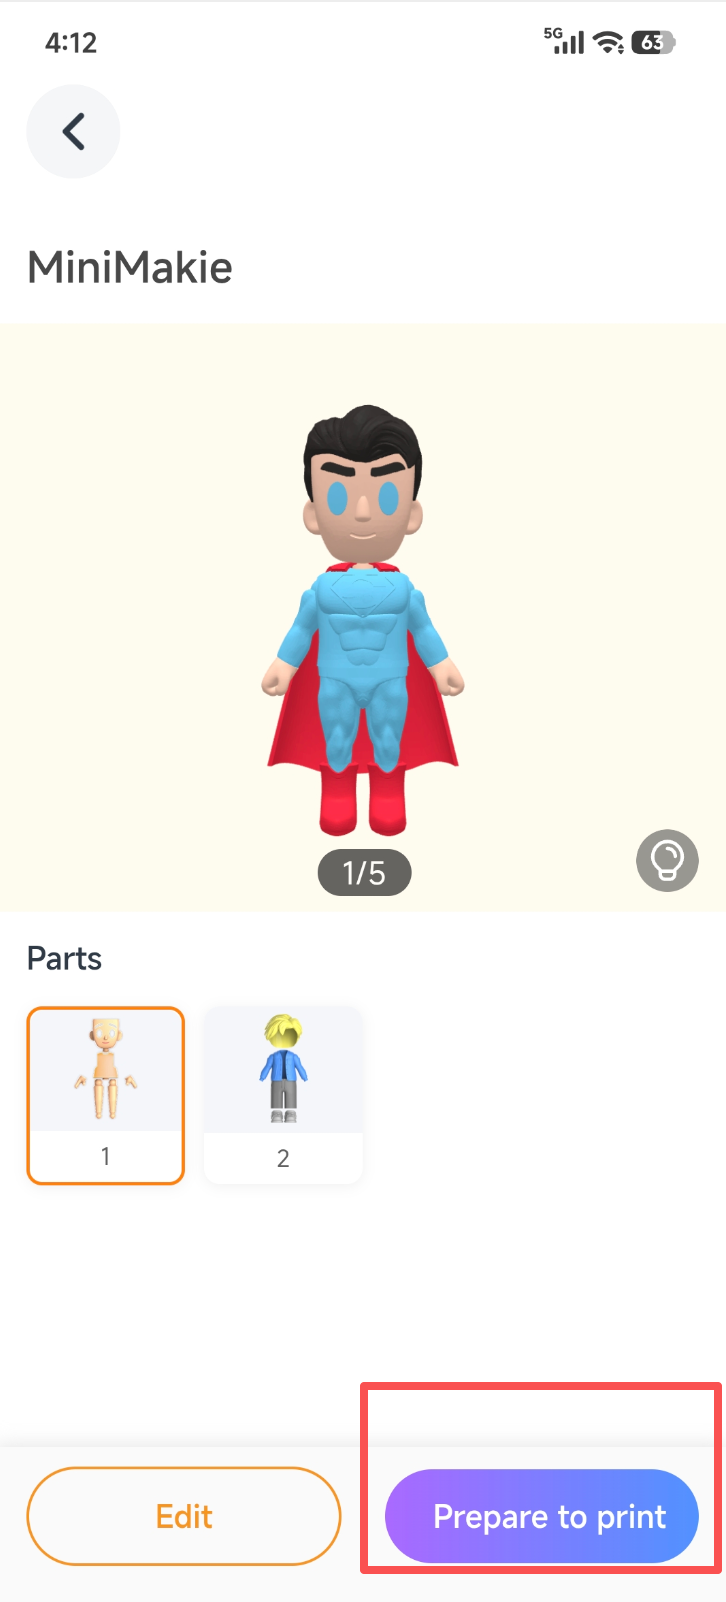
5. MiniMakie: Customise a character doll by swapping parts (hair, face, eyebrows, etc.) to create your own doll, then print it.
EXPLORE
Explore
1. Fun play ideas (introductions to various special toy playstyles).
2. Tutorial guides (videos covering common issues during printer use).
3. Premium courses (introductory 3D modelling courses with difficulty levels).
4.3 Homepage – Toys (TOY) – Tap the TOY button at the bottom. (Further details under this section will be provided if available.)
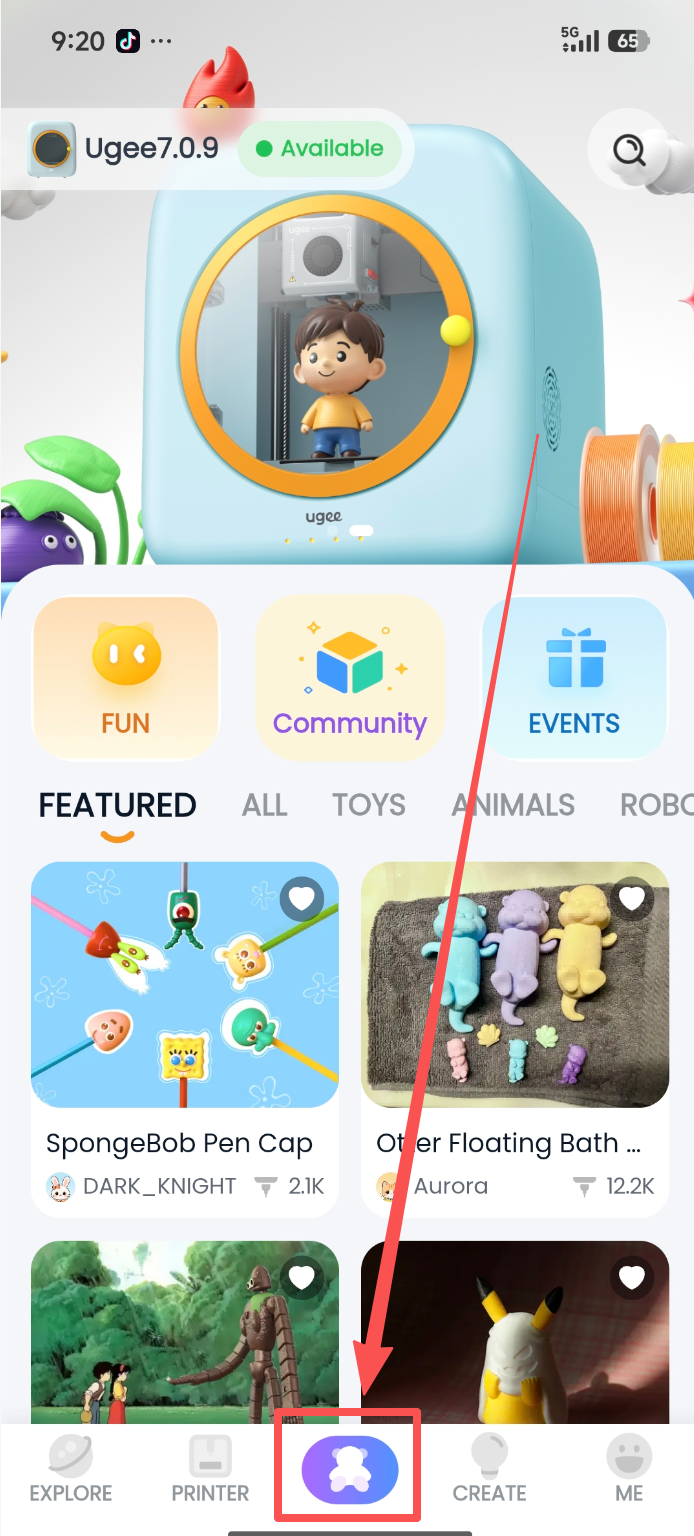
The Toy module covers 10 styles and themes, such as toys, animals, etc. Through search, filtering, and other methods, even beginners can easily find their favorite models and print them with one click.
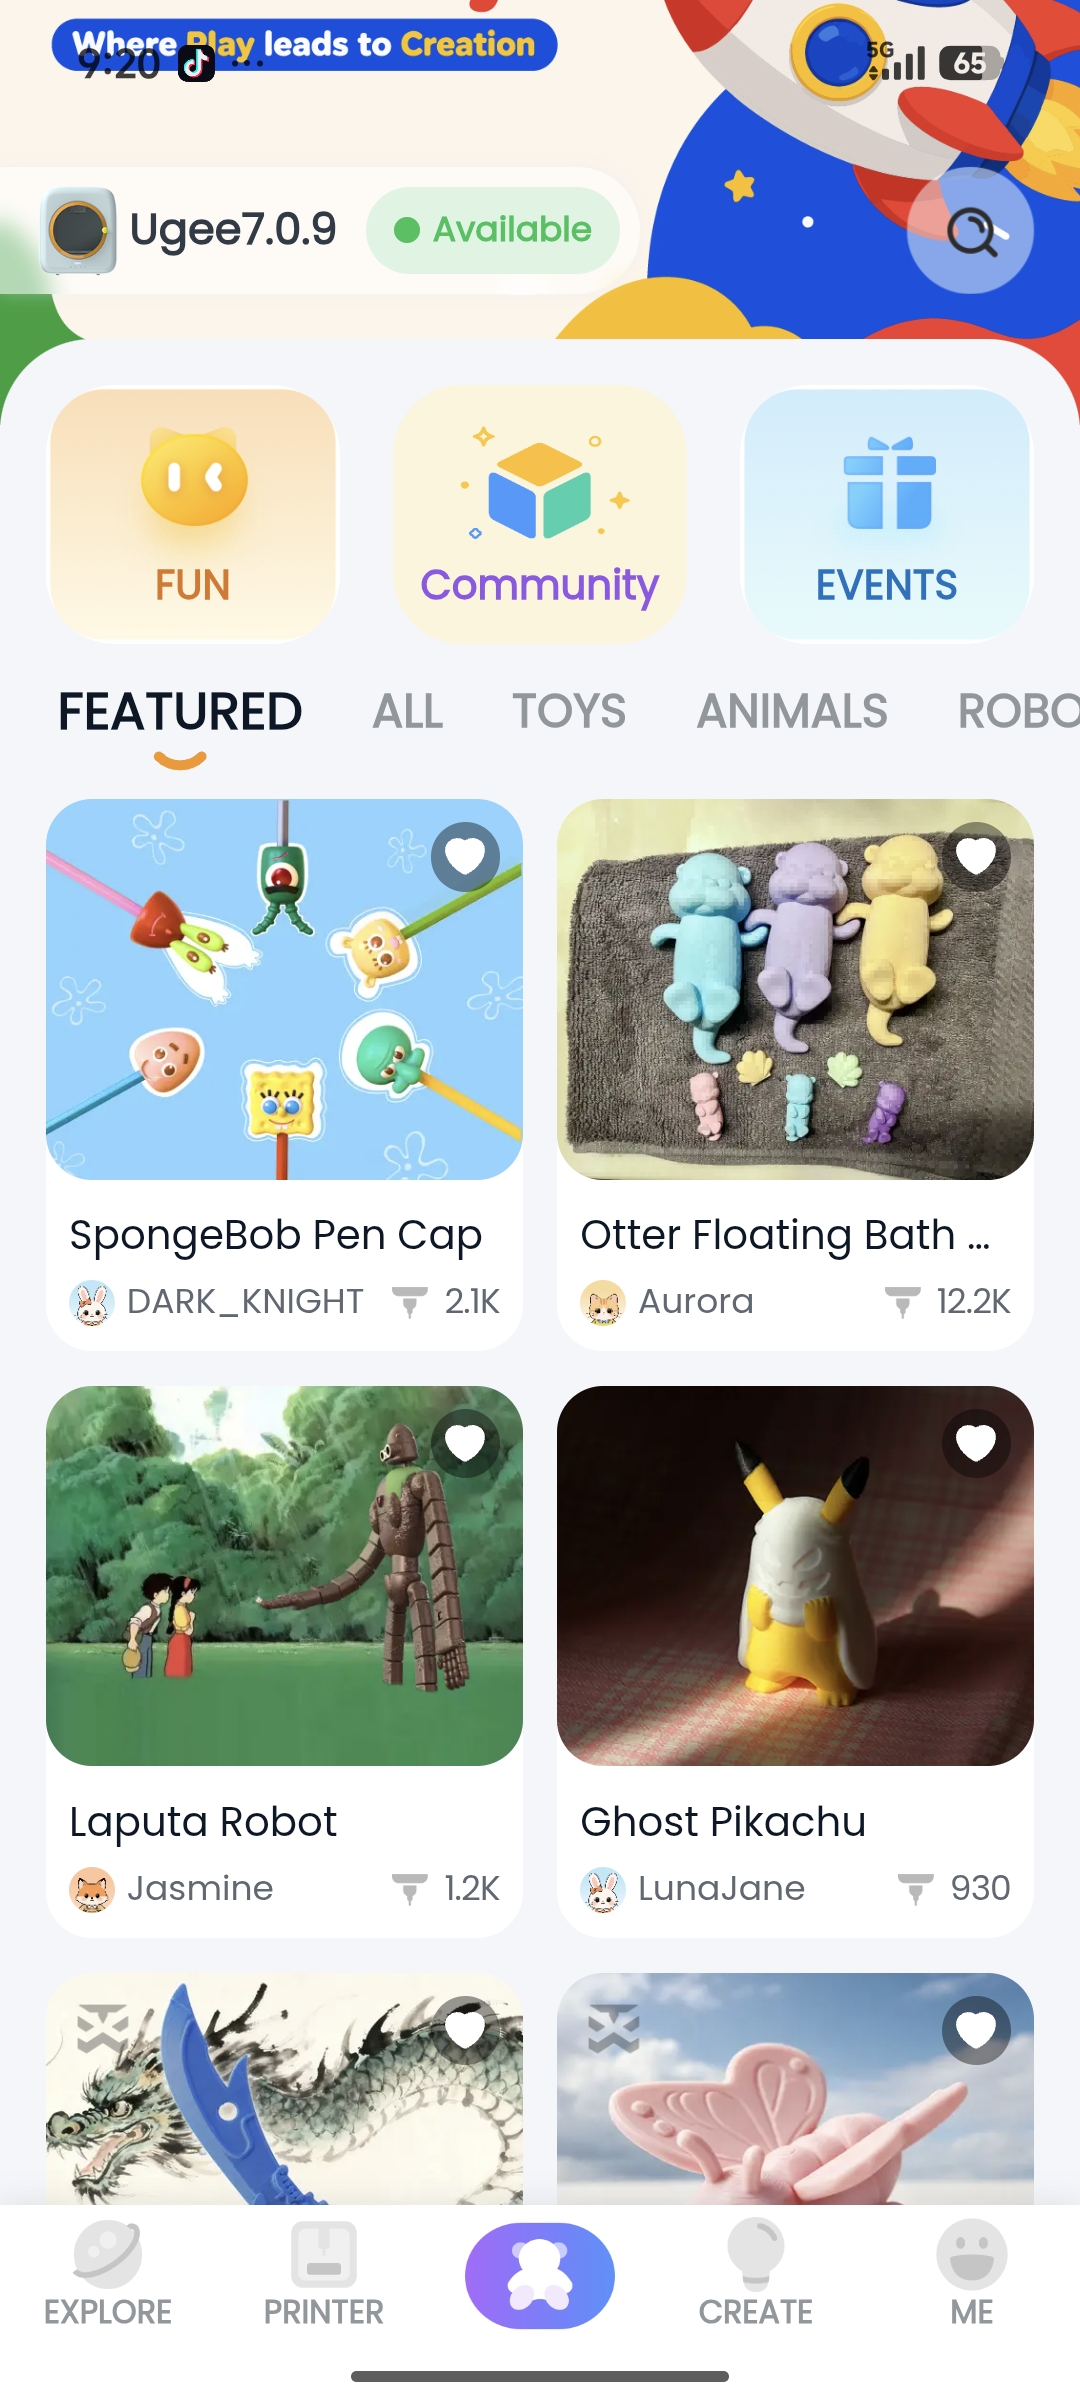
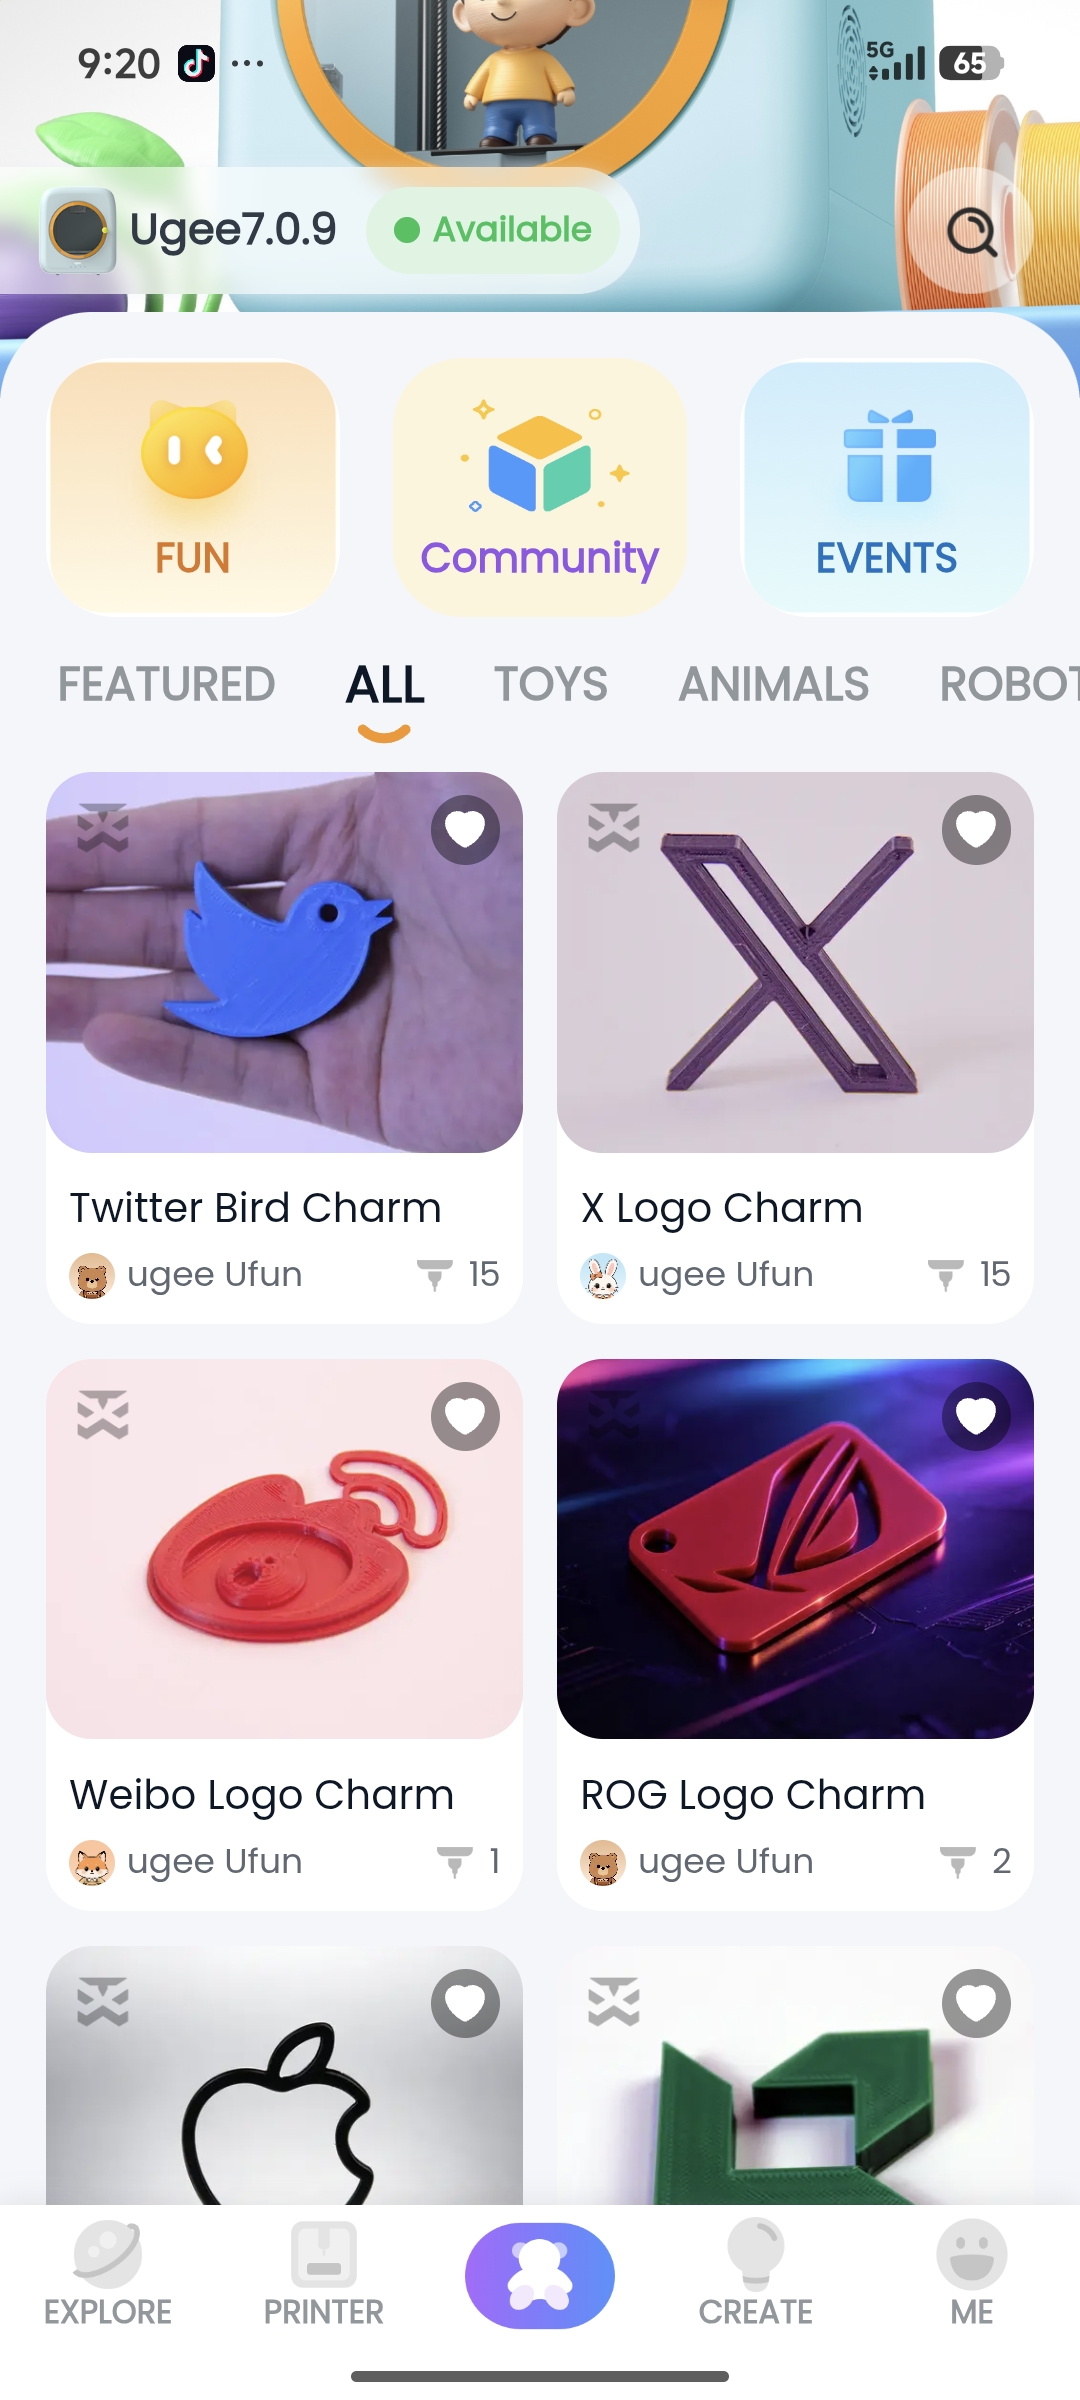
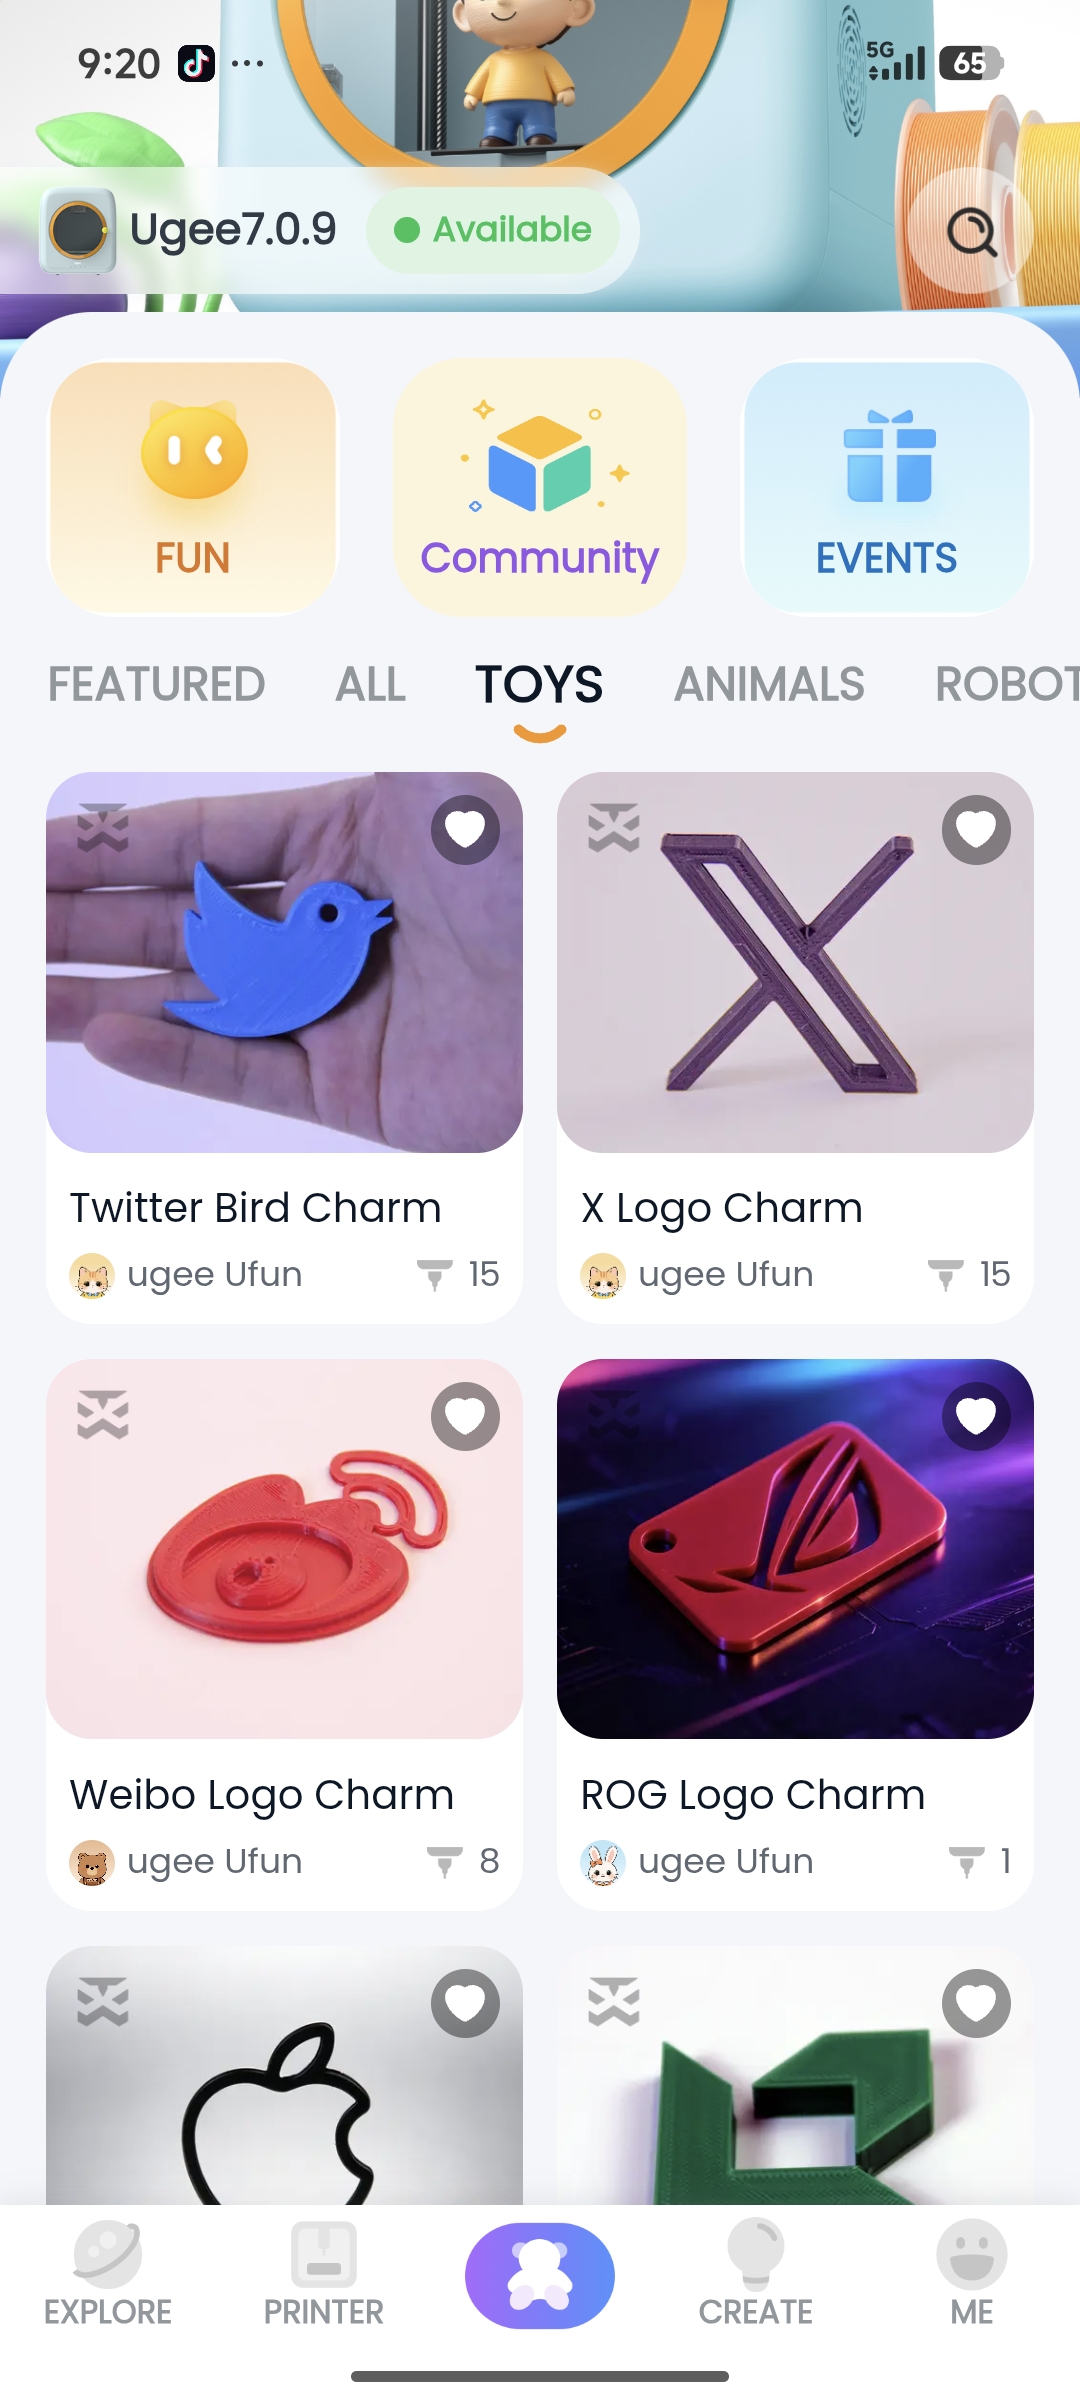
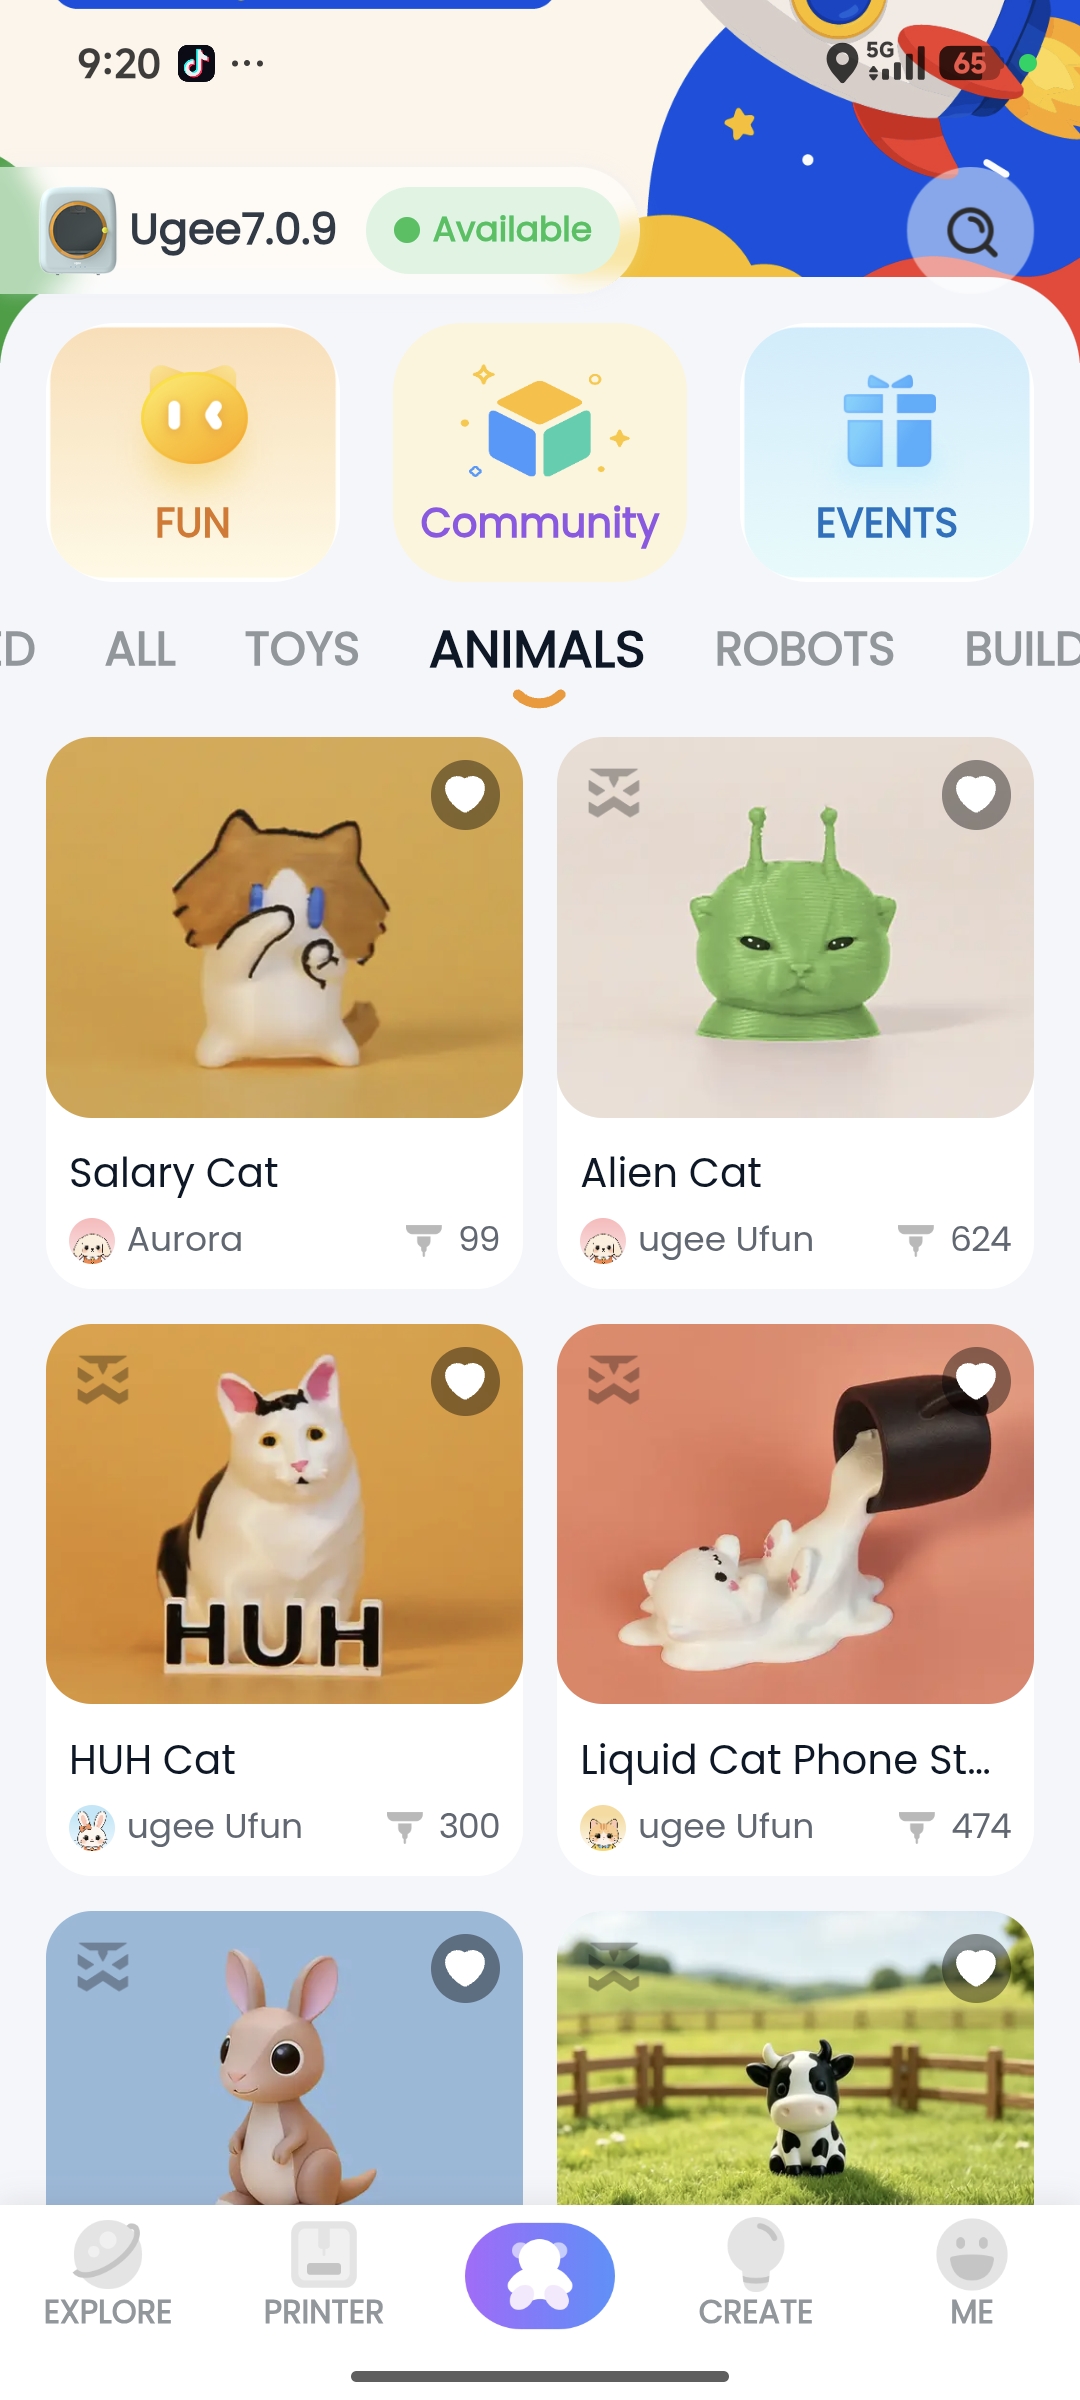
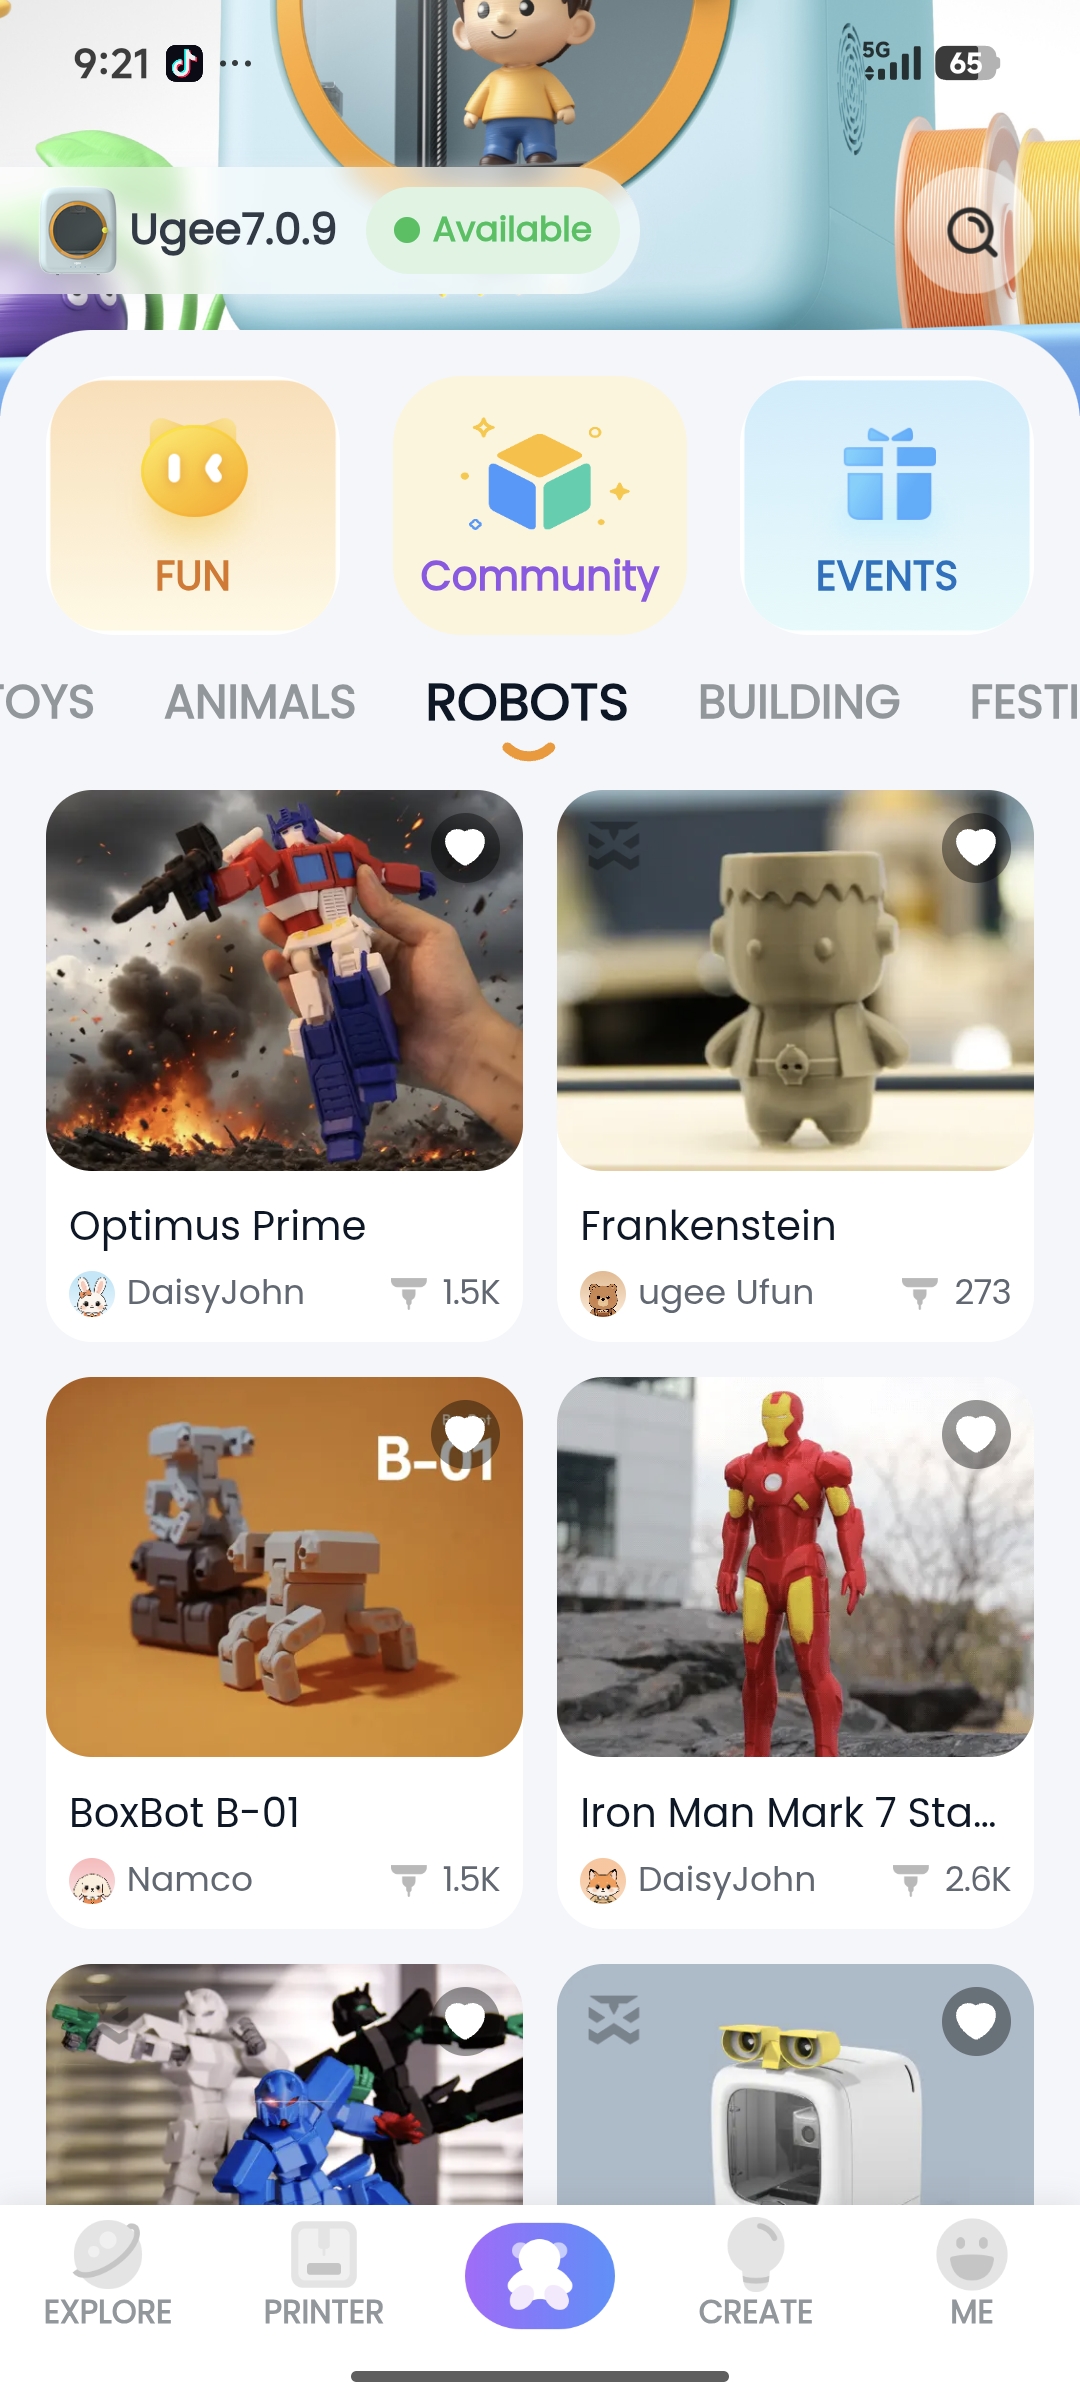
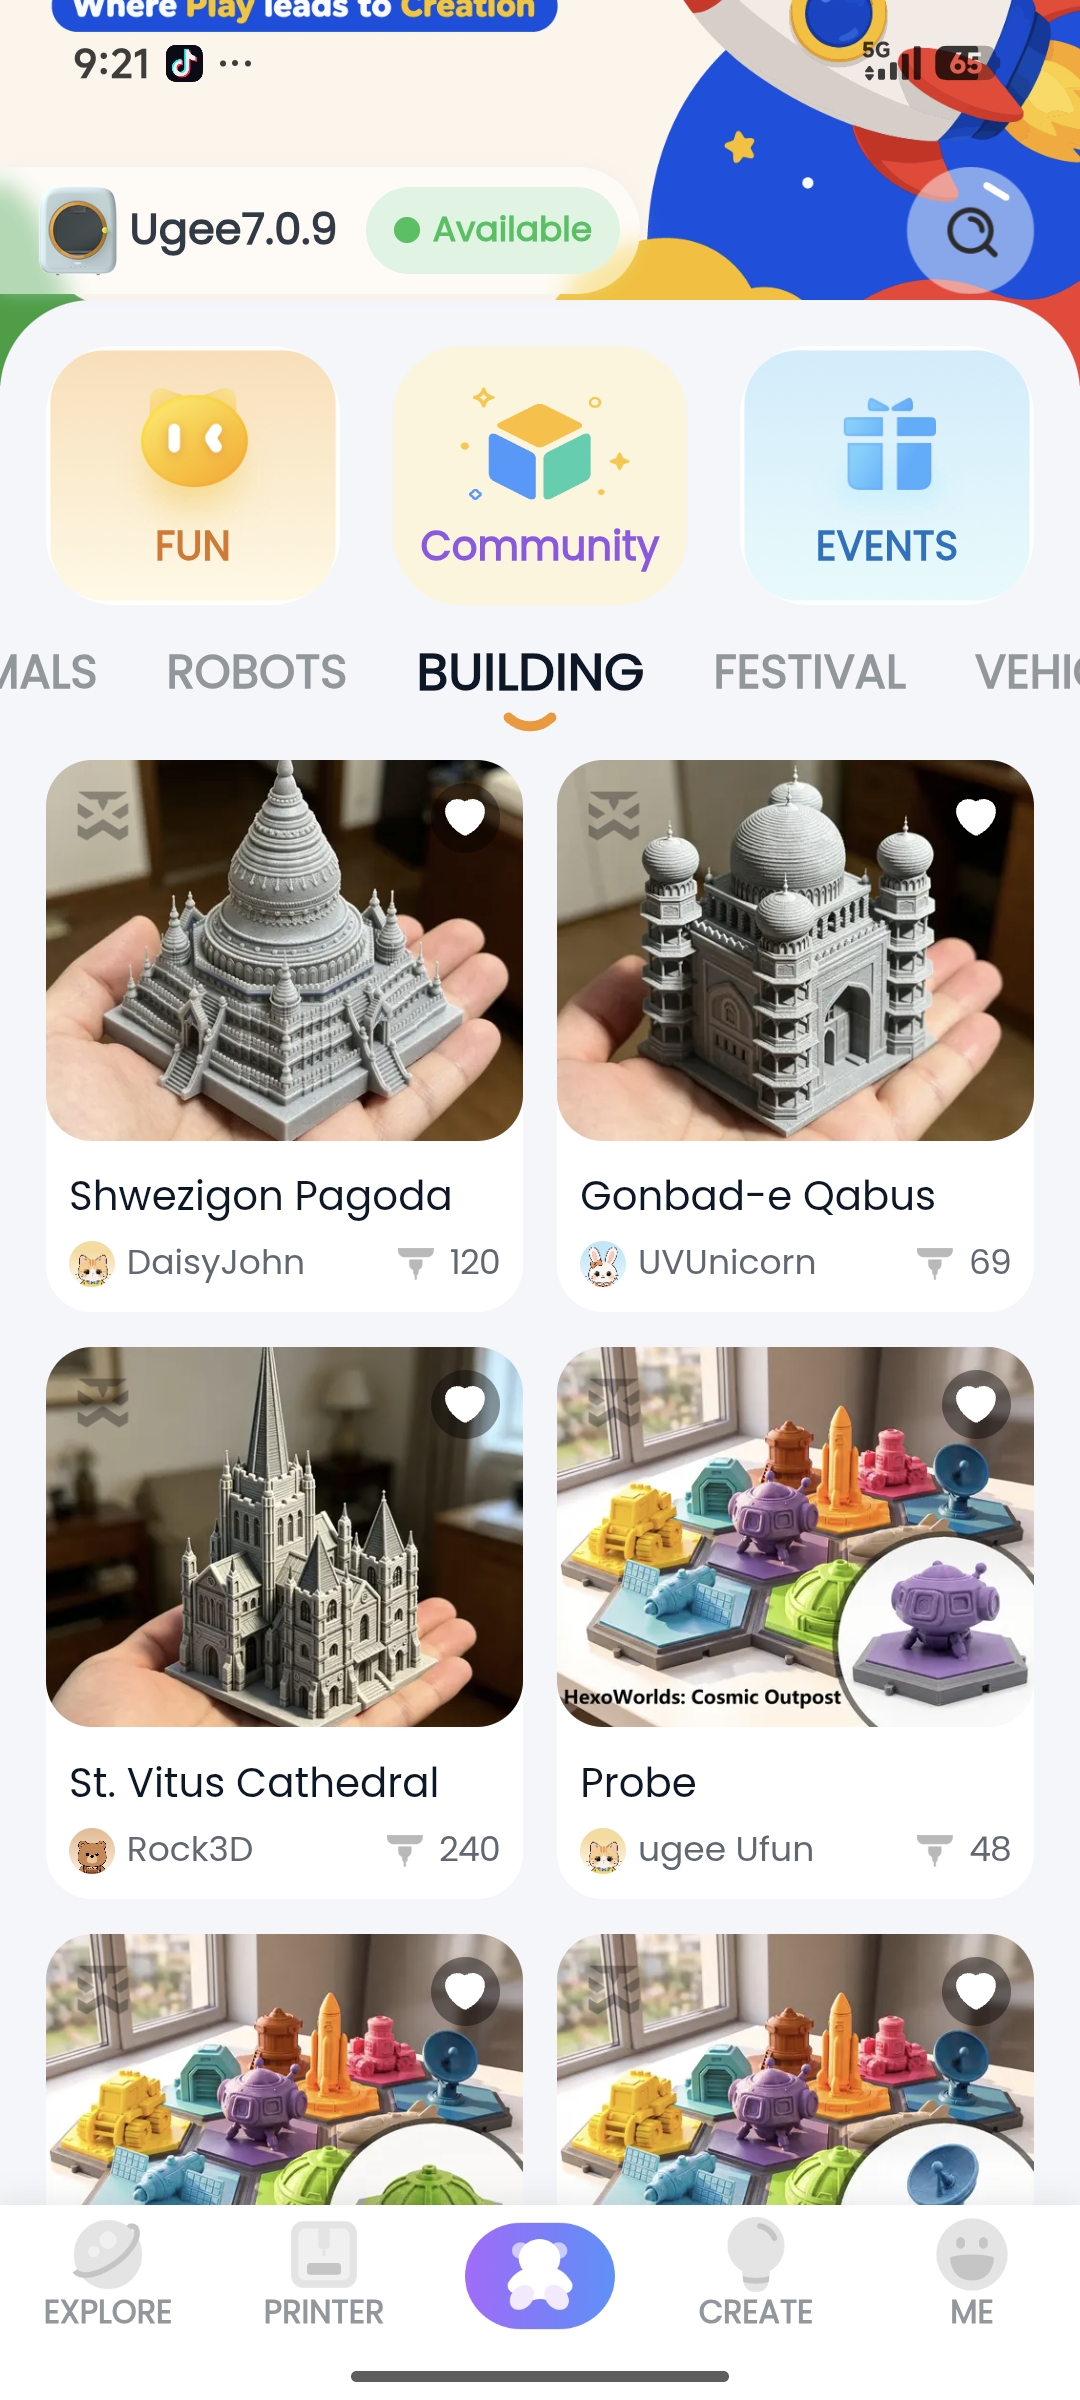
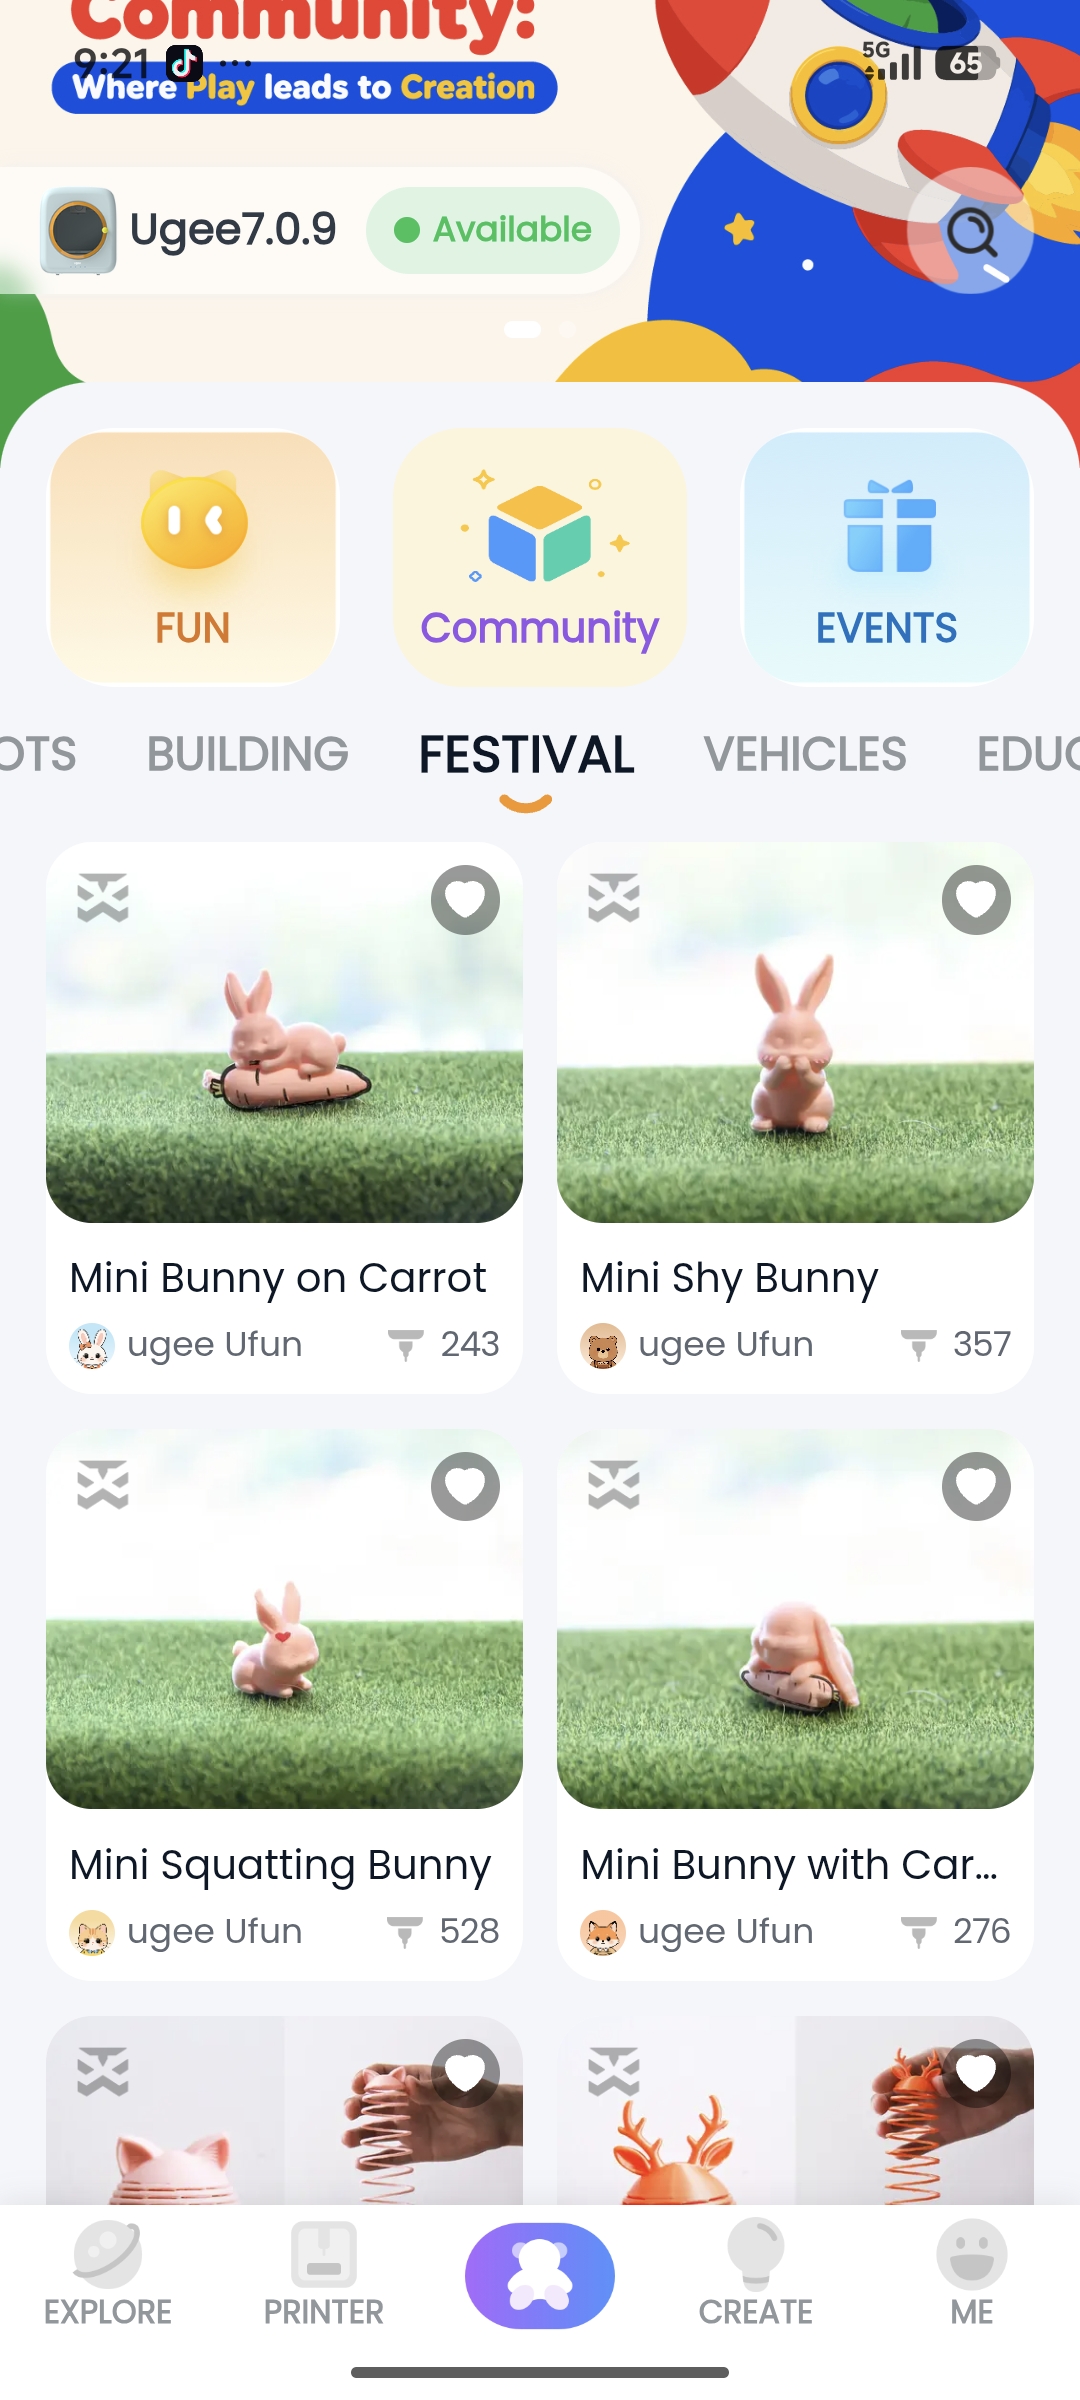
4.3.1 Vast Collection of Child‑Friendly Models
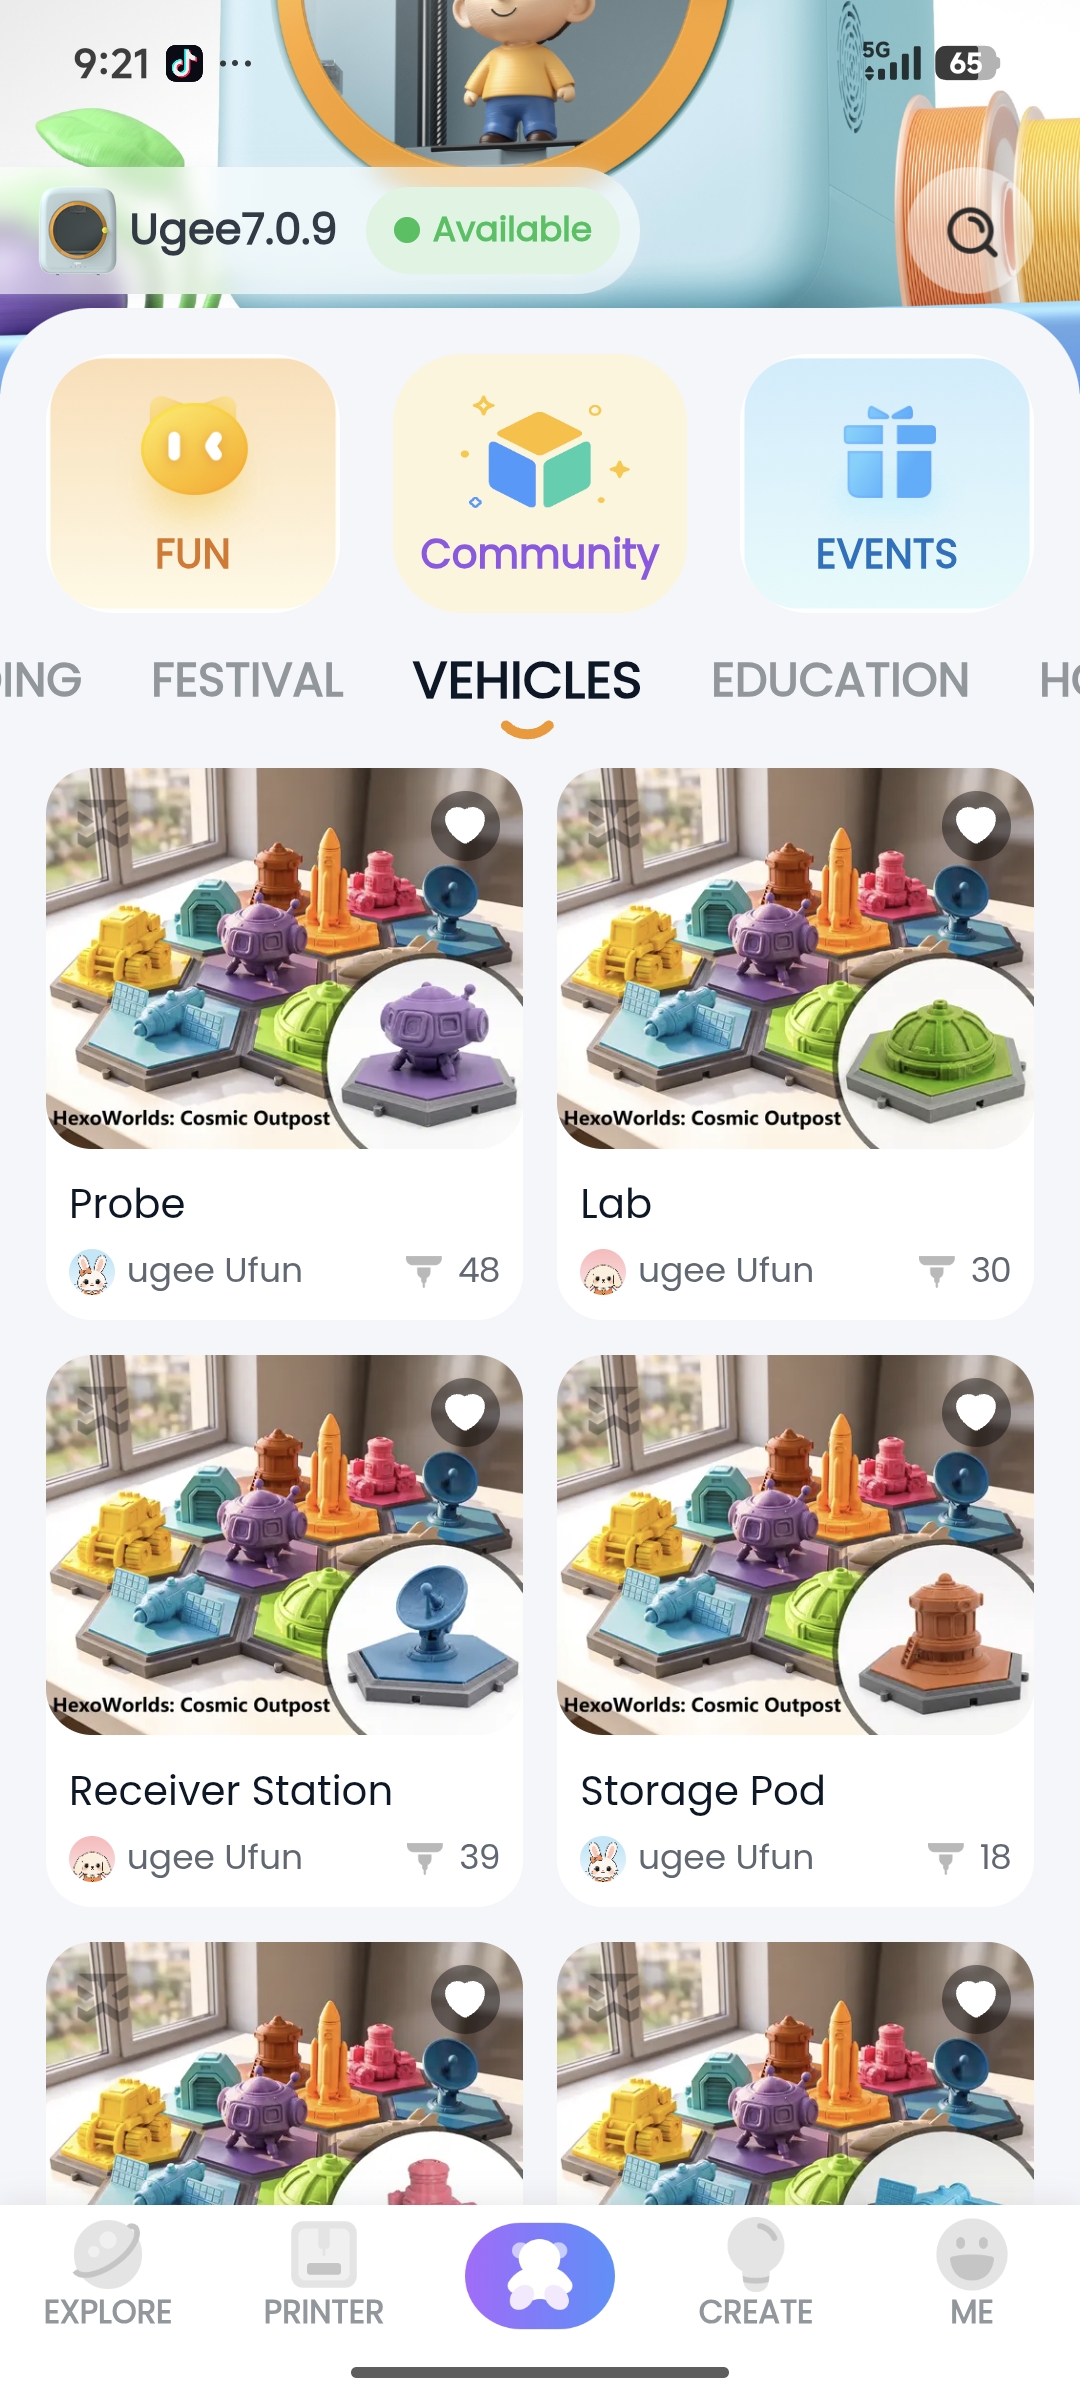
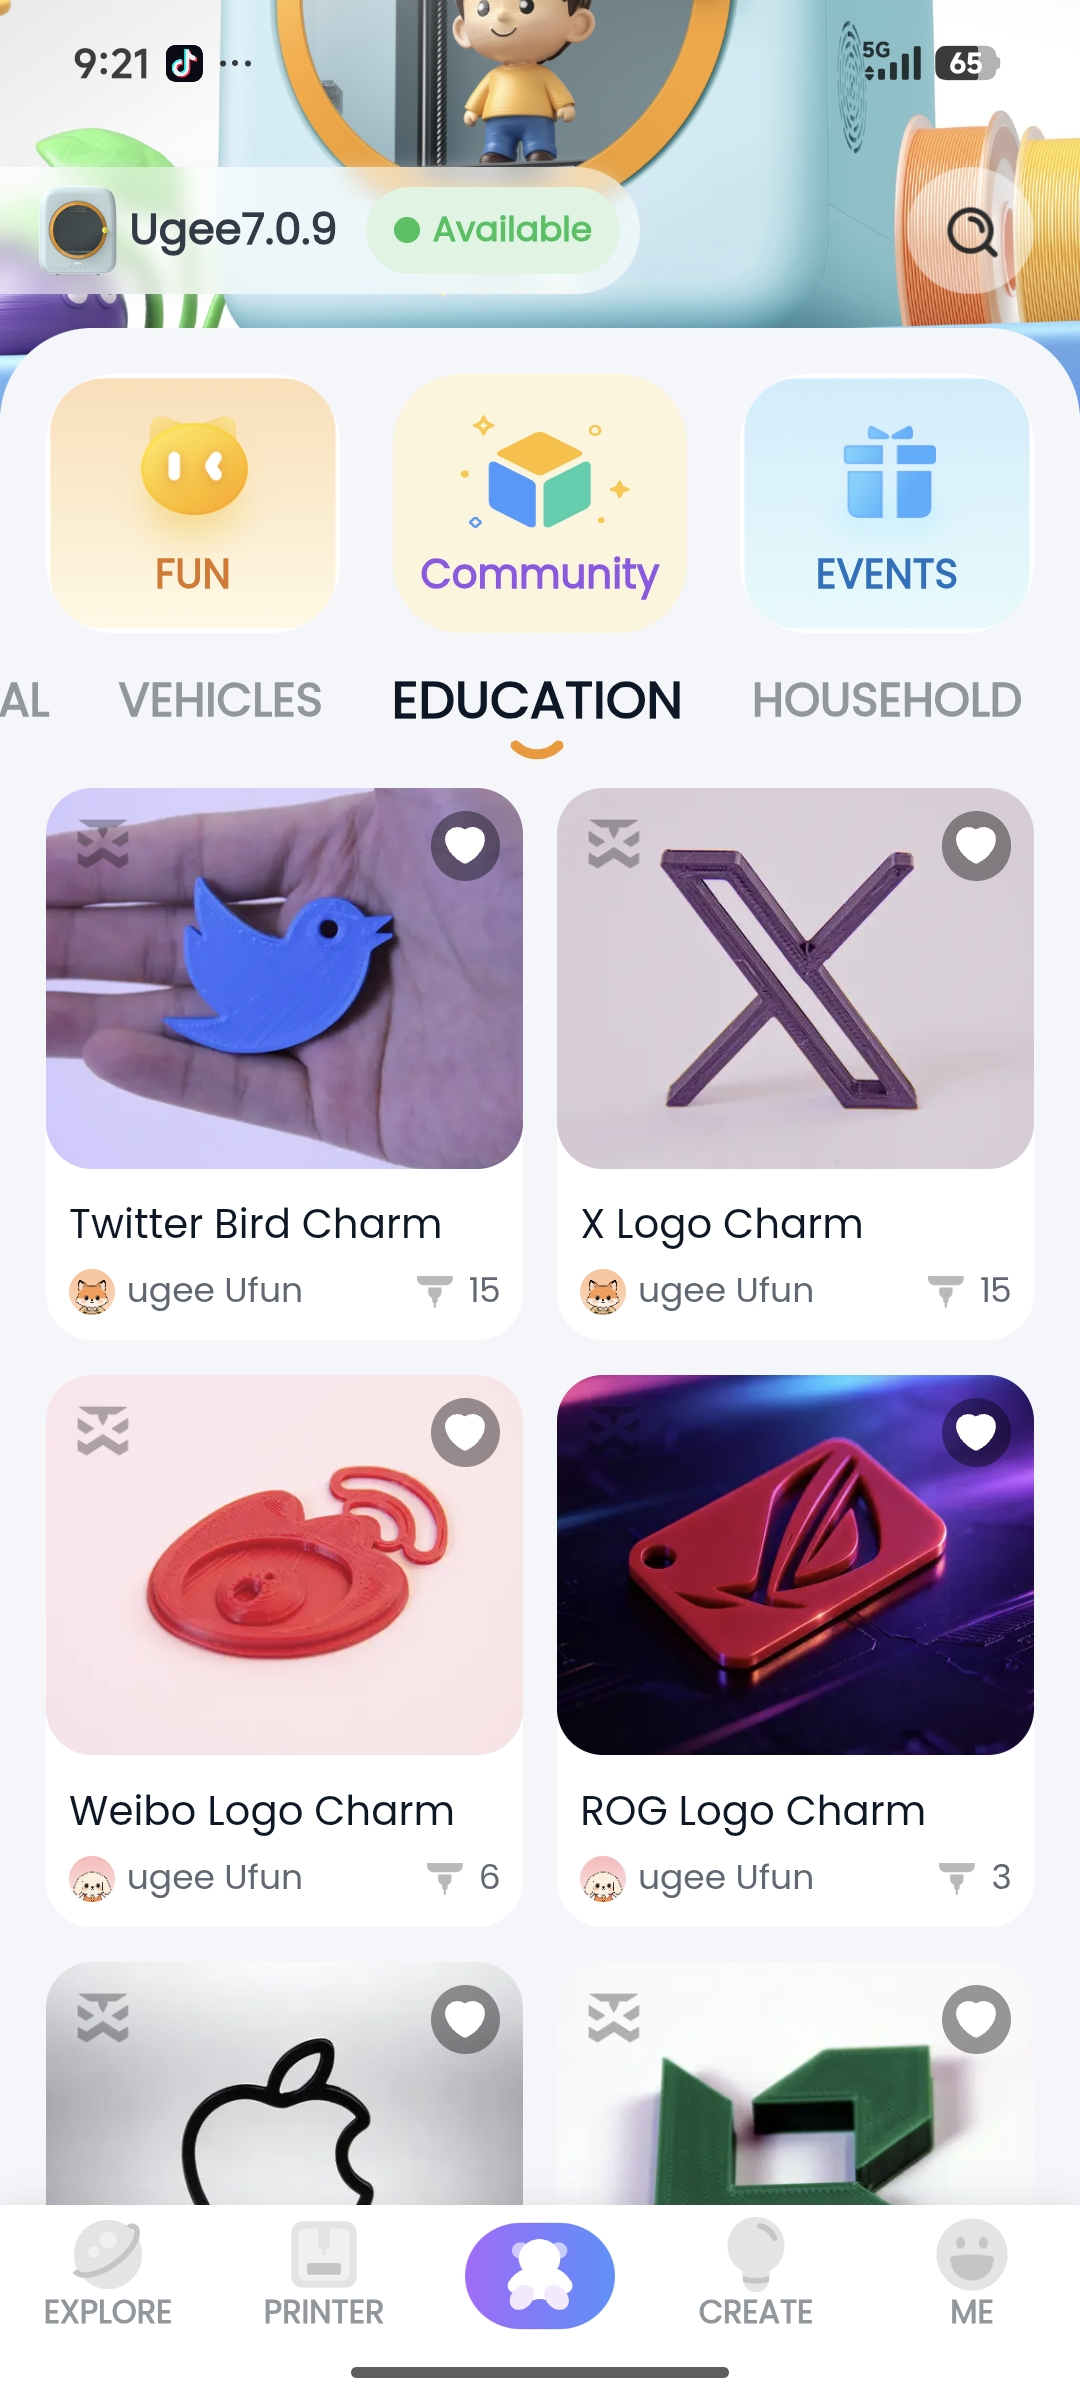
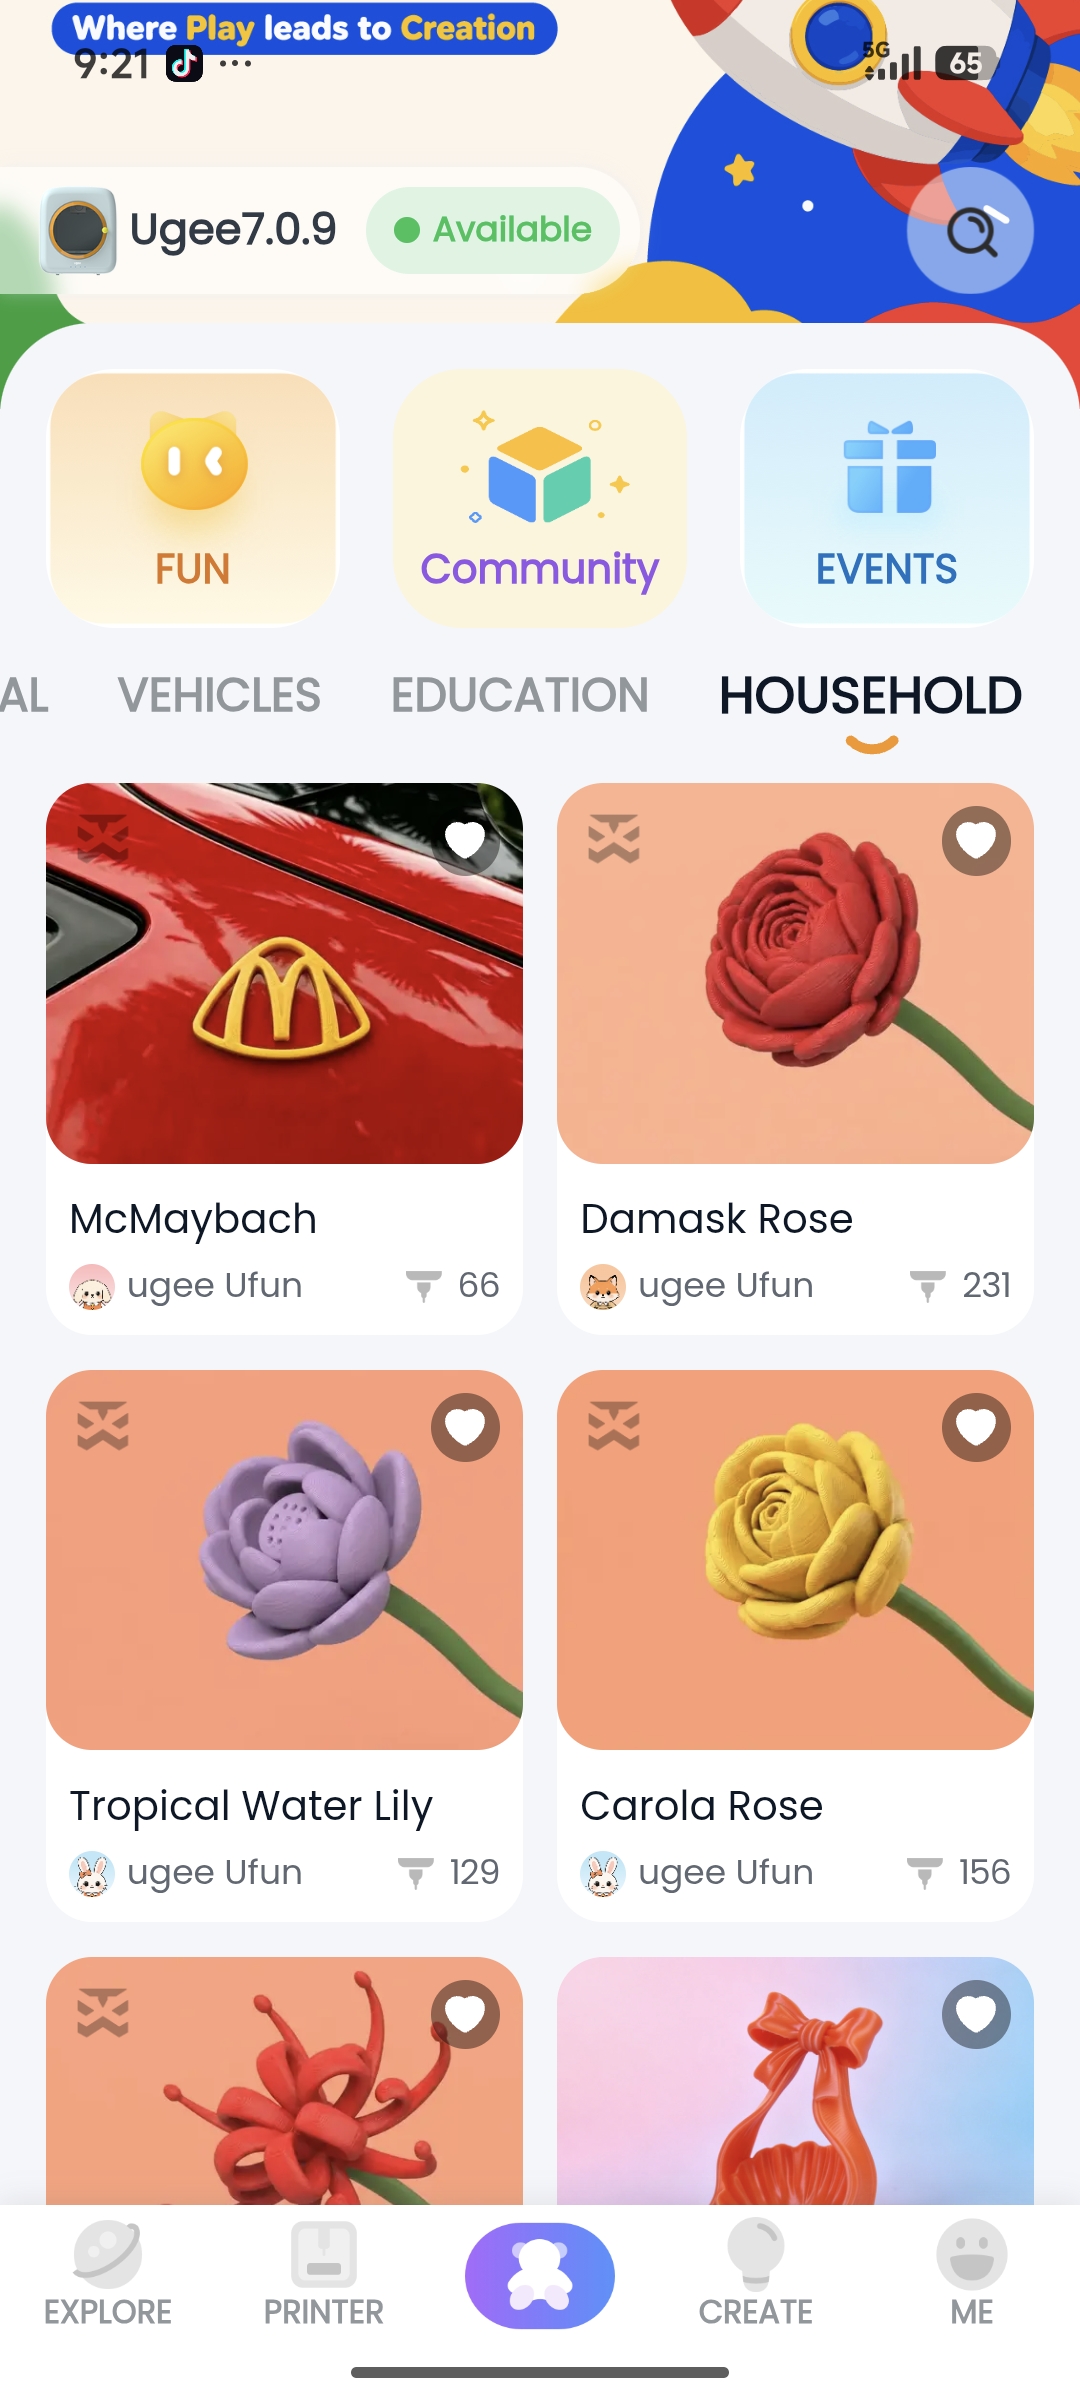
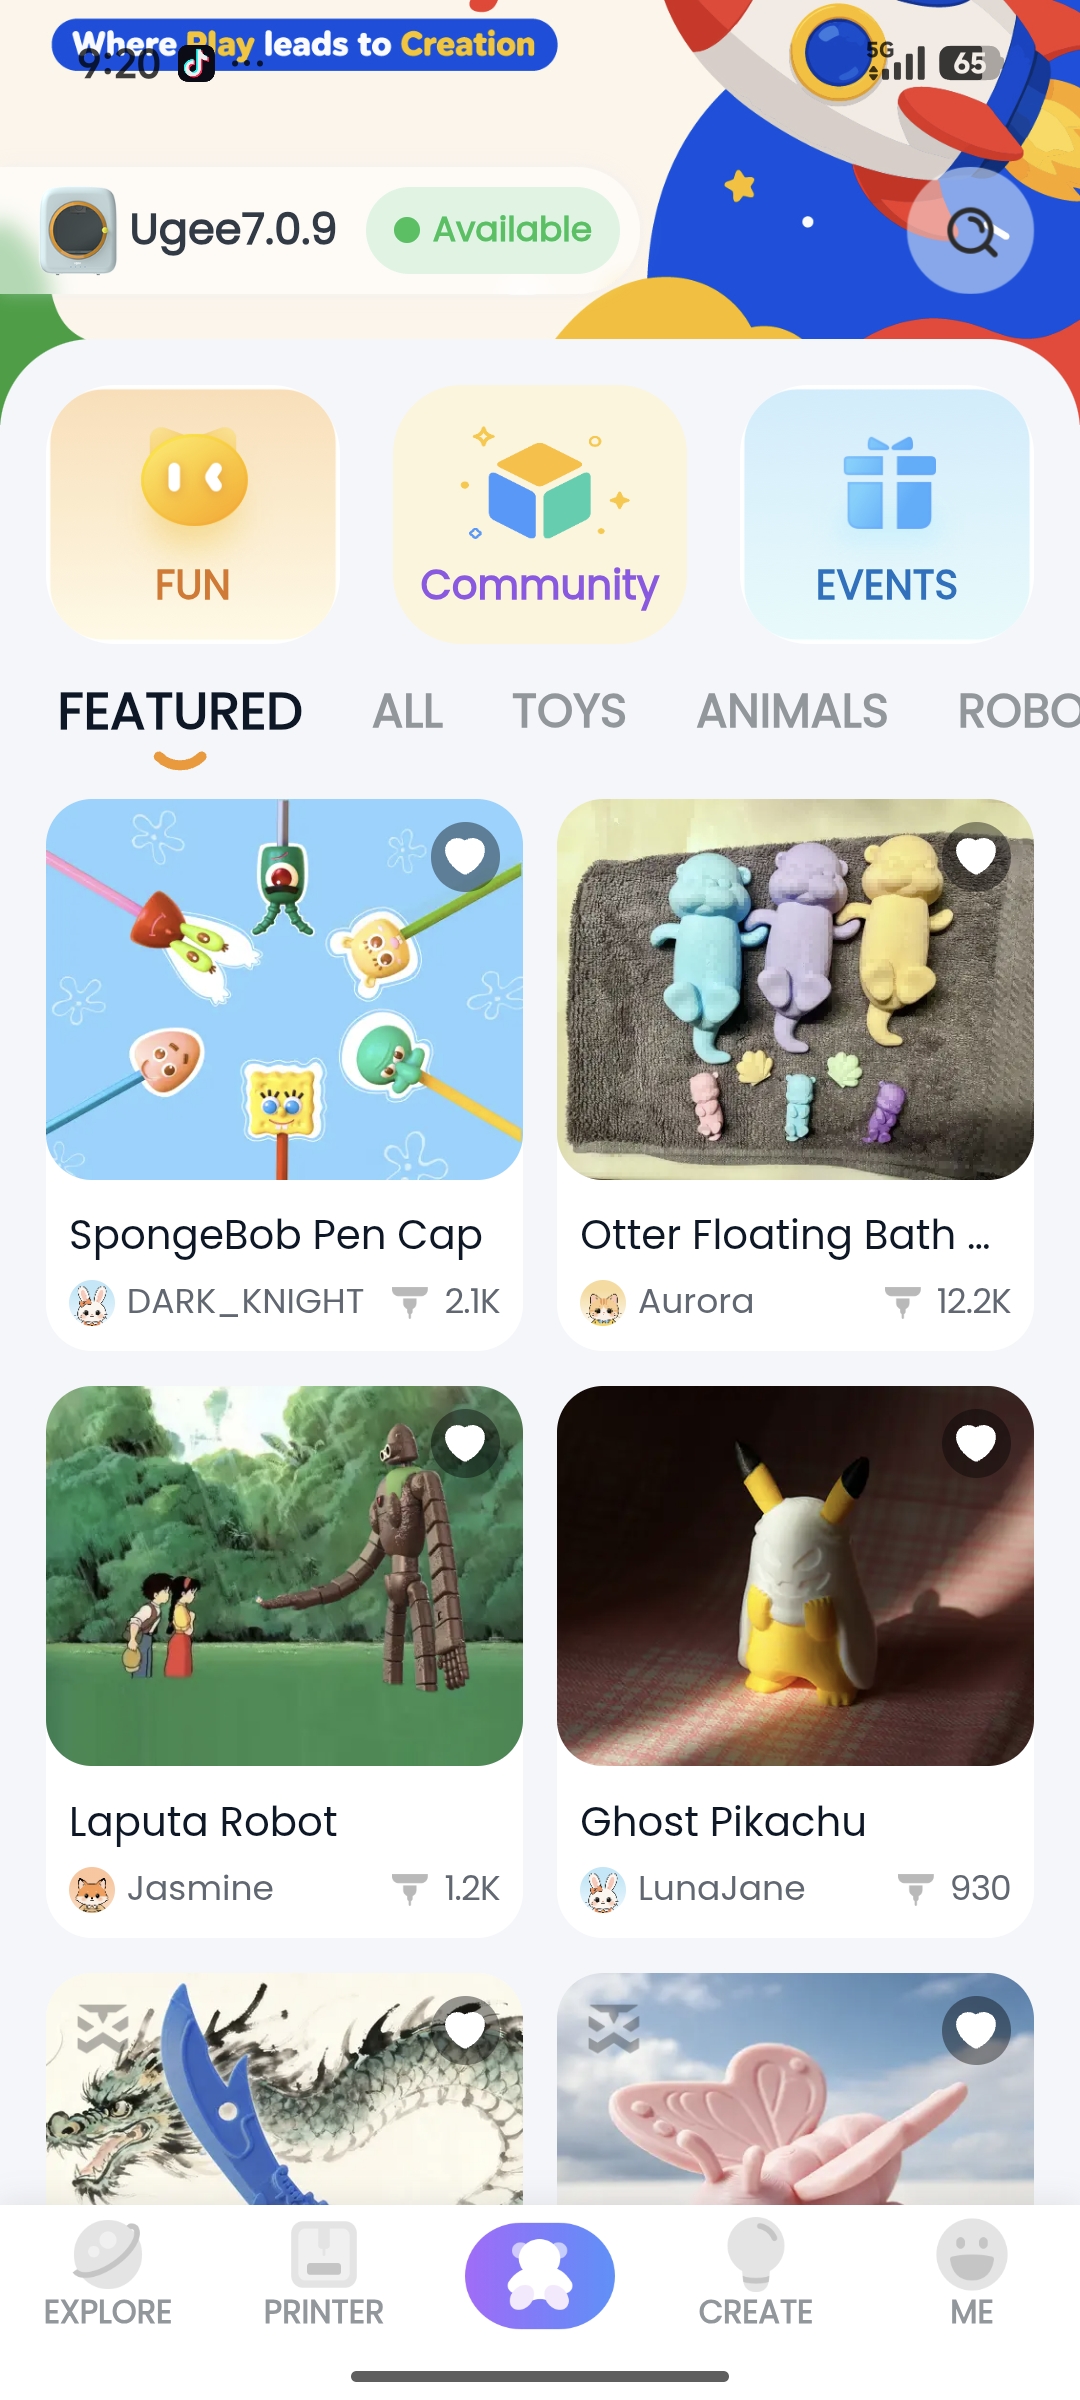
• Upon entering the app, the Toy (TOY) page is displayed by default. Select the desired category on the interface to view the corresponding models.
• There are 10 categories to choose from: Featured, All, Toys, Animals, Robots, Buildings, Festivals, Transportation, Education, and Lifestyle.
4.3.2 Search Function
• The software supports both text search and voice search.
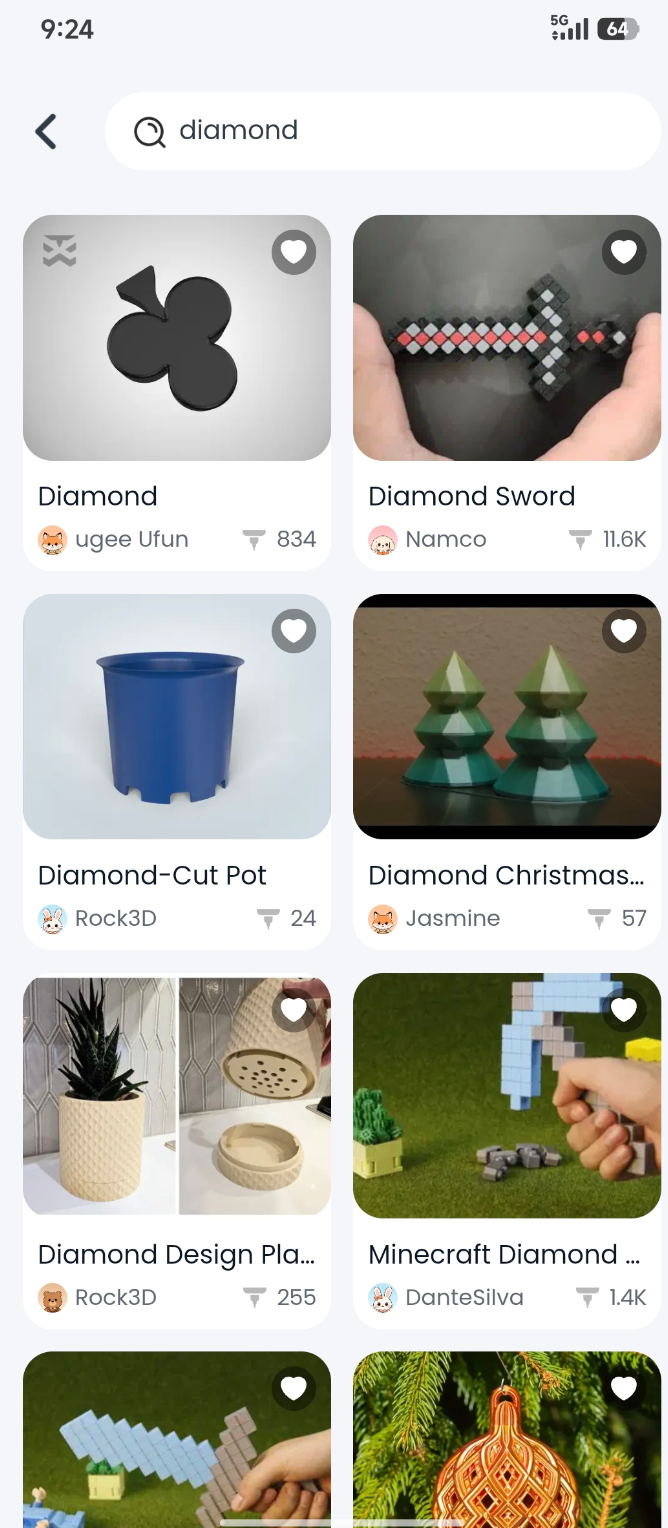
• Enter text in the search box or tap the microphone icon to input voice, and the corresponding models will be displayed.
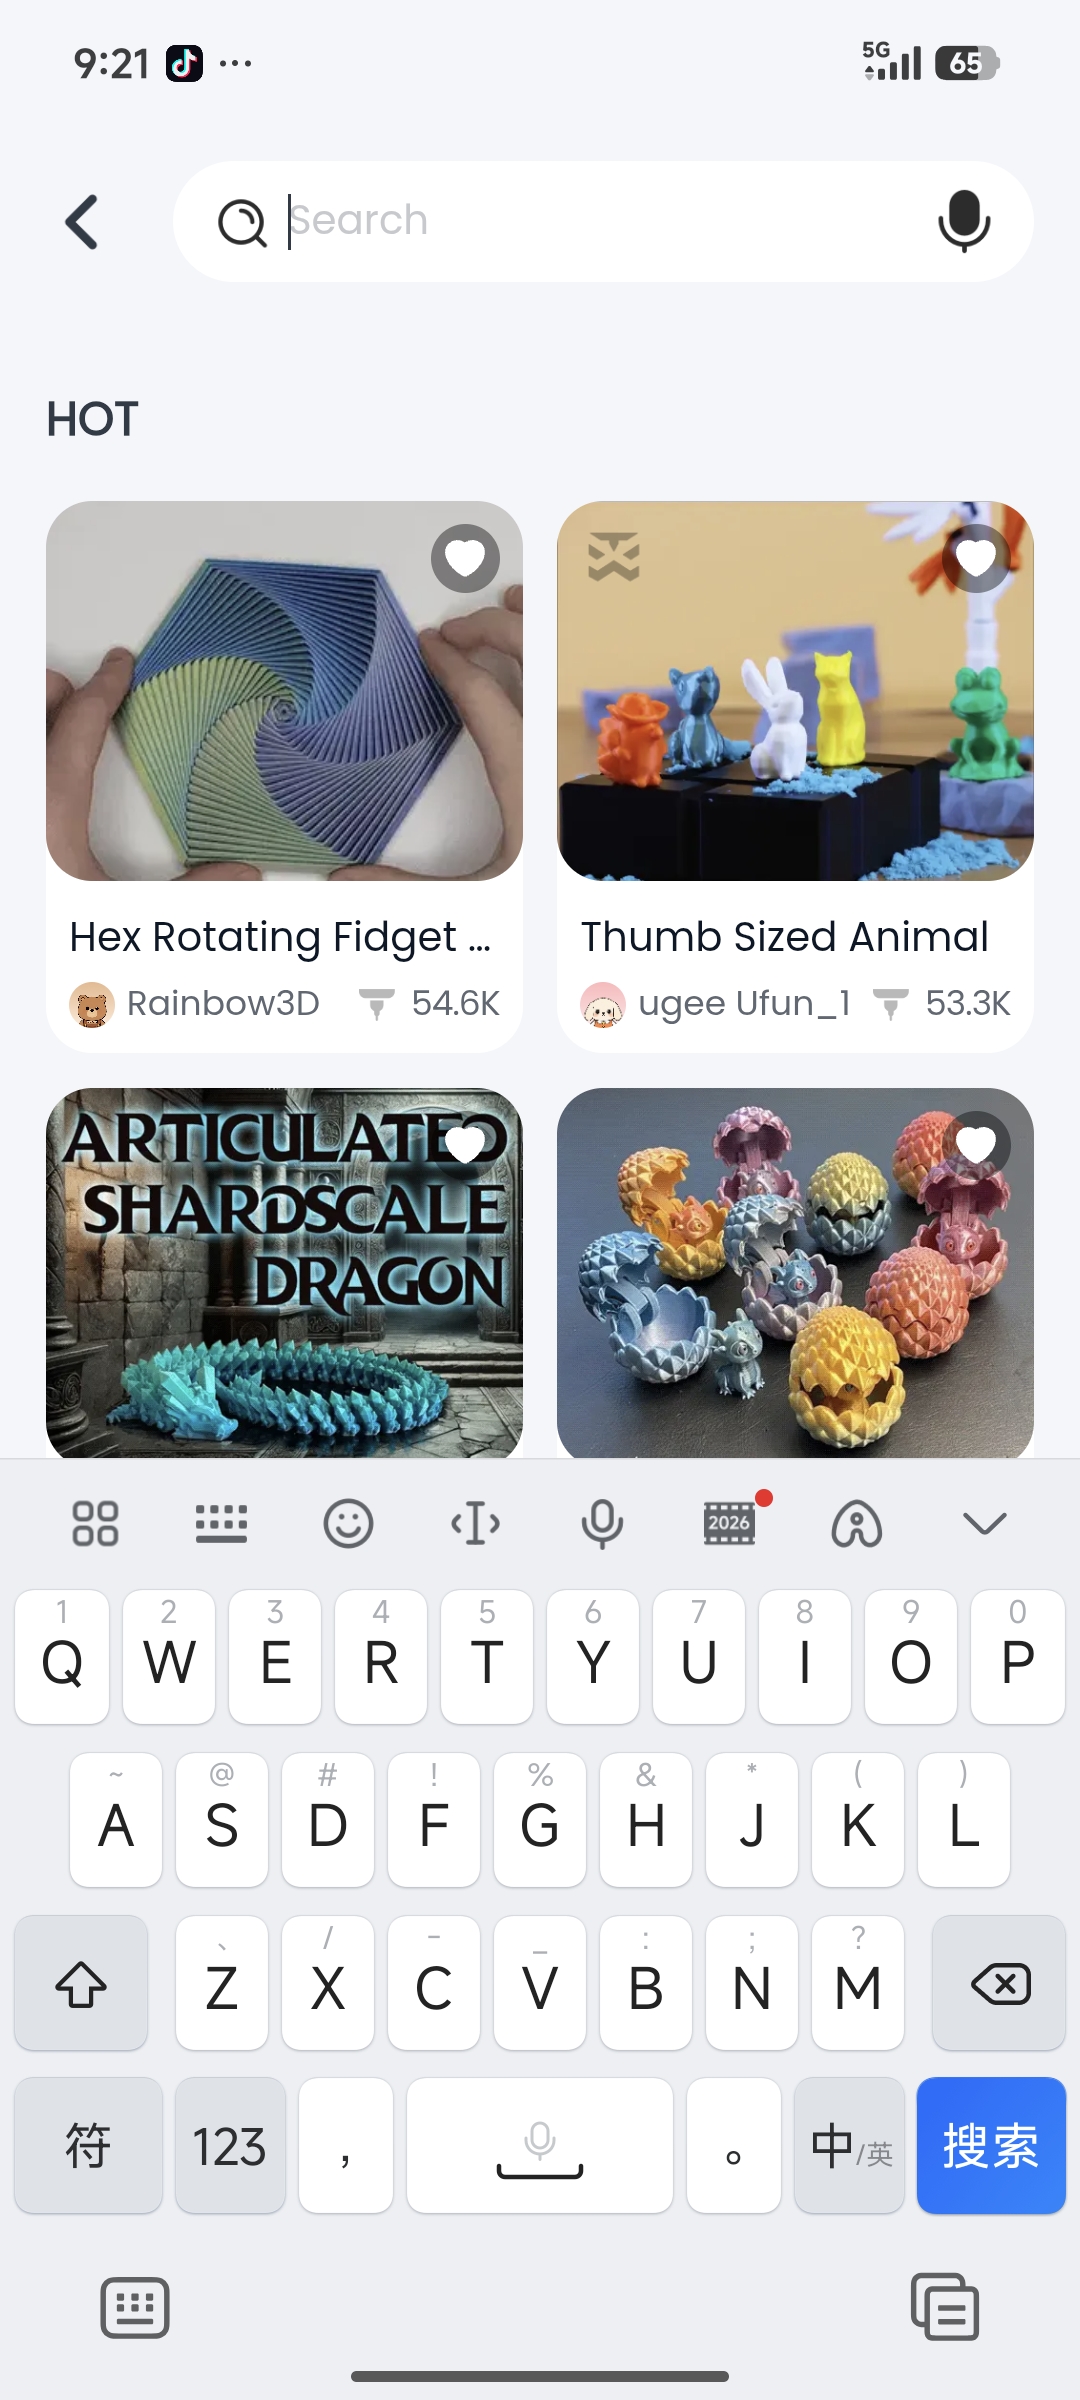
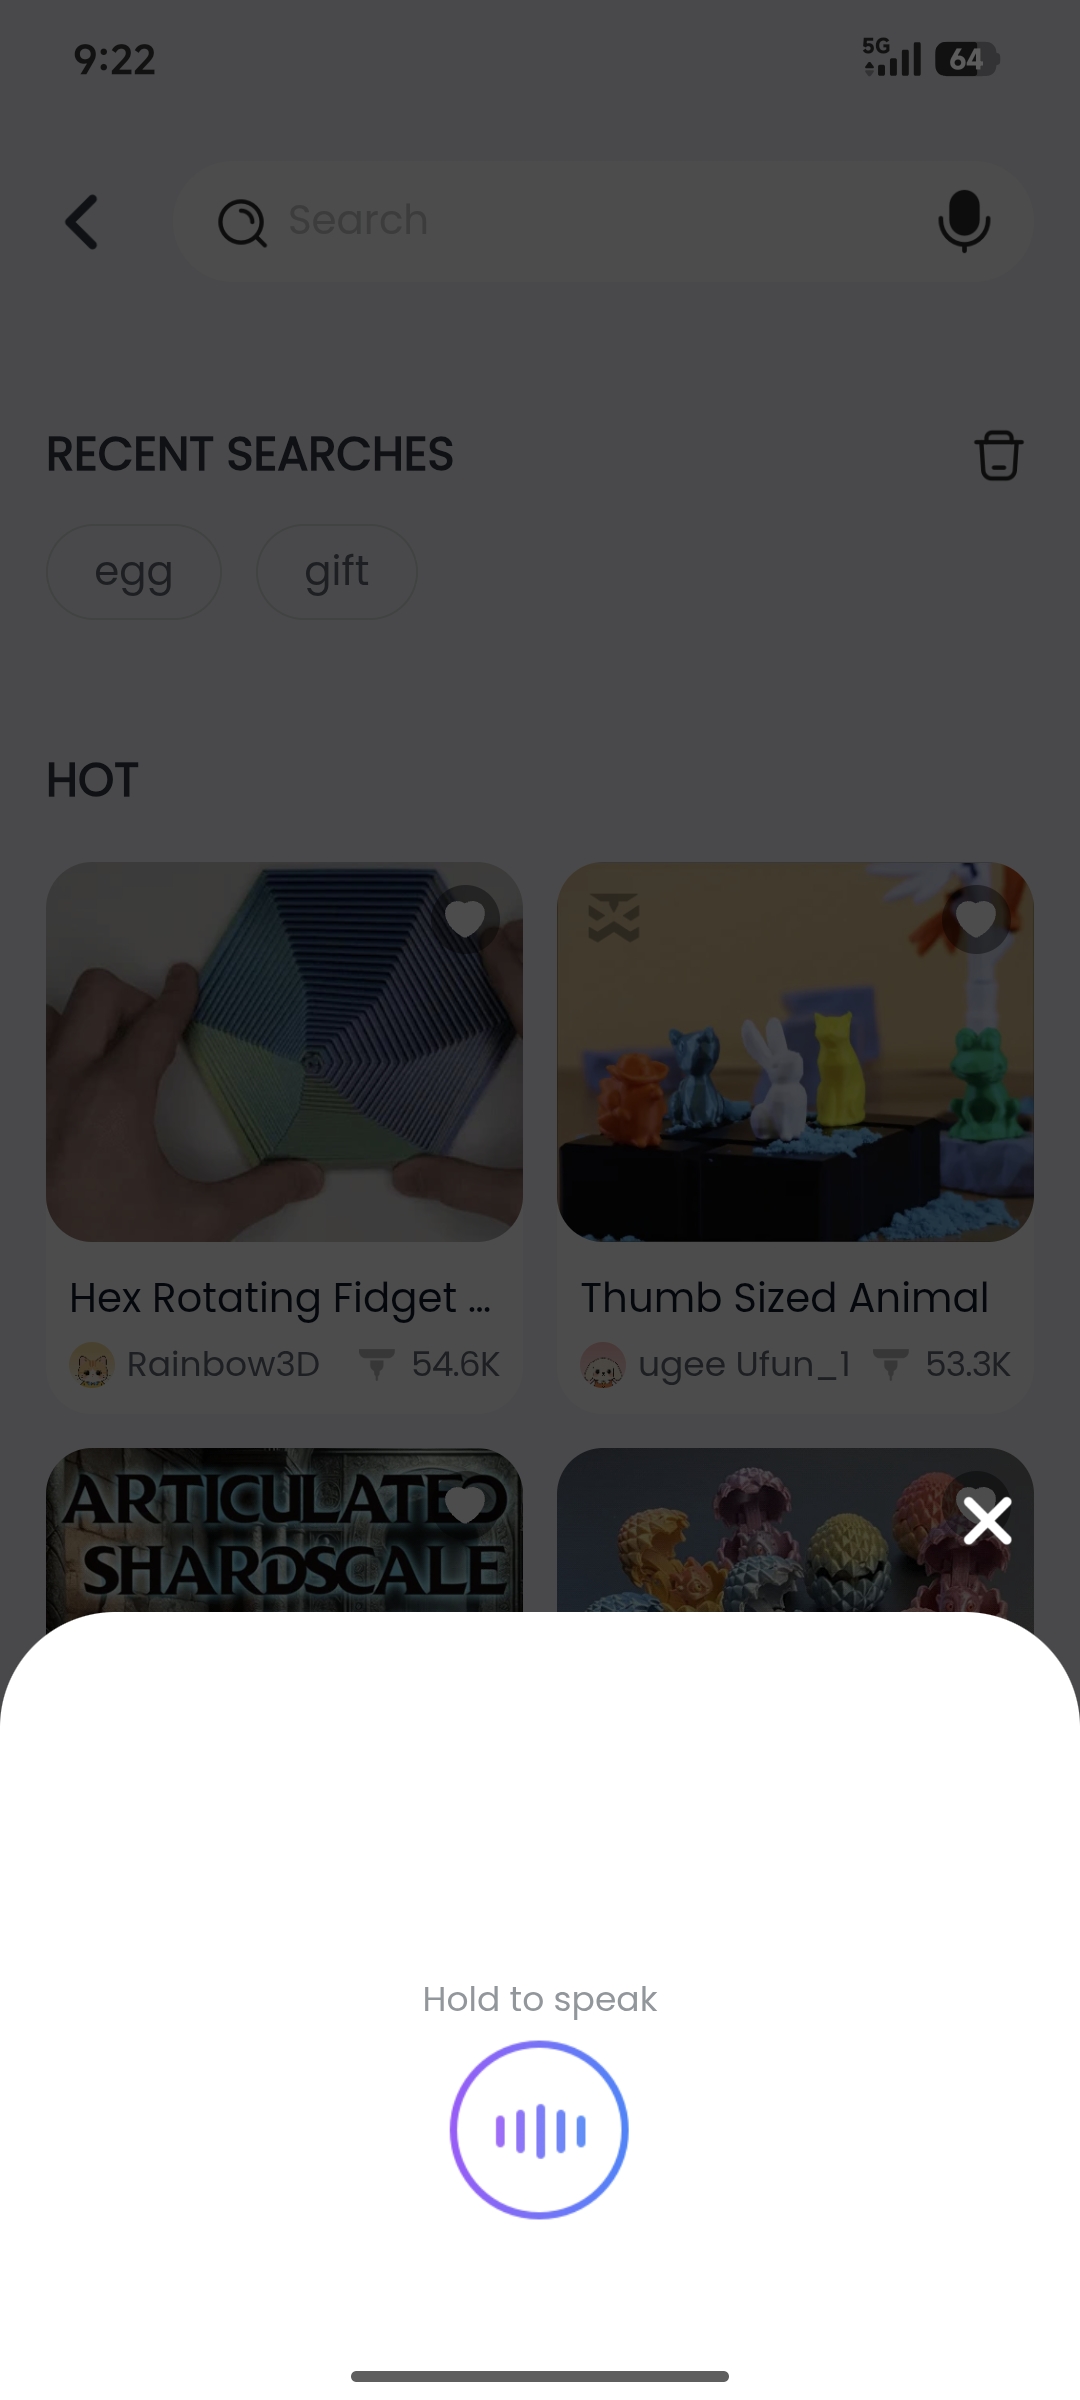
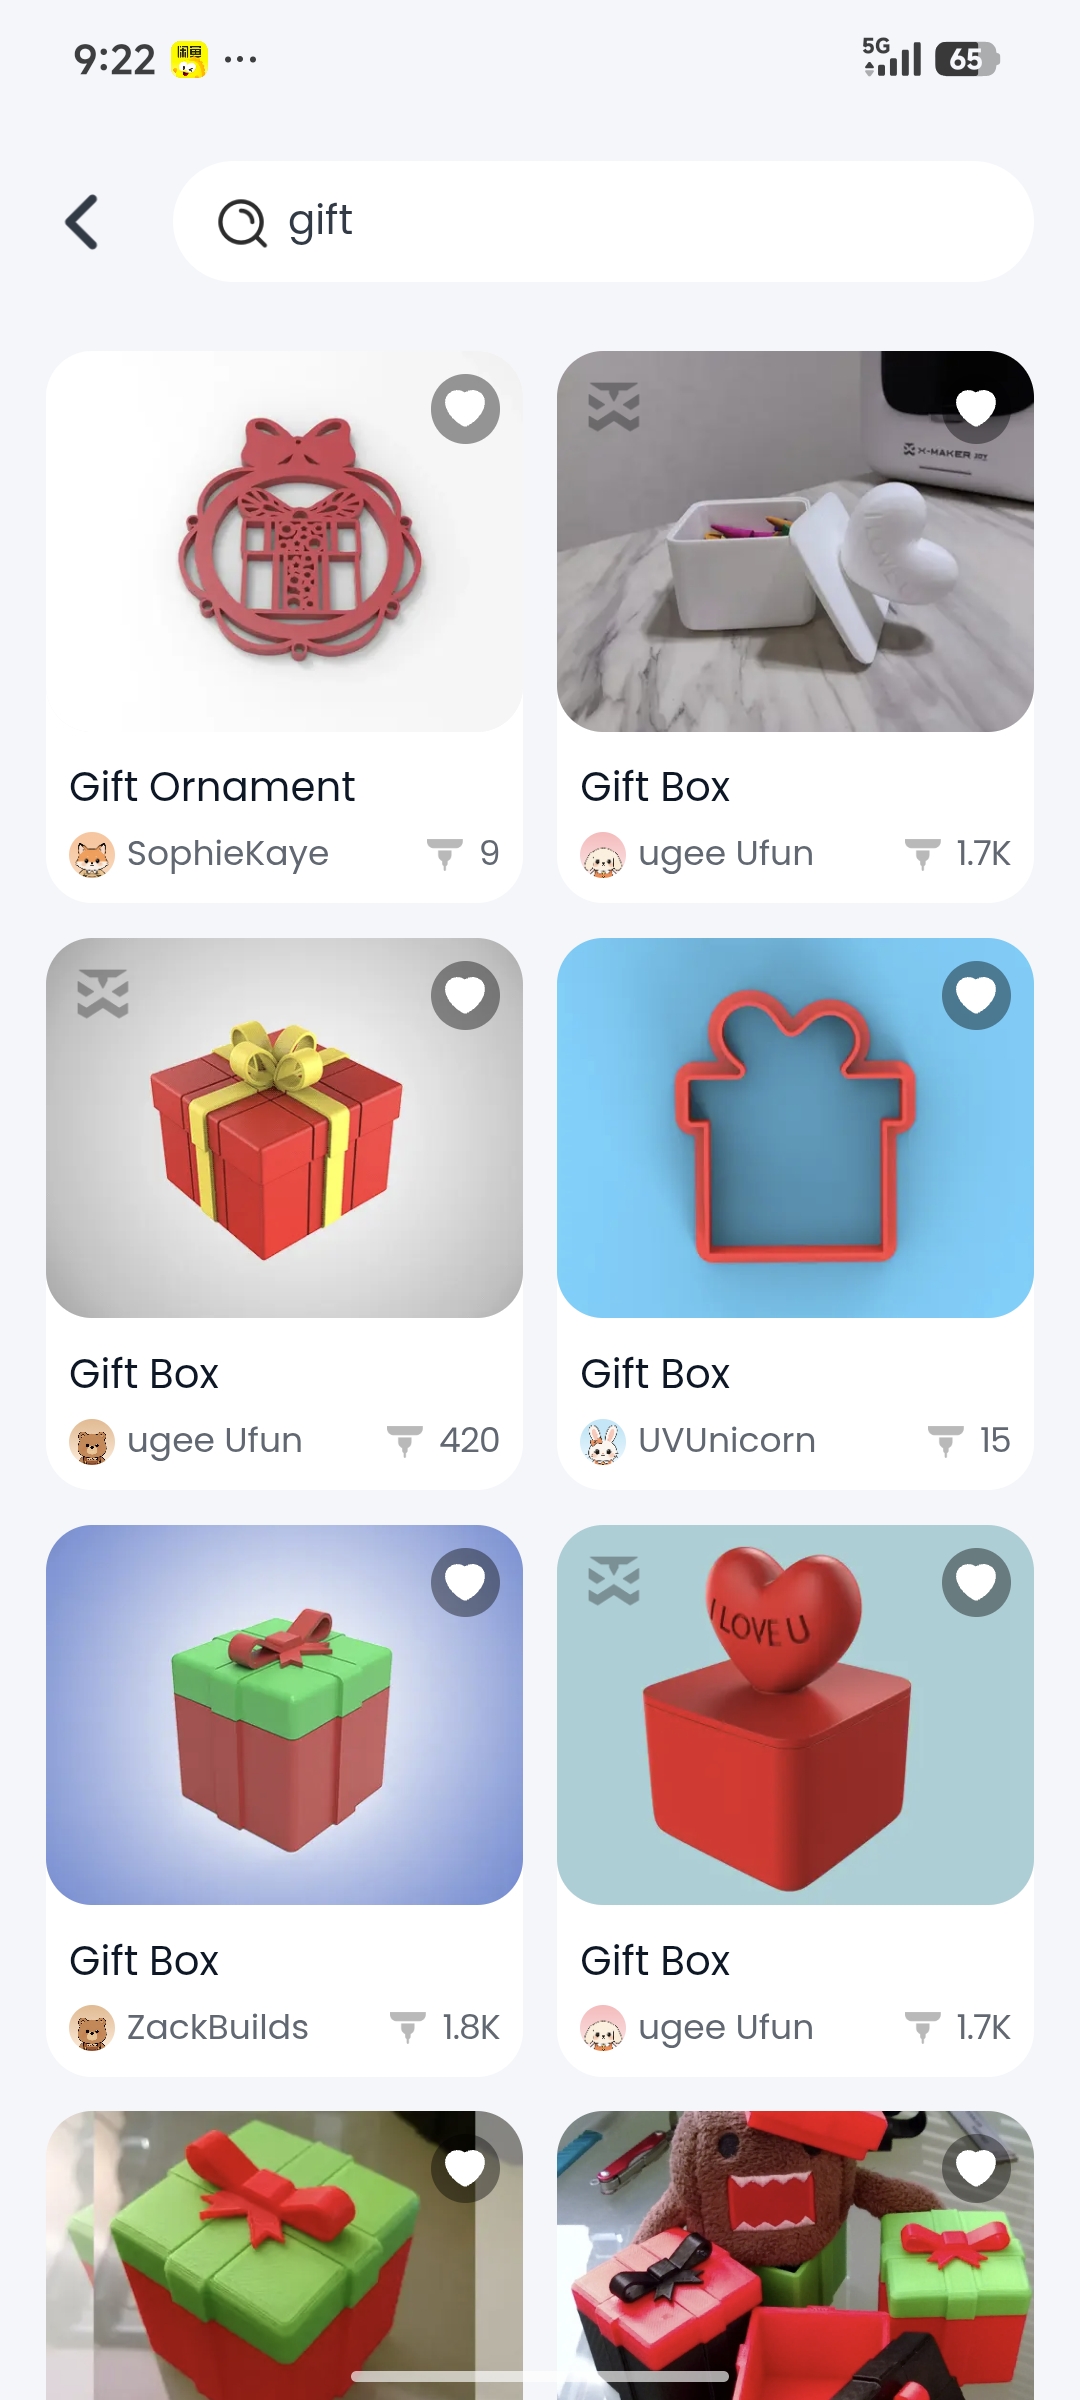
Notes:
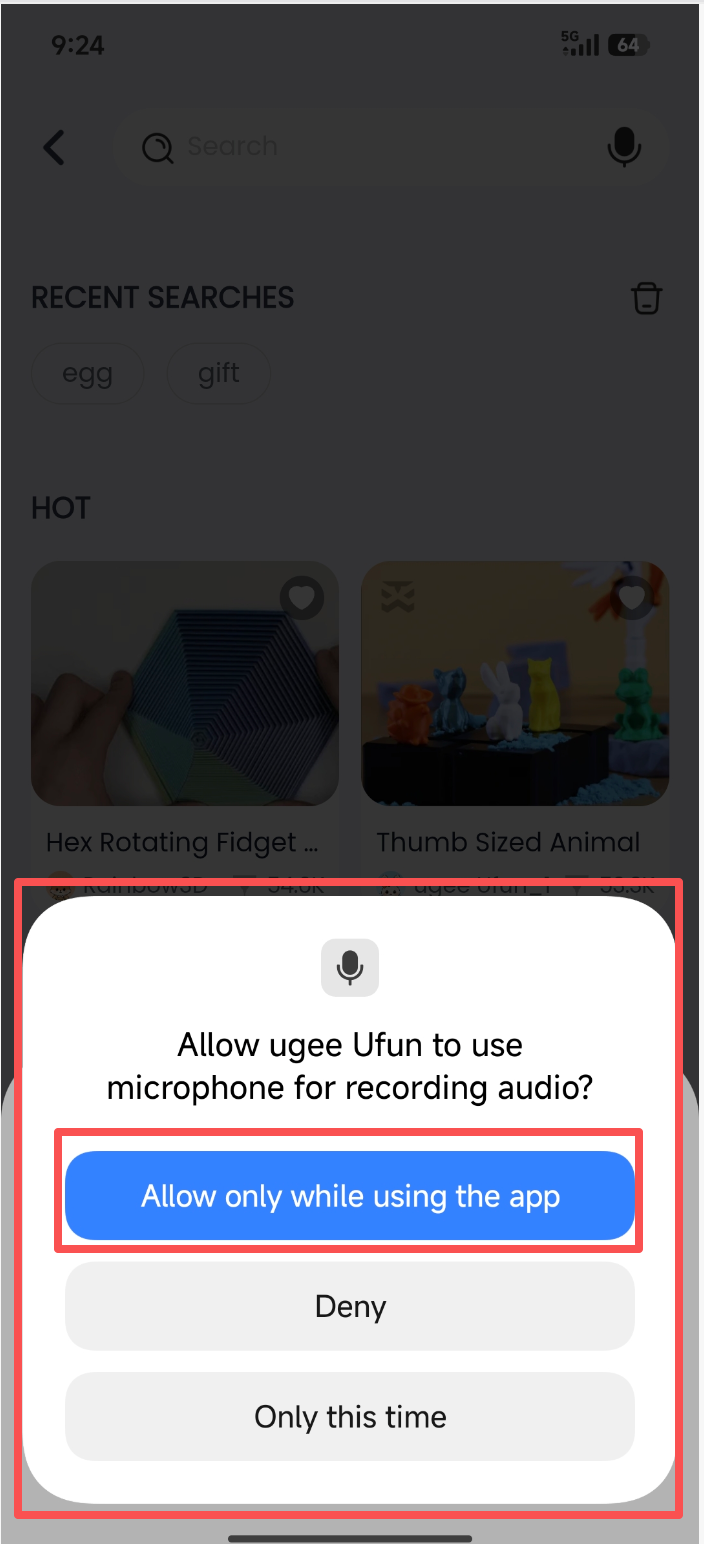
- When using voice search, as shown in Figure 2-3, microphone permission is required. Without permission, the voice input function cannot be used.
Q1: How do I grant microphone permission?
A1: Long‑press the voice input icon. If permission has not been granted, a permission pop‑up will appear. Select "Allow only while using the app" to enable voice input. (The operation is the same across all systems.)
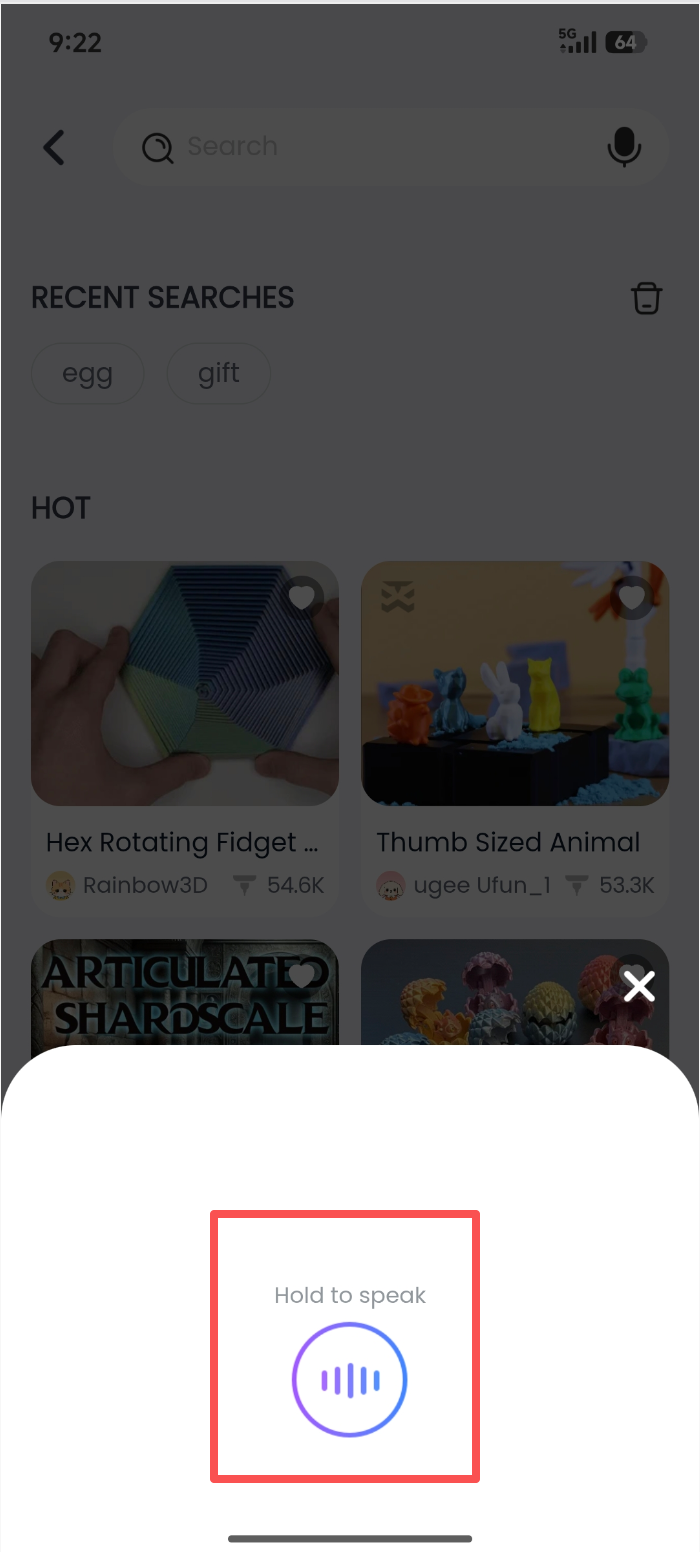
4.3.3 Model Sorting and Filtering
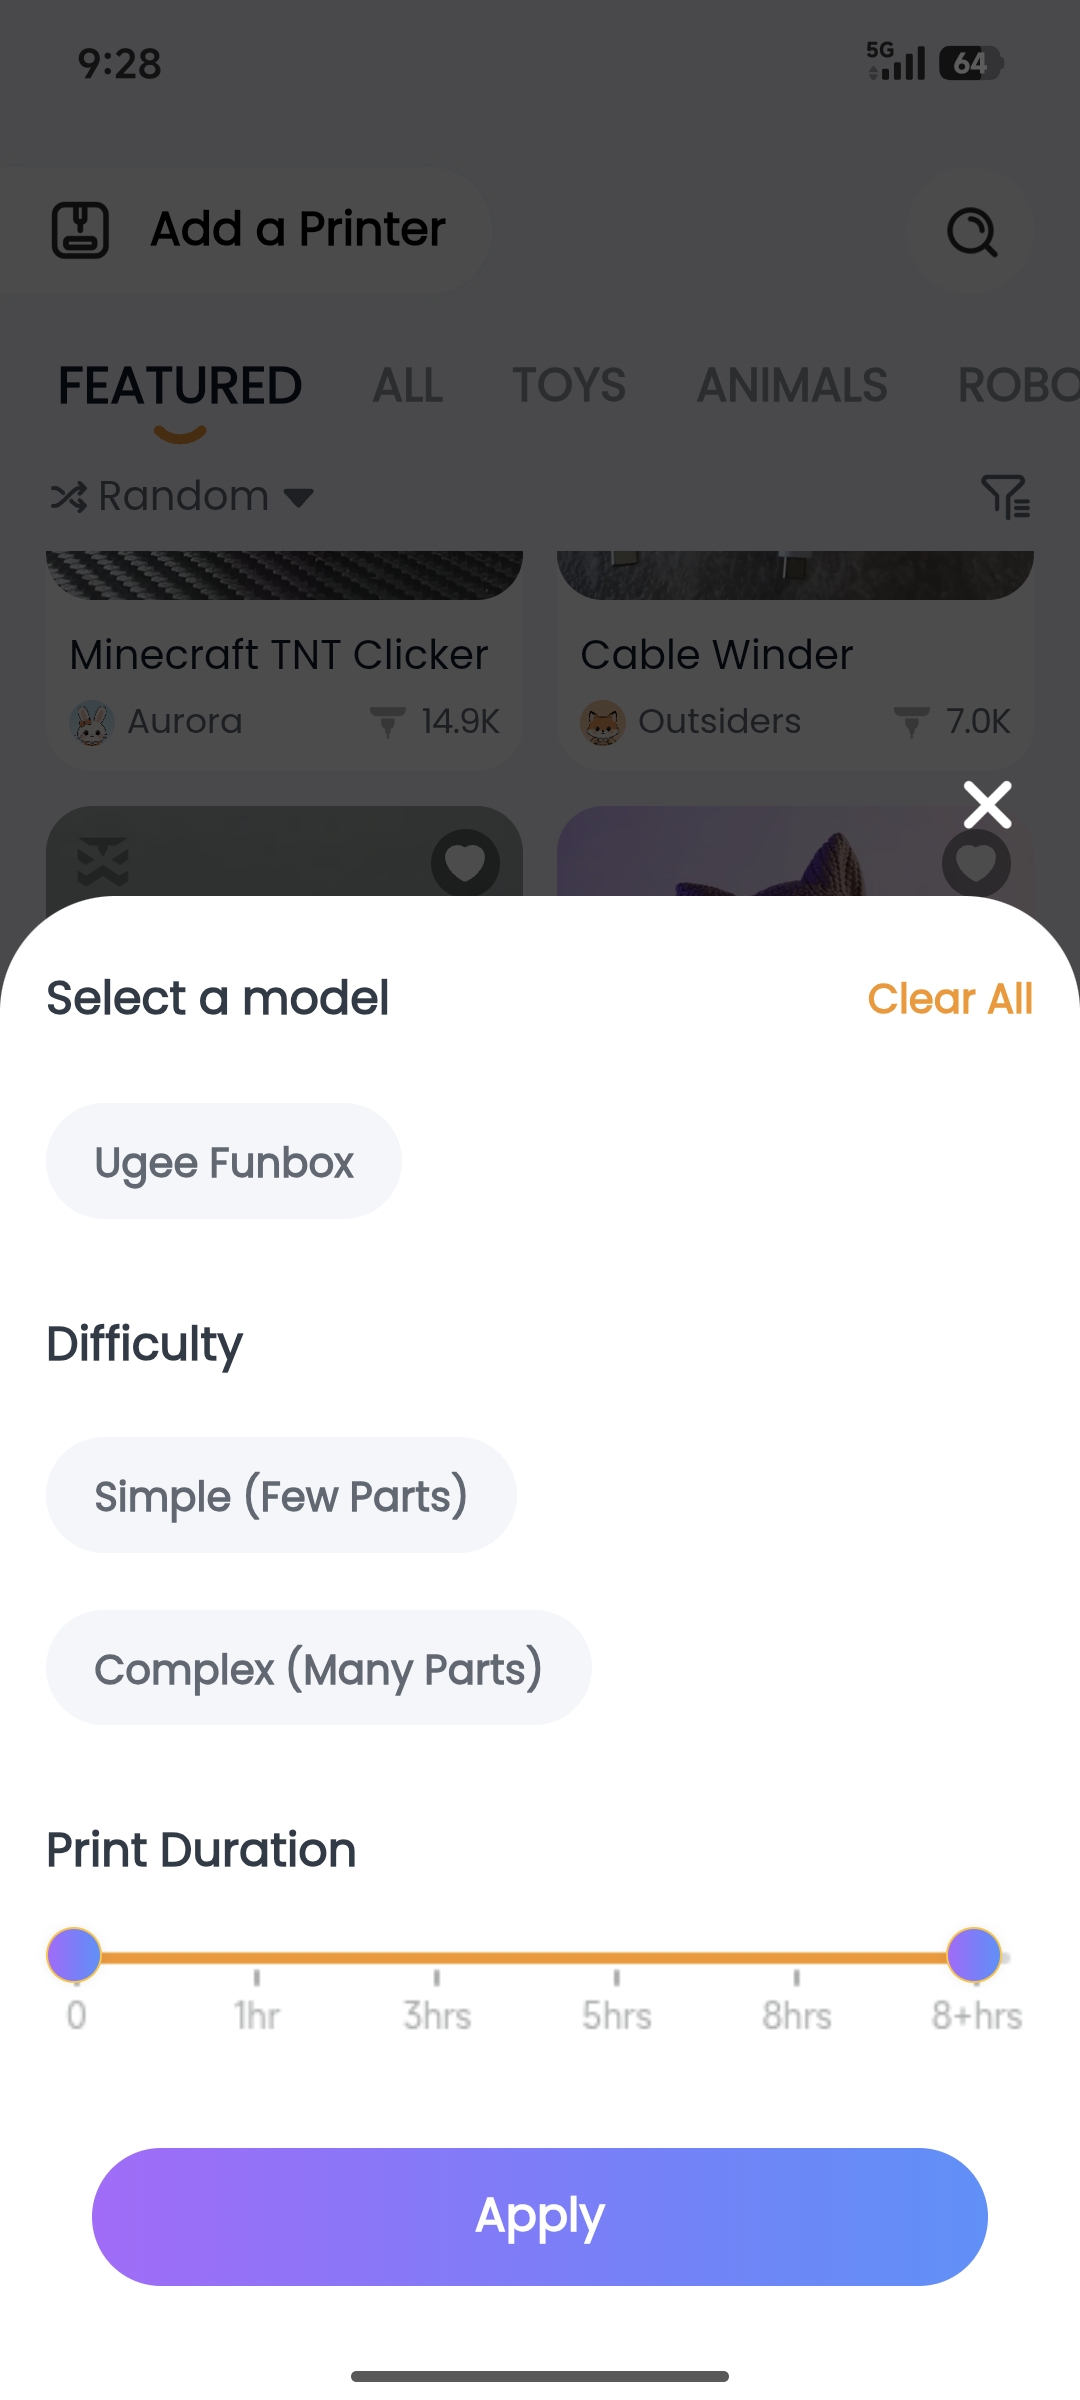
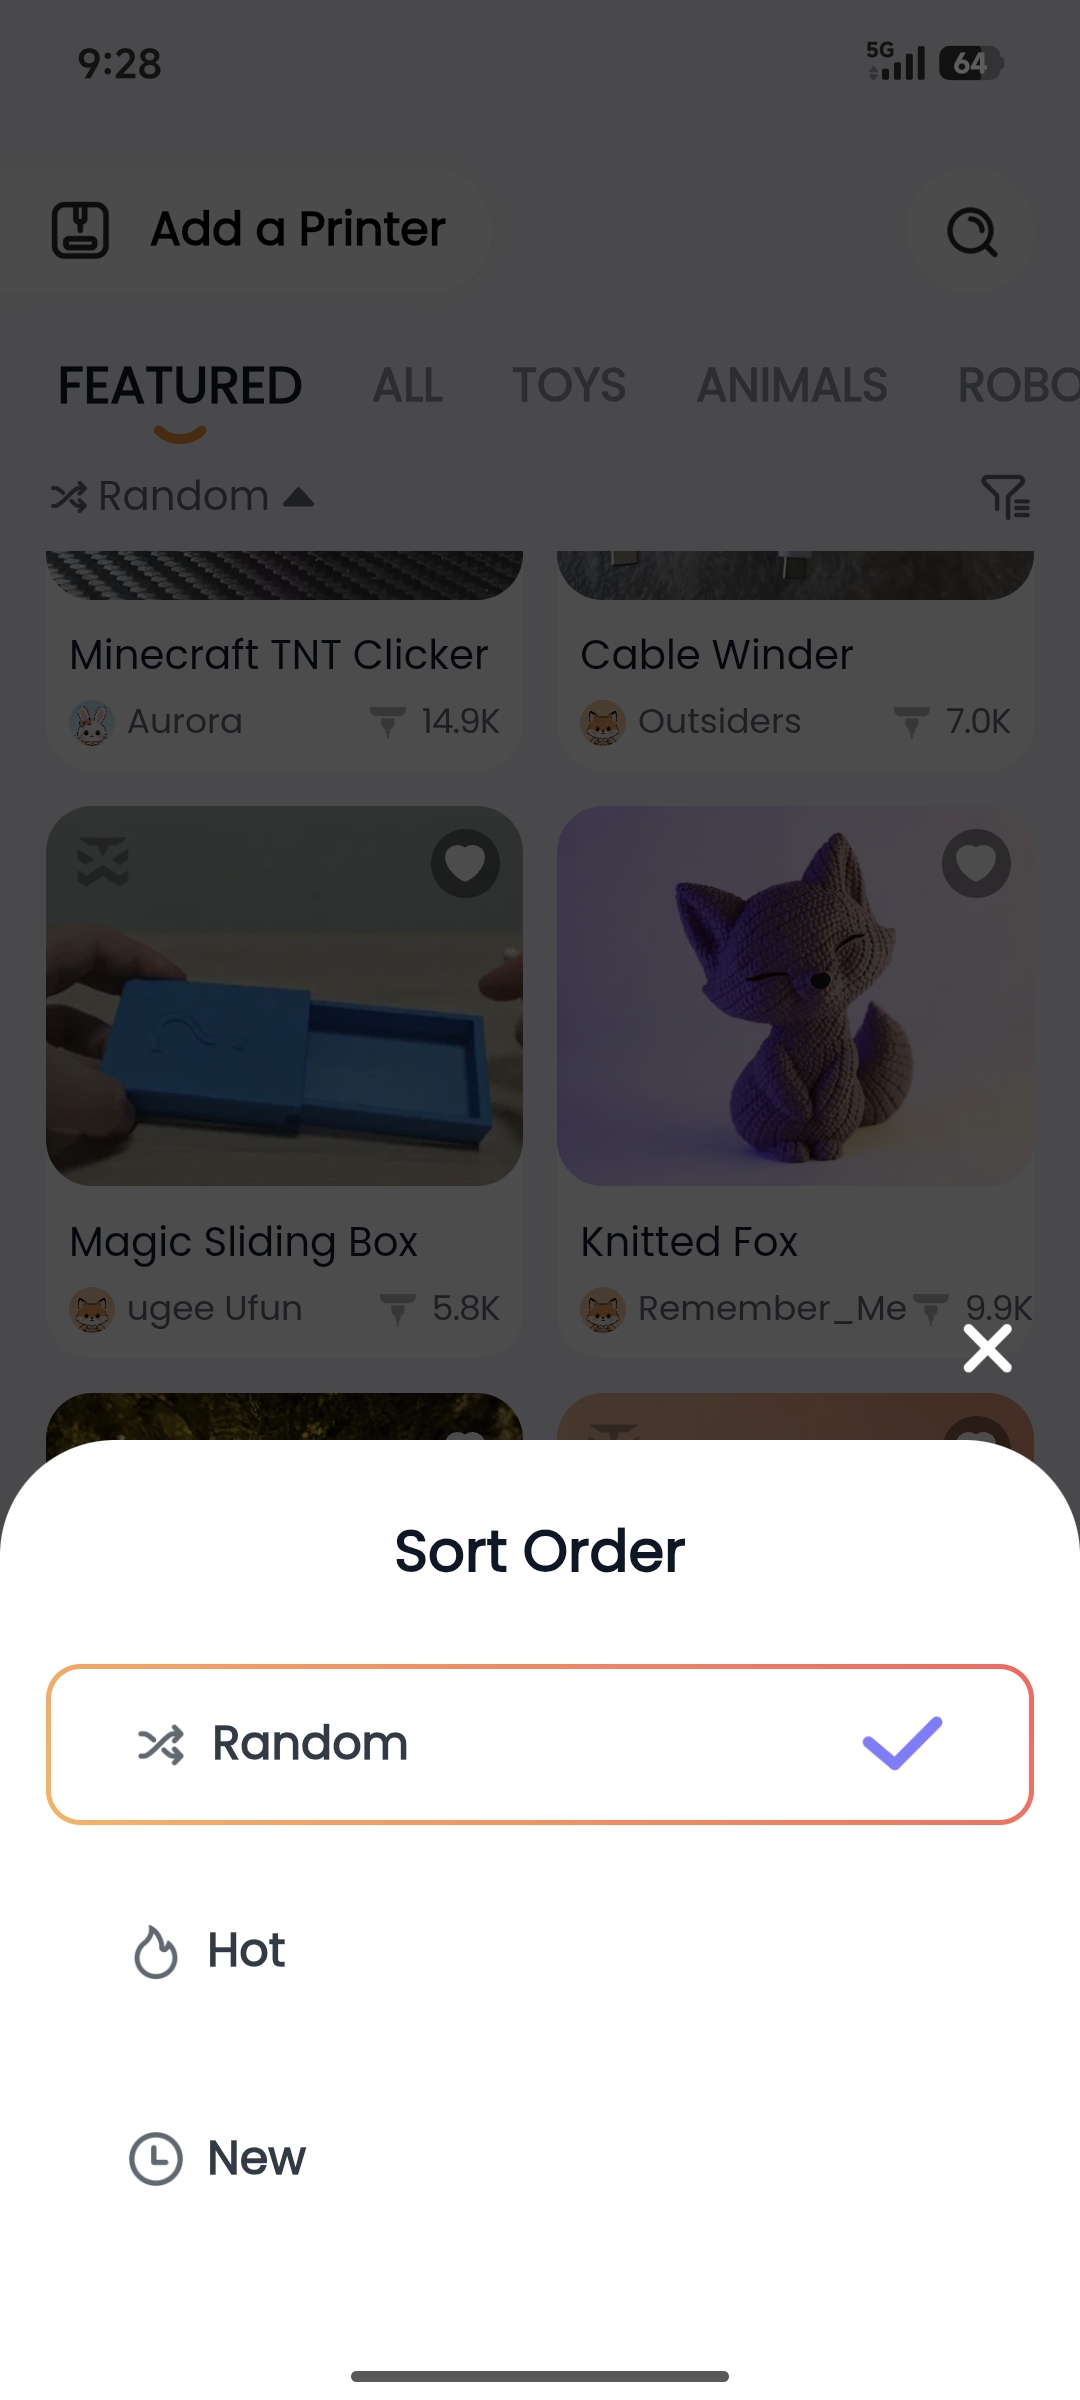
• Swipe up on the model library page until the filter dropdown appears. Tap the "Random" button in the upper‑left corner to adjust sorting (Random, Popular, Latest). Tap the filter box in the upper‑right corner to filter by complexity (single‑part or multi‑part) and print duration.
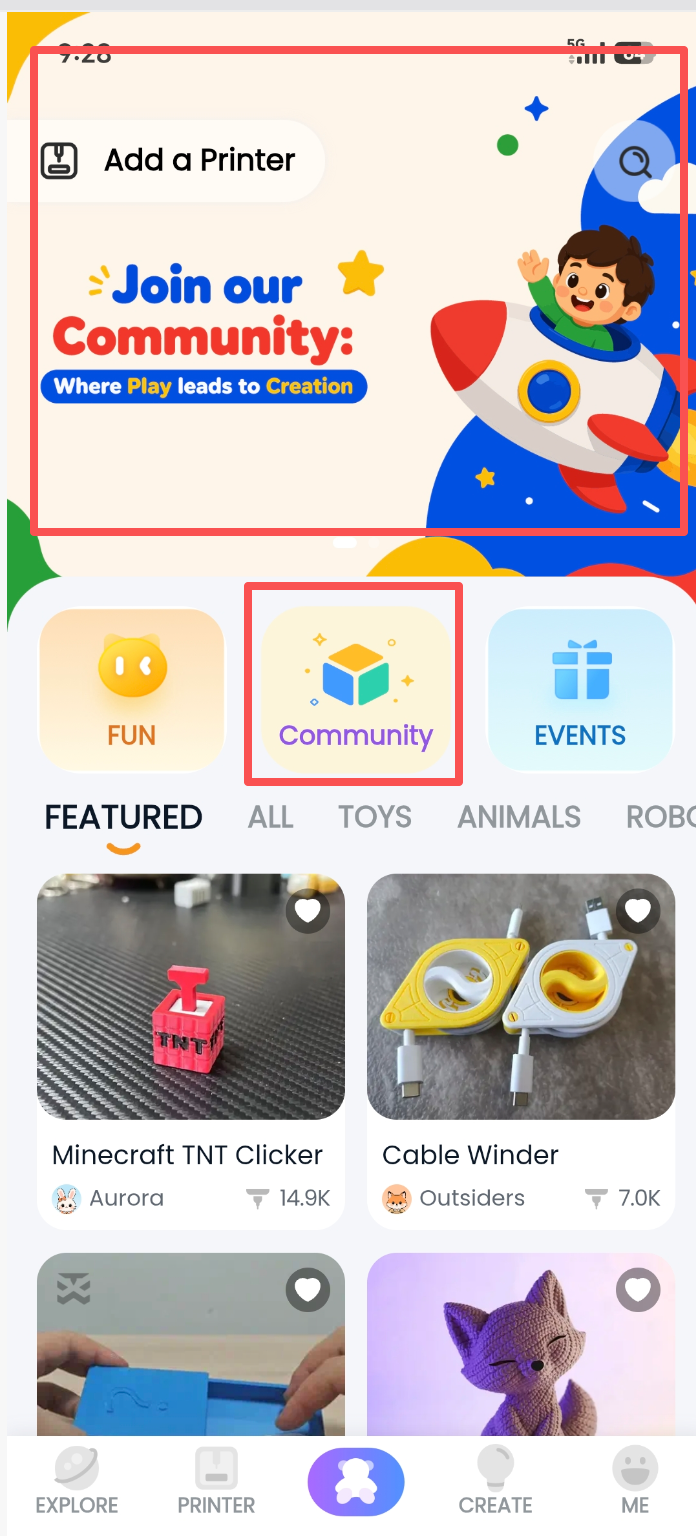
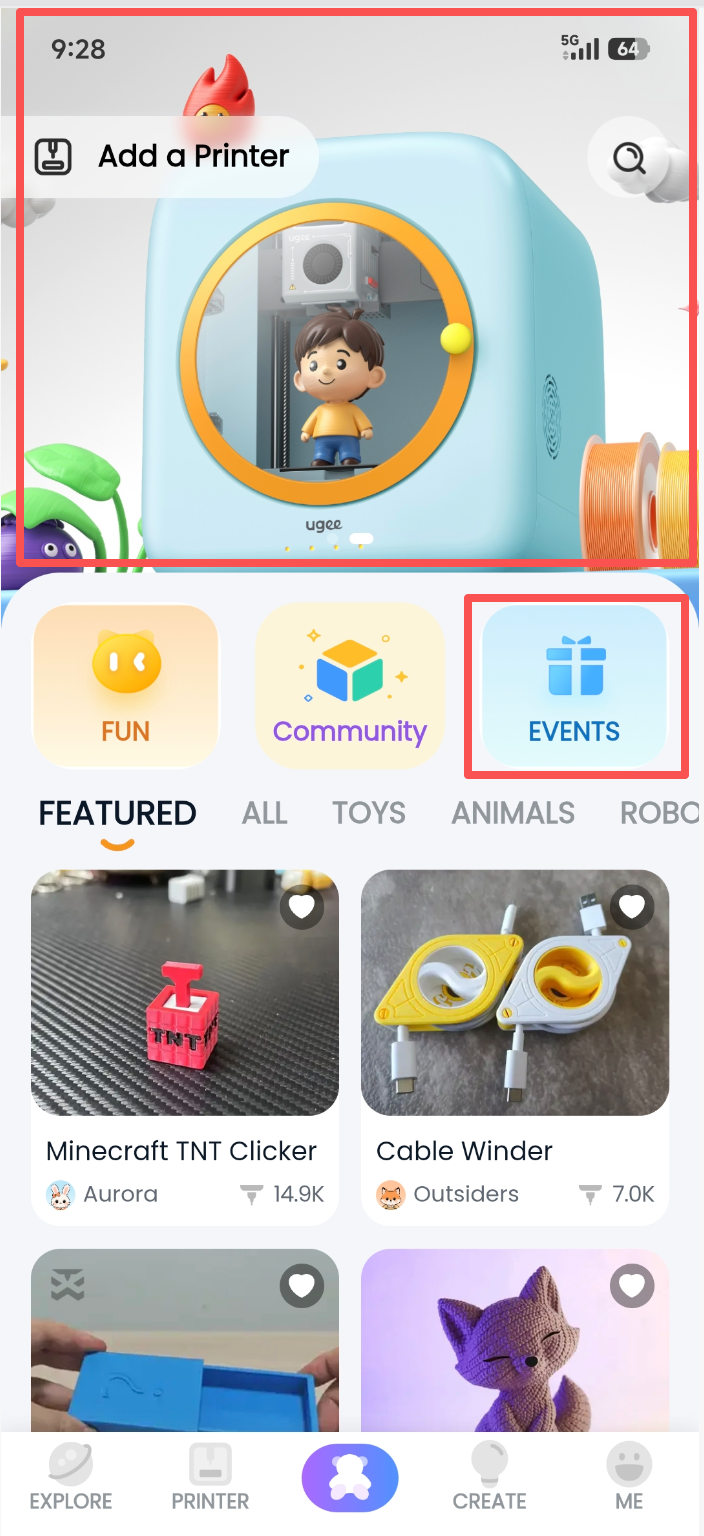
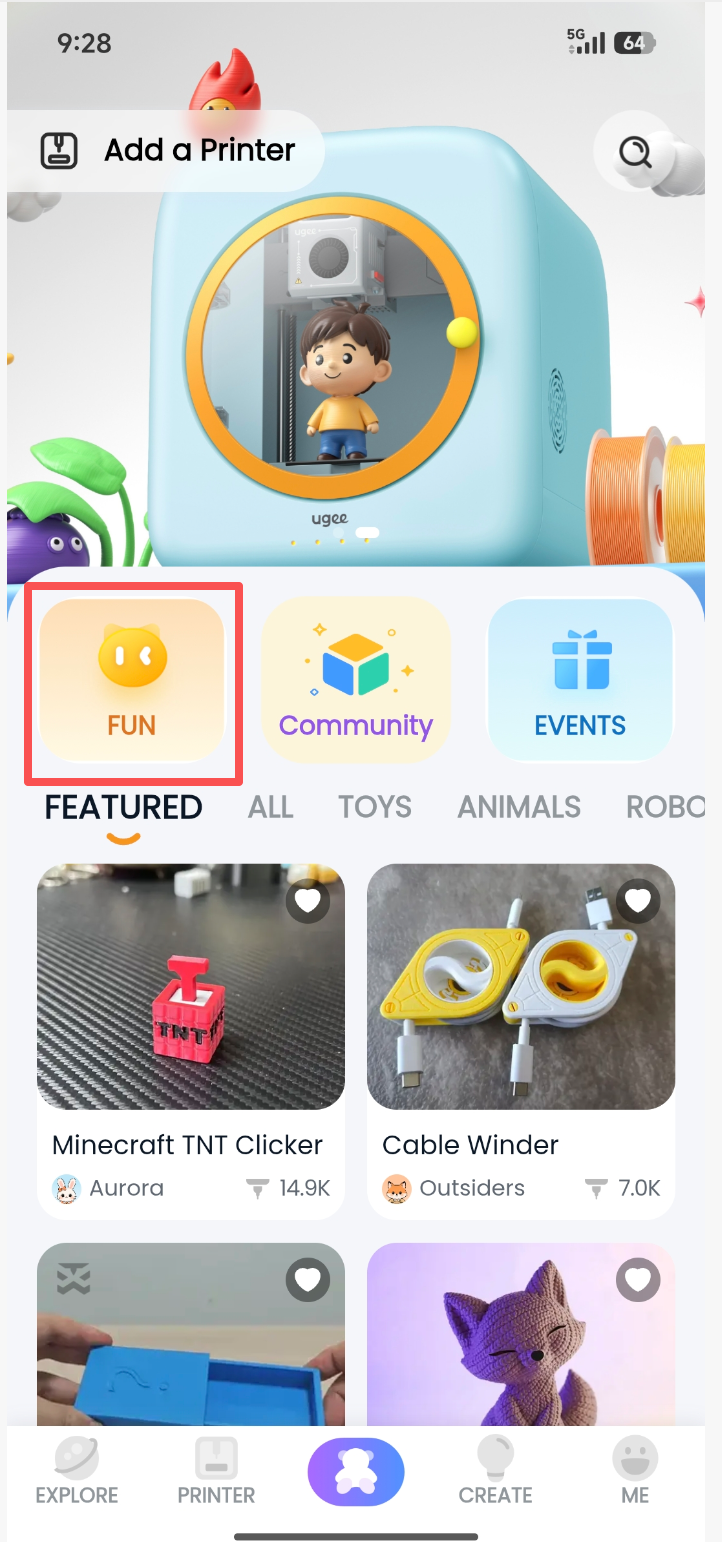
4.3.4 Latest Models / Events / Community Showcase
• At the top of the interface, the latest community models, holiday‑themed models, and purchase promotions are displayed. Tap any item to enter the corresponding content page.
4.3.5 Printing Function
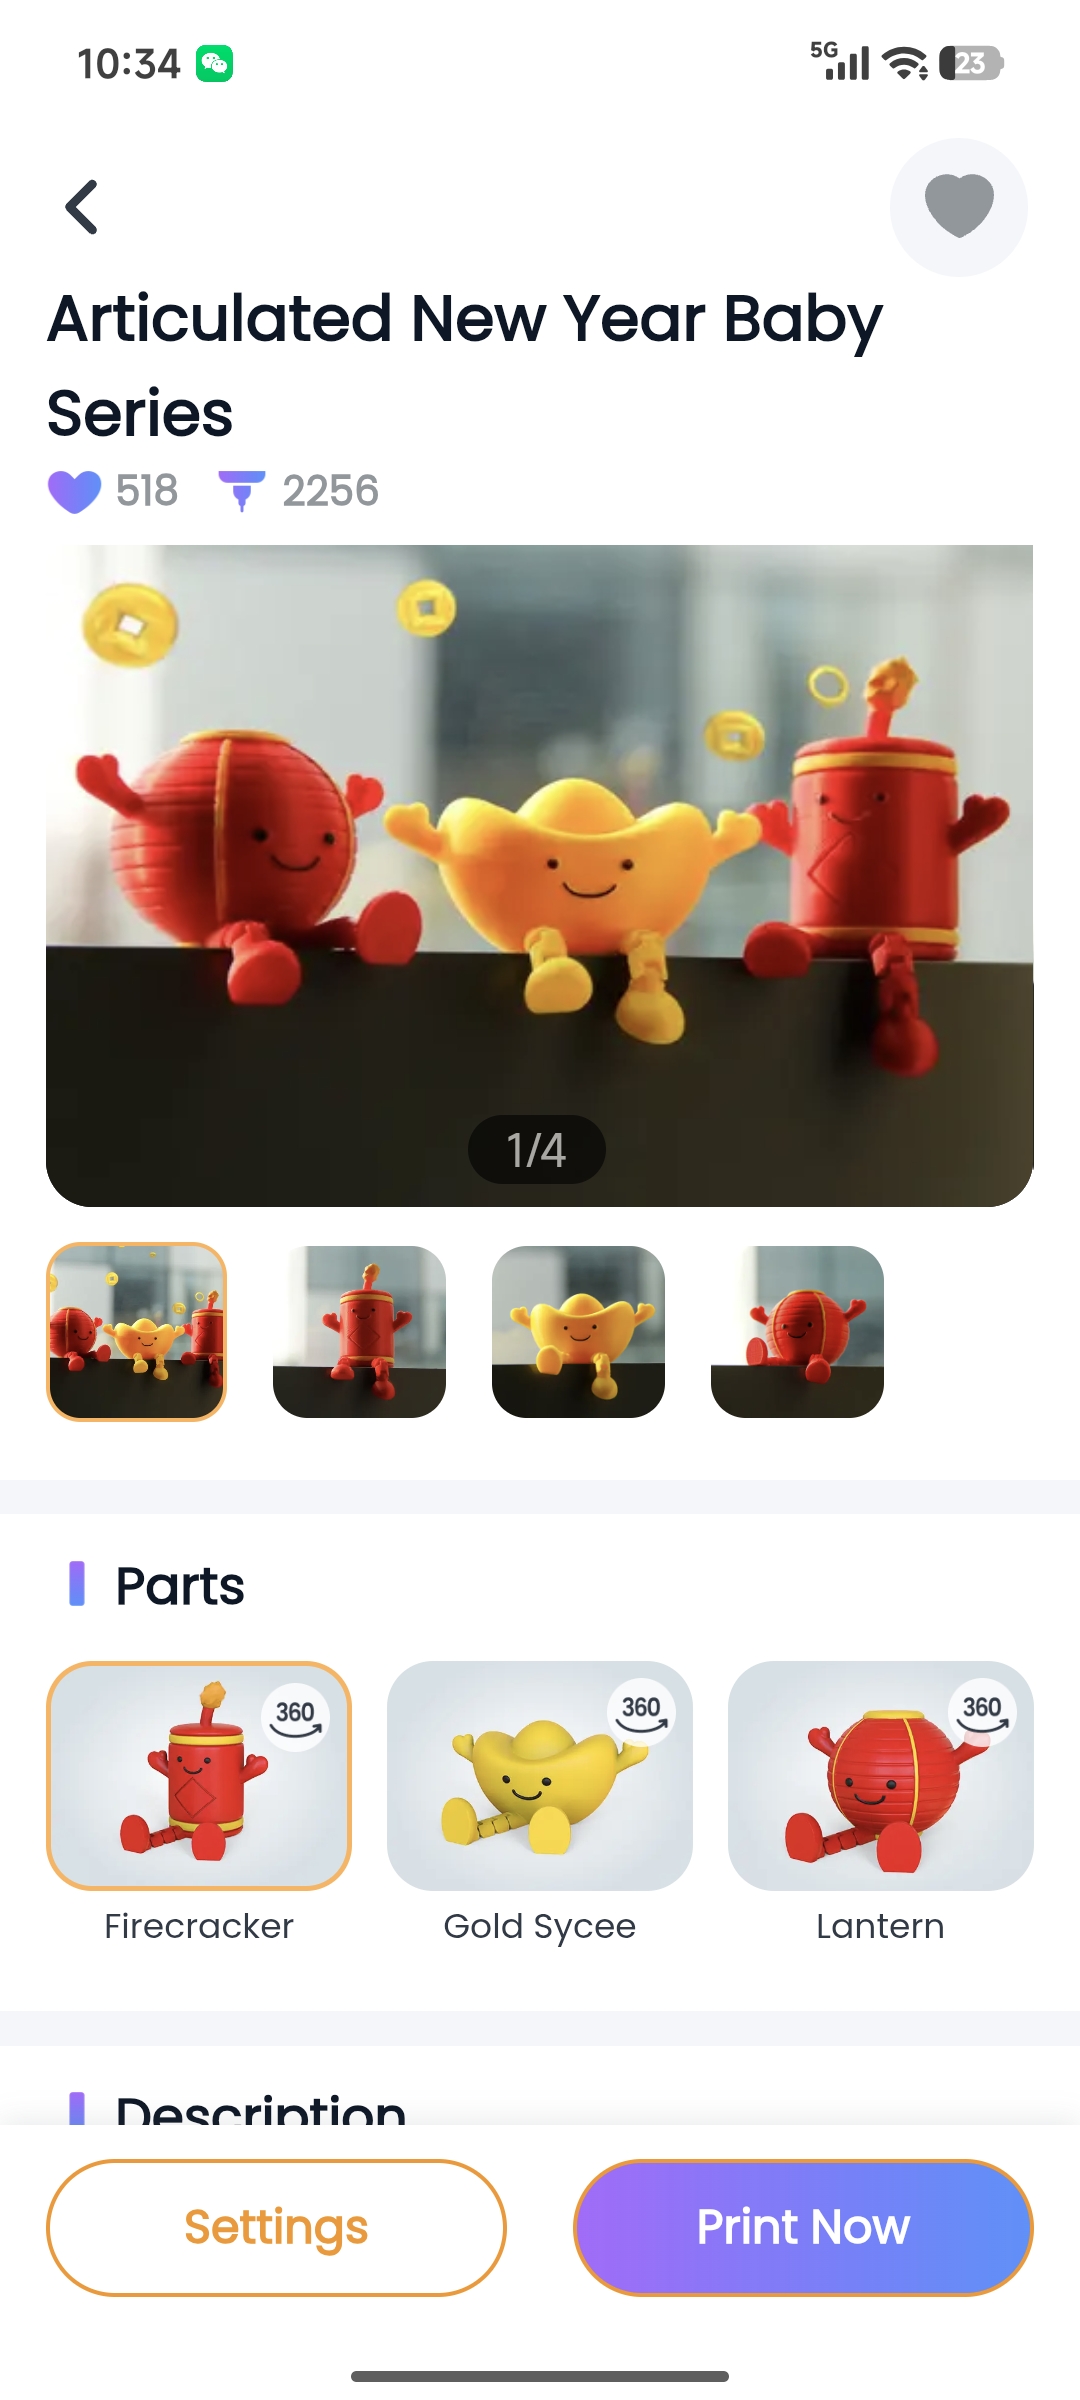
• One‑click print: Select a preferred model on the homepage → enter the model details page → tap "Print Now" → enter the print preparation page → tap "Print" to start.
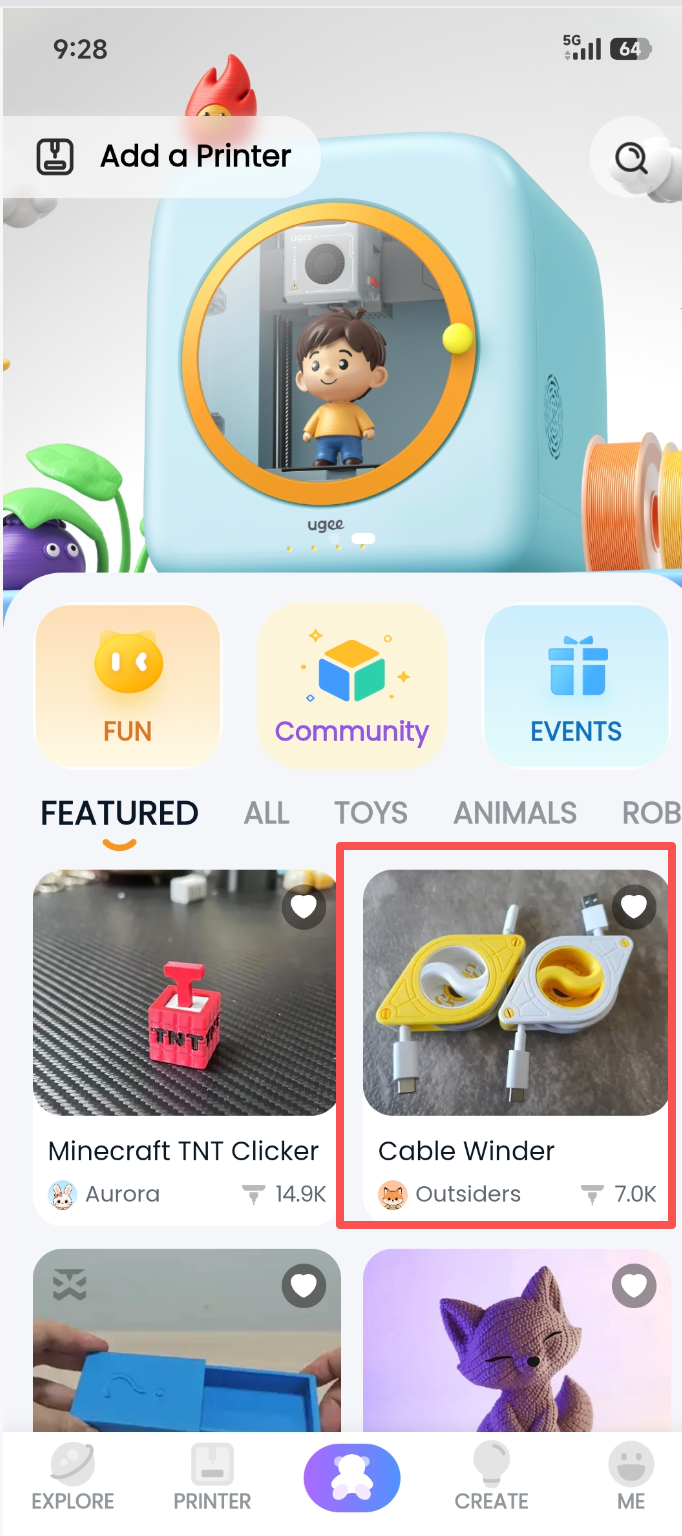
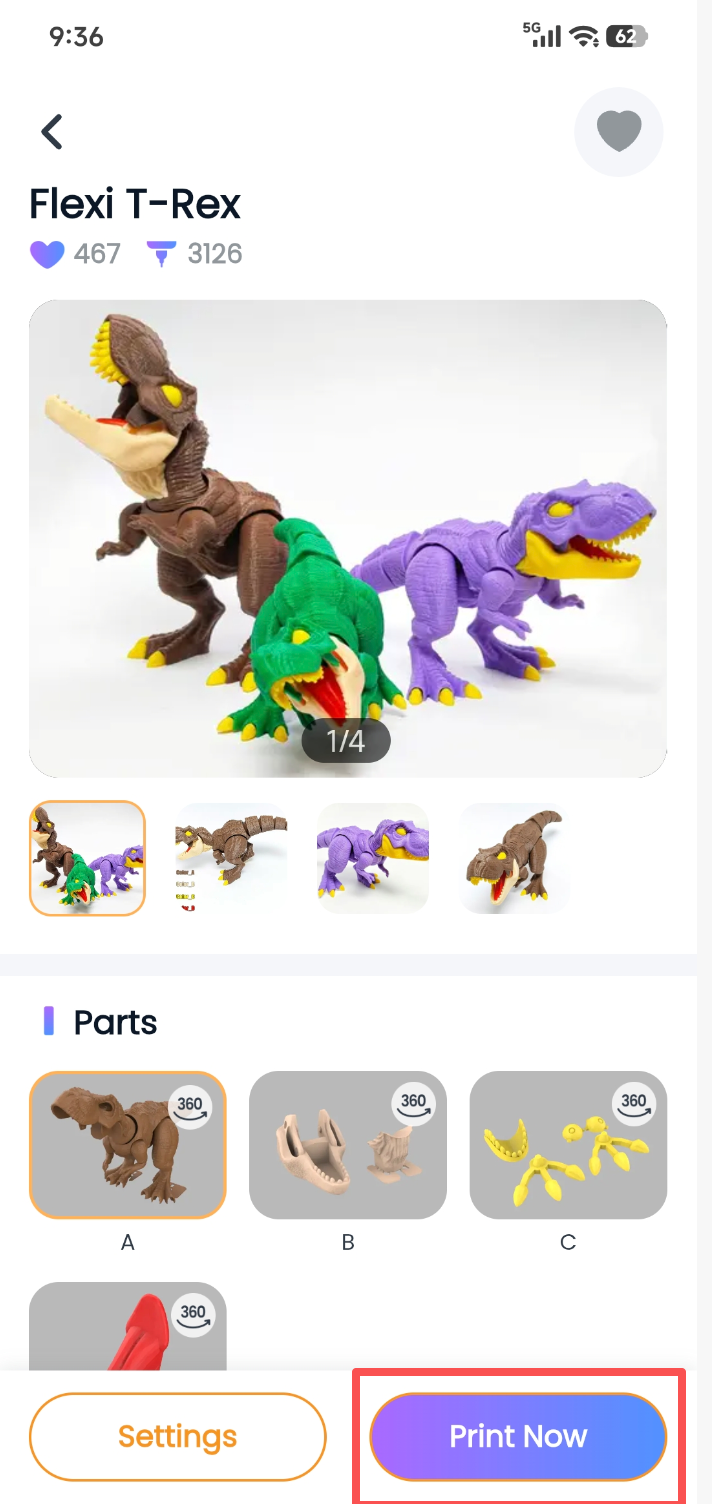
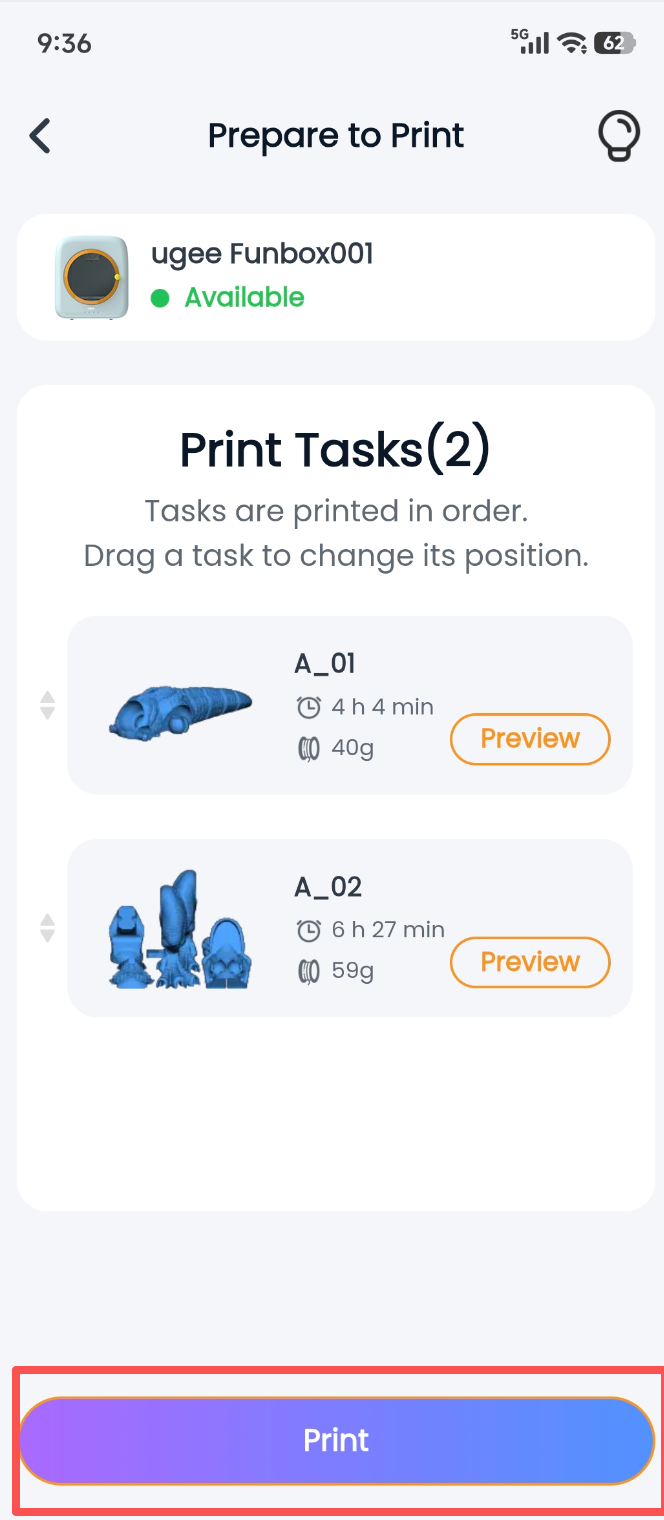
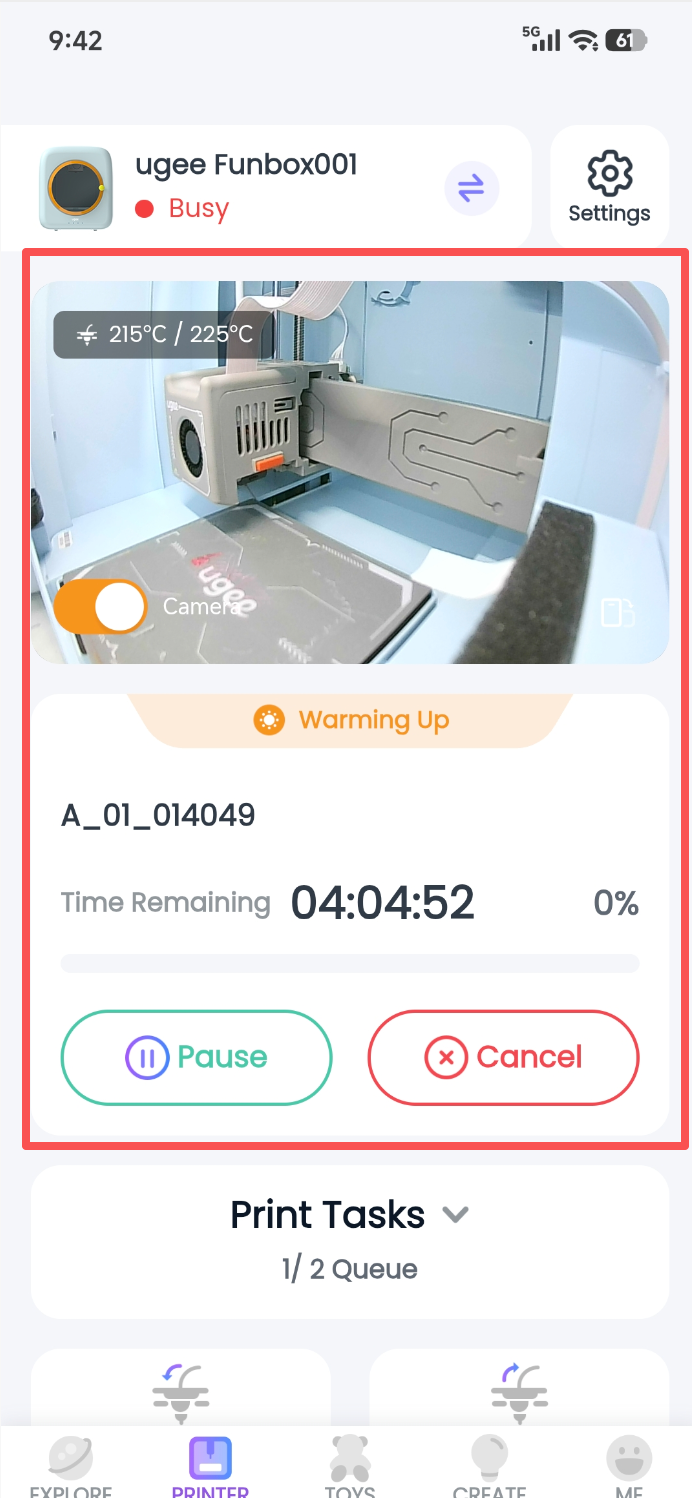
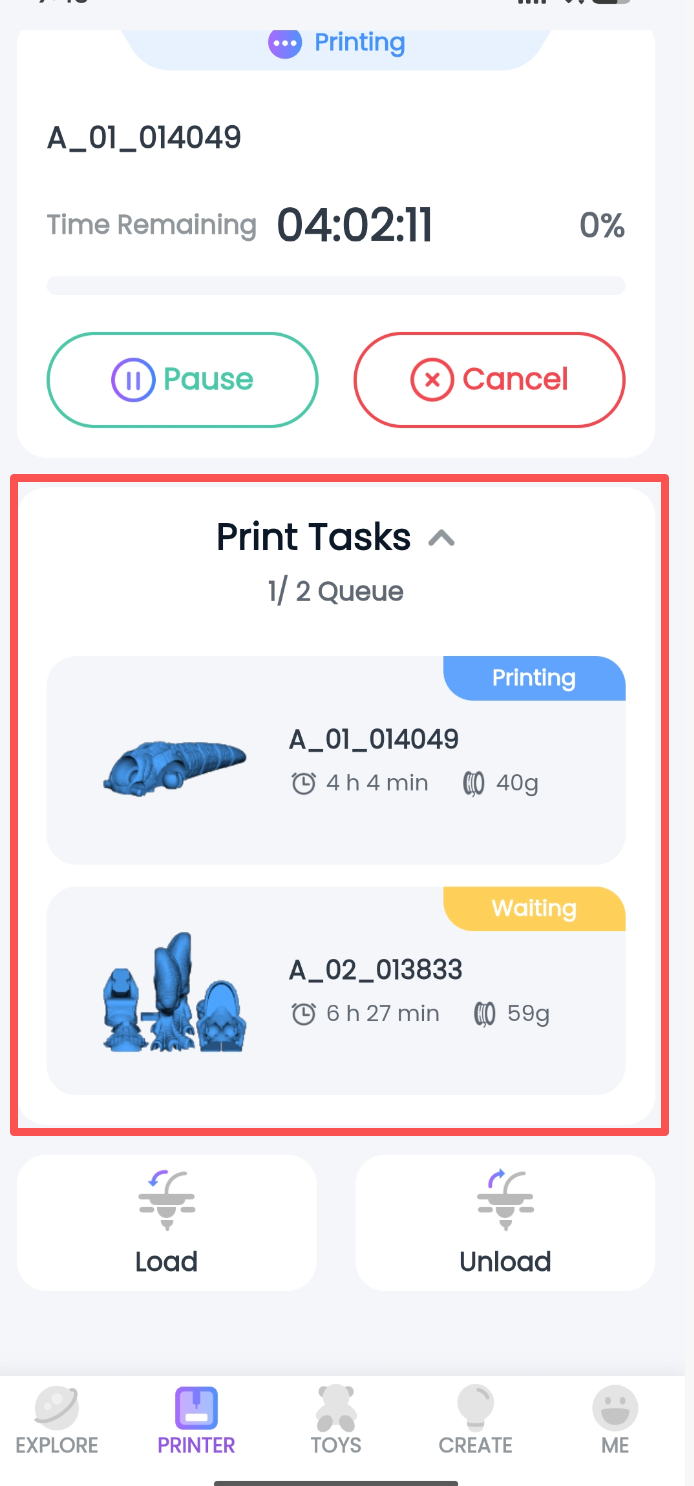
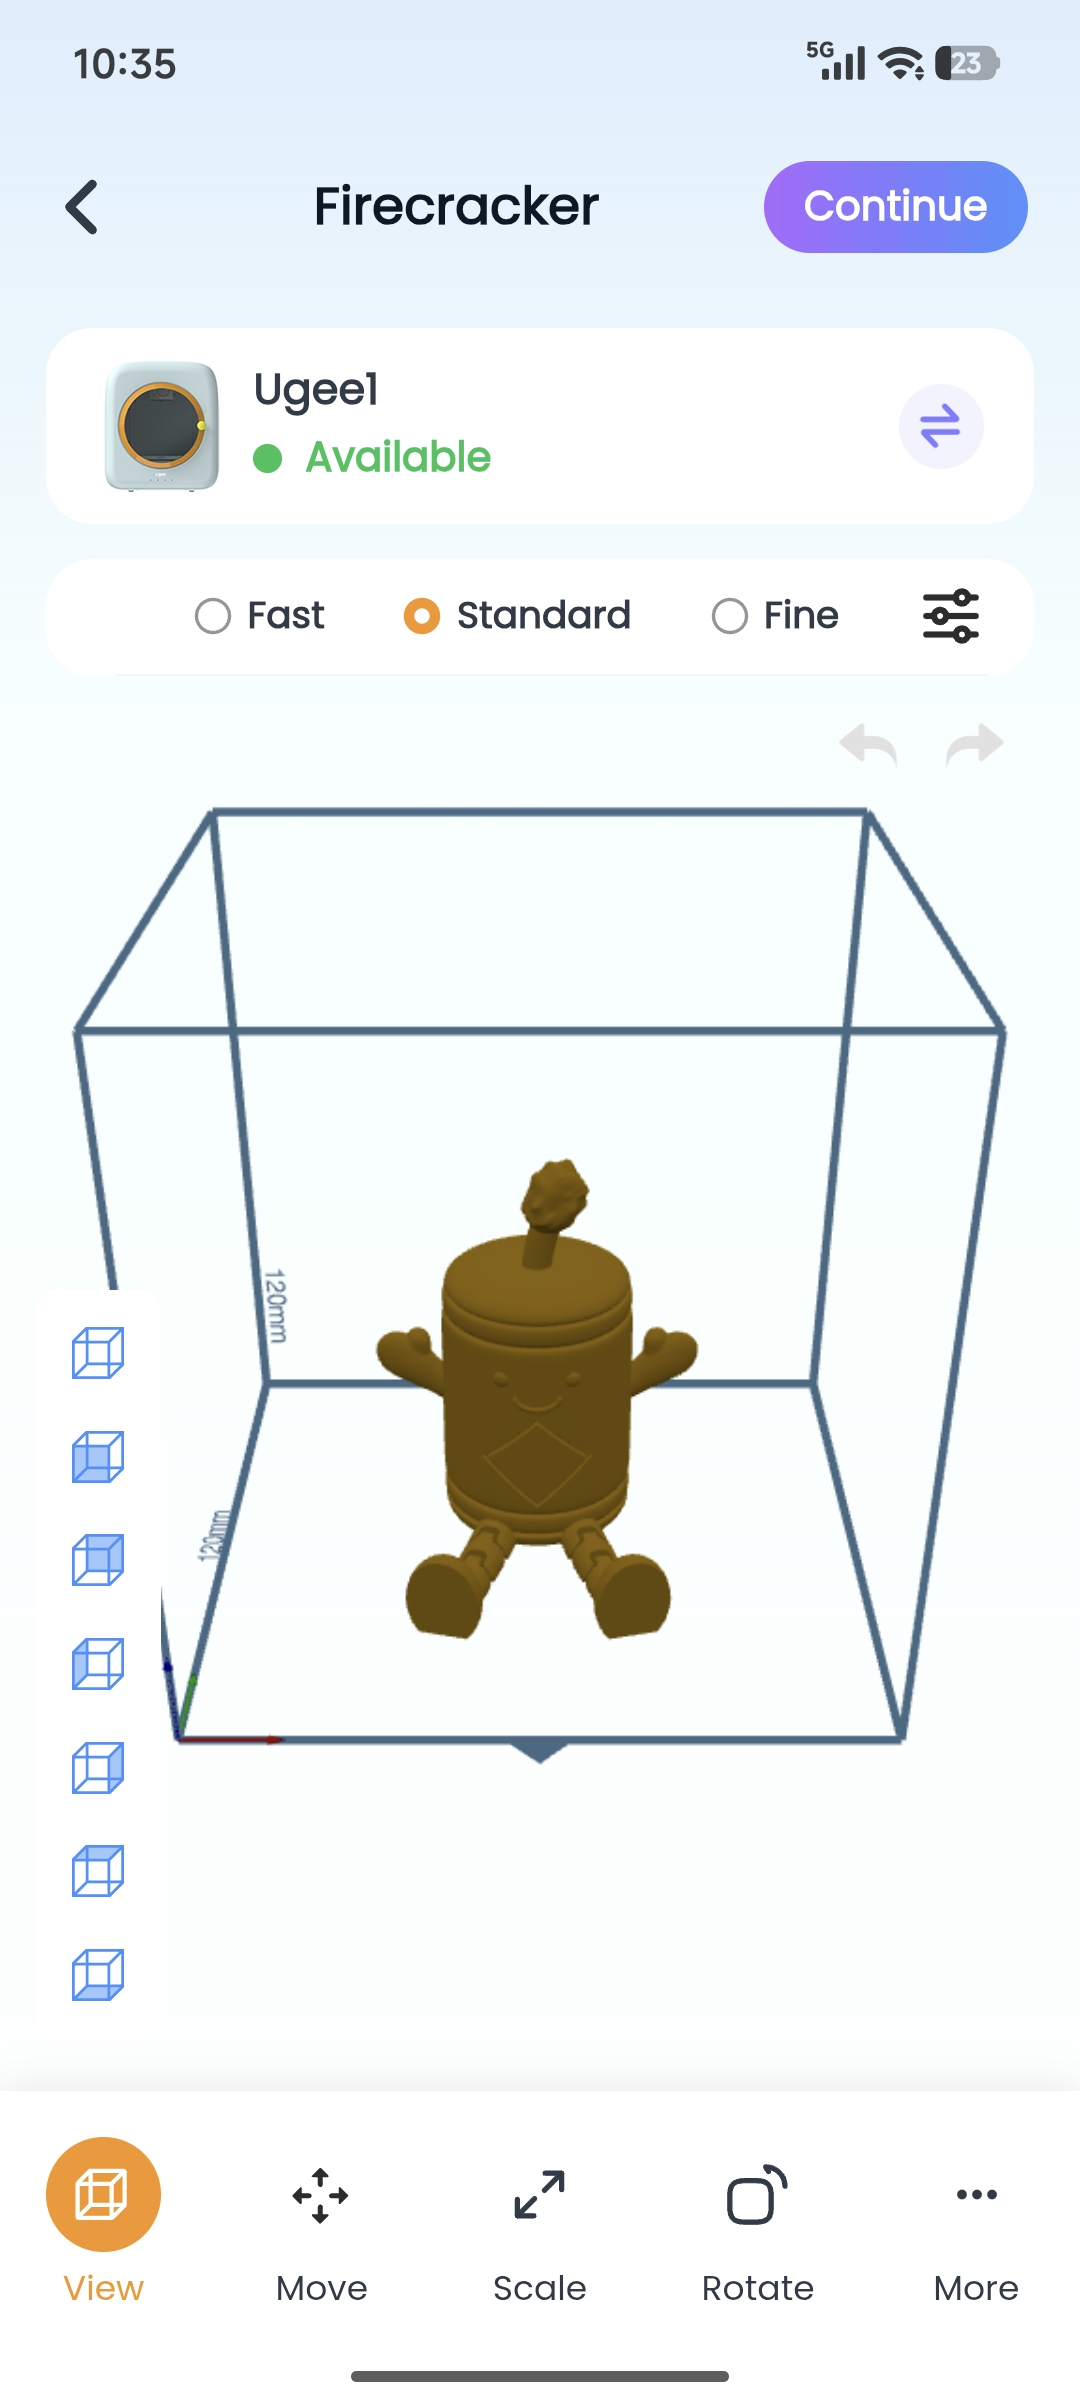
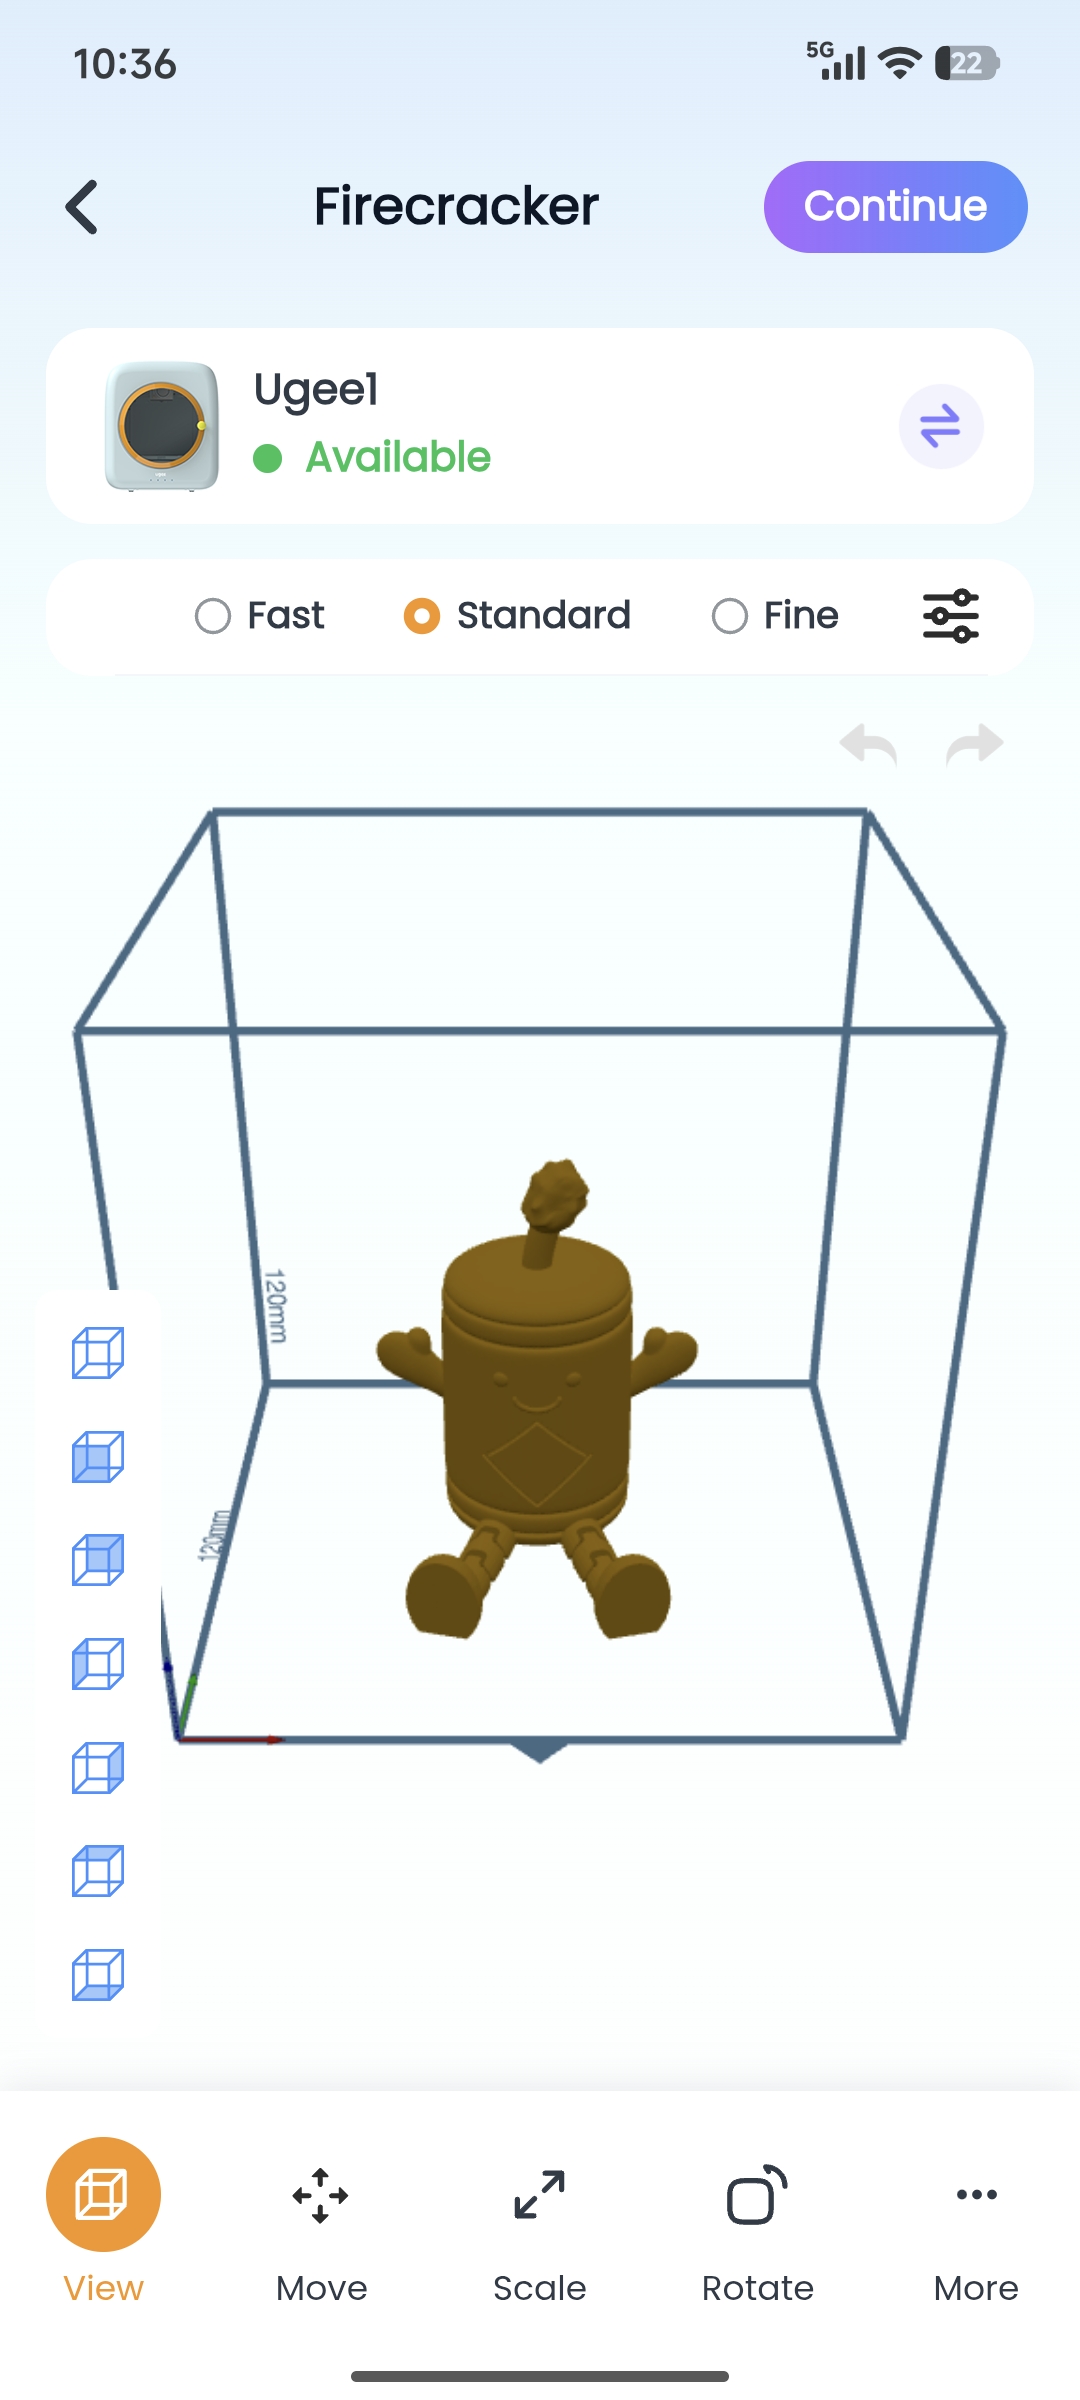
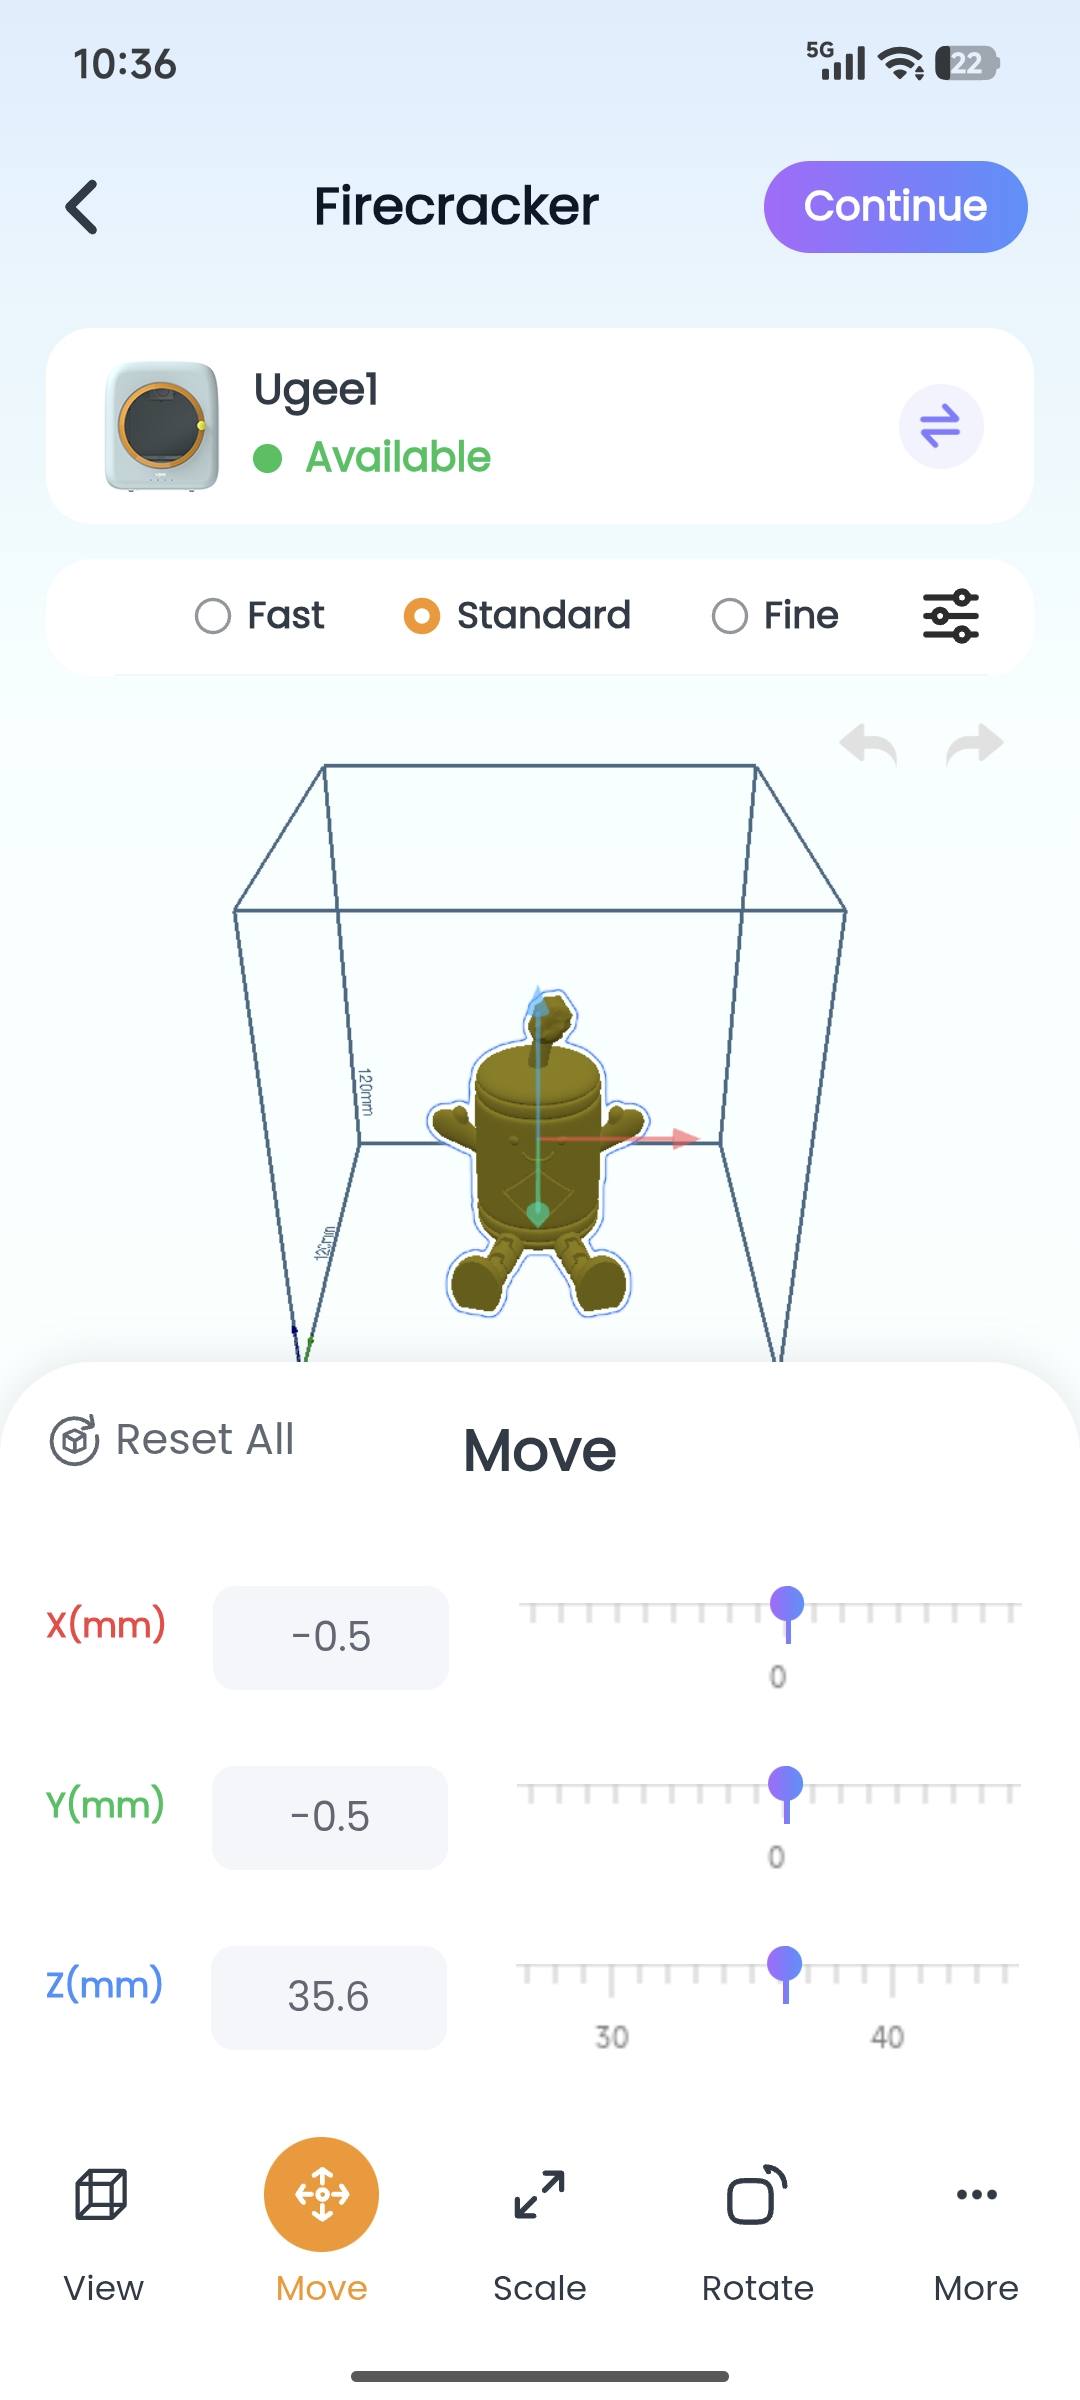
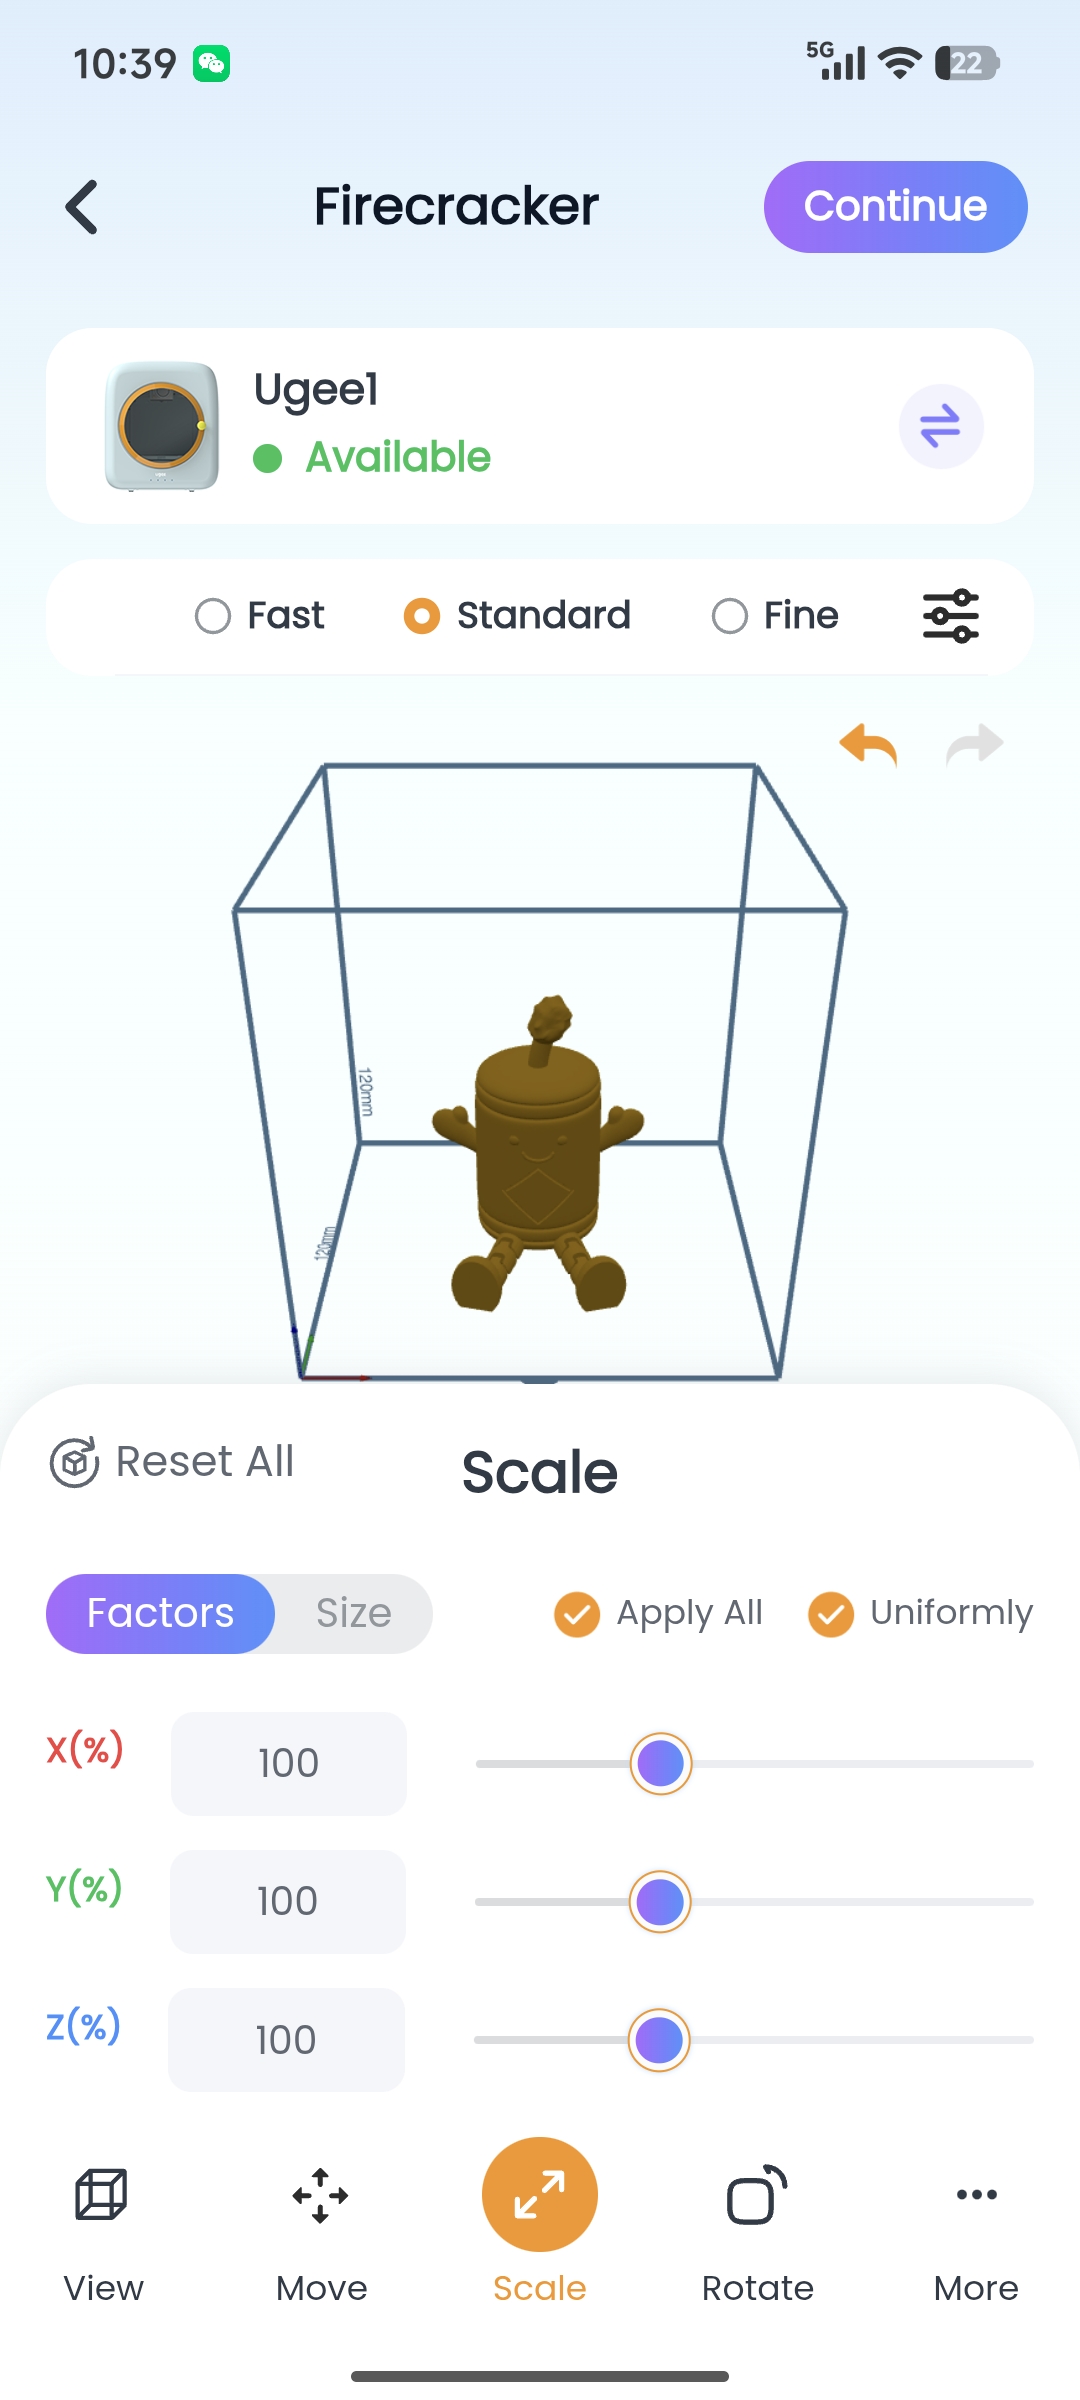
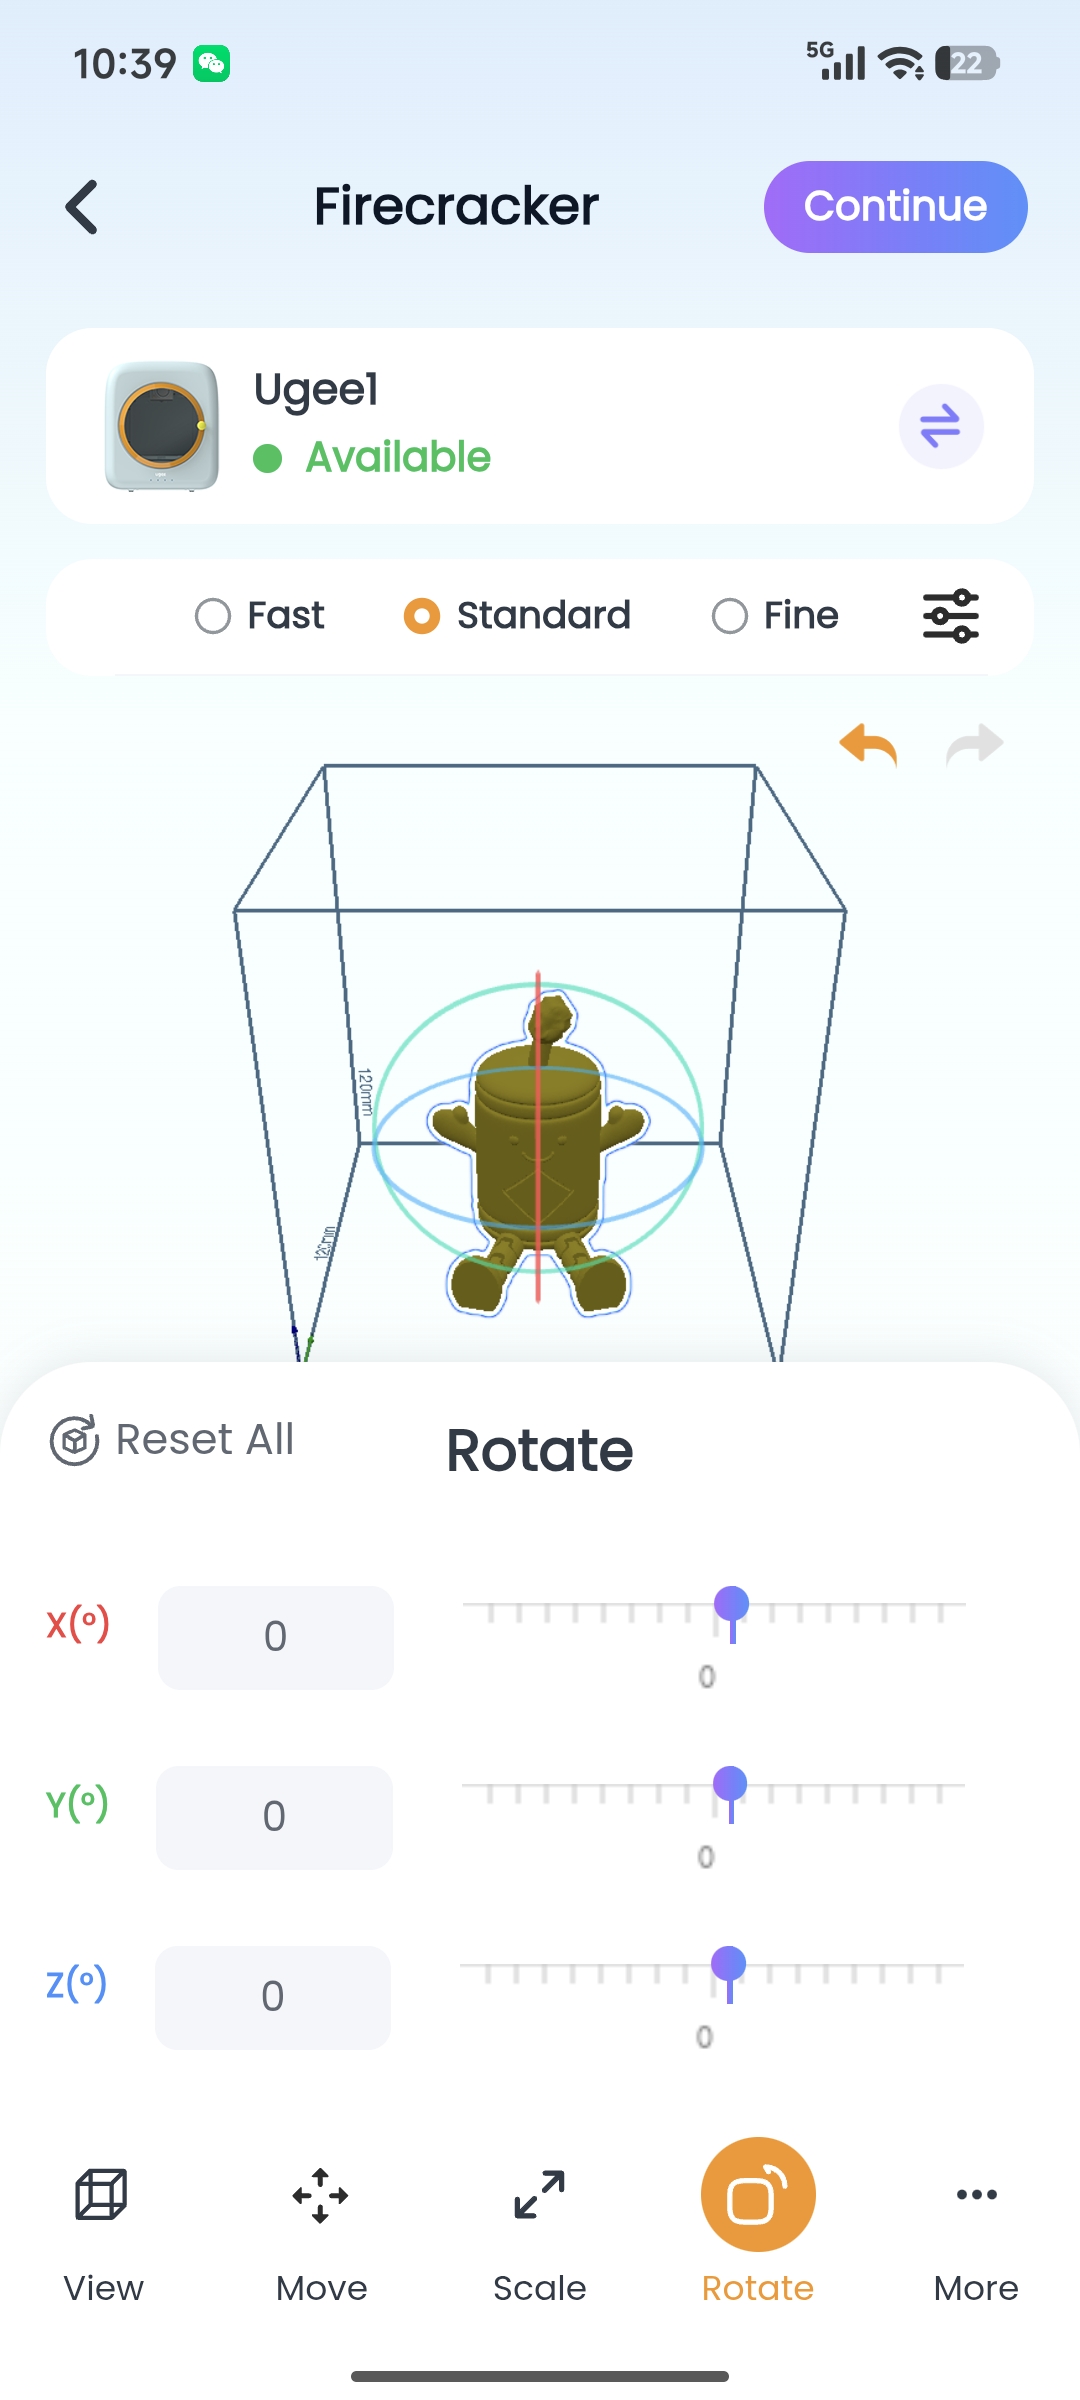
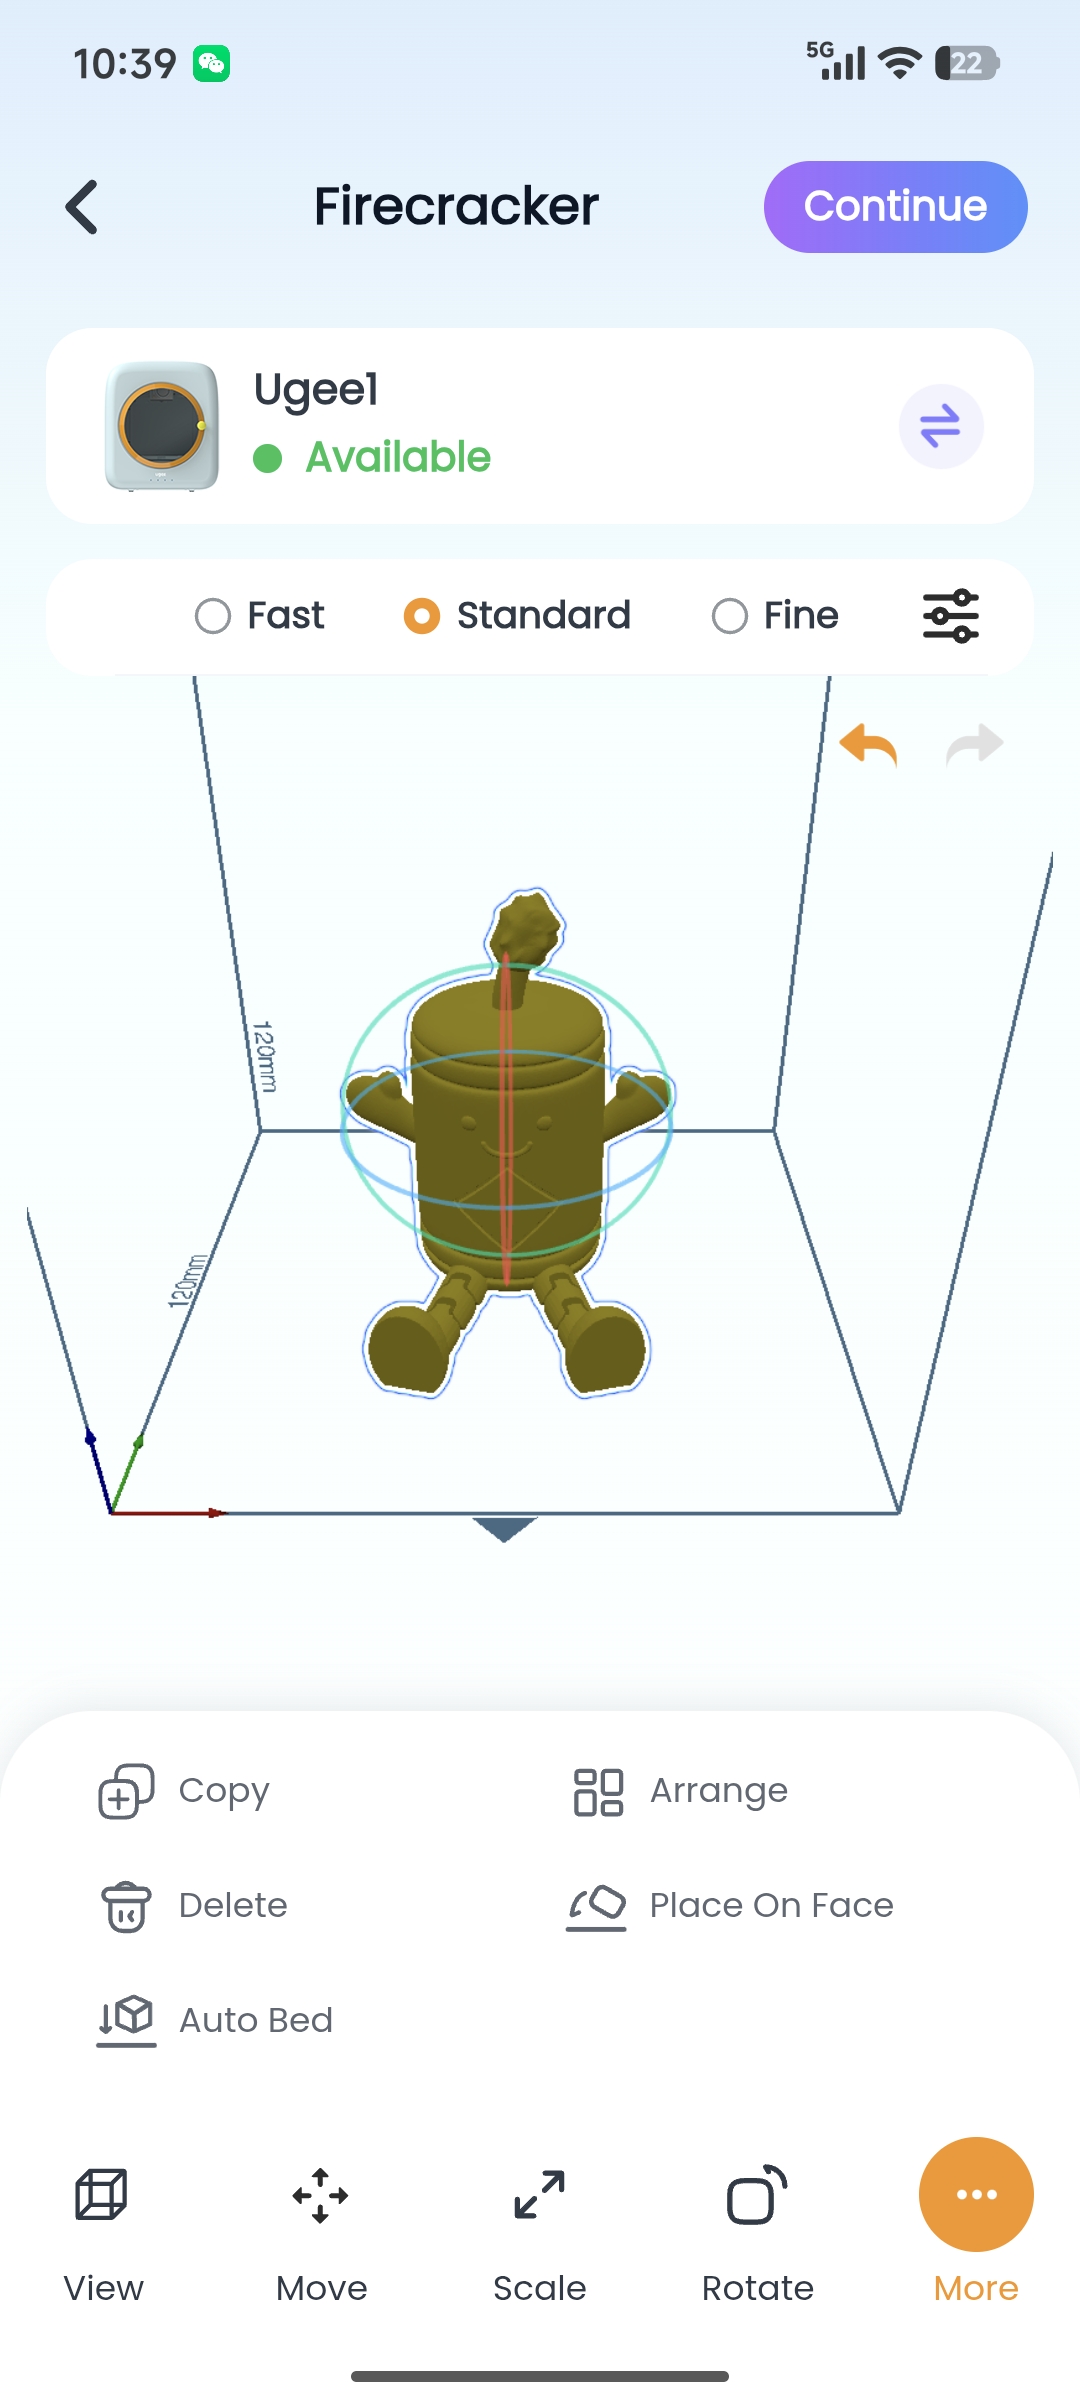
• Print settings: Tap the "Print Settings" button to enter the editing interface, where you can adjust print quality (precision), manage print jobs, resize the model, reposition it, and more.
Q1: What if some models are not suitable for the Funbox printer?
A1: This usually happens when the model's sliced size exceeds the printable volume. Please go to the editing interface and tap "Scale” to Fit Print Volume to resize it within the build space.
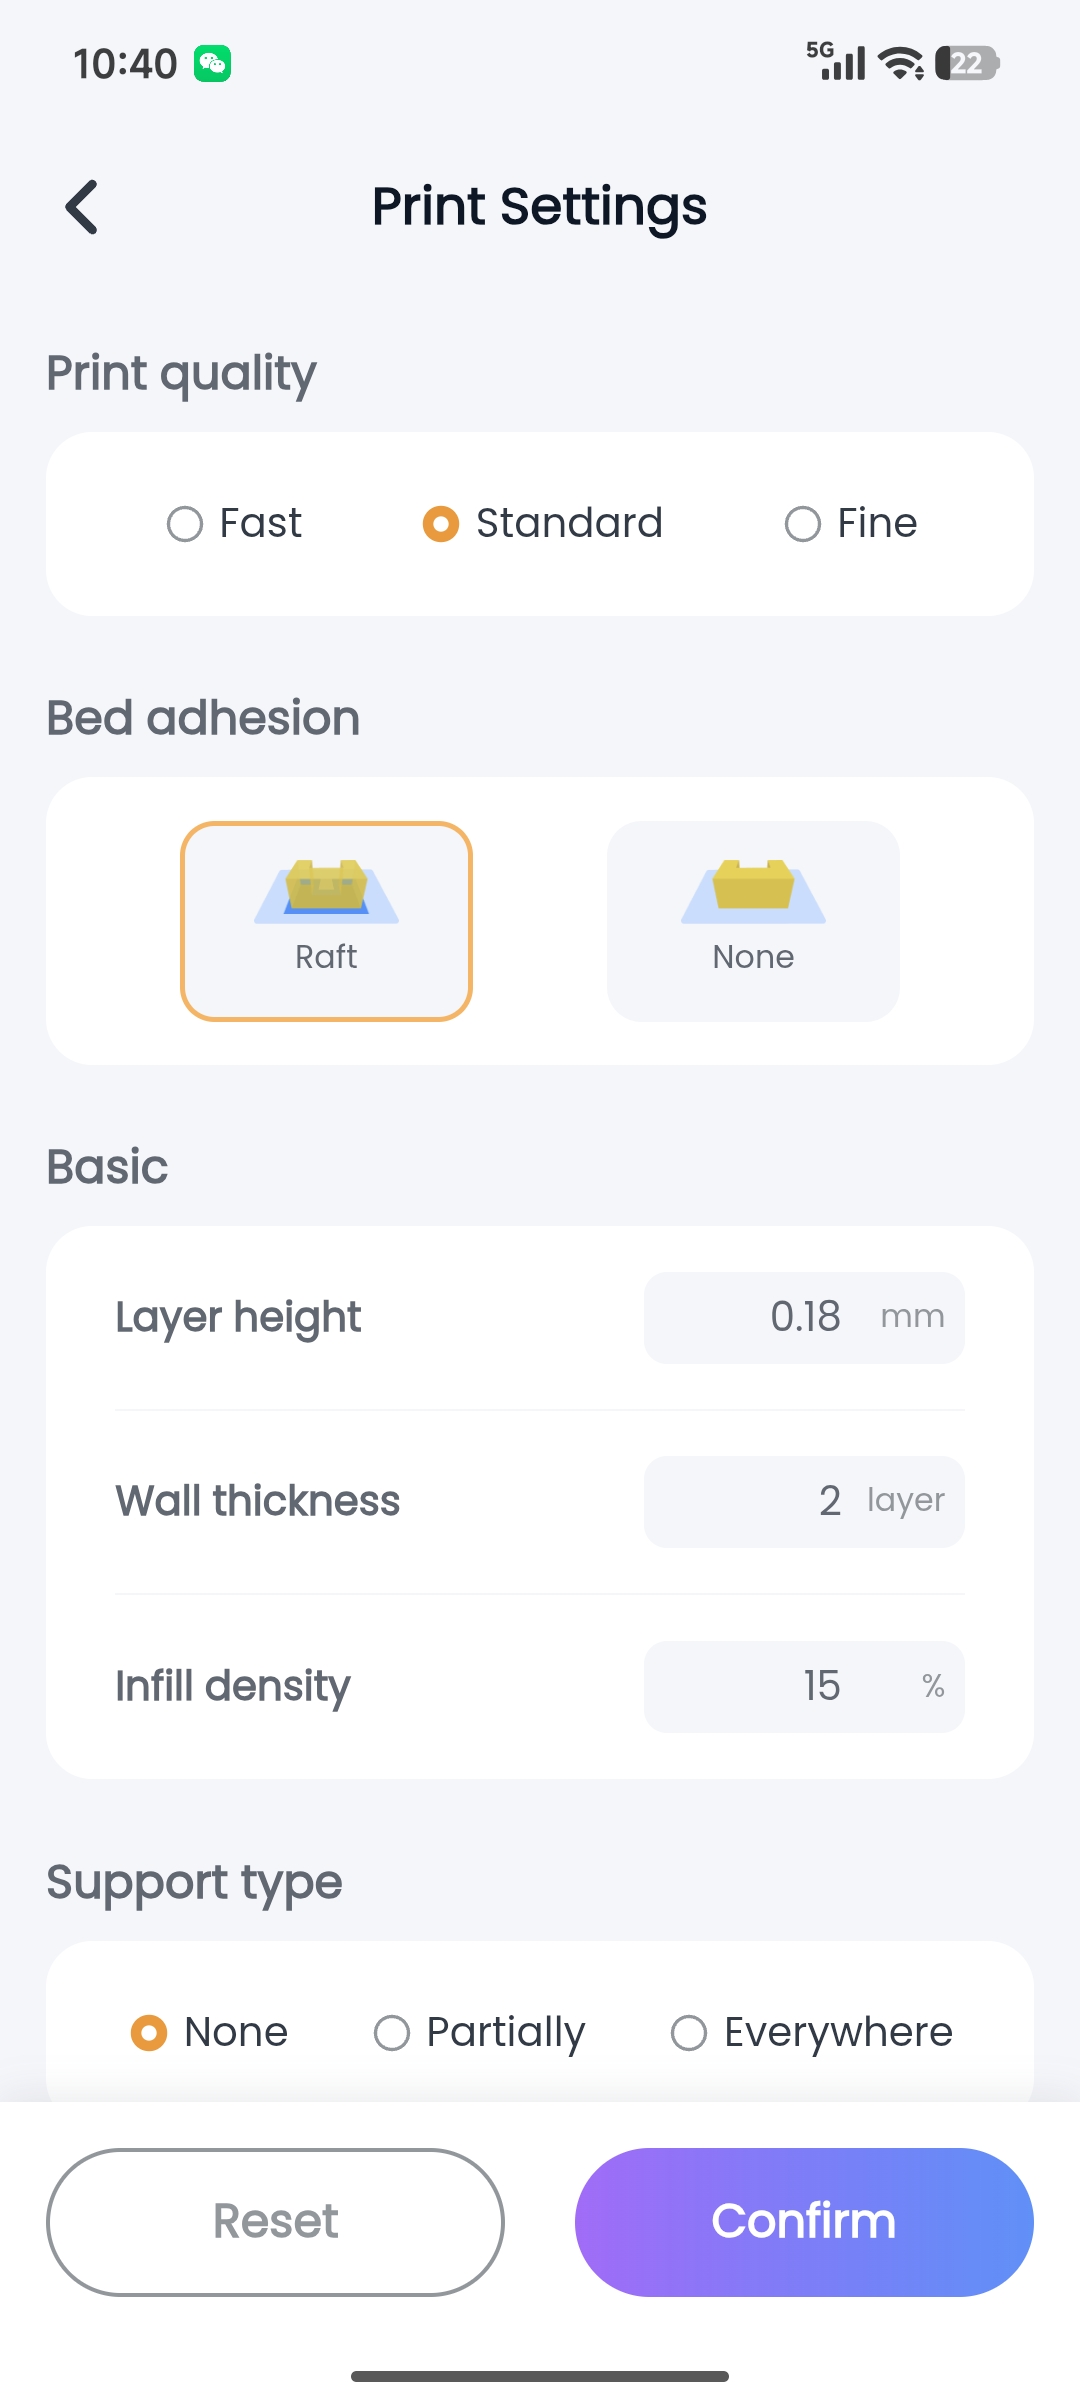
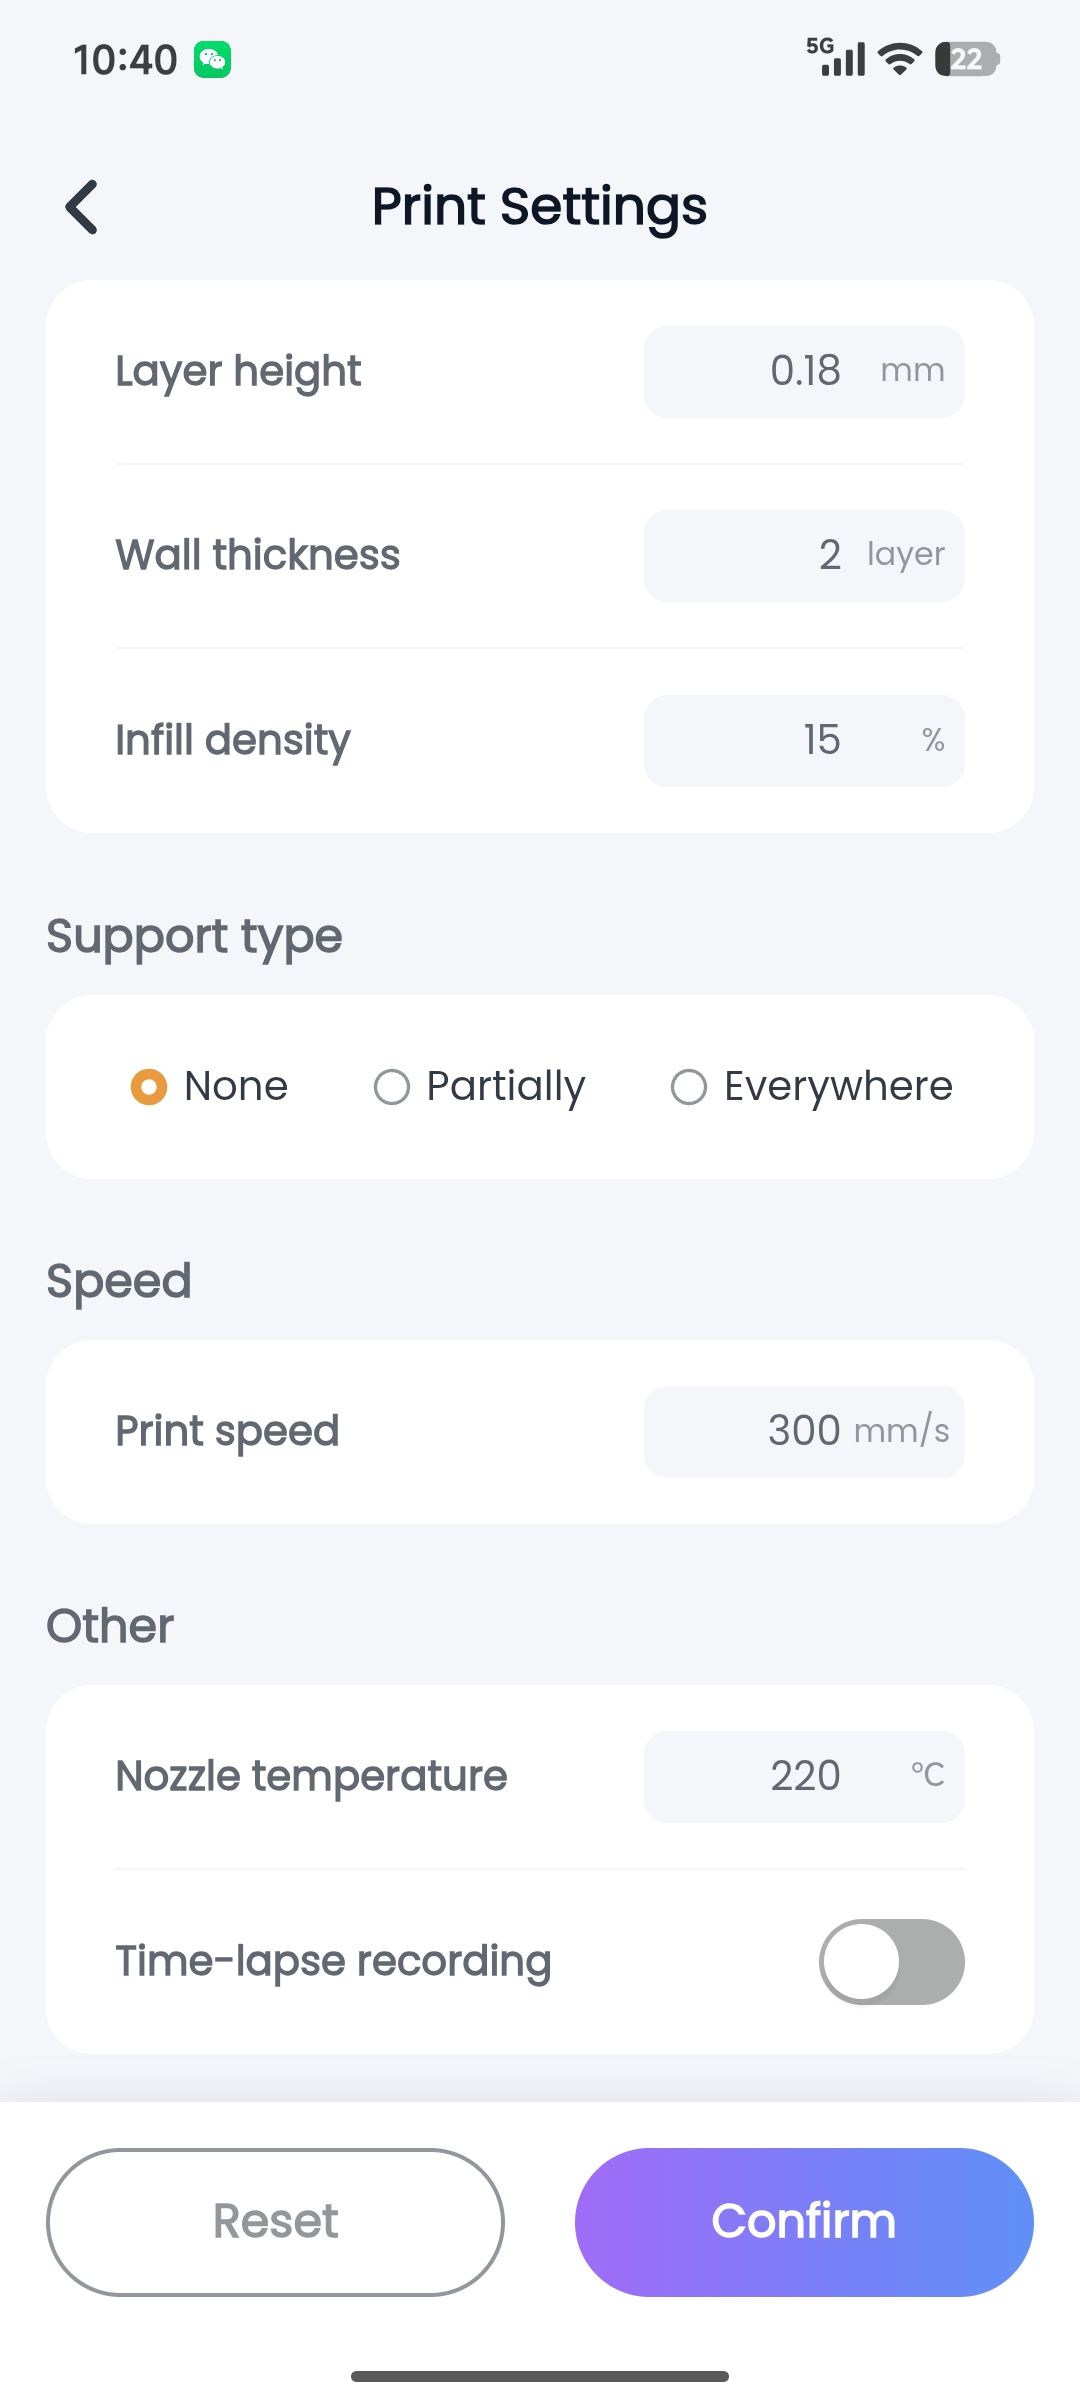
Q2: Will the modified print settings be applied to all subsequent prints?
A2: No. The settings are effective only for the current model. When printing other models later, the default parameter configuration will be restored automatically.
4.4 PRINTER– Tap the Device button at the bottom
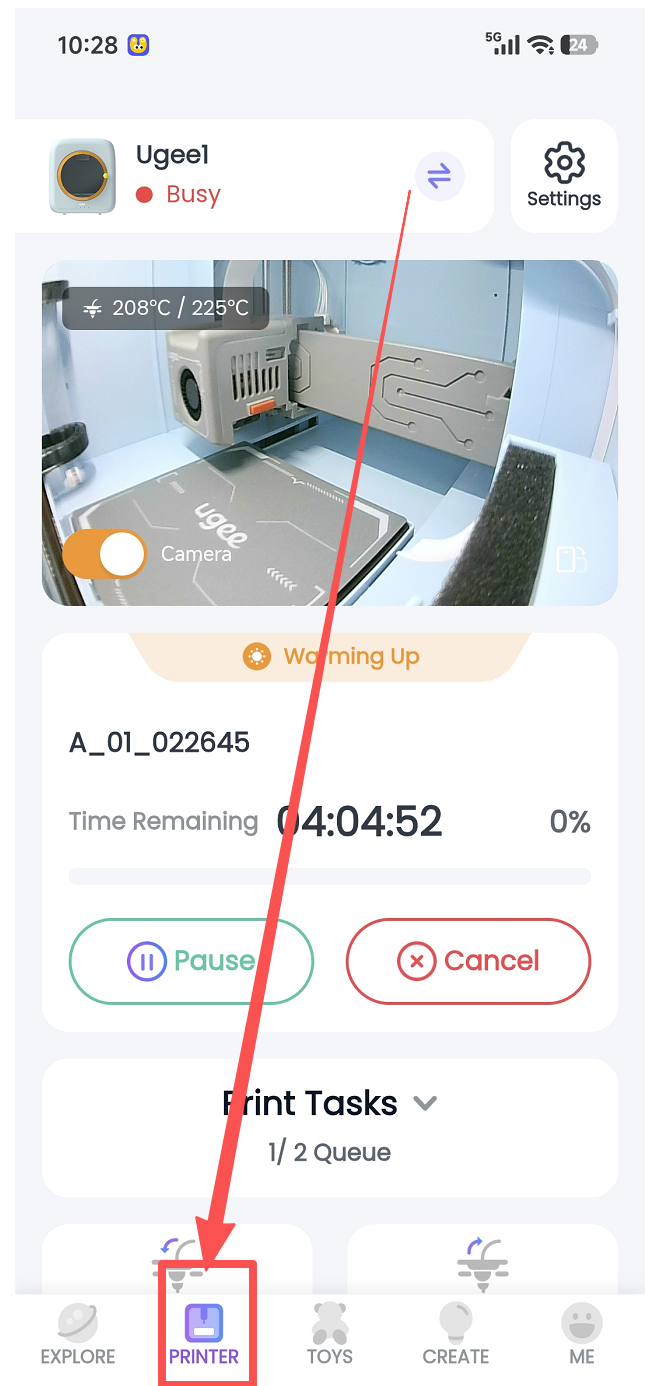
The printer interface serves as an integrated control centre, supporting print initiation, device maintenance, and management – including progress monitoring, filament replacement, preheating, calibration, etc., to ensure high‑quality output.
4.4.1 Printer Pairing and Connection
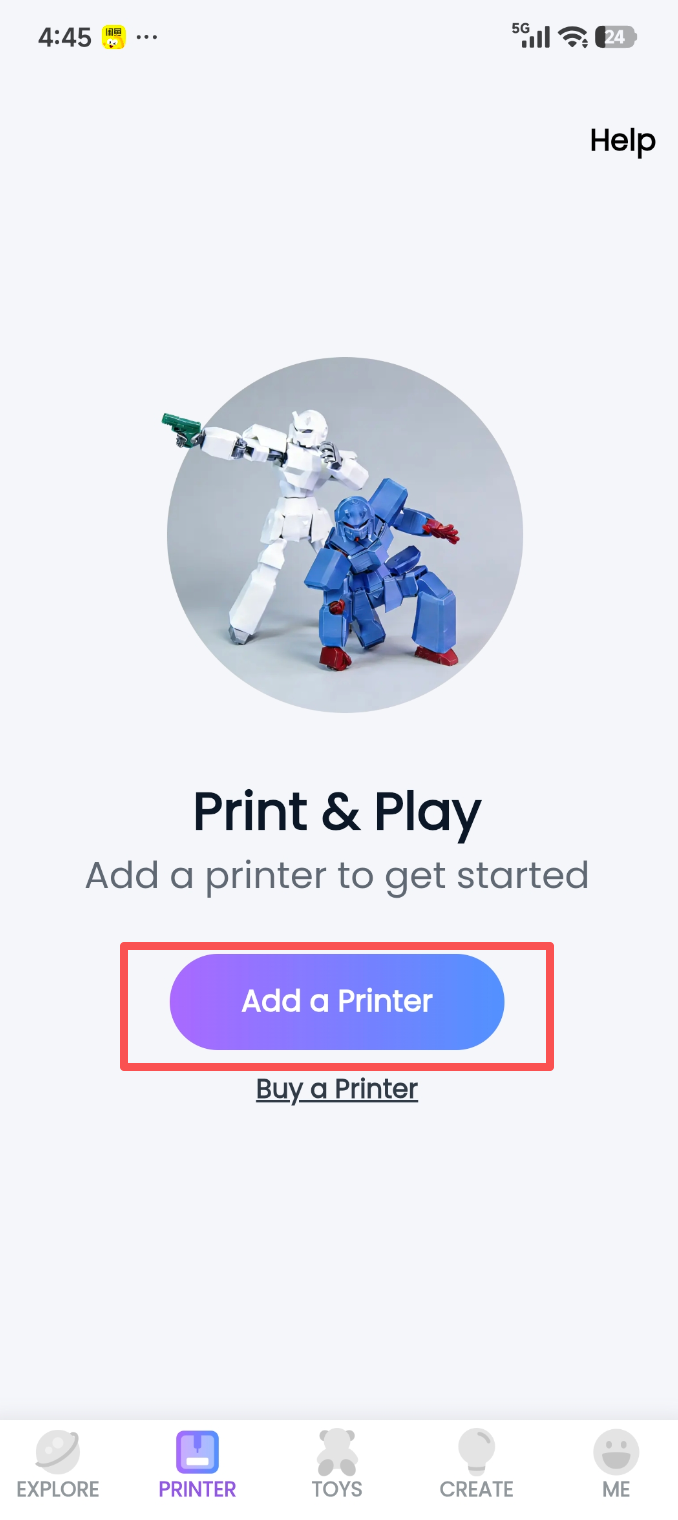
① First‑time connection: When you download and launch the app, it will automatically guide you through account registration and printer connection steps.
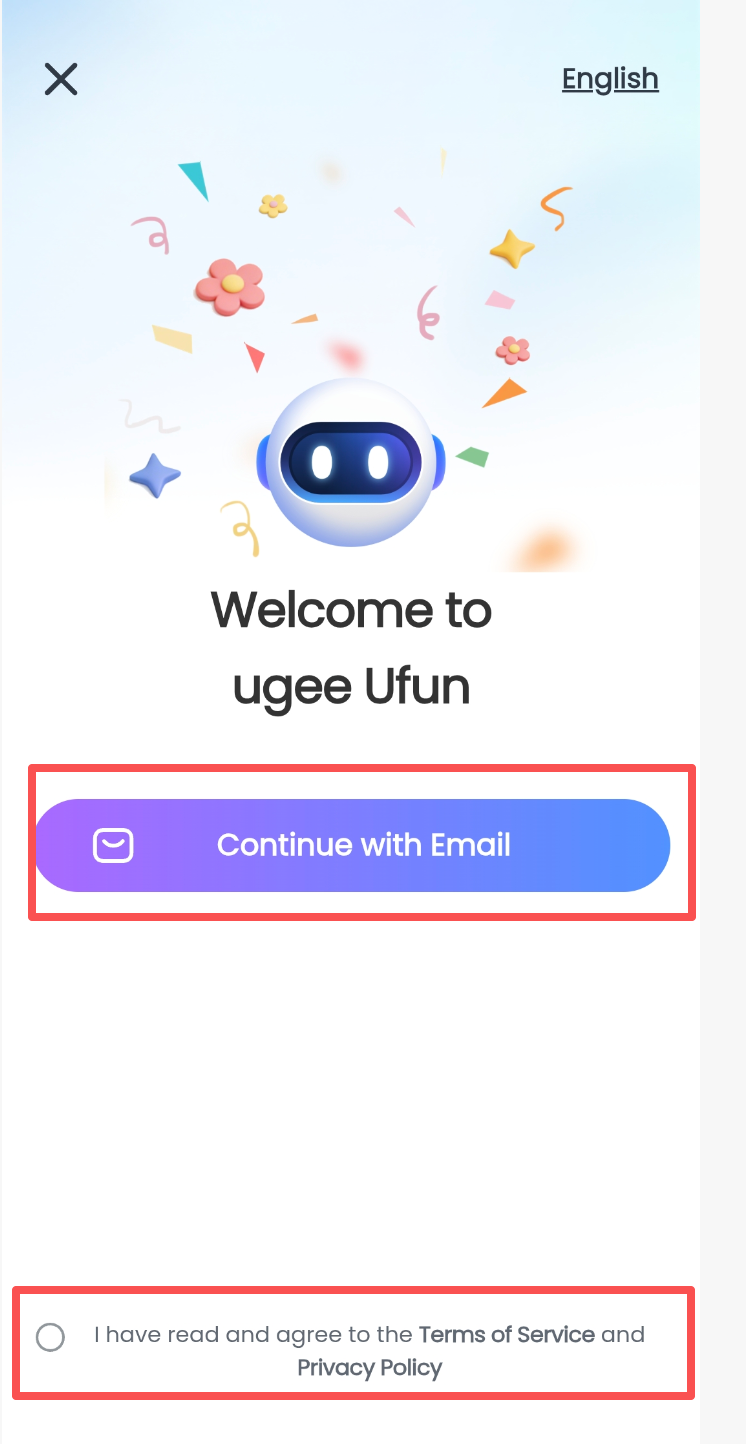
② When the printer is not connected and the account is not logged in : You need to log in before connecting.
- You must first register and log in to your account before proceeding with the printer connection process described in step ③.
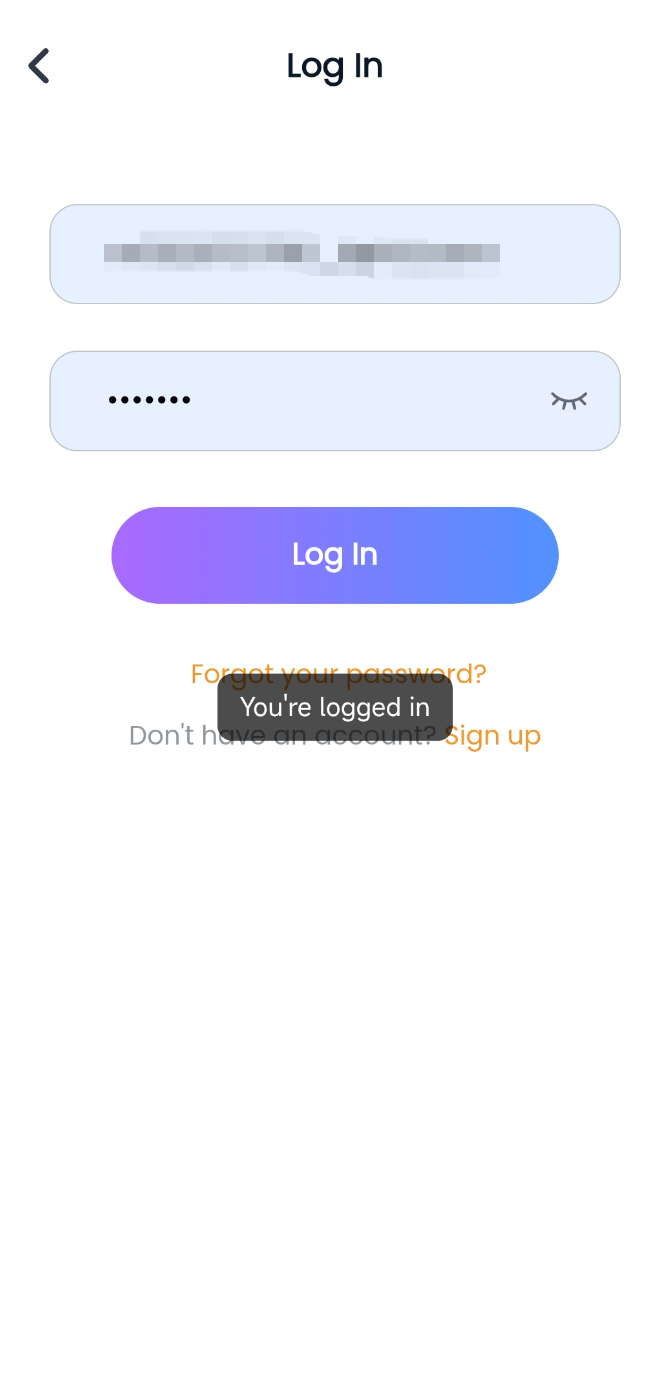
Notes:
- Q1: Why do I get an "incorrect username or password" error when using the Chinese language version, after I have successfully registered and logged in to the overseas language version (all languages except Chinese) of ugee Ufun?
- A1: The overseas language versions (all languages except Chinese) and the Chinese language version use separate servers. You need to register and log in again separately for each version in order to access it.
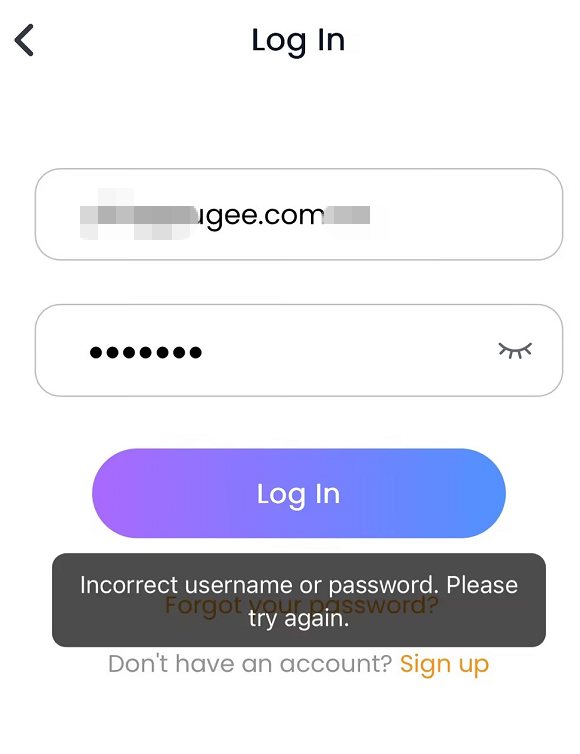
- Q2: Why do I have to log in again when I switch to another language version after successfully logging in with the English language version?
- A2: Currently, our app’s account settings are designed this way. This is mainly because selecting a new language version requires reloading and reconfiguring the entire language setup of the app, so you need to log in again.
③ Printer Connection Process
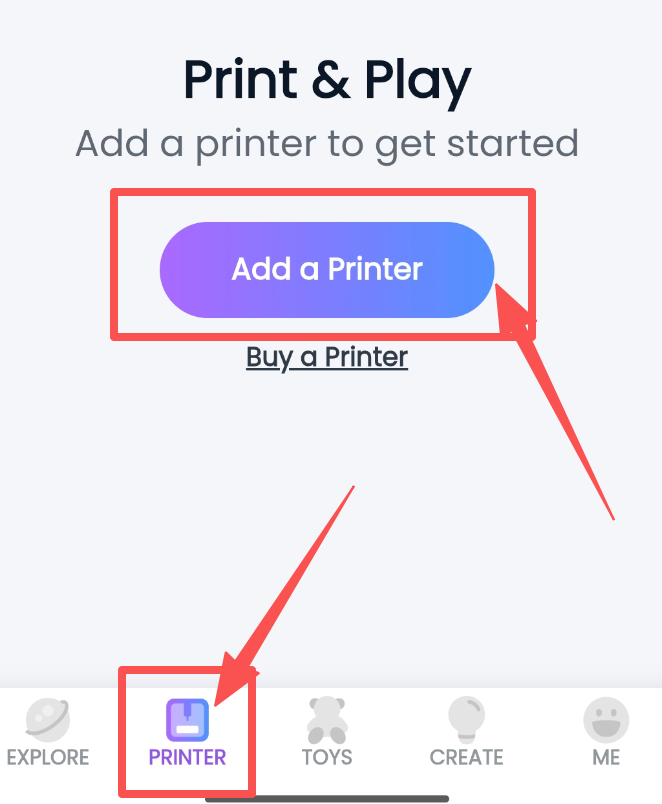
1. Tap "Add Printer".
2. Tap and select "Configure New Printer".
3. Select the model "ugee Funbox".
4. Grant precise location permission.
5. Enter the welcome page.
6. Prepare the printer: connect the power supply and place the build plate.
7. Prepare for network setup: check whether the bottom indicator light is solid yellow. If not, long‑press the red button on the back until the light turns solid yellow.
8. Wi‑Fi connection: ensure that the printer and the mobile device are connected to the same Wi‑Fi network.
9. Select the Wi‑Fi network and enter the correct password.
10. Tap "Connect" and confirm the pop‑up.
11. Enter network configuration.
12. Connection success indicator: the printer’s blue light stays solid or a beep sounds.
Note: If the mobile device still shows a connecting status, you can exit the app and restart it.
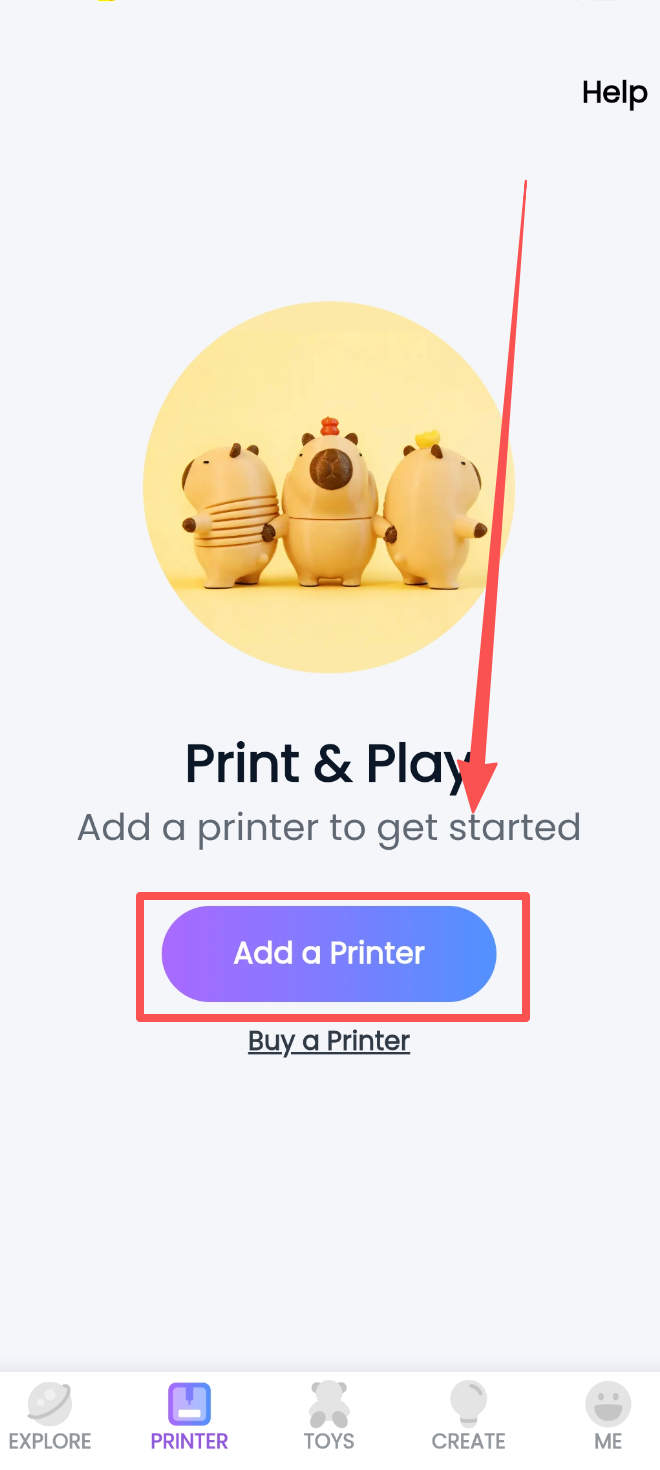
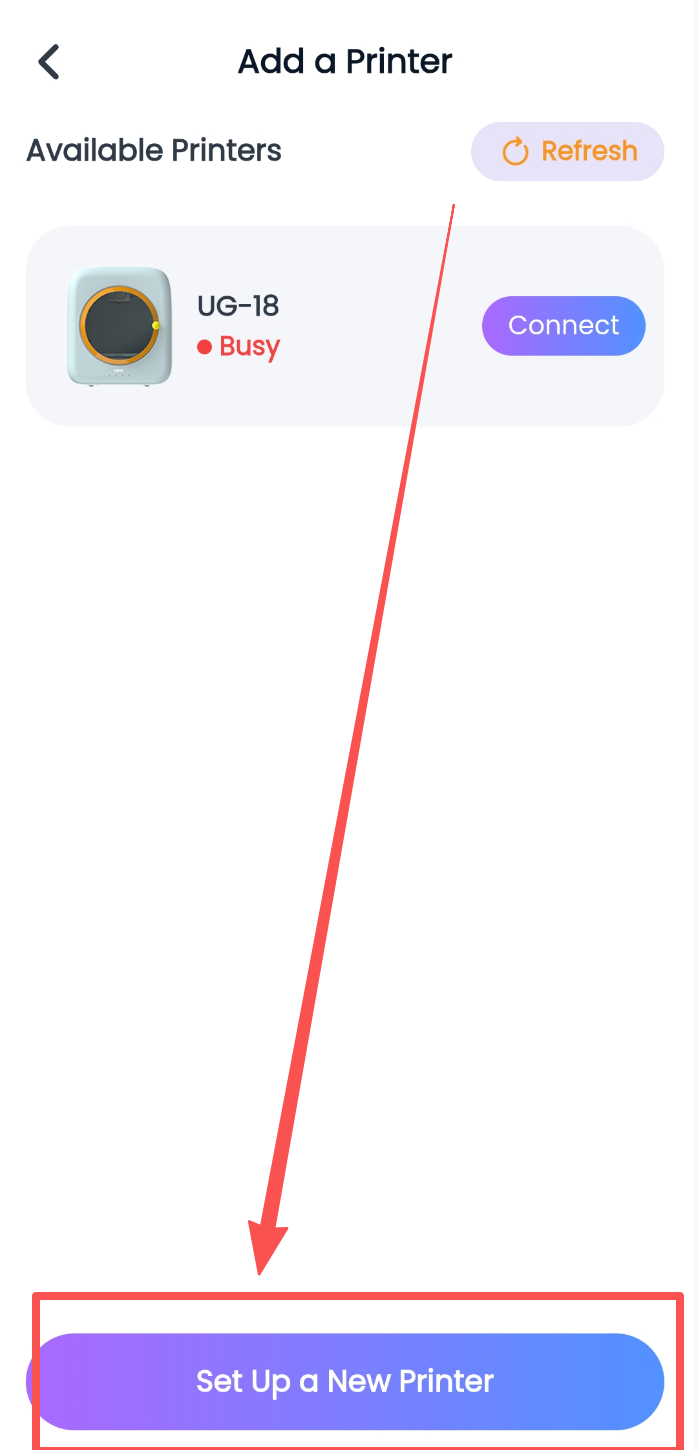
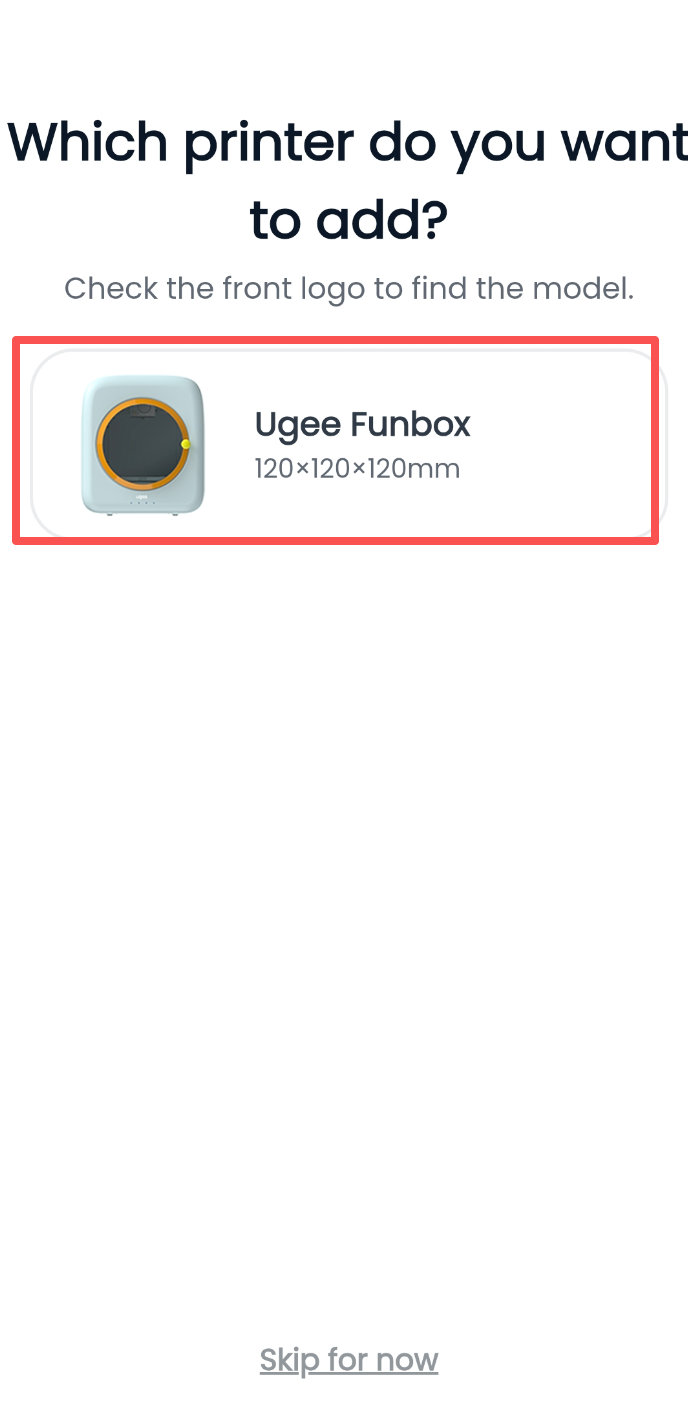
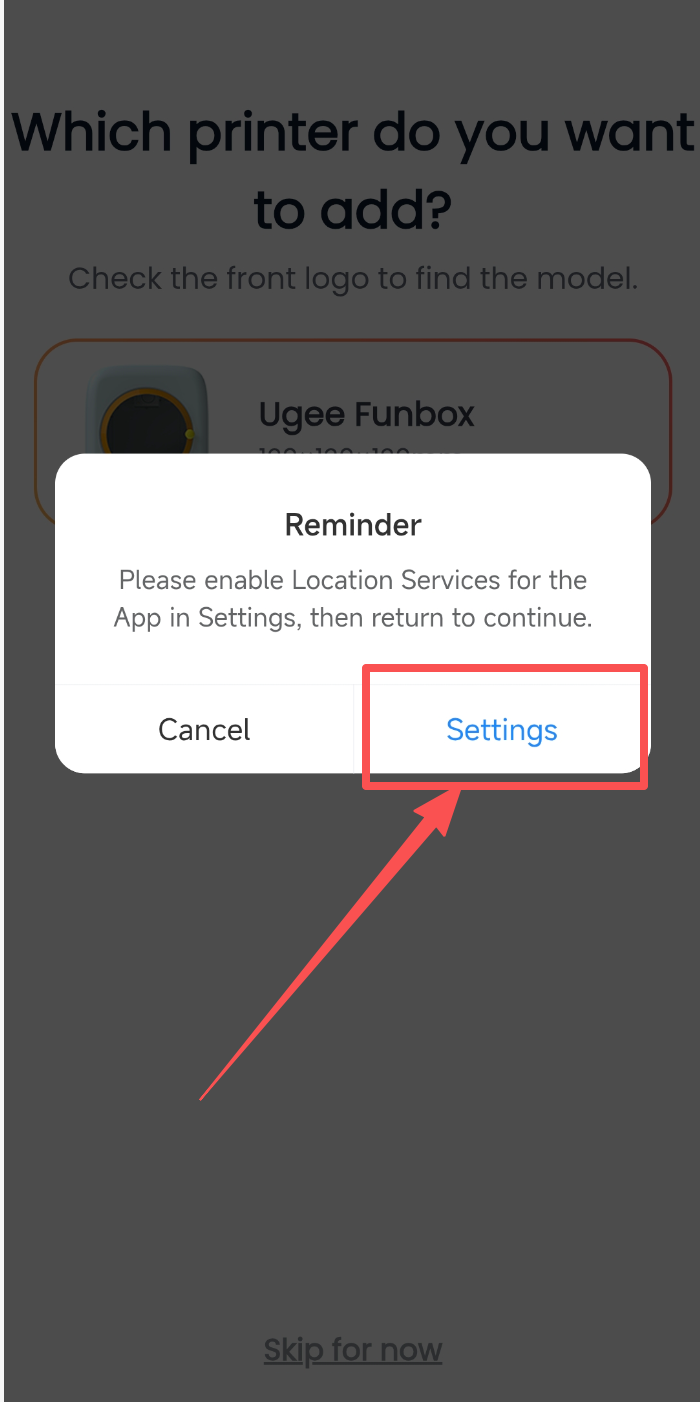
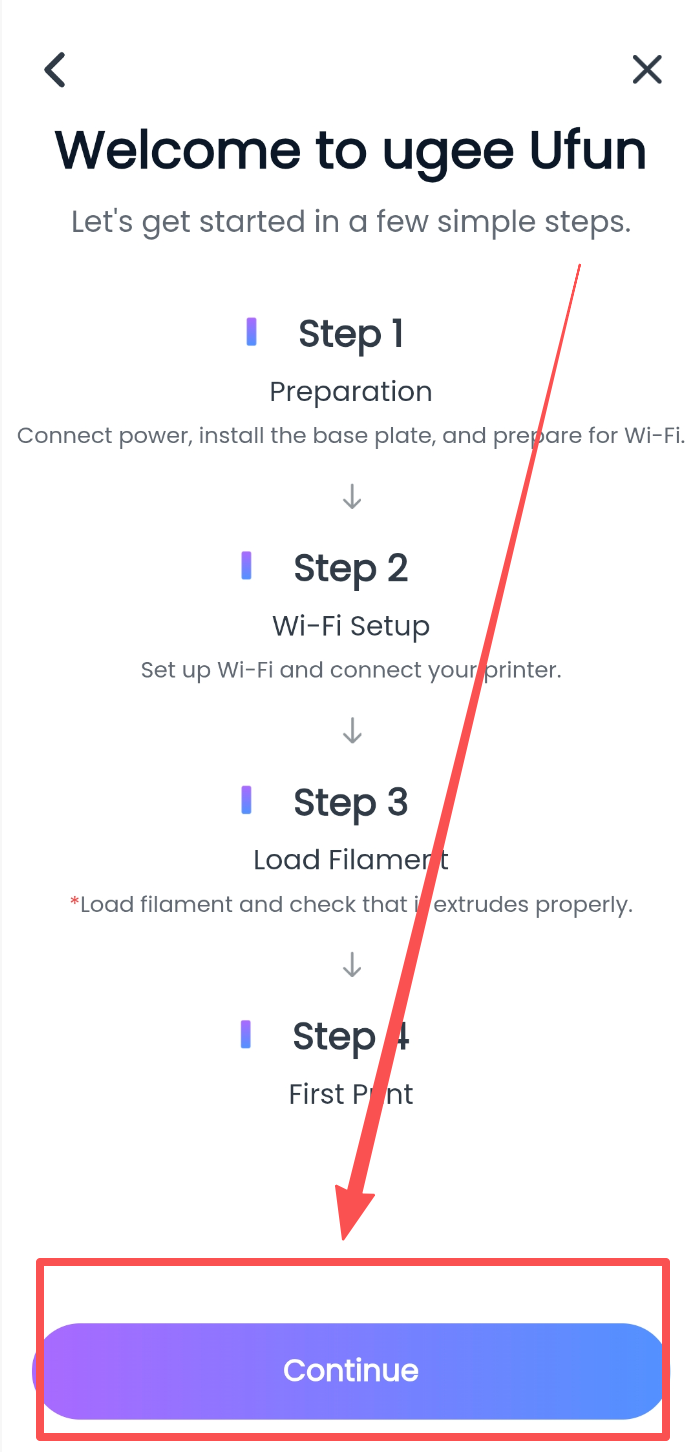
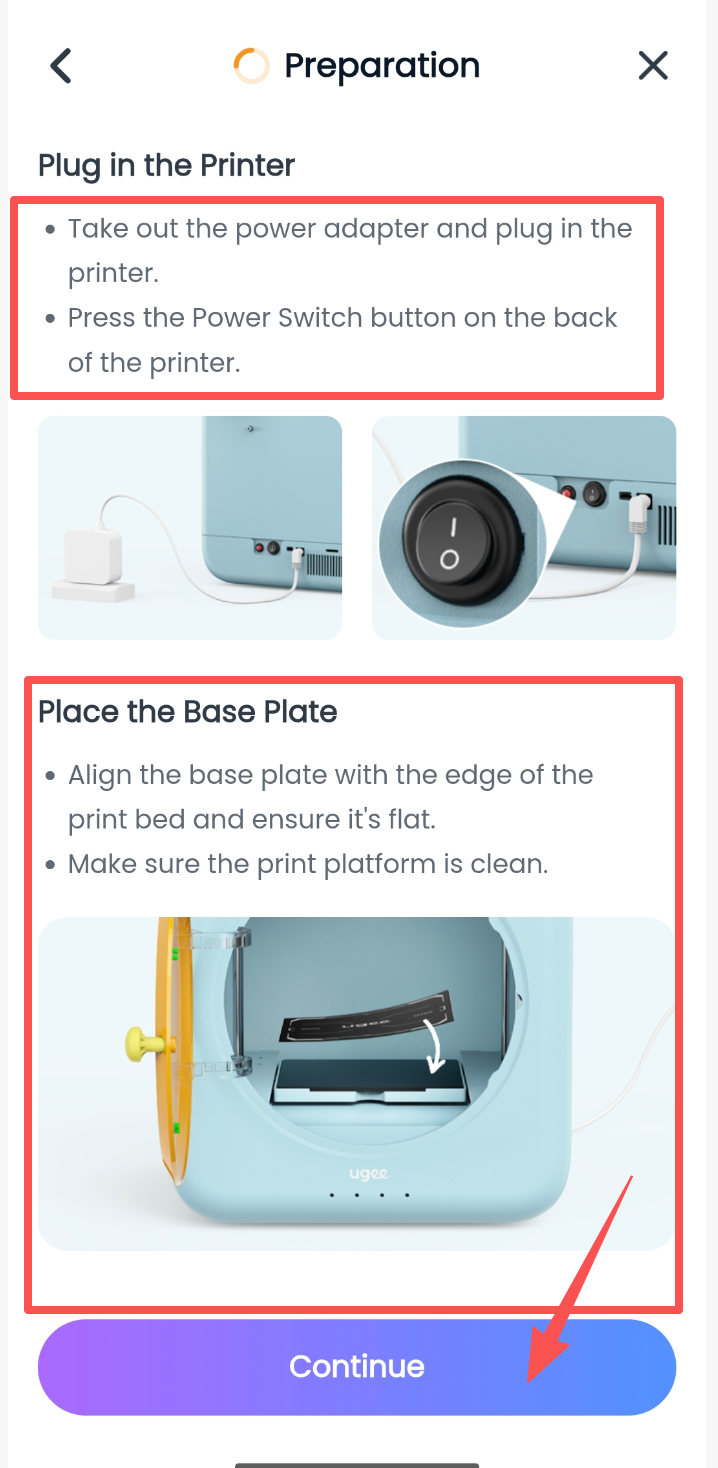
Figure a Figure b Figure c Figure d Figure e Figure f
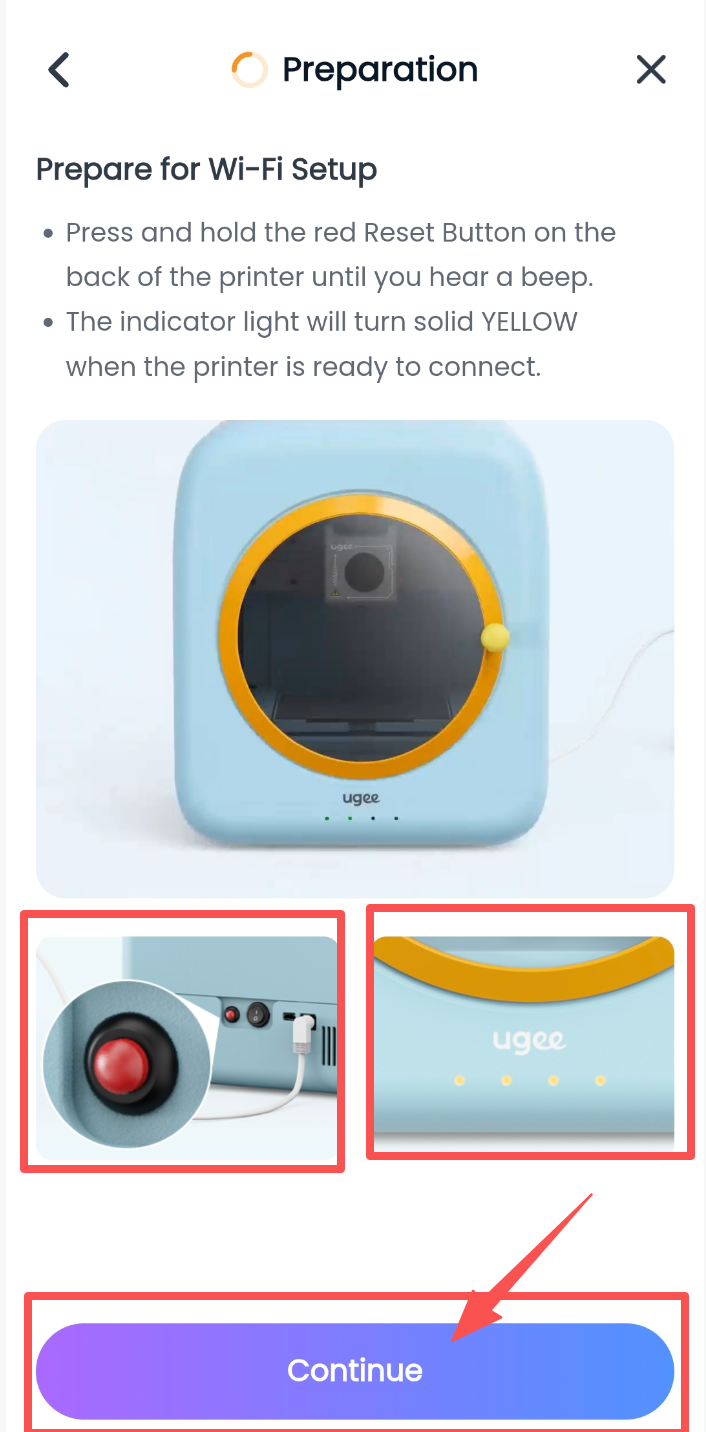
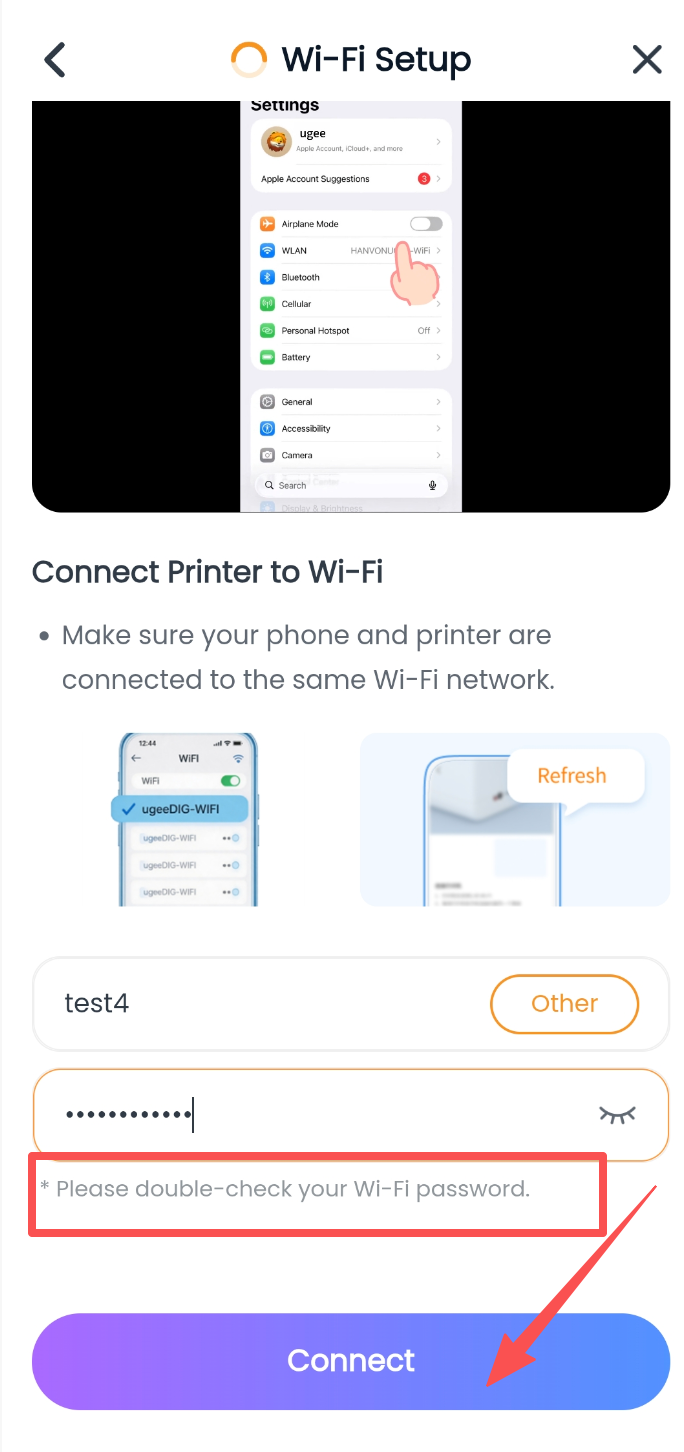
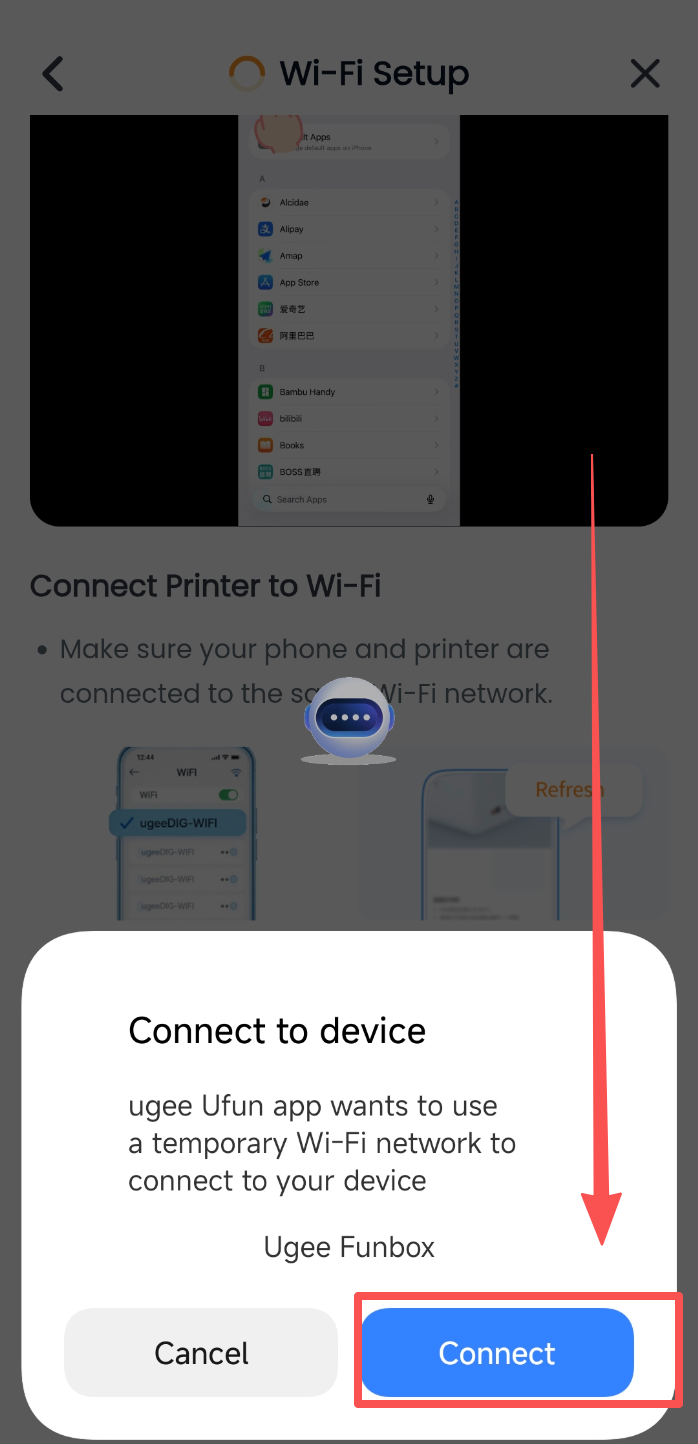
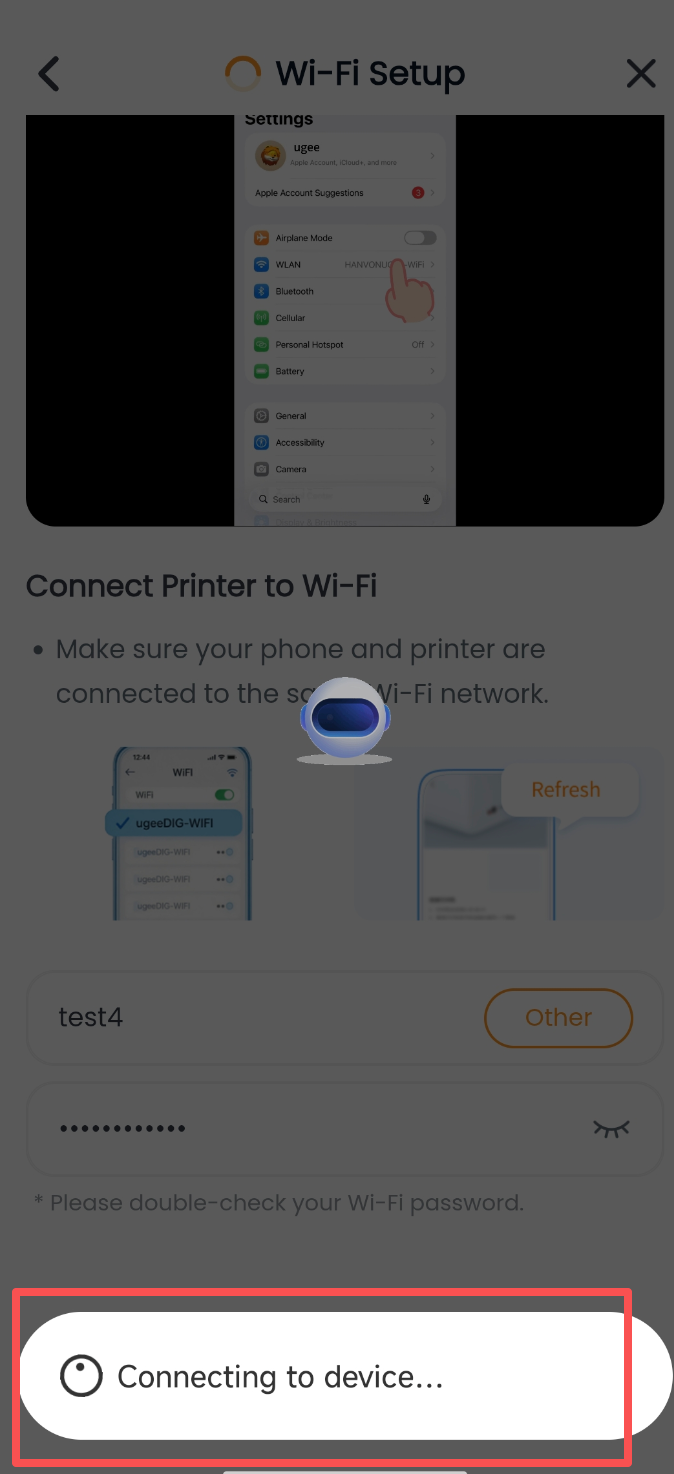
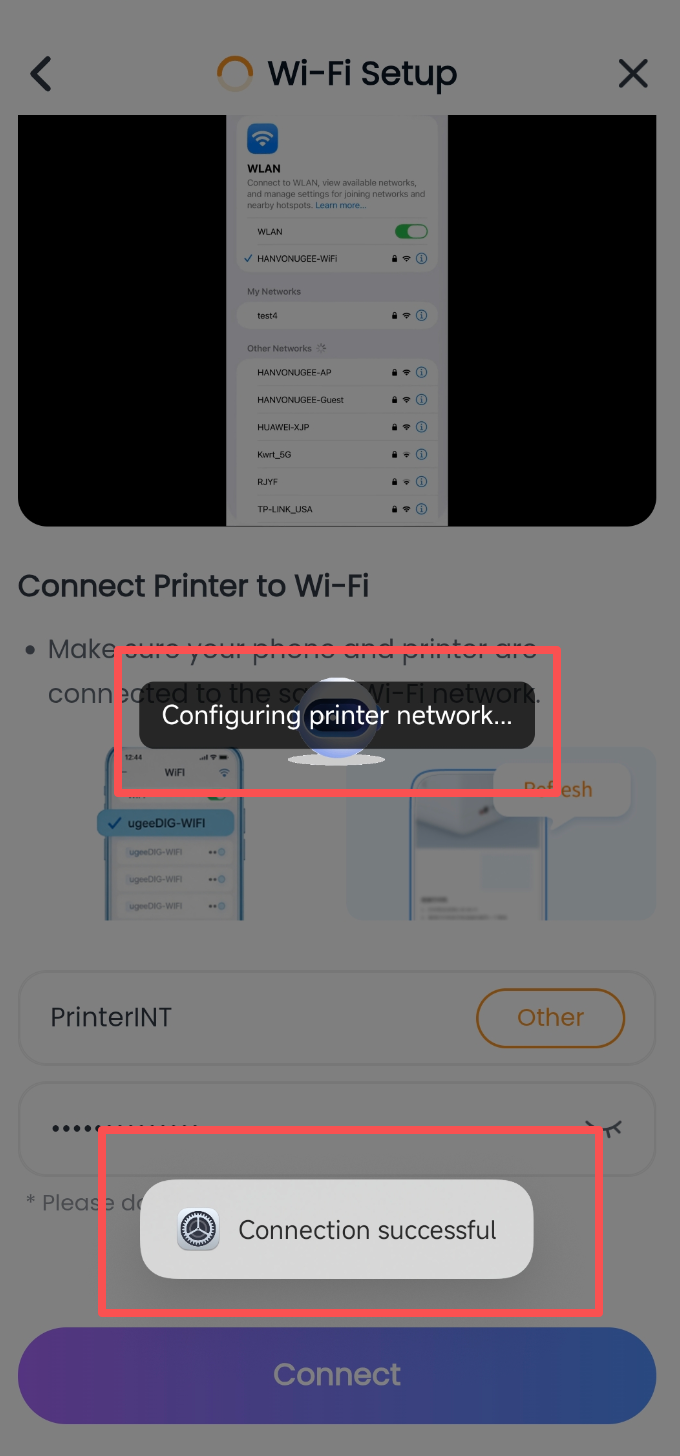
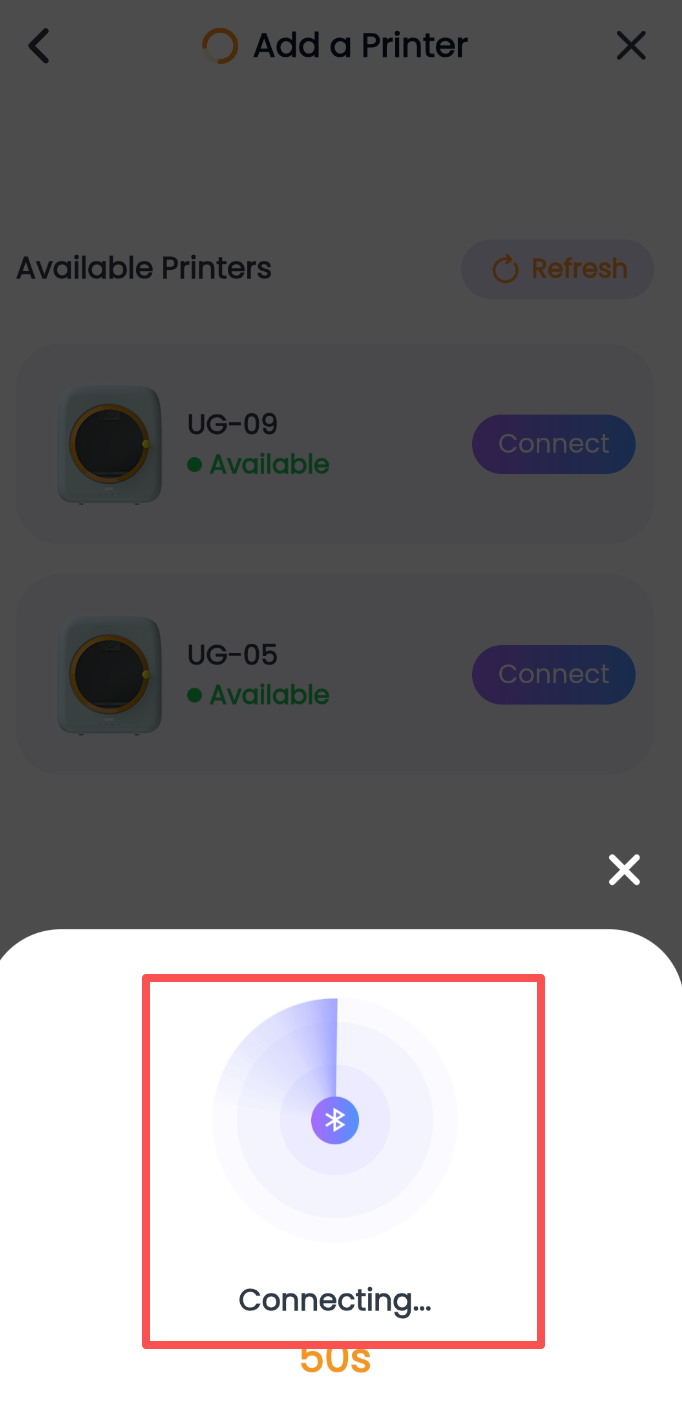
Figure g Figure h Figure i Figure j Figure k Figure l
Note:
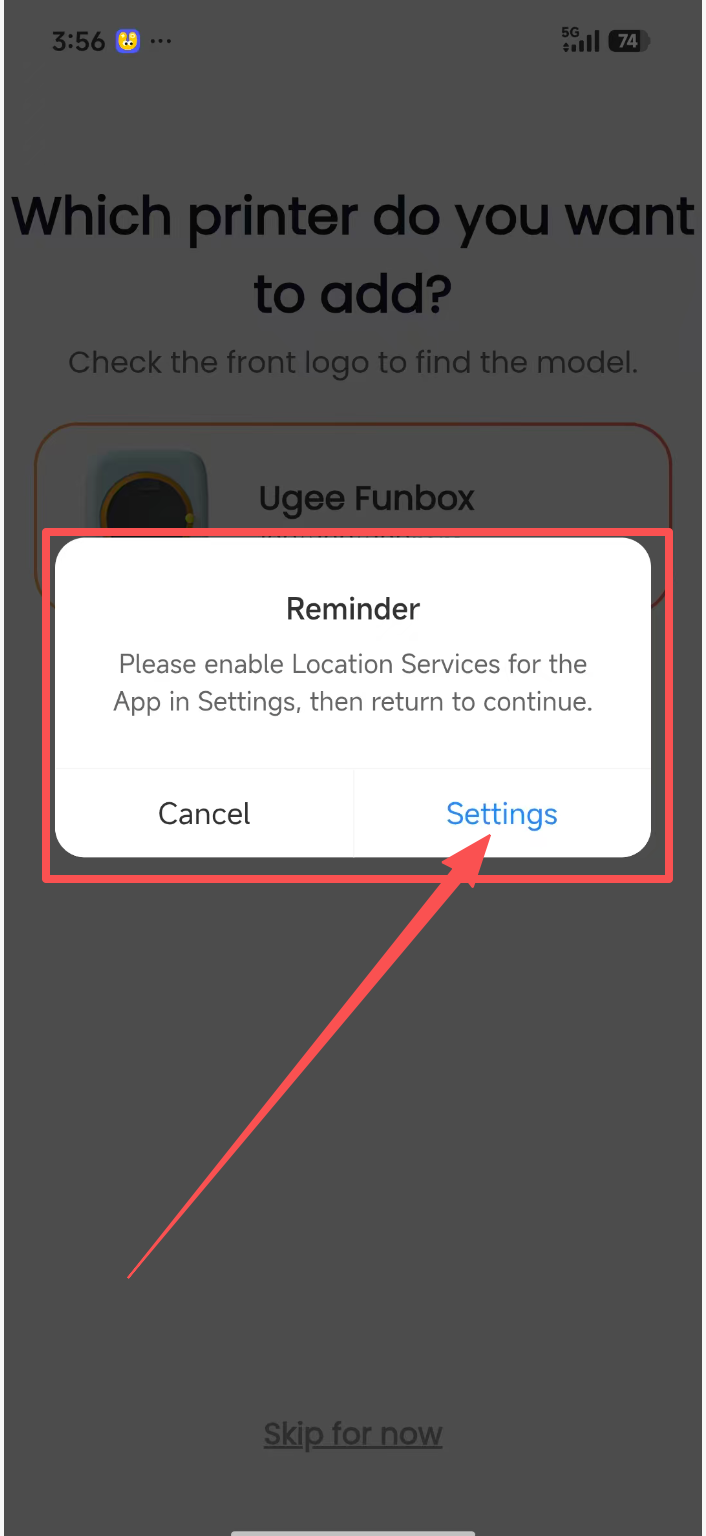
Q1: As shown in Figure d, why does tapping Add Printer require access to my precise location?
A1: Connecting to the printer hardware requires Wi-Fi. Precise location information is needed for the printer to find the corresponding home Wi-Fi network. Without this permission, the Wi-Fi network cannot be found.
Android Wi-Fi setup steps: Tap “Settings” in the location permission pop-up -> tap “Permission Management” -> tap “Location” -> select “Allow only while using the app” -> turn on “Precise Location” -> tap Back to return to the ugee Ufun app.
iOS location setup steps: In the pop-up asking whether “ugee Ufun” may join the “ugee Funbox” Wi-Fi network, tap “Join” -> go to Location in Settings, select “While Using the App,” and turn on Precise Location -> tap Back in the upper-left corner to return to the ugee Ufun app.
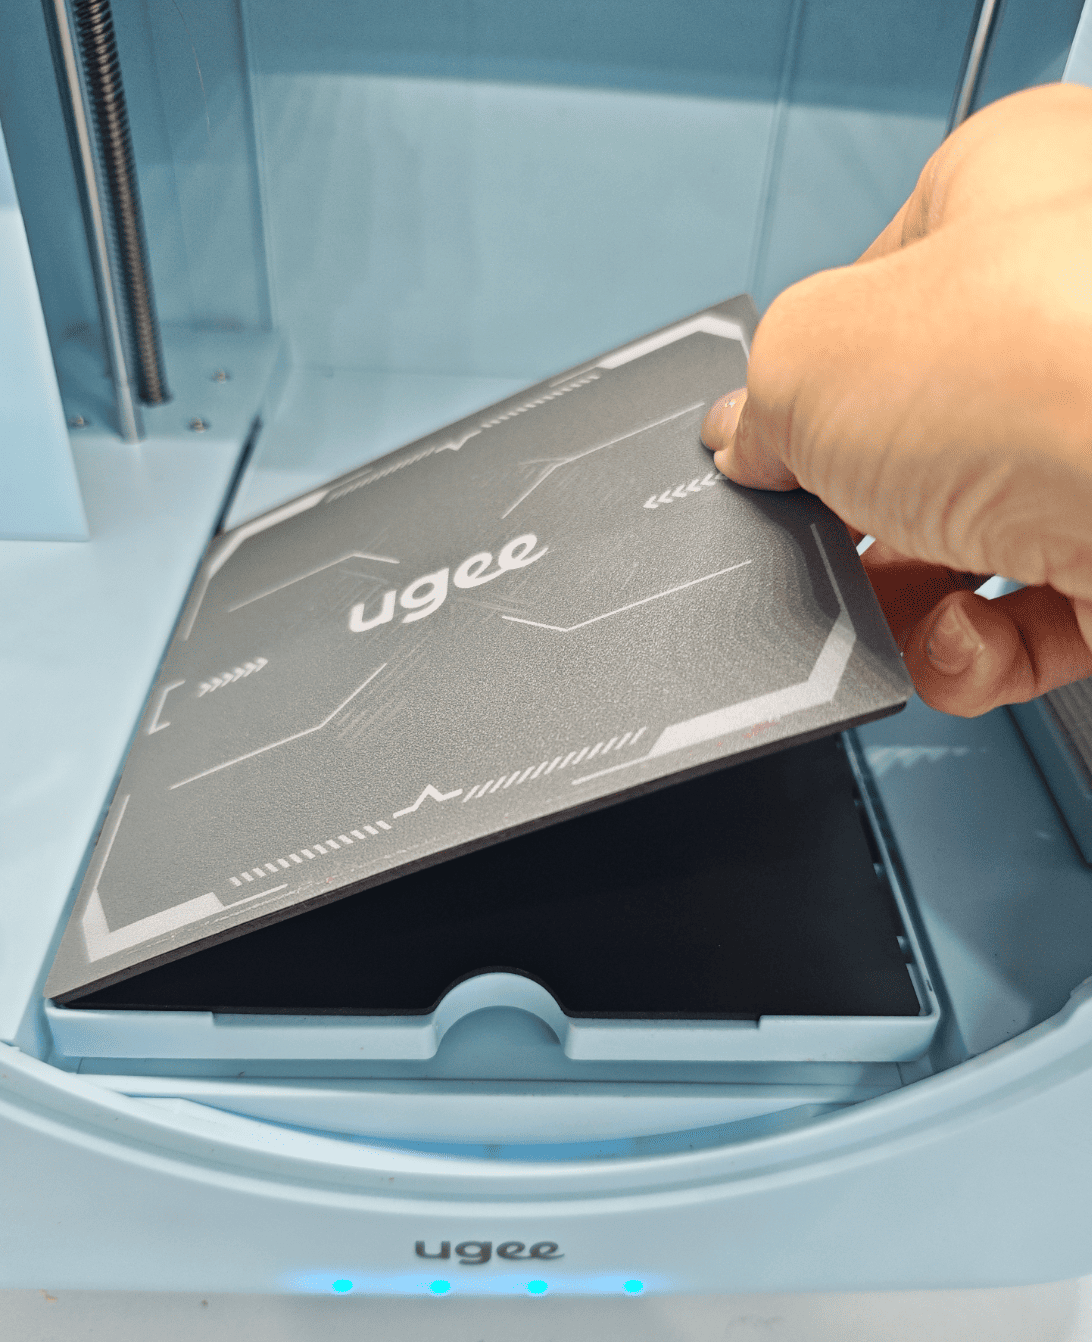
Q2: Can the build plate be placed anywhere inside the printer?
A2: No. The build plate must be placed on the printer platform.
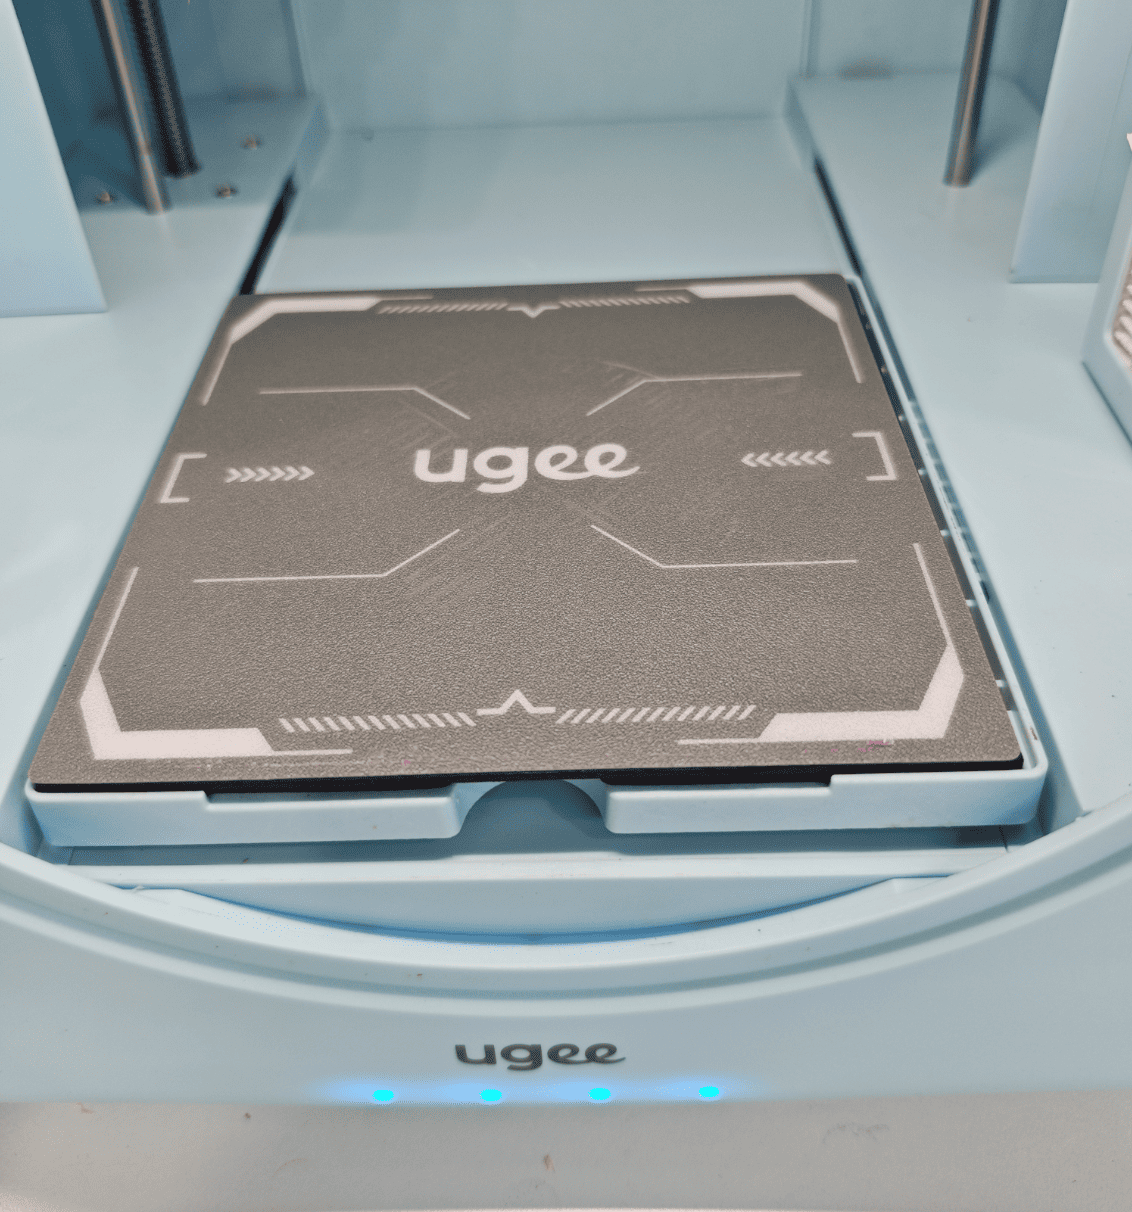
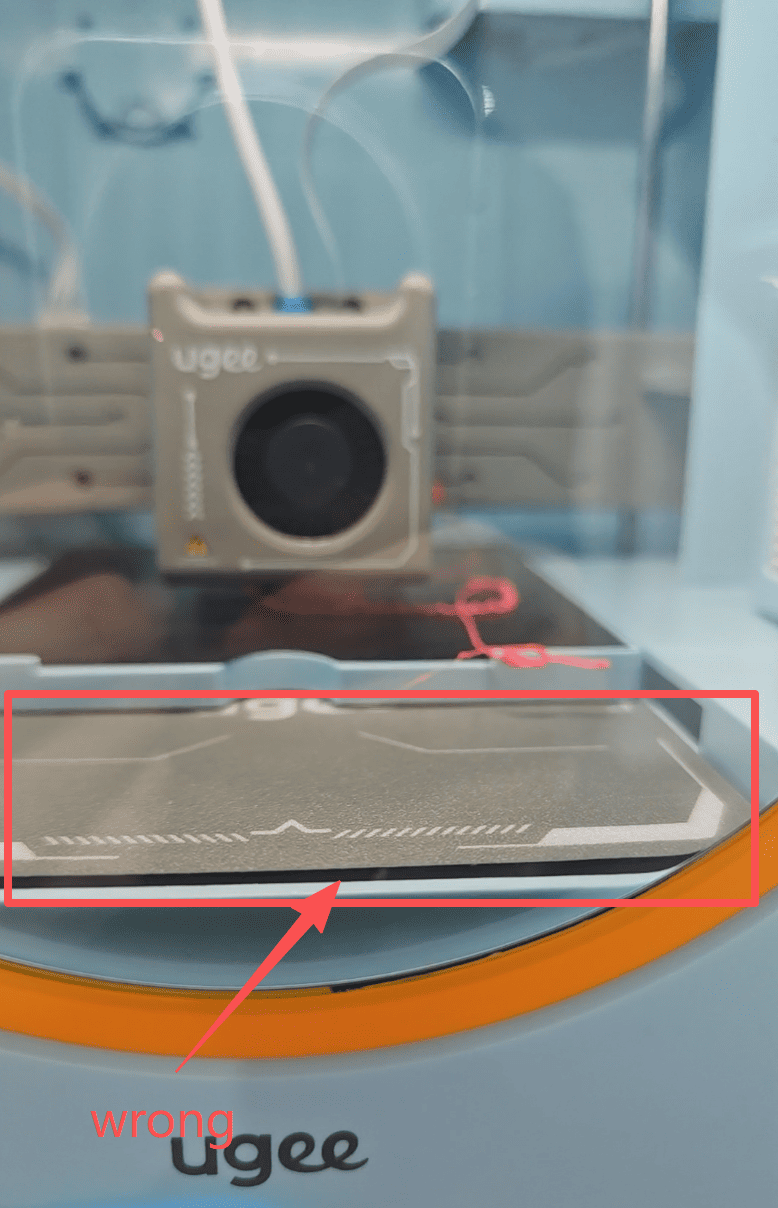
Q3: In Figure g, must the printer indicator light remain solid yellow during connection?
A3: A solid yellow indicator means the printer is ready to be paired again. Set the light to solid yellow when ① pairing the printer for the first time; ② restarting the network configuration process after a failed connection; or ③ the phone cannot find the printer. Otherwise, the phone will not be able to discover the printer.
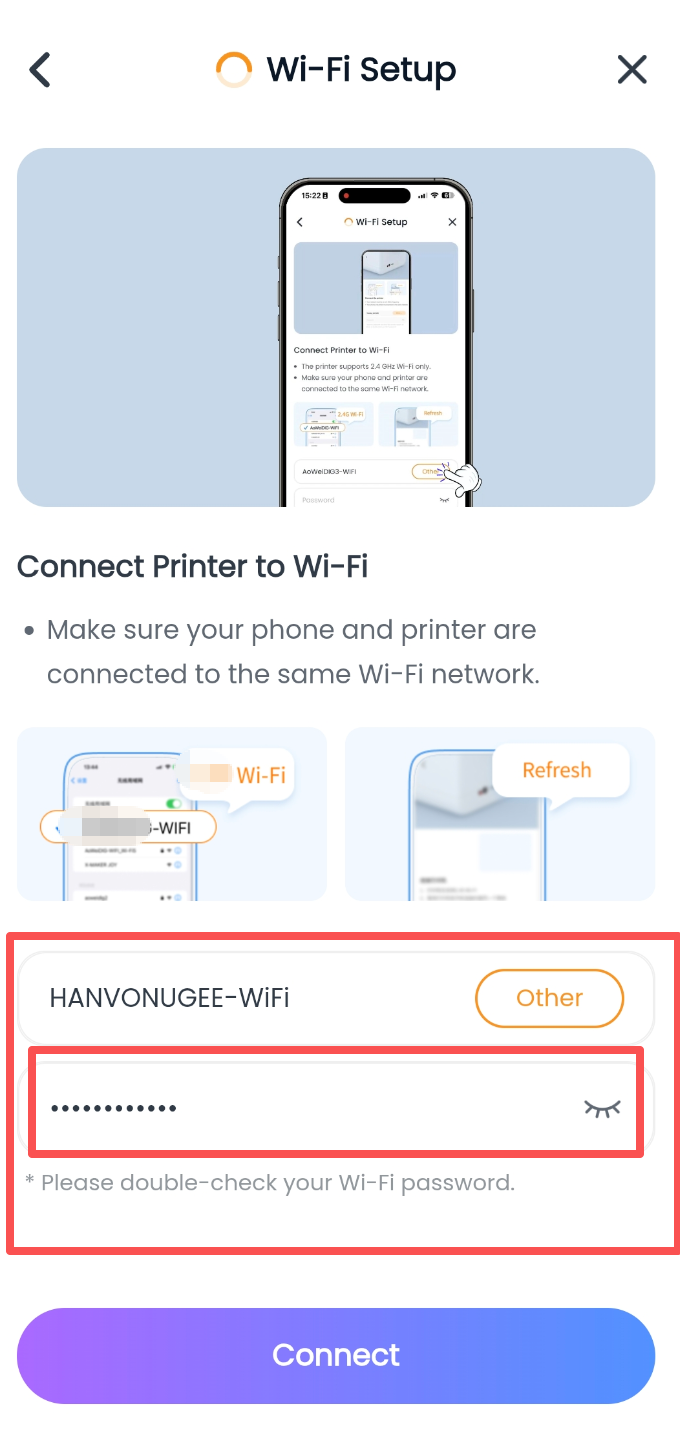
Q4: Why does the network configuration keep failing at the final step?
Step 1: Check whether the Wi-Fi password is correct. Enter the correct password for the selected Wi-Fi network (this is a common connection issue) to pair successfully.
Step 2: Check whether the Wi-Fi network connected to the phone matches the selected Wi-Fi network. The phone’s Wi-Fi must match the Wi-Fi selected under “Network Configuration” in the app for pairing to succeed.
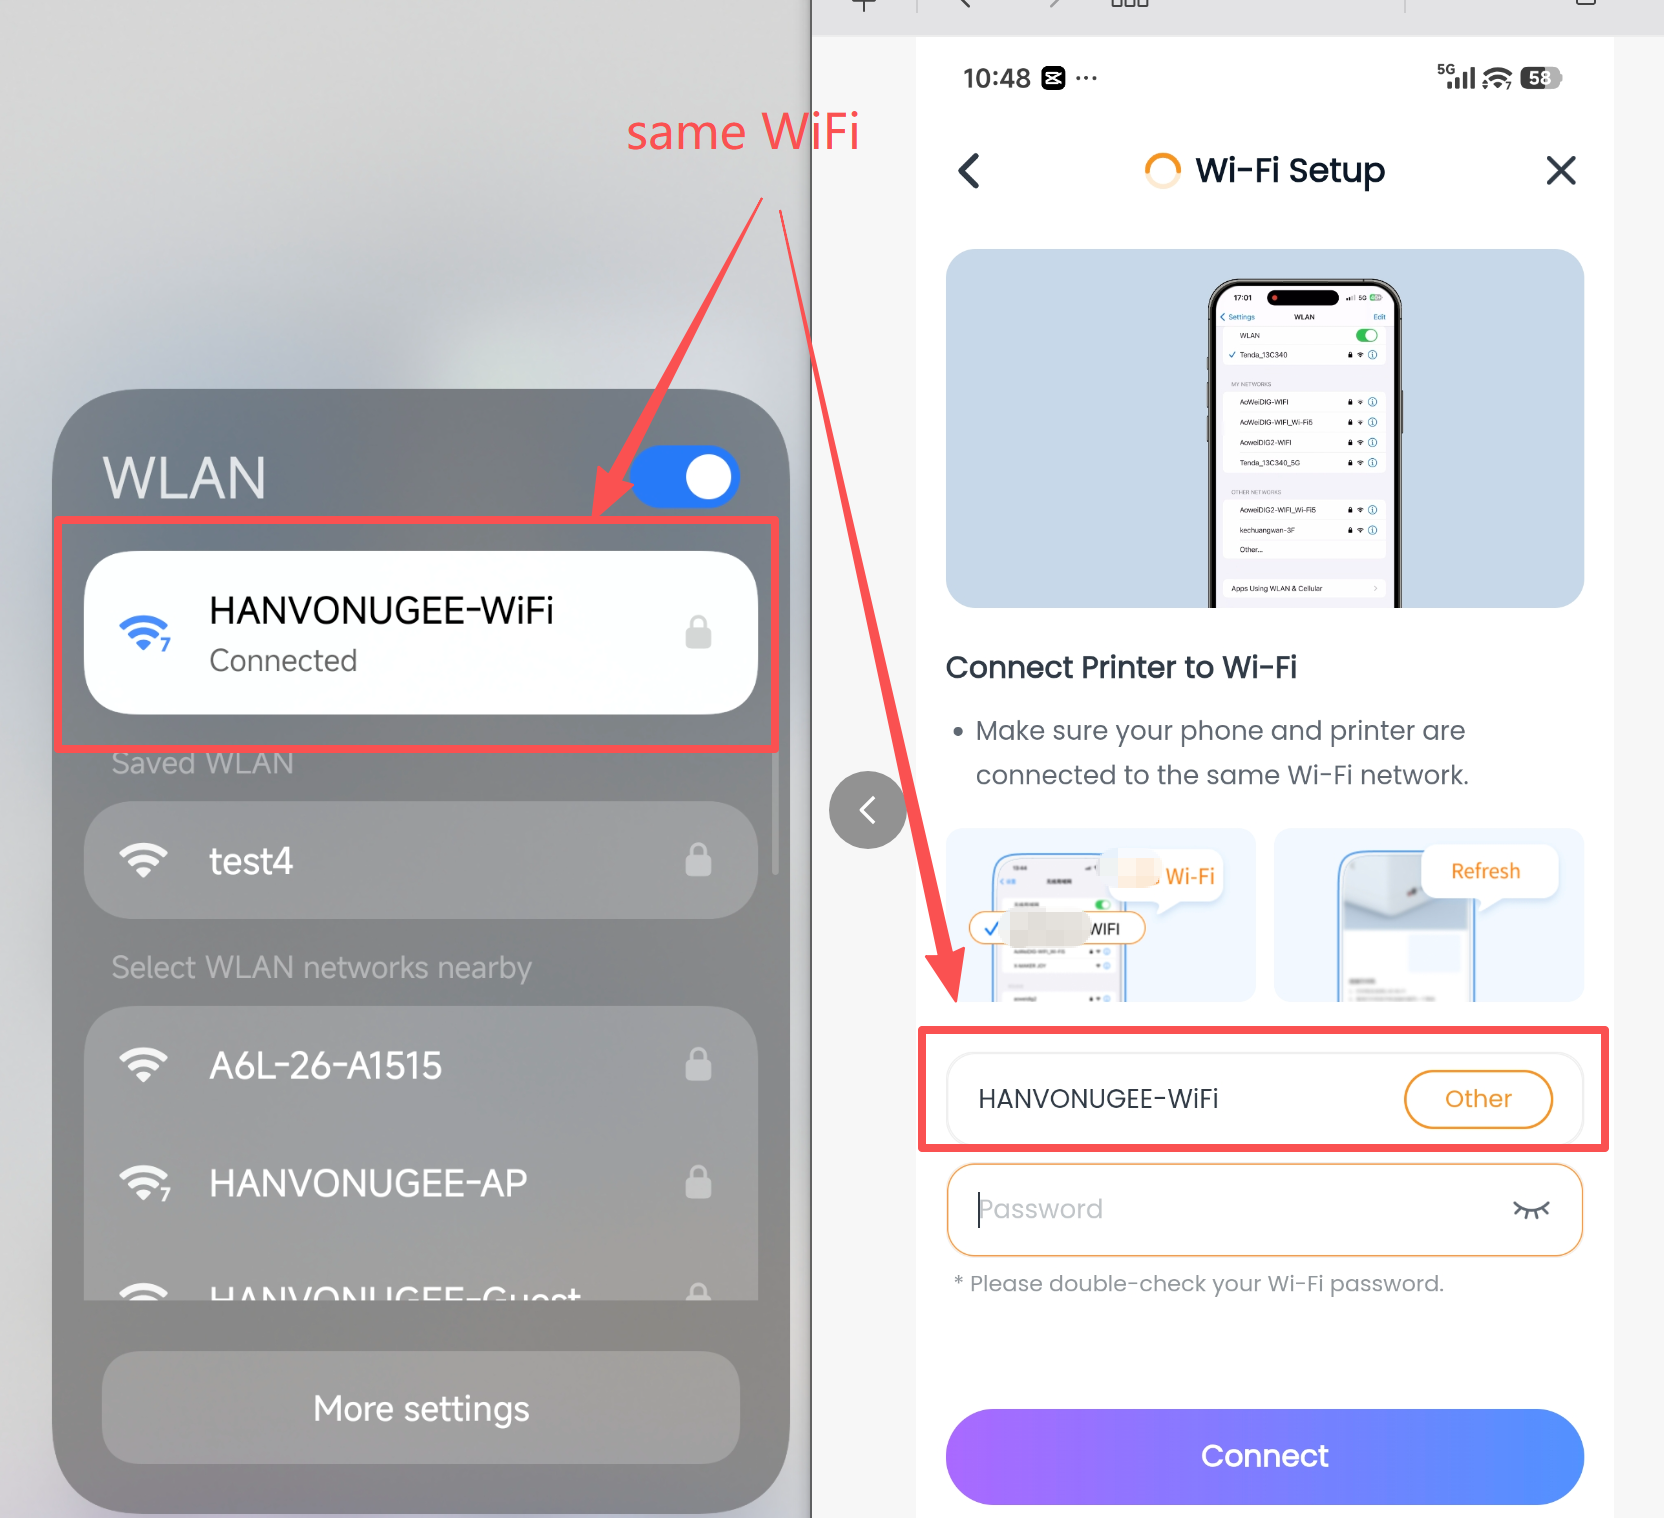
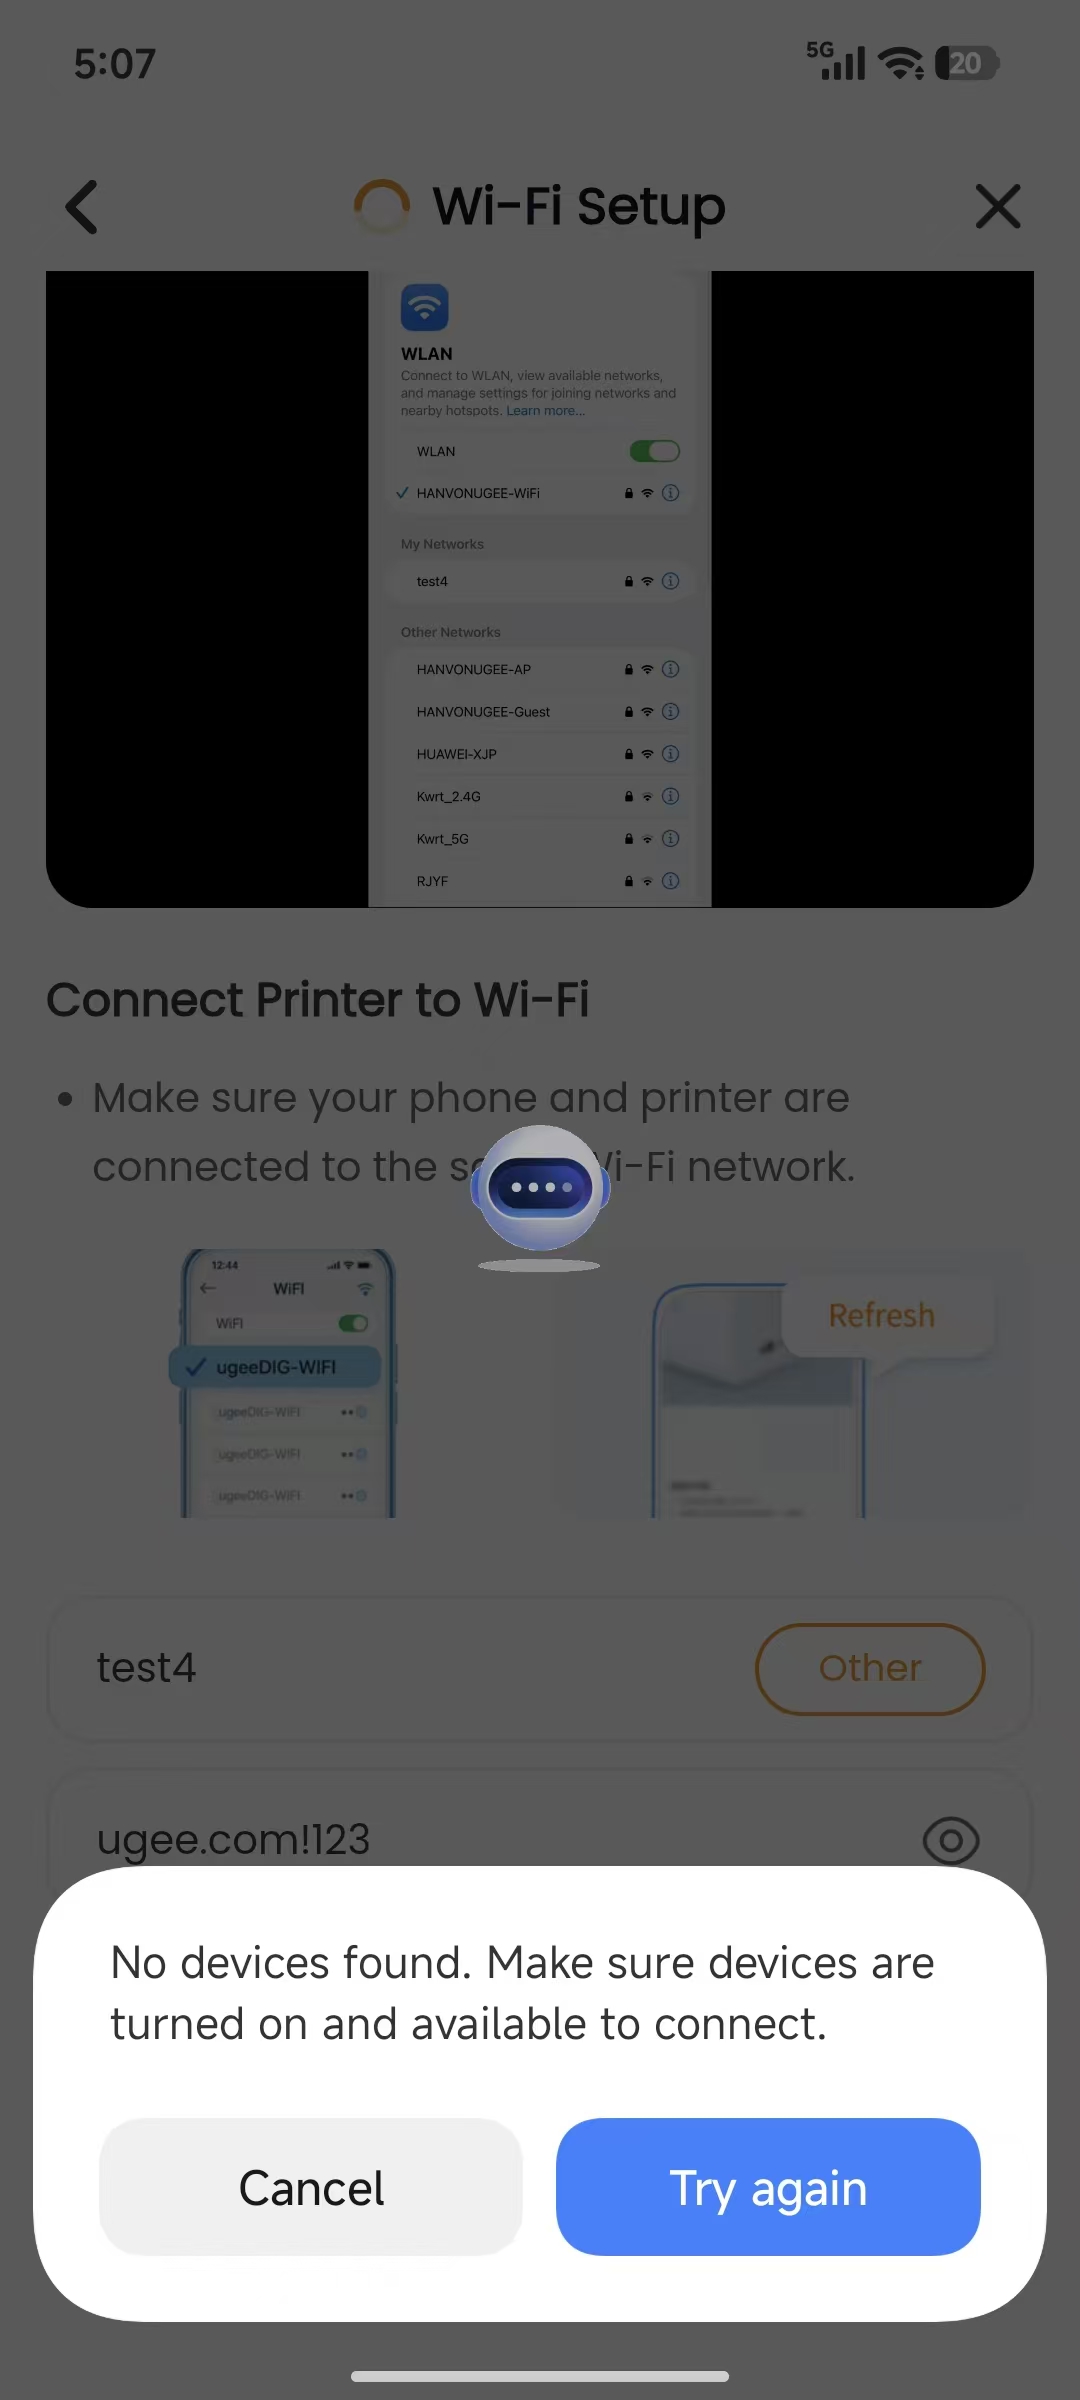
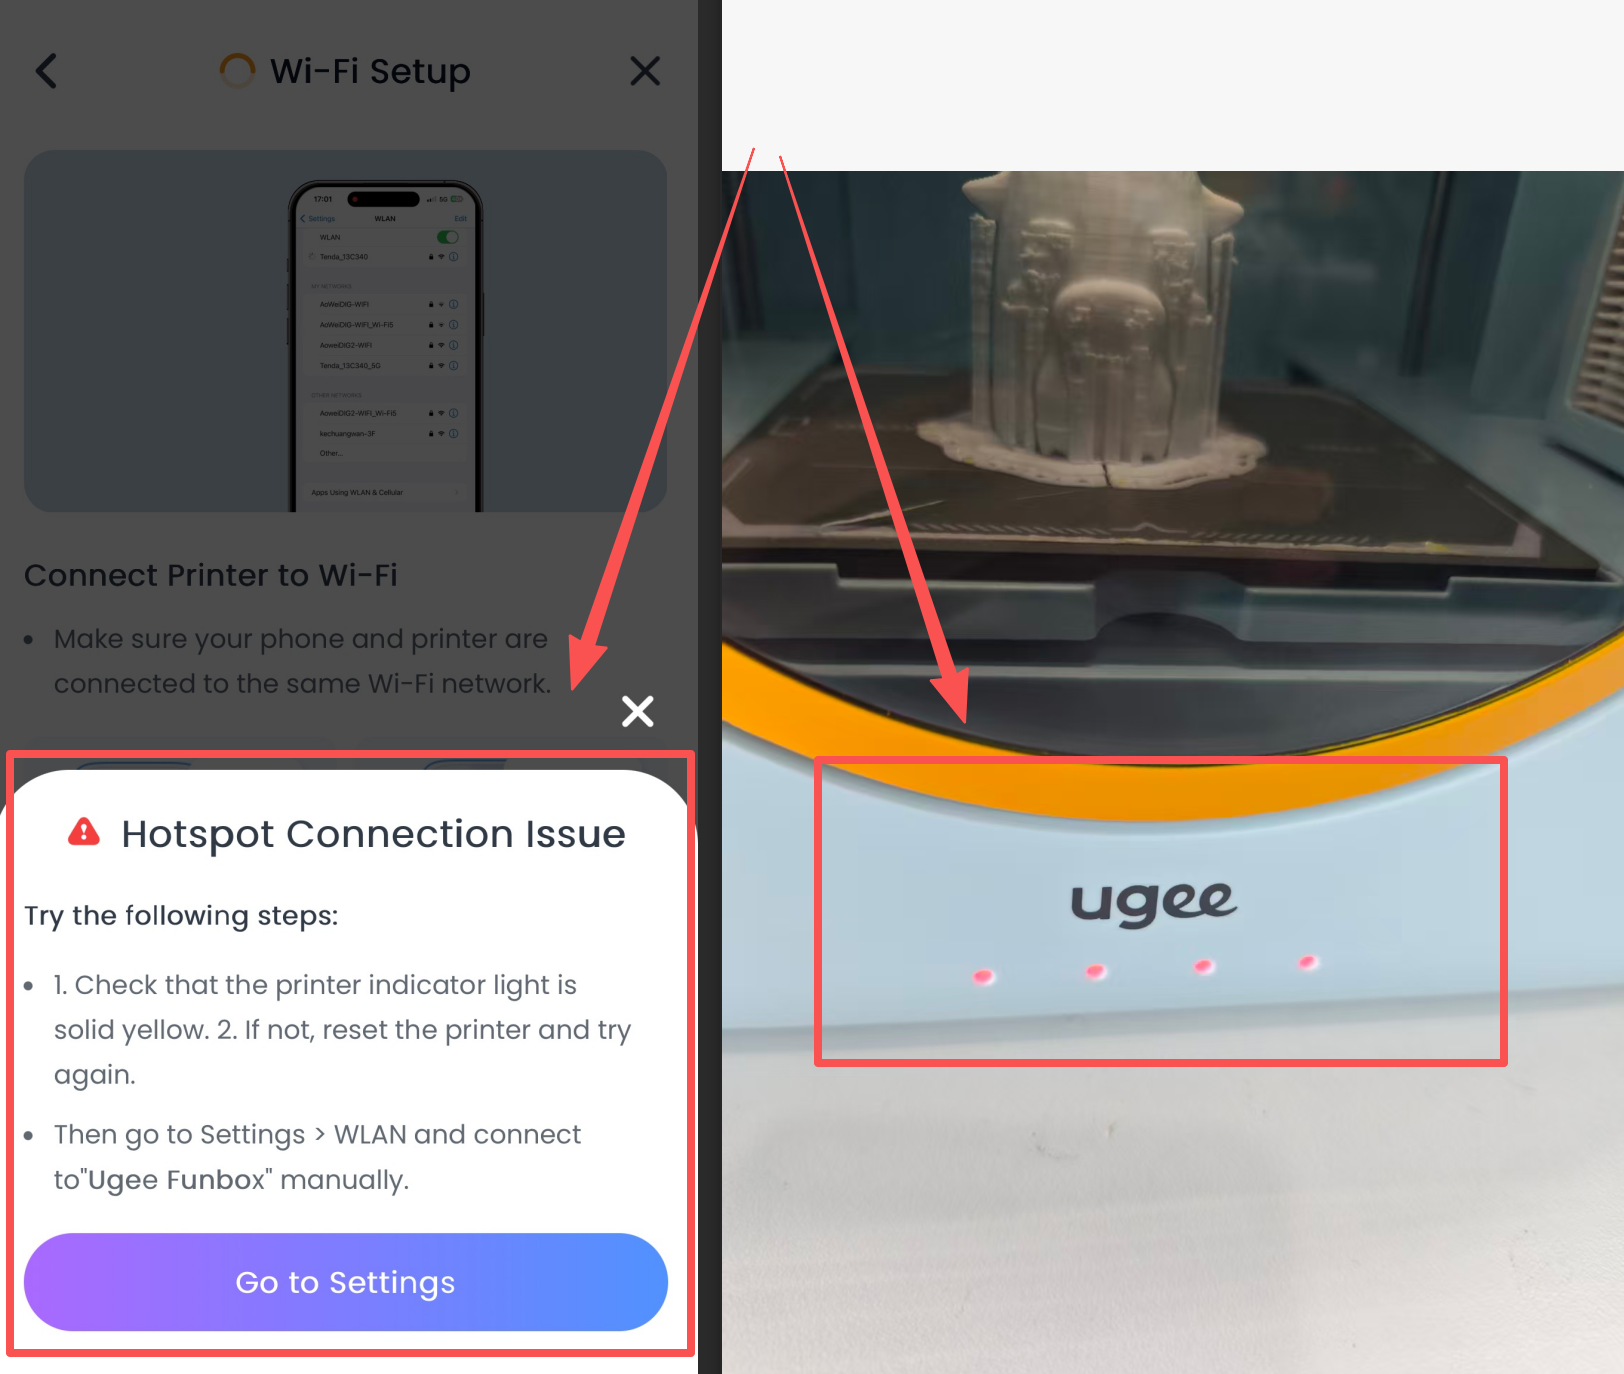
Step 3: If the phone displays an error pop-up saying that it cannot connect to the hotspot:
Action 1: If the printer status light is red, press and hold the red button on the back of the printer until the indicator becomes solid yellow. Then exit the app and restart the printer network configuration process.
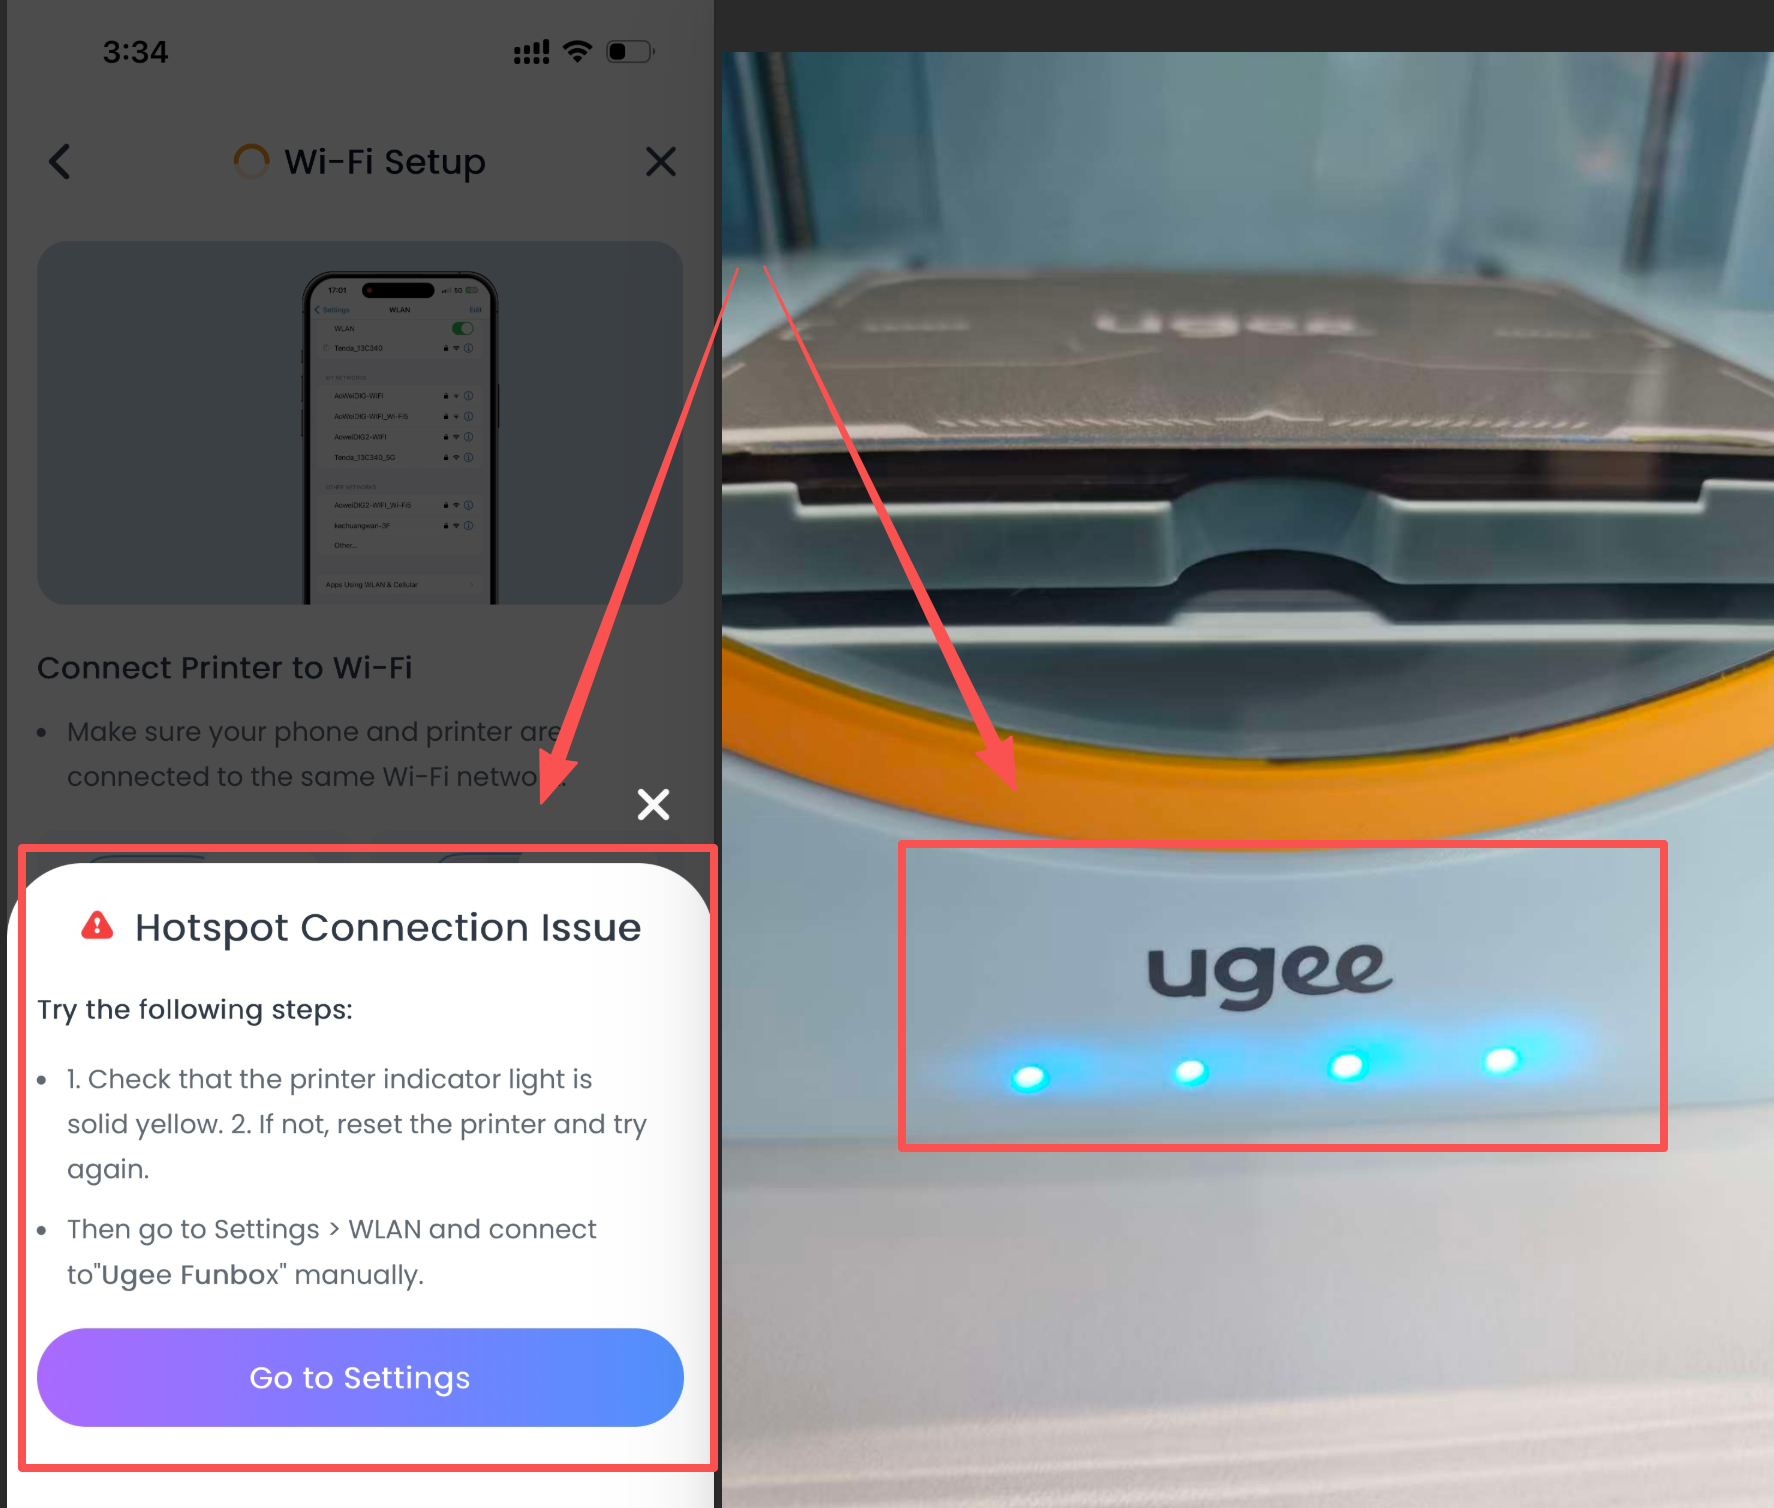
Action 2: If the printer status light is solid blue and you heard a beep, the phone has actually connected to the printer, but the app reported an error due to network latency. Restart the app and tap the Device button to confirm that the printer is connected.
Step 4: If you followed all on-screen instructions but still cannot connect, turn off the printer and press the red button again until the yellow light remains on. Then remove the connected printer and pair it again.
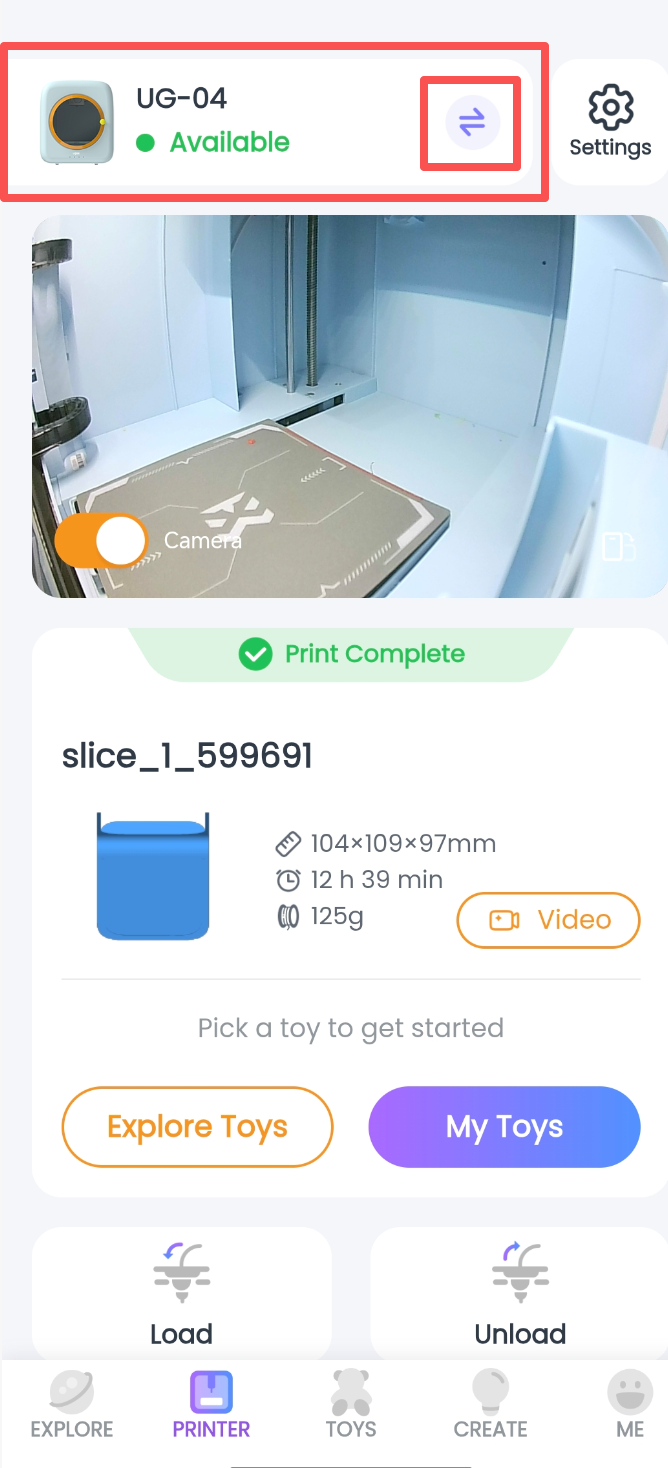
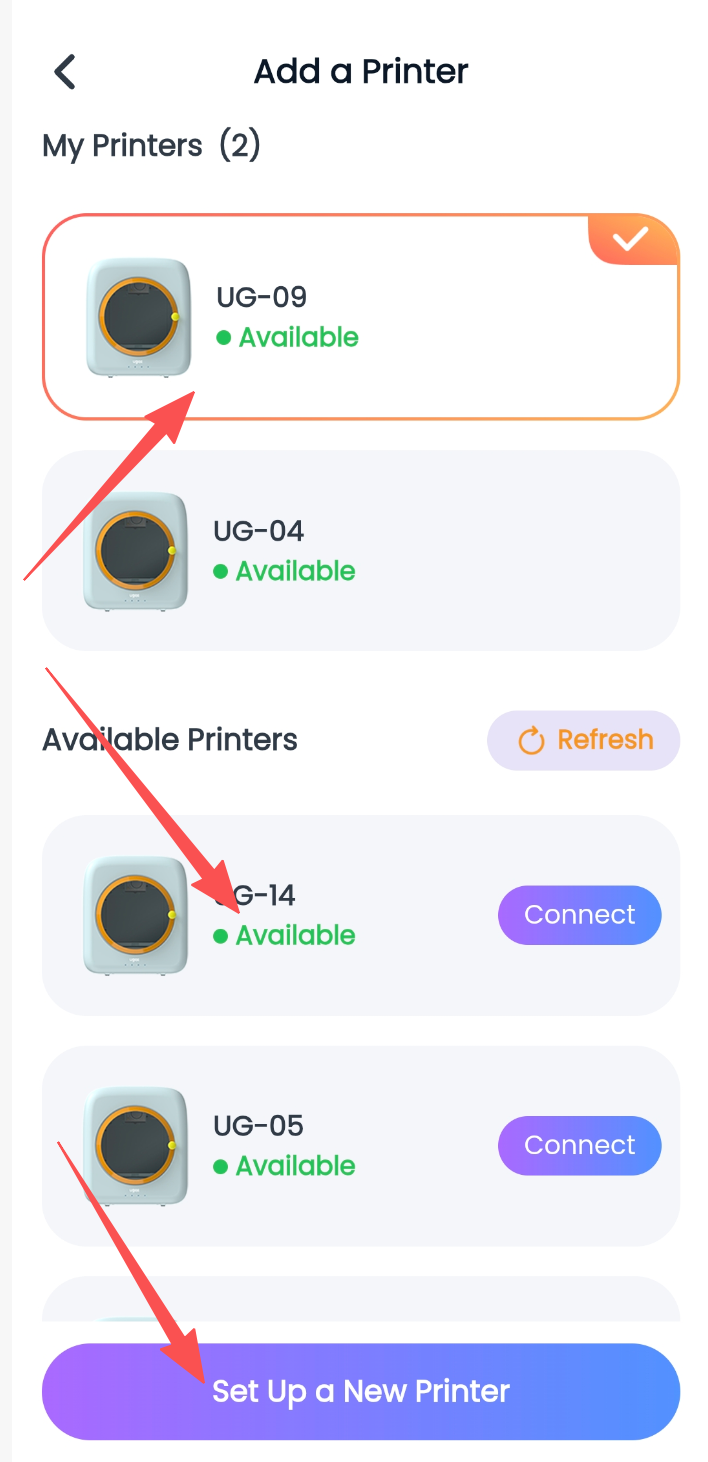
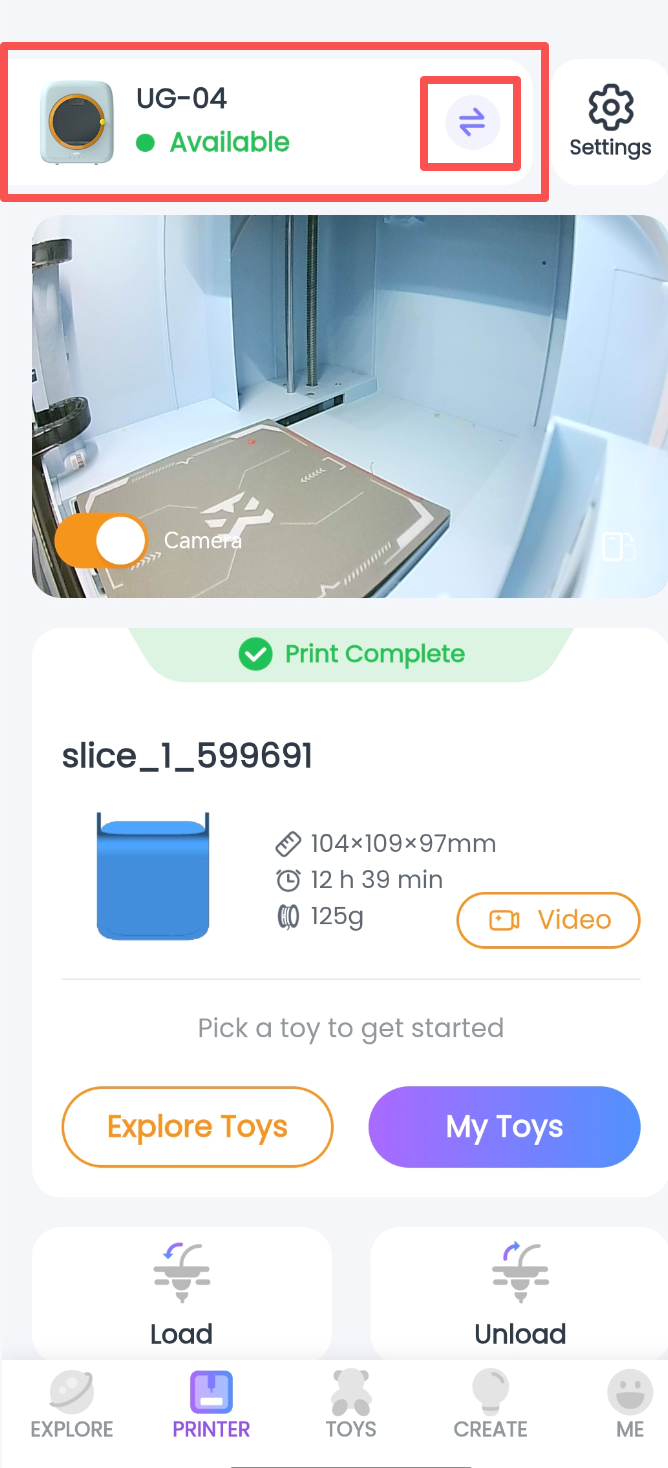
Step 4-1: Tap the “Device” button at the bottom of the app, then tap the “Switch” button for the connected printer at the top.
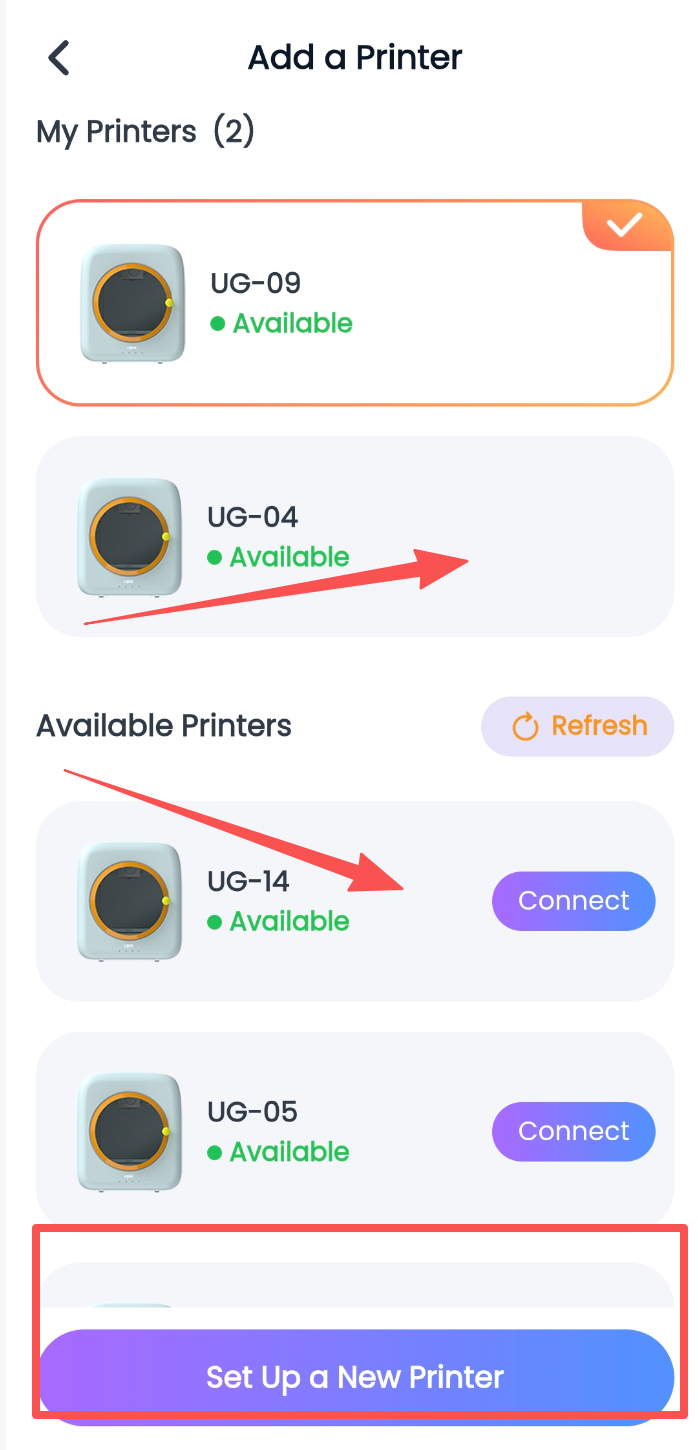
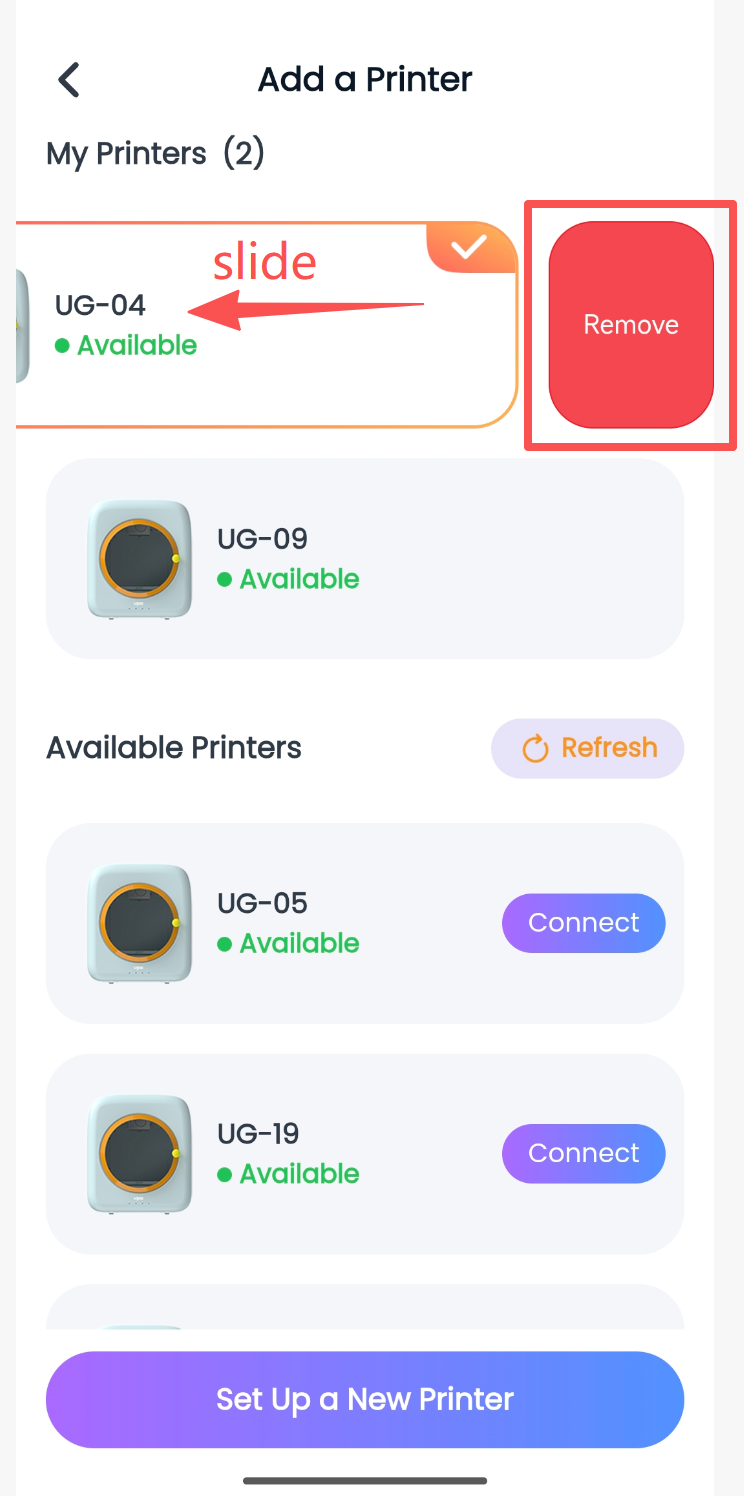
Step 4-2: Open the Add Printer page and view the My Printers list.
Step 4-3: Swipe left on every device in My Printers and tap “Unbind.”
Step 4-4: When the “Binding successful” message appears, select “Configure a new printer” to start reconnecting and configuring the network.
Step 4-1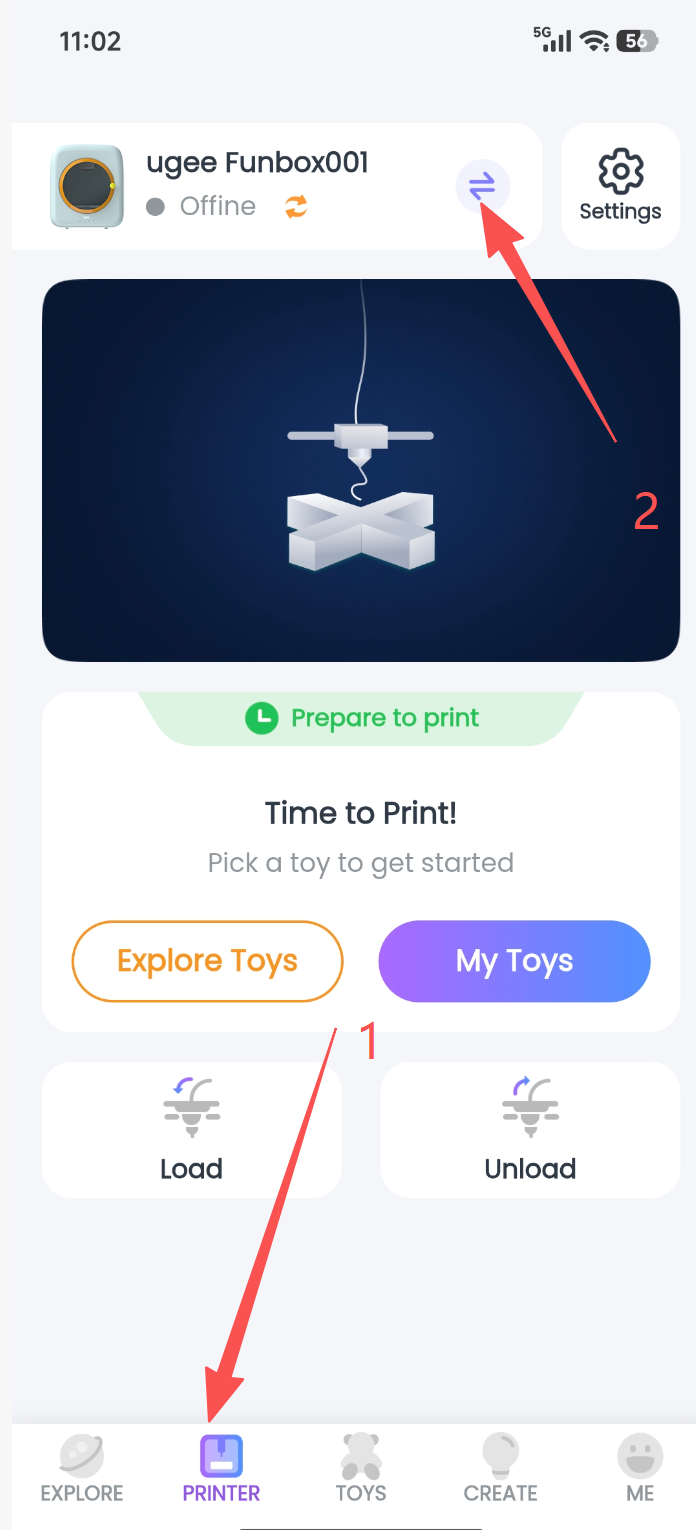
Step 4-2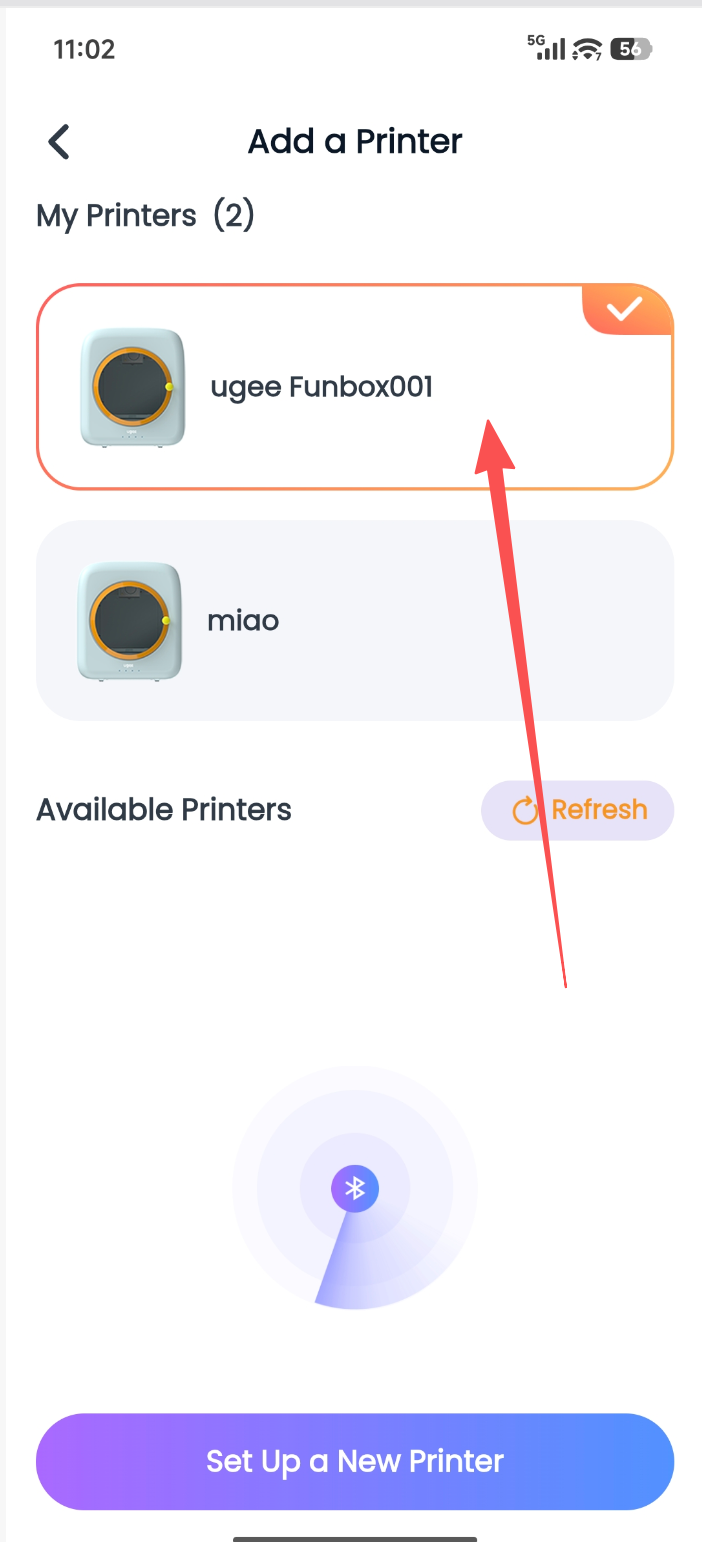
Step 4-3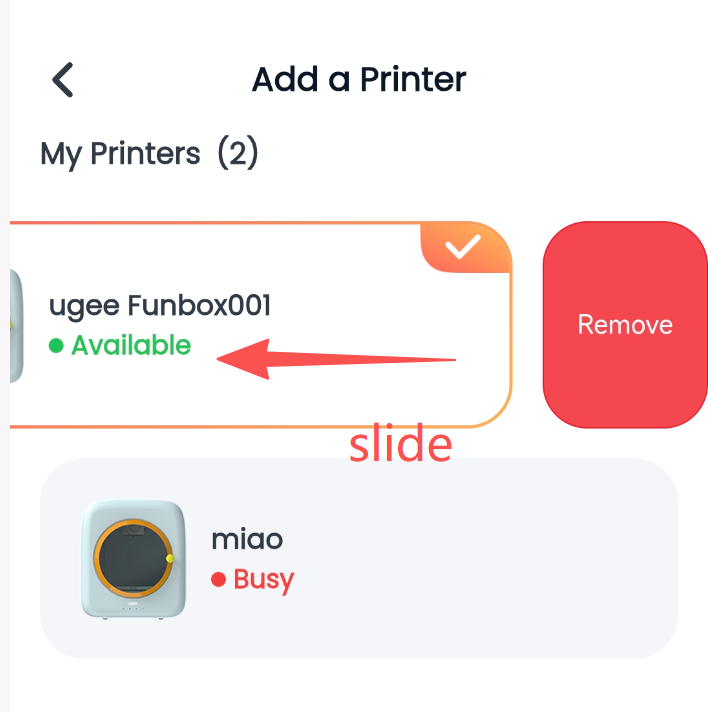
Step 4-4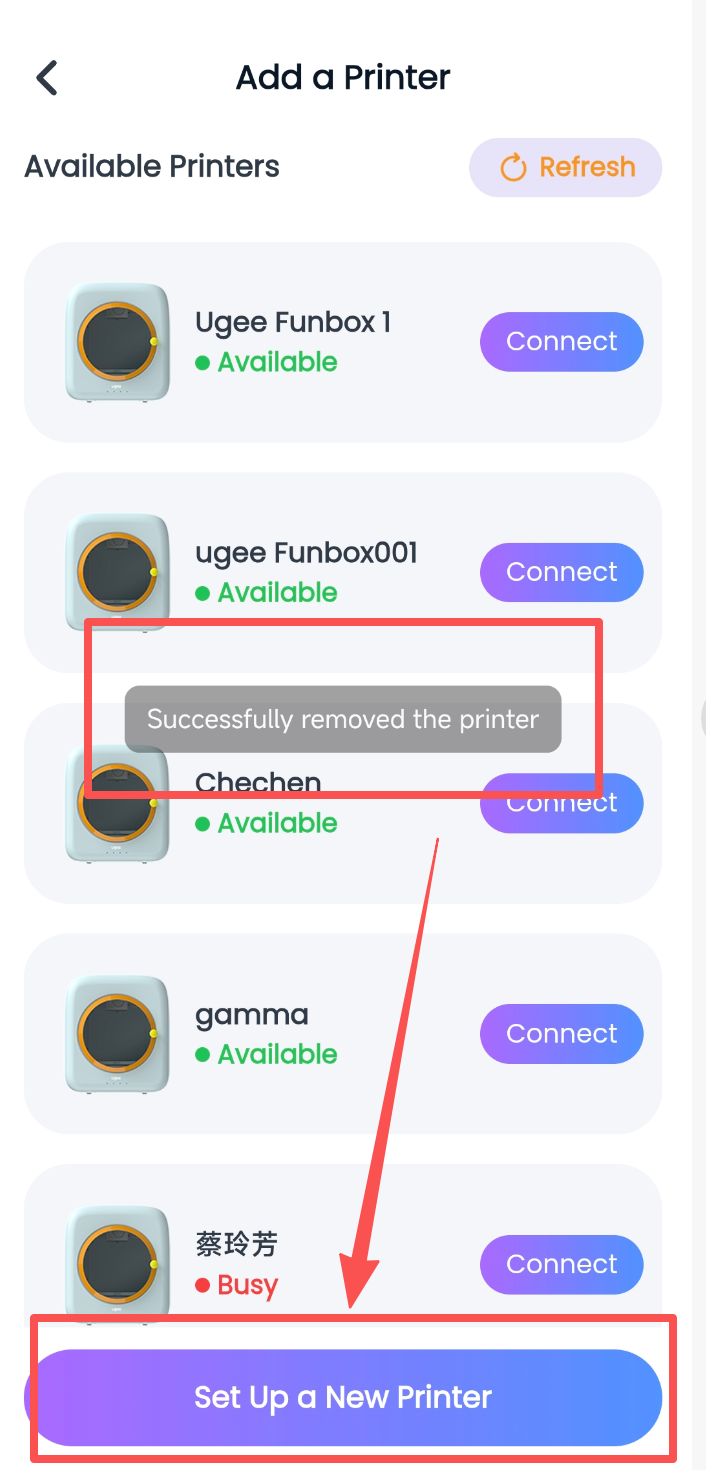
③ Filament Loading
For filament loading, tap “View Video” in the upper-right corner of the loading page to watch the corresponding operation video.
Note:
Q1: Why can’t I push the filament in?
A1: ① Check whether the end of the filament is cut as shown below, and cut it accordingly. ② Insert the filament upward into the filament inlet as shown in Figure 2. ③ Press the orange latch upward while pushing the filament upward.
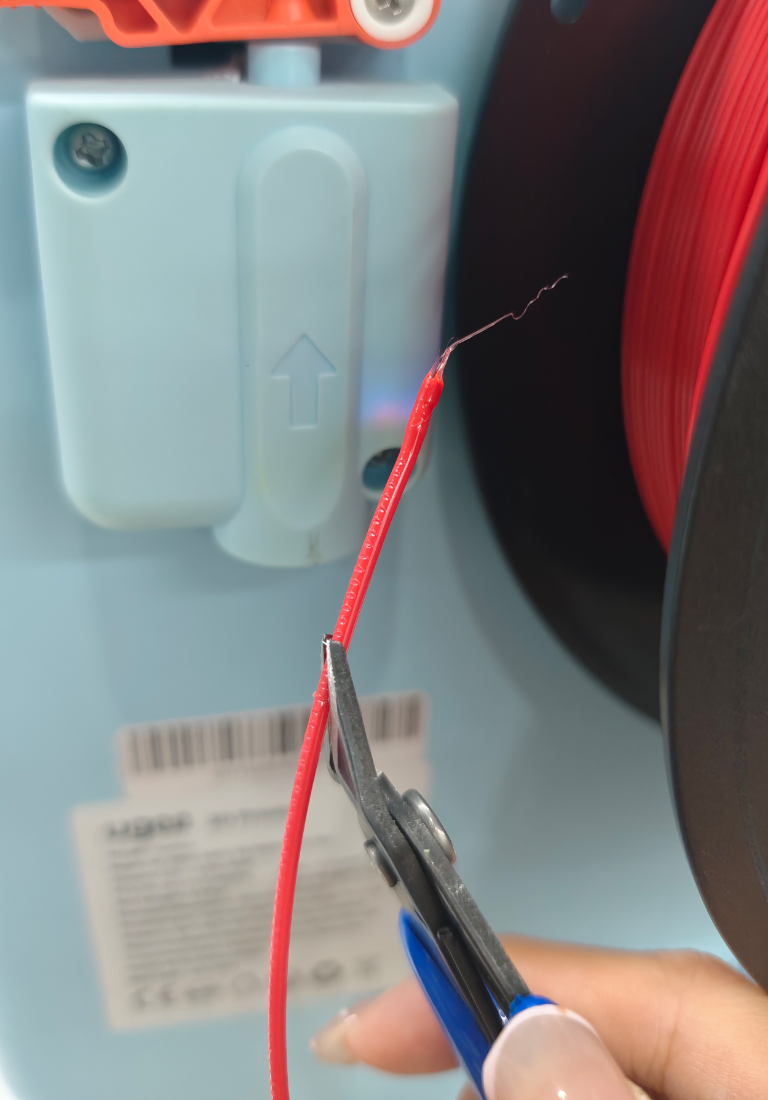
4.4.2 Print Process Management
• Printer Connection Status Display
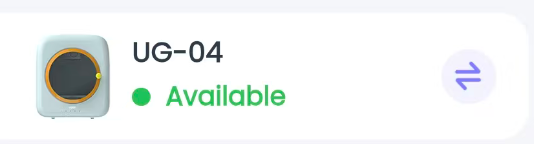
There are five connection states:
• Not Connected: The app is not connected to a printer, and the “Add Printer” button is displayed.
• Idle: The app is connected to the printer and a model is being printed; the “Idle” status is displayed.
• Busy: The app is connected to the printer and there is currently no print task; the “Busy” status is displayed.
• Connecting: This status appears when the app and printer are not on the same network, Wi-Fi is disabled in the app, or the Wi-Fi connection is poor.
• Offline: This status appears when the printer is powered off or cannot connect for an extended period.
Printer Connection Status Display
Connection Status
Not Connected
Busy
Idle
Connecting:
Offline
Connection Status Screen
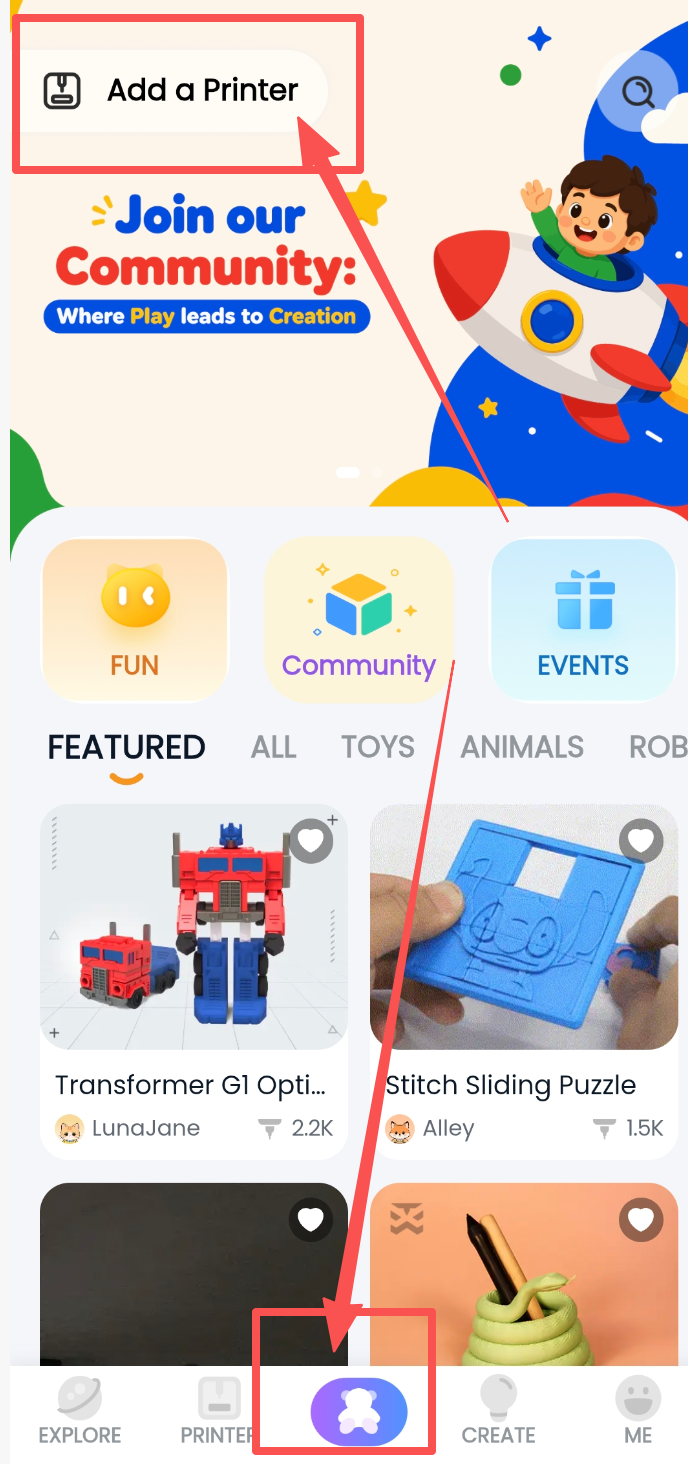
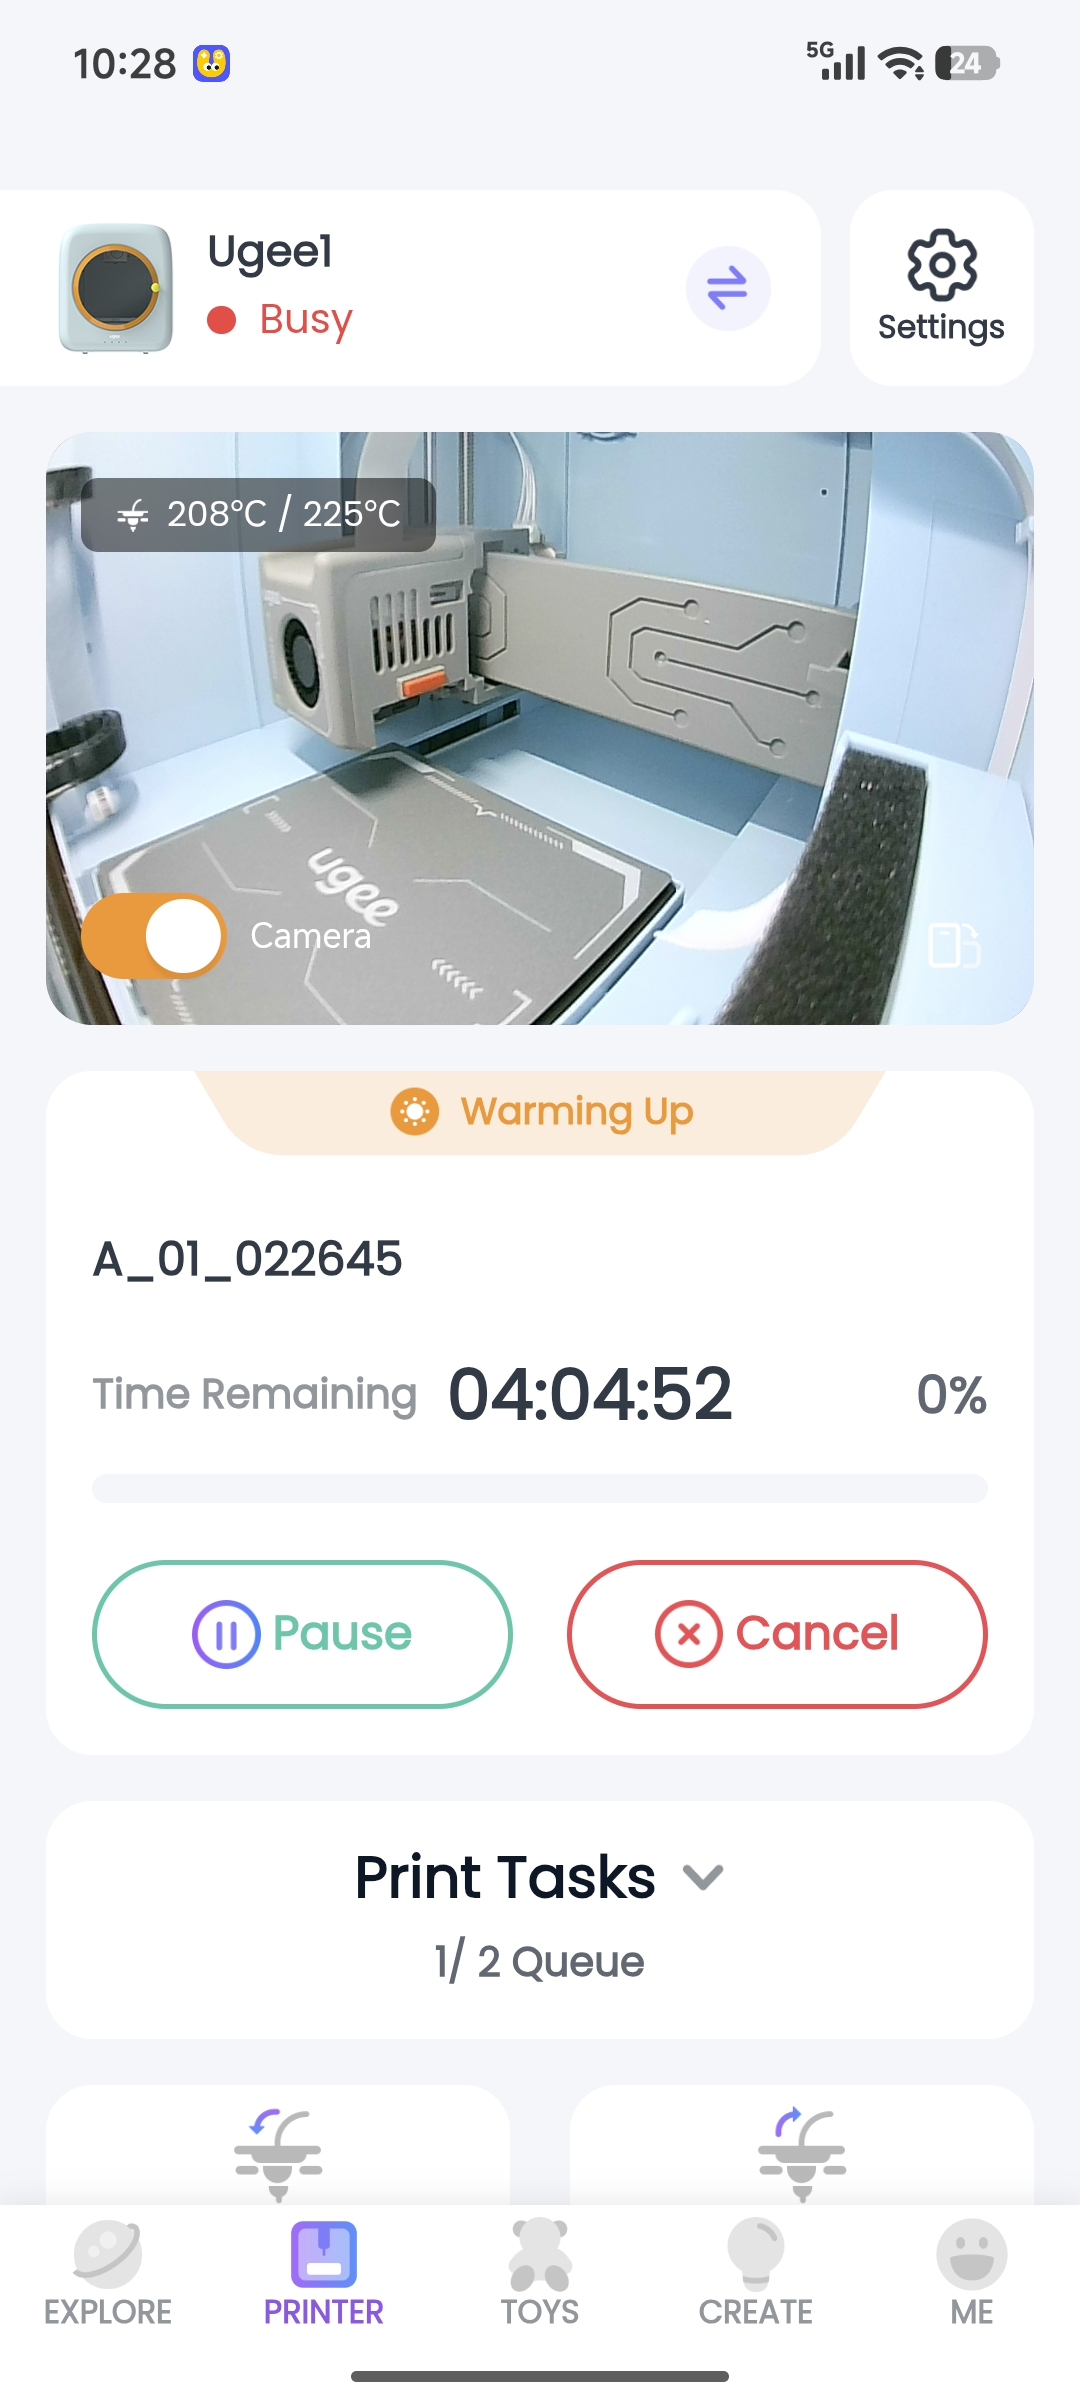
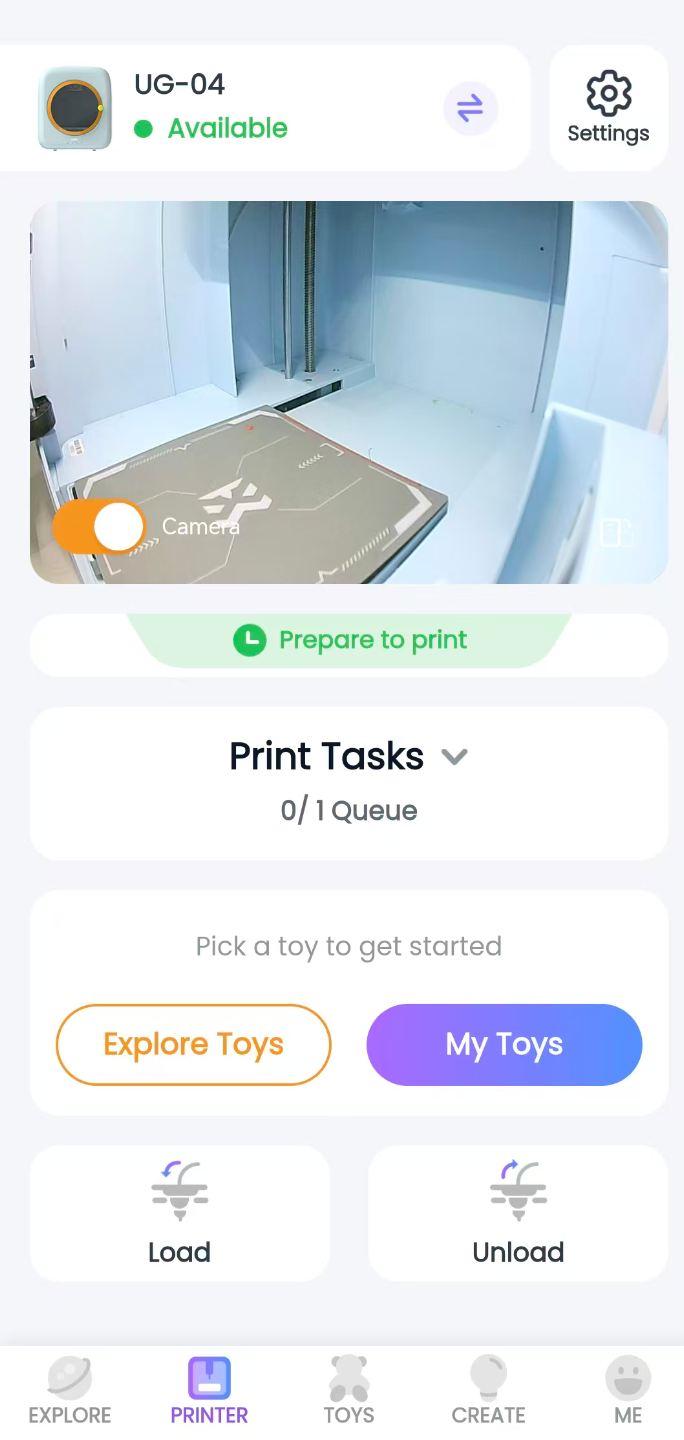
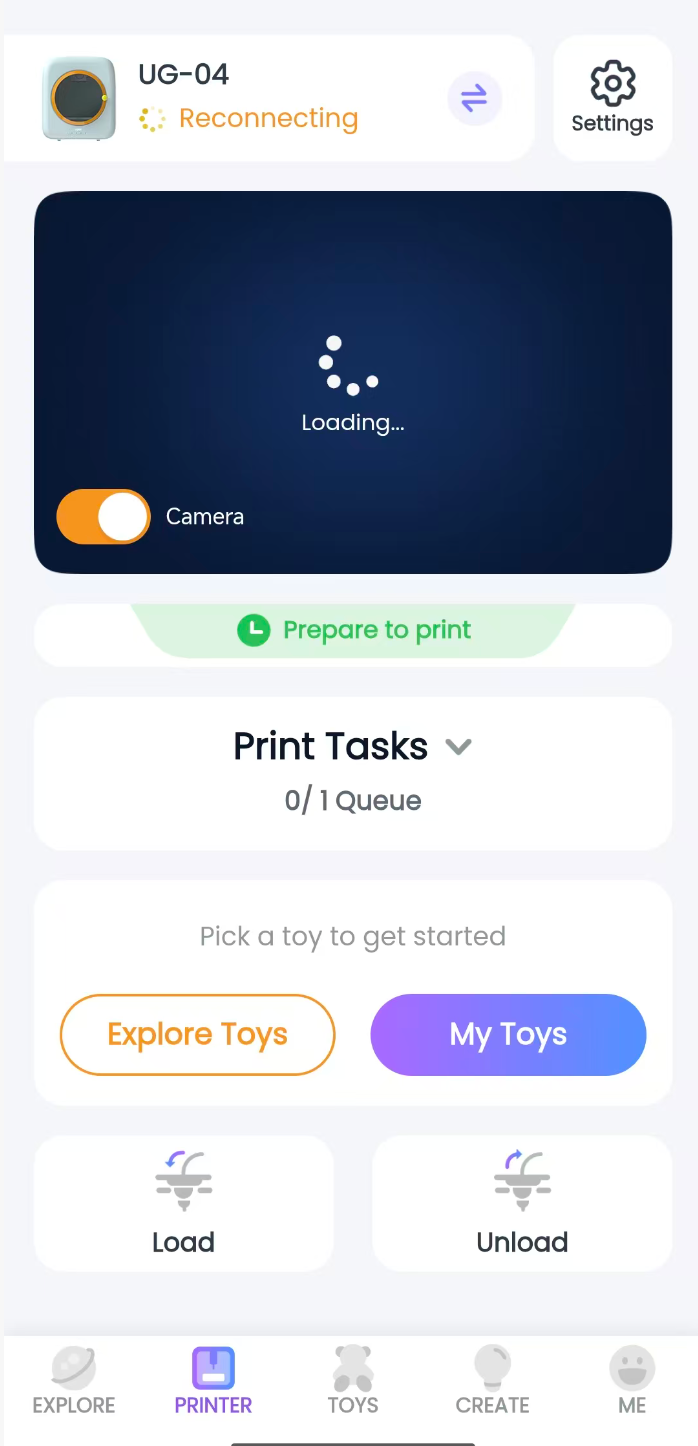
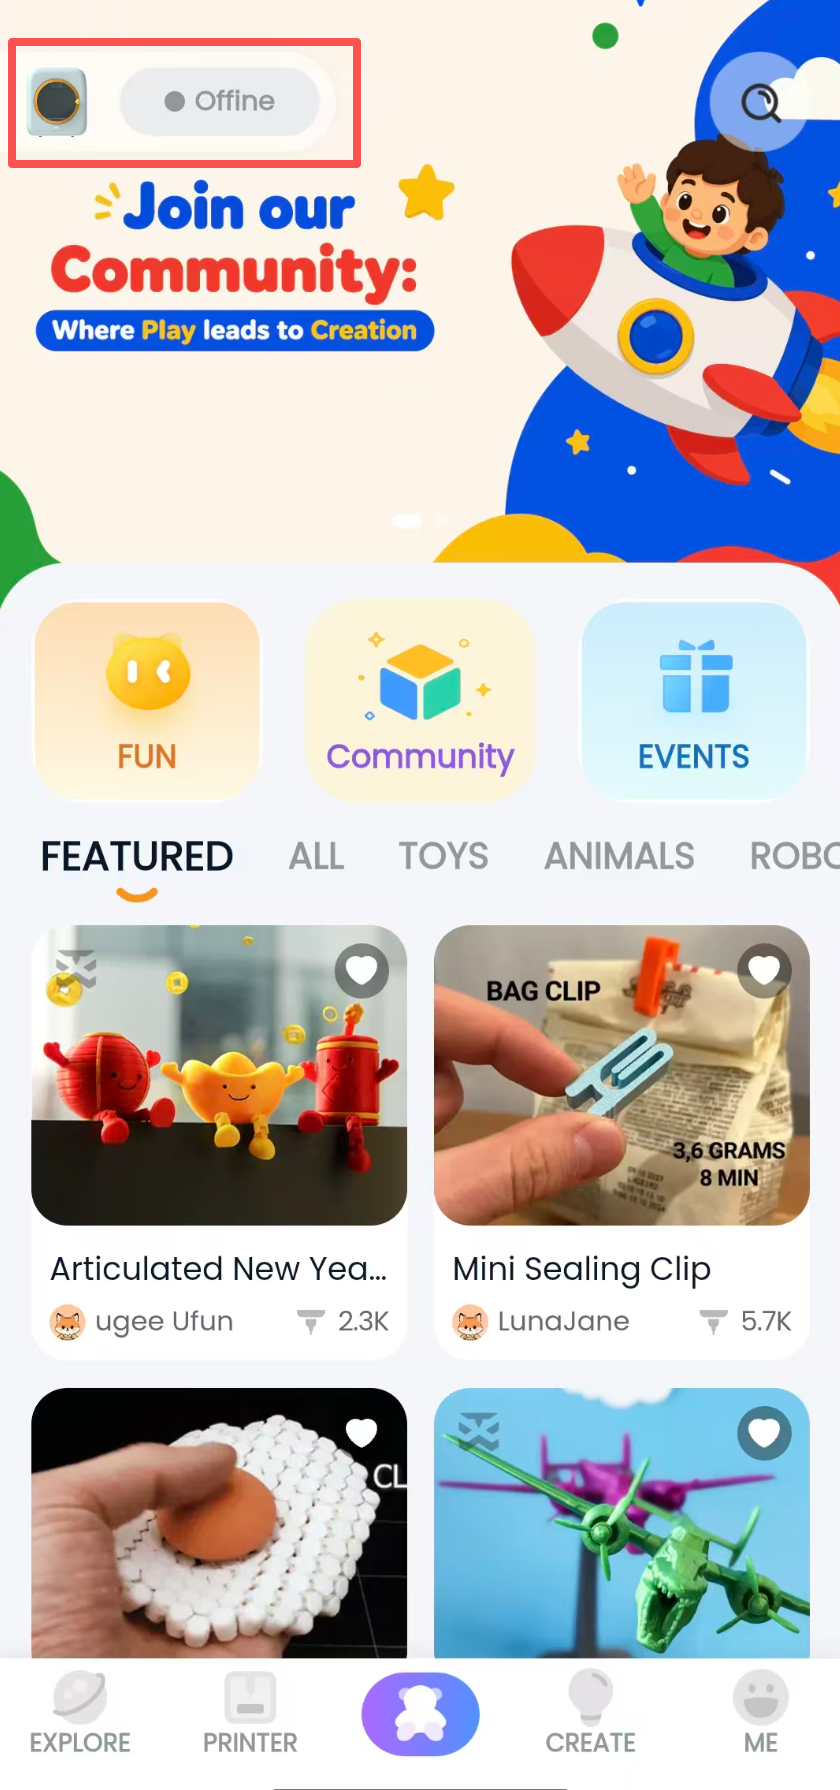
• Printer Switch Button
Switch button: Tap this button to connect to another printer or pair the printer again.
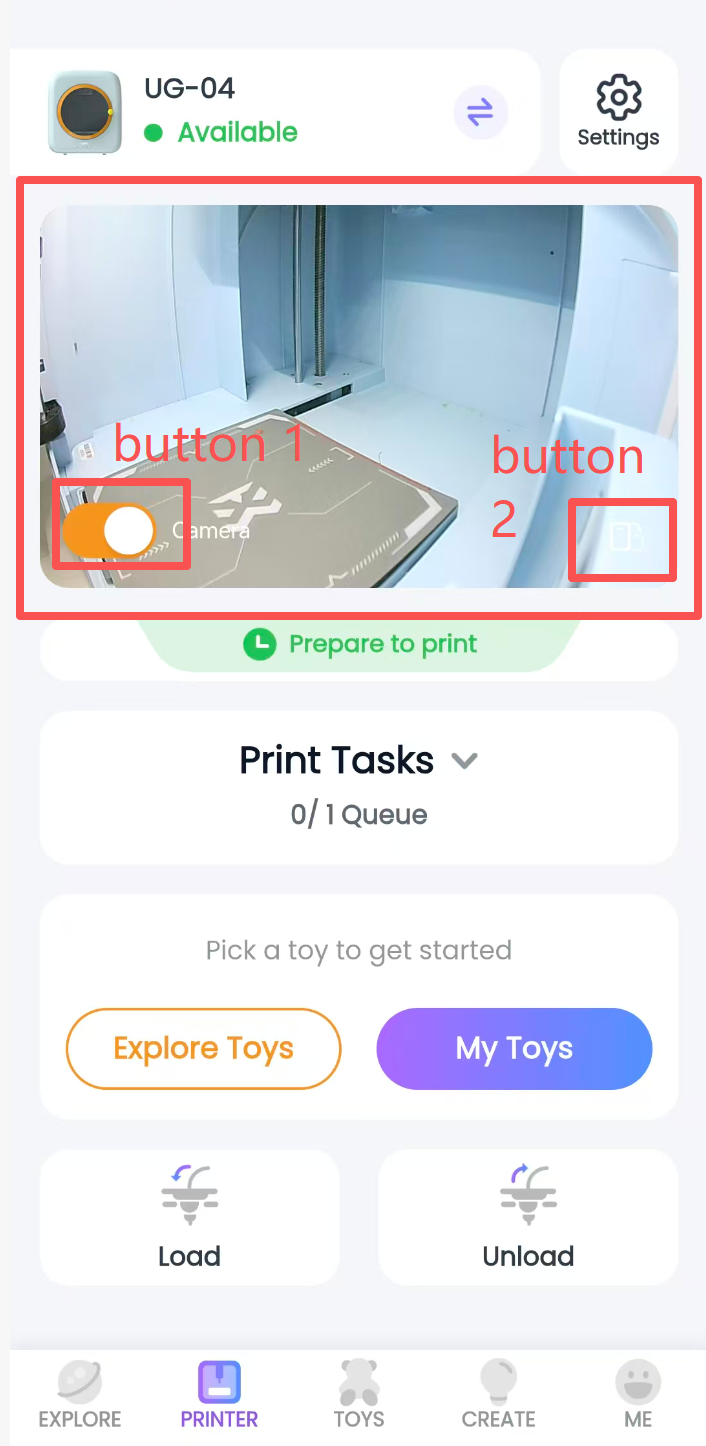
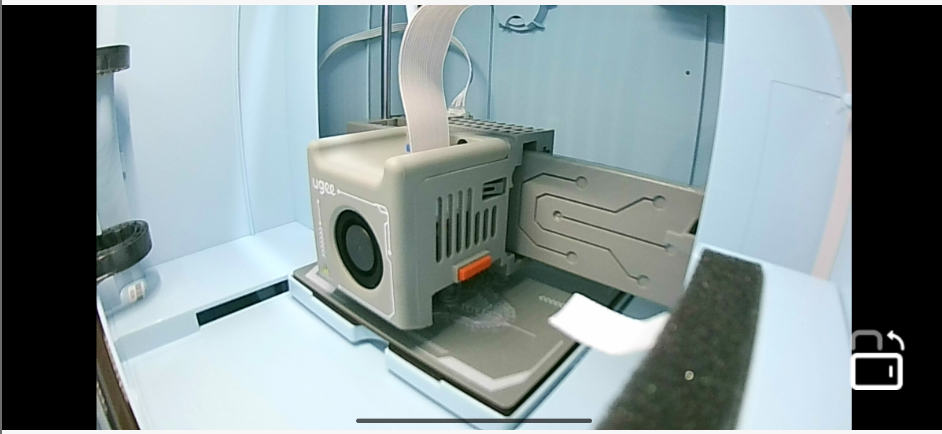
• Live Camera View
• Button 1: Camera switch. Turn it on or off to enable or disable the camera.
• Button 2: Screen view. Tap it to enlarge the video display.
Note:
Q1: Can I view the camera at any time and from anywhere?
A1: The printer and mobile device must be on the same network.
• Print Task Controls
• Printer task control has two states. When there is no print task, it shows the "Not Printing" state, as shown in Figure 1;
- Explore Toys Button: Tap to open the TOY page.
- My Models Button: Tap to open Print History under the Me page.
• When there is an active print task, it shows the "Printing" state, as shown in Figure 2;
- Print Process Information: Heating (nozzle heating) -> Printing (model printing), model name, and print duration.
- Pause Button: During printing, tap “Pause.” The software will pause printing within two minutes, and the “Pause” button will change to “Resume.”
- Cancel Button: During printing, tap “Cancel.” The software will cancel the print within two minutes.
- Resume Button: When a print task is paused, tap “Resume” to continue printing.
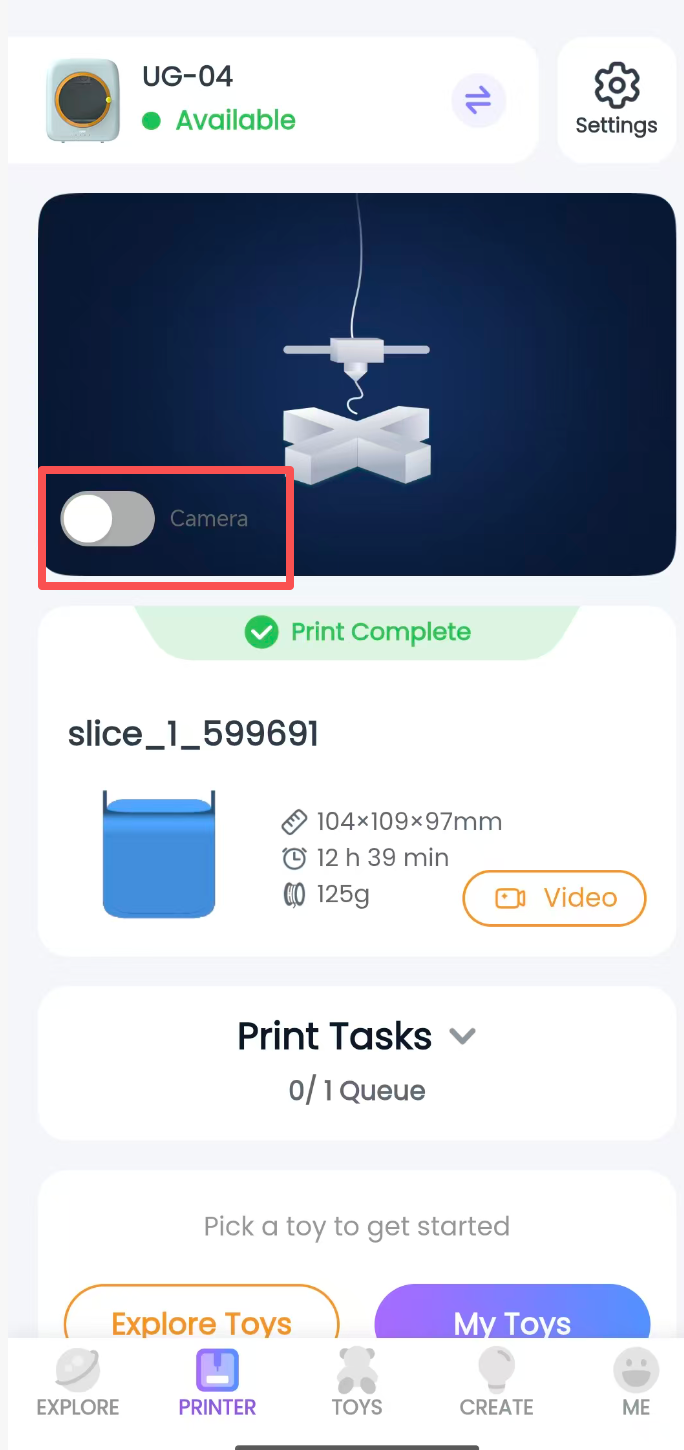
• When printing is complete, it shows the "Print Completed" state, as shown in Figure 3;
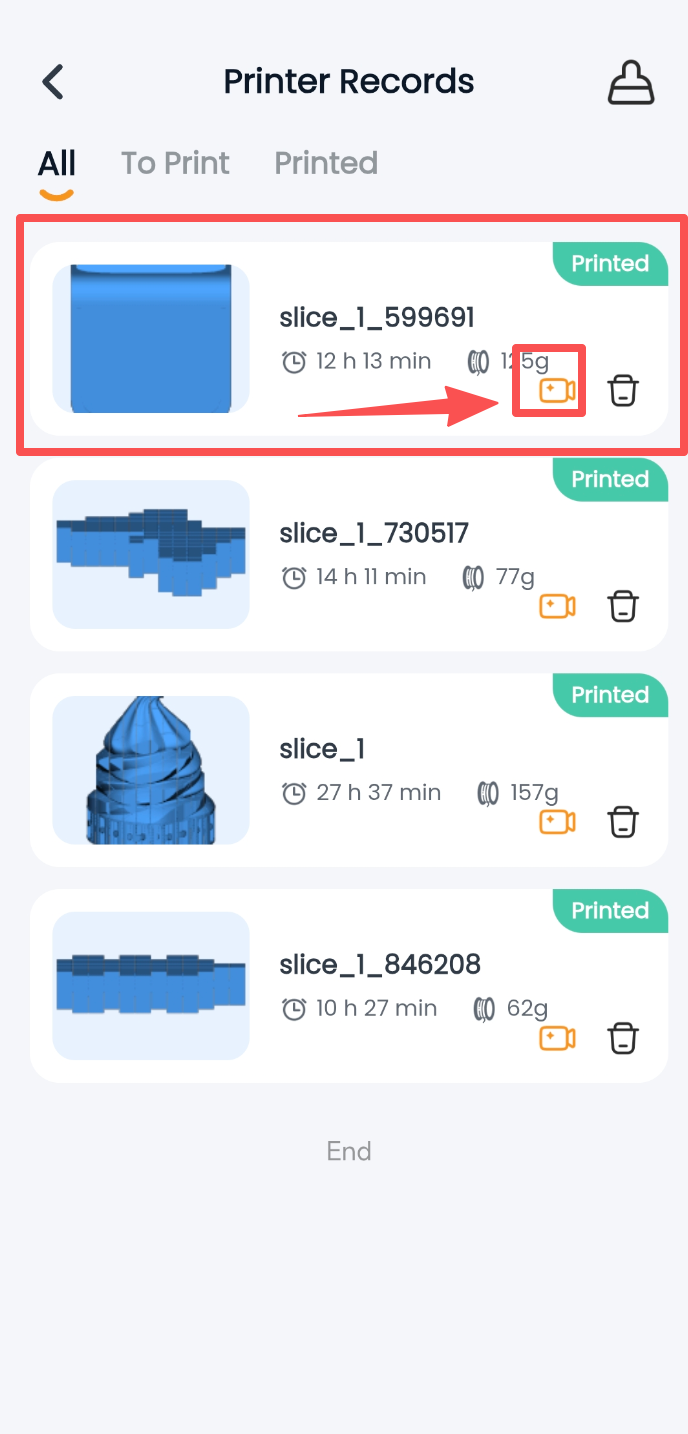
- When printing is complete, tap “Video” to download a 15-second video of the printing process. The video can be found in the phone’s photo album.
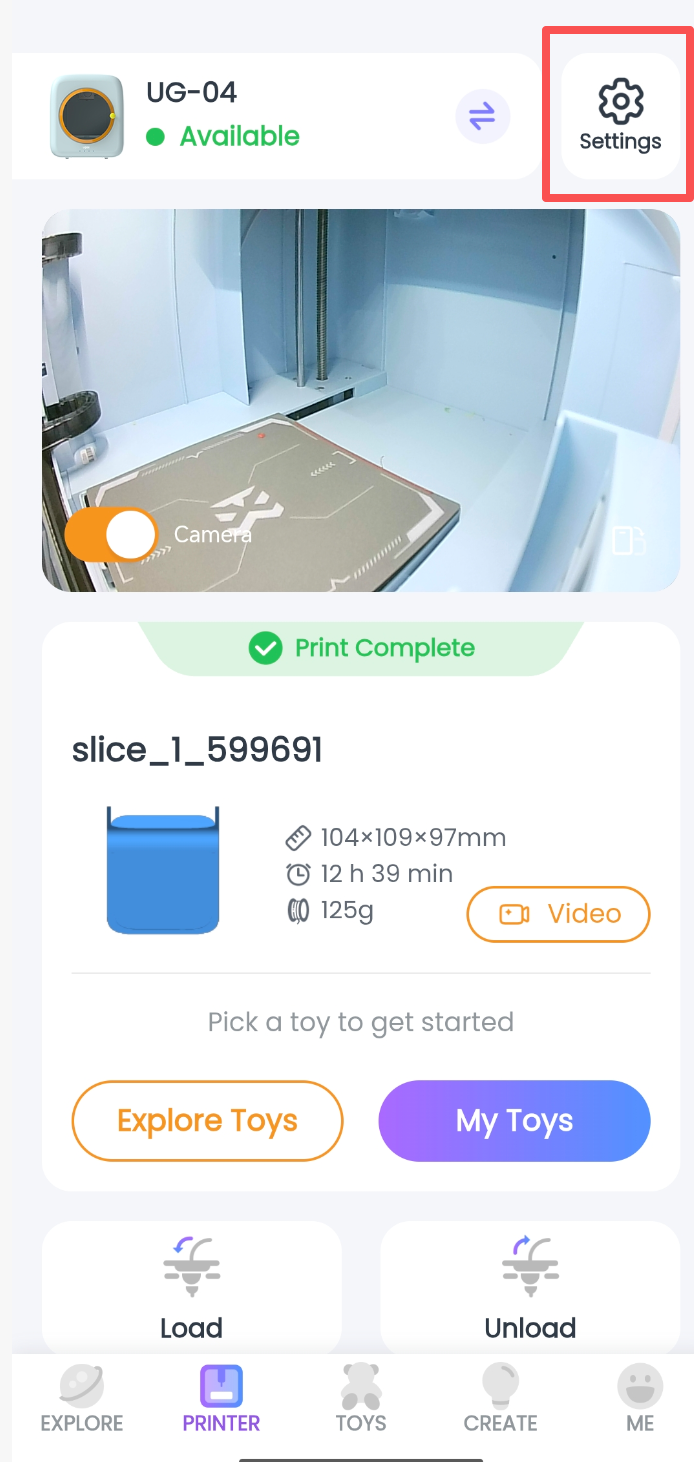
- After printing is complete, tap “Device” at the bottom to open the Device page -> tap “Settings” in the upper-right corner -> tap the printer icon in the upper-right corner -> tap any record with a yellow video icon to find the corresponding print-process video.
Not Printed
Printed
Print Completed
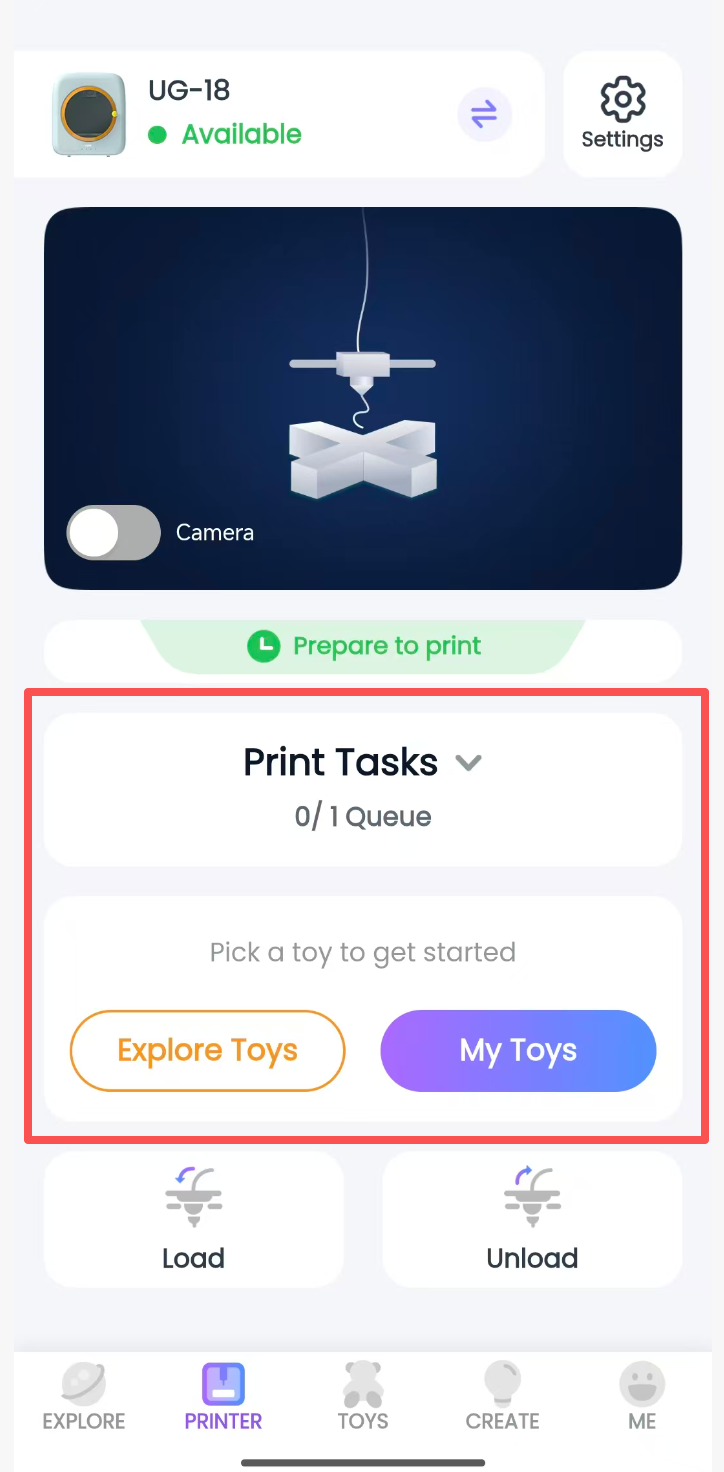
Figure 1
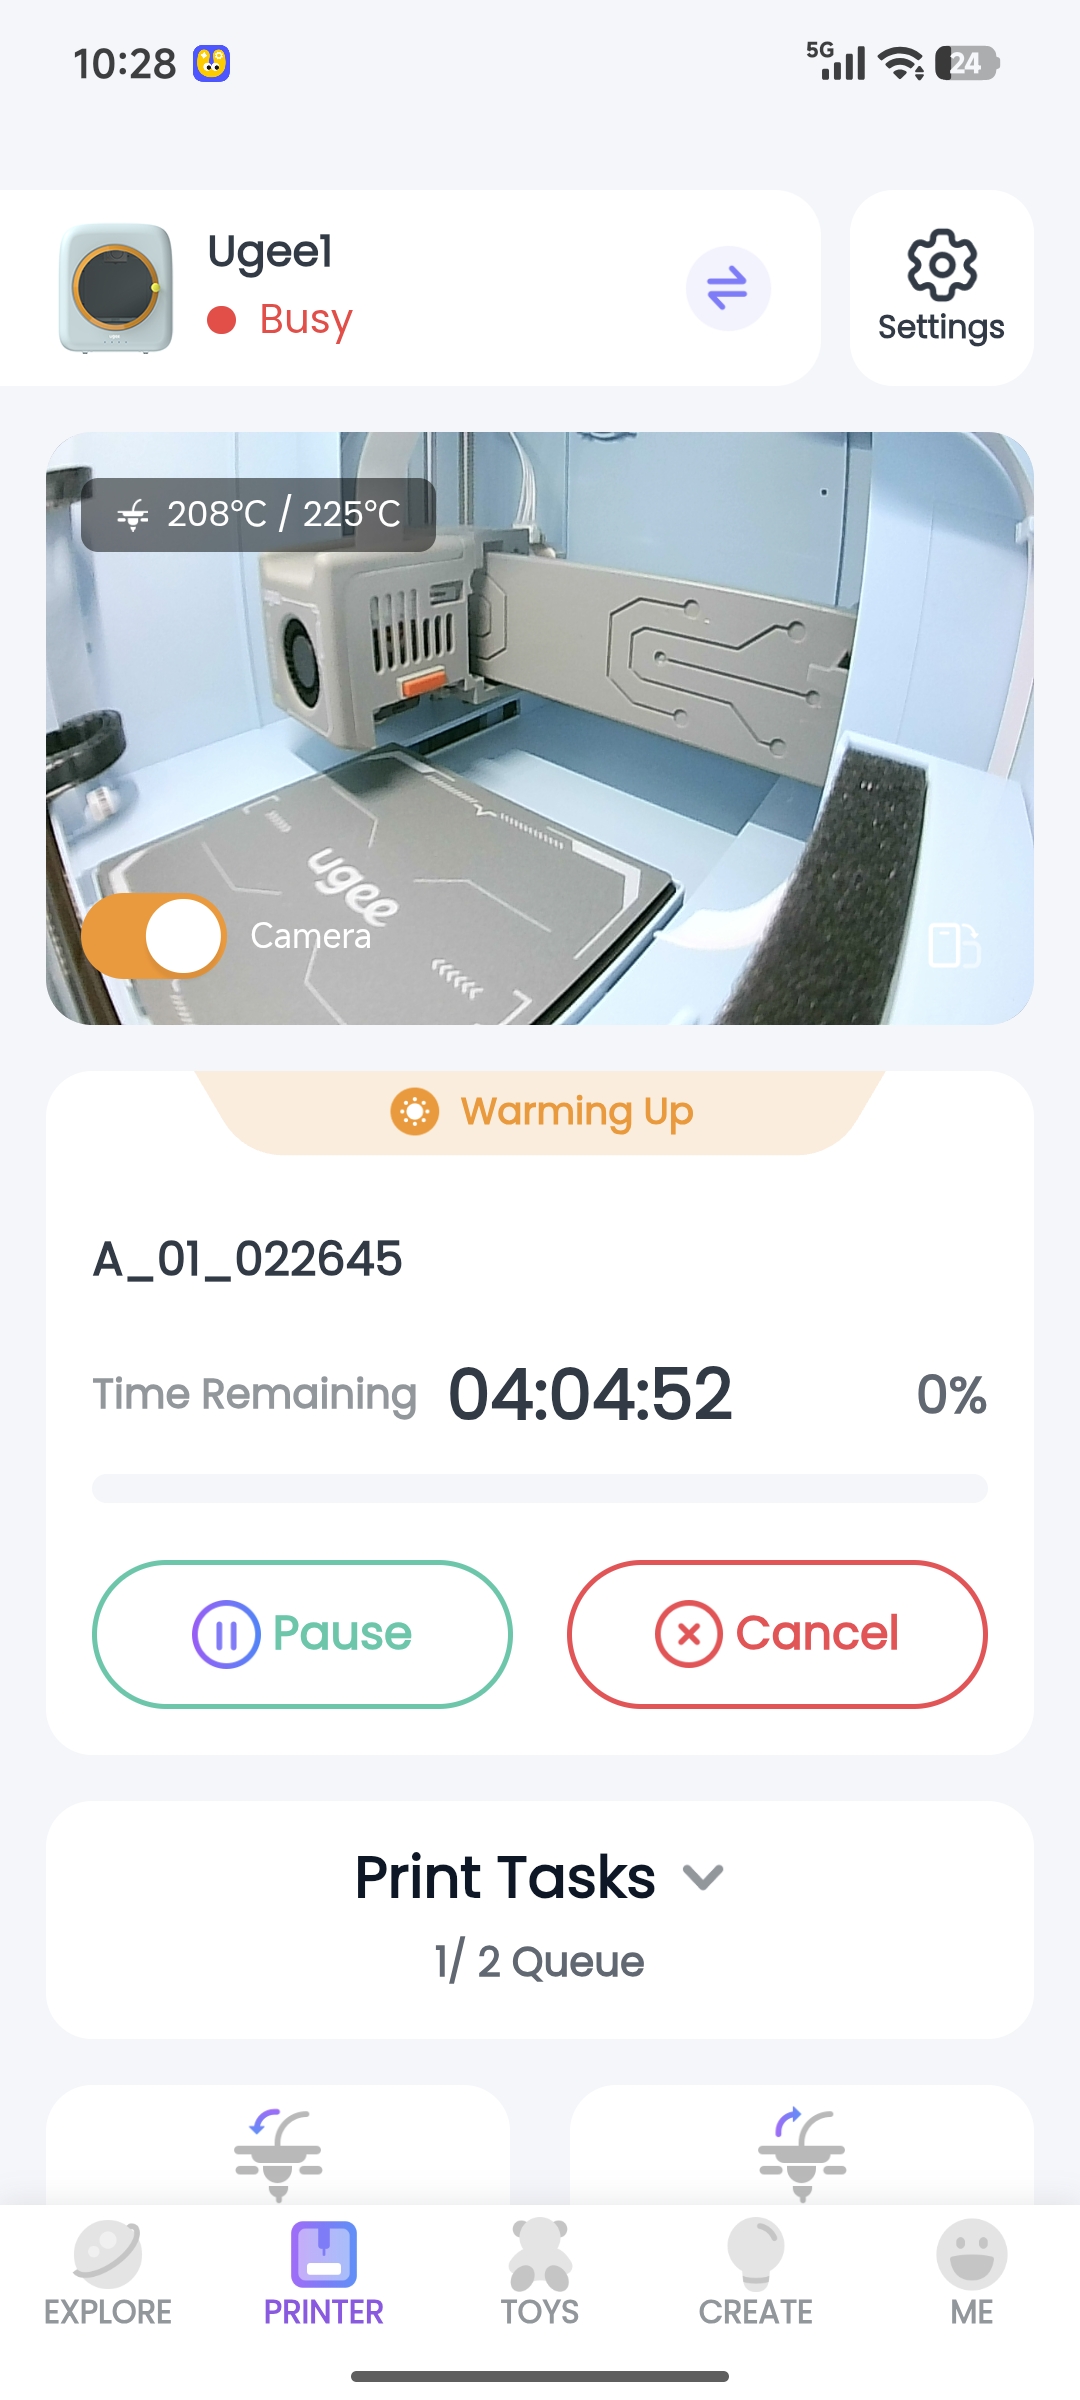
Figure 2
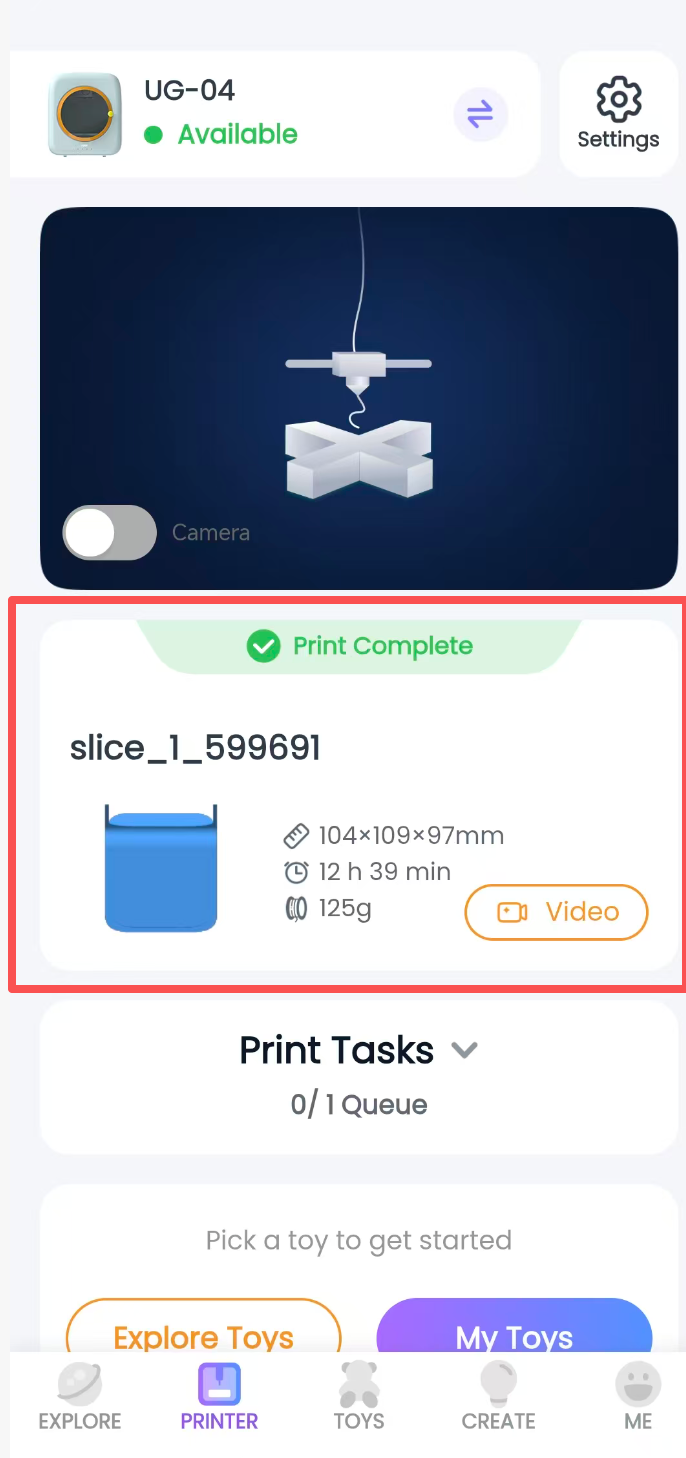
Figure 3
Note:
Q1: Can printing be paused or stopped during the print process?
A1: Yes. However, when the printer is controlled through the app, its response time depends on network conditions and the requested action is generally completed within two minutes. Avoid performing other actions during this period.
• Print Task List
- If you select a multi-part model, printing one model creates multiple print tasks, as shown in Figure 1. After printing starts, the task list displays the task currently printing and those waiting to print, along with the estimated duration and PLA usage for each task, as shown in Figure 2.
Q1: Will Task 2 start automatically after Task 1 finishes printing?
A1: After Task 1 is complete, remove the model. Then open the task list in the app, select Task 2, and tap “Start Printing,” as shown in Figure 3.
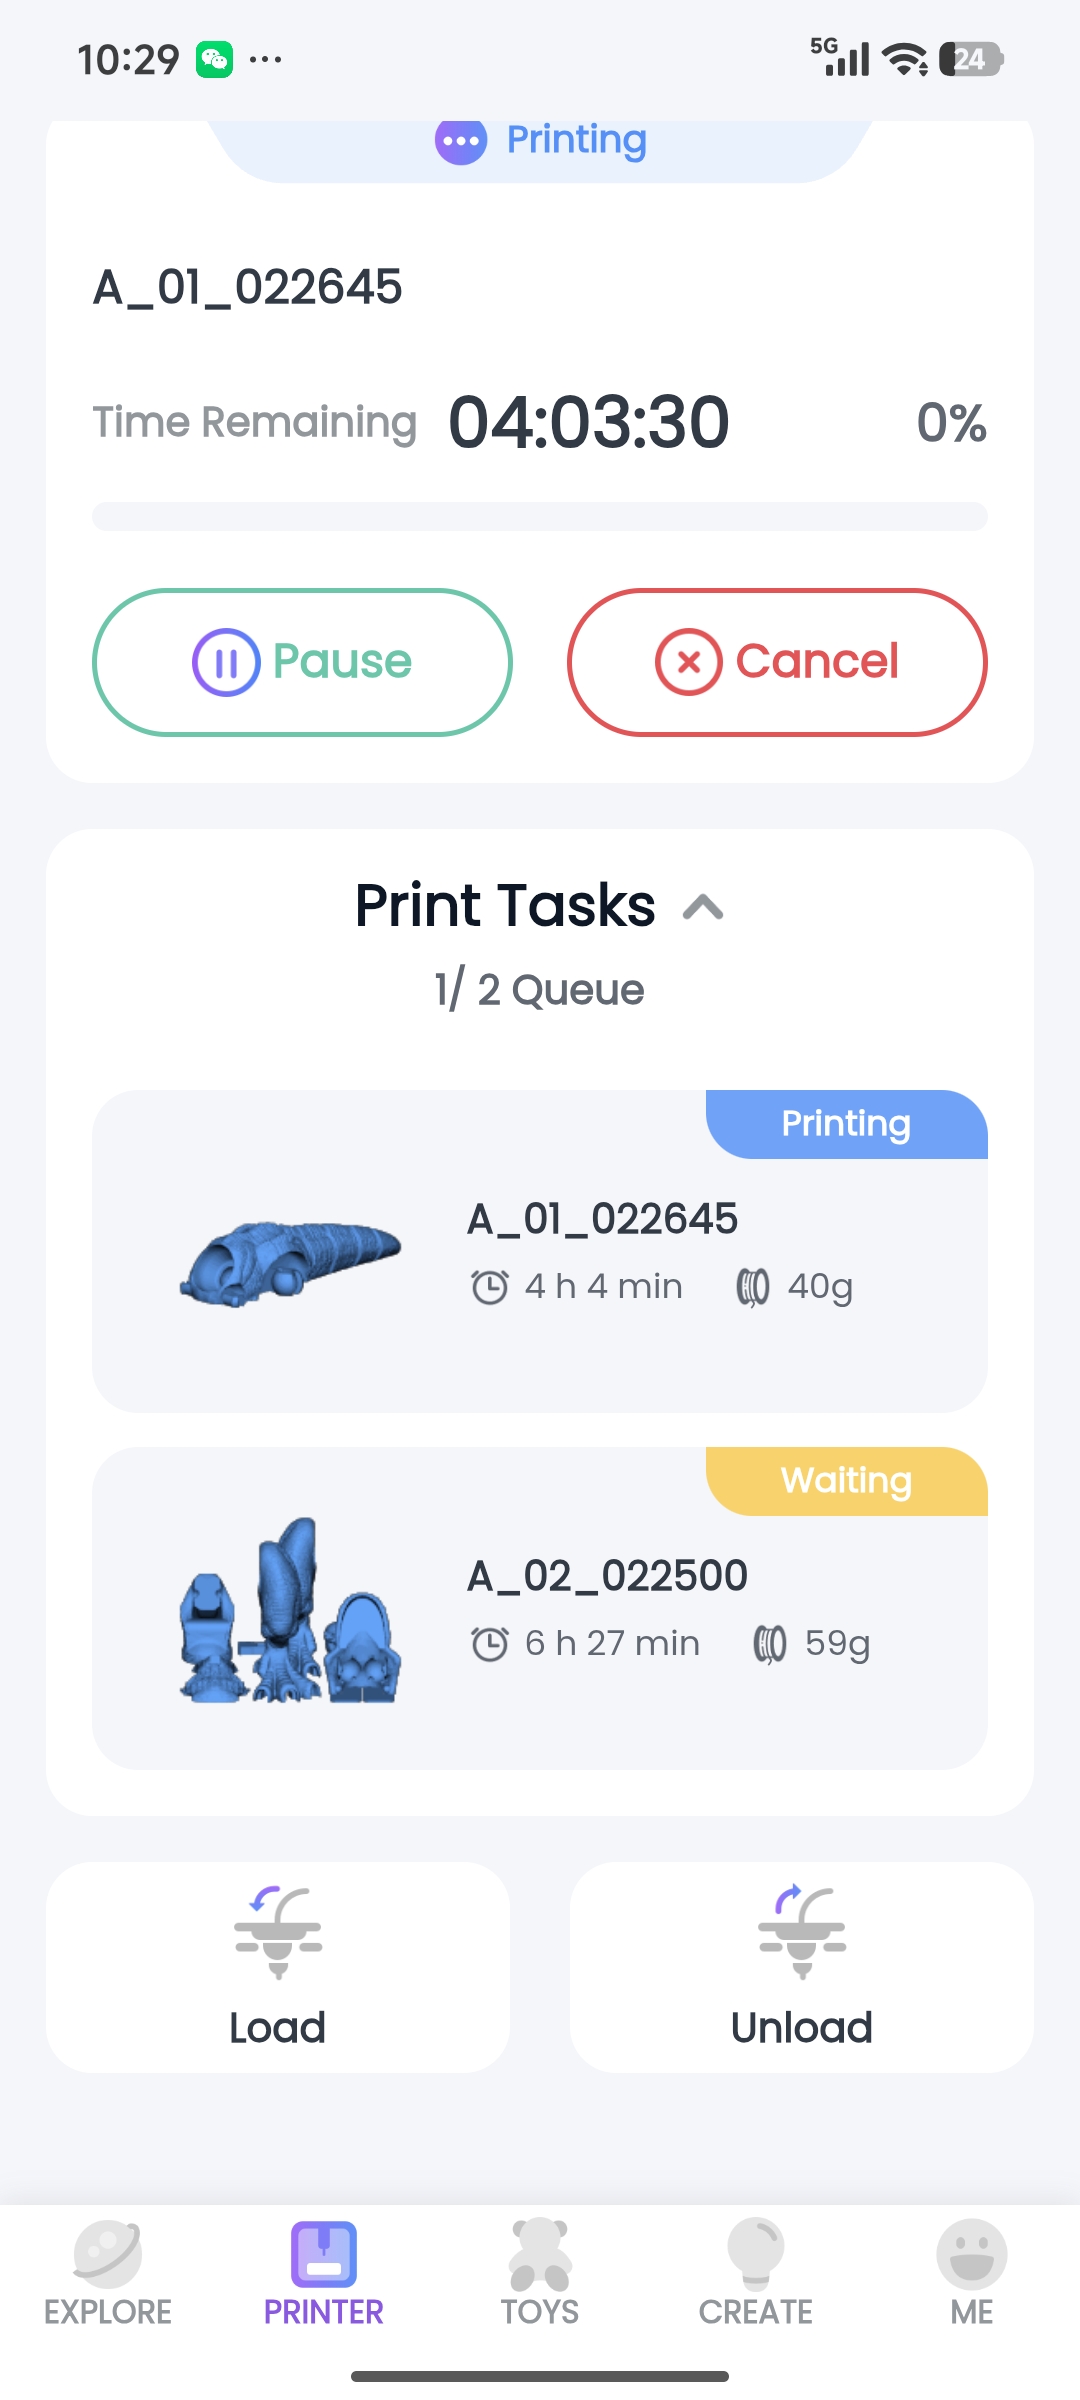
Figure 1
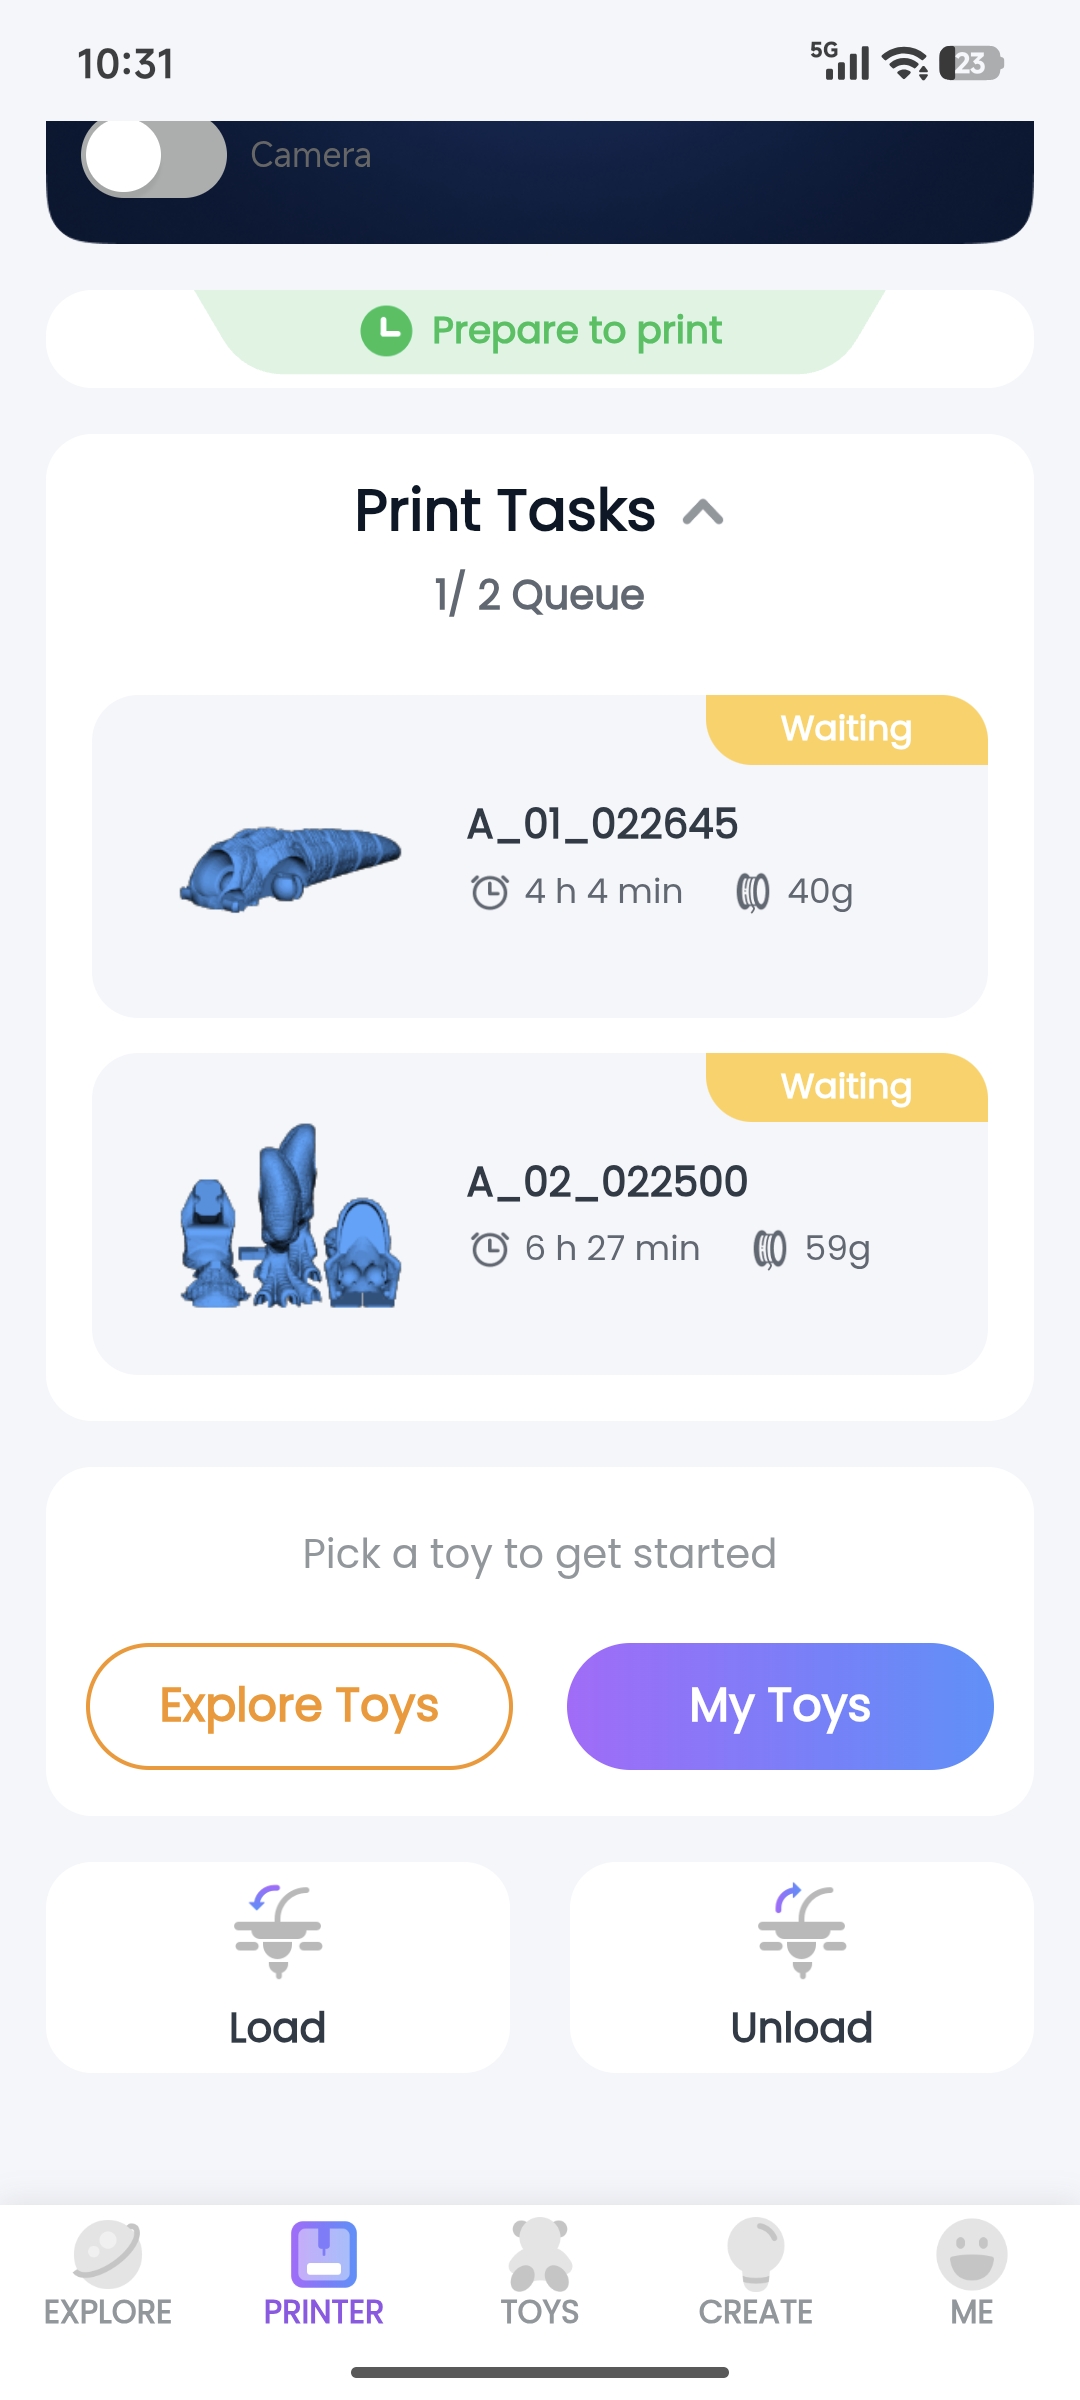
Figure 2
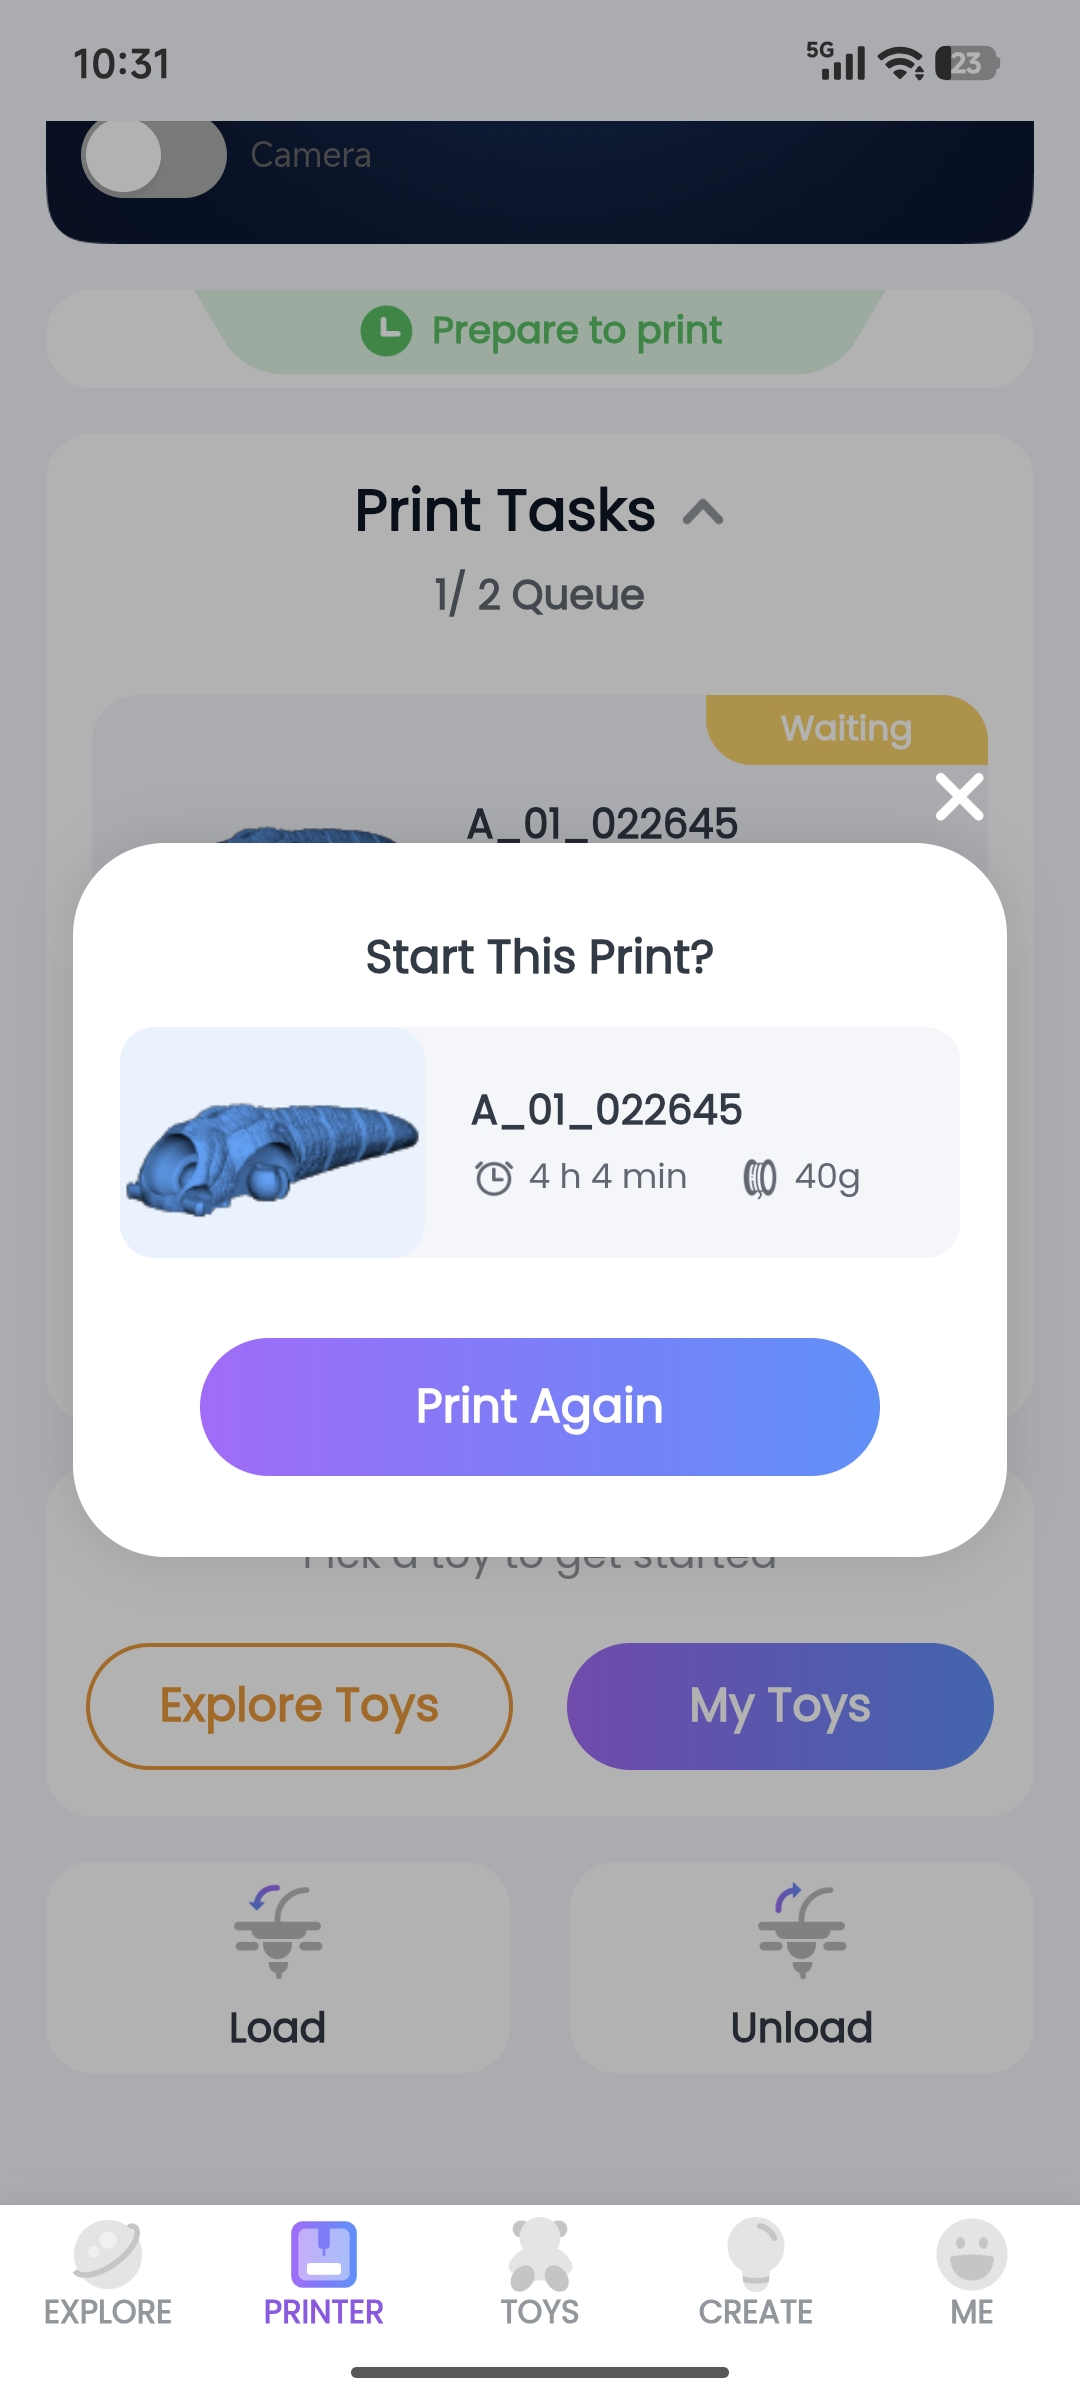
Figure 3
• Load / Unload Filament
After connecting successfully, complete the filament-loading process before printing. You can also load filament through either of the following paths.
Action 1: After pairing successfully, while the printer is connected -> tap “Device” at the bottom -> swipe up on the page -> tap “Load Filament.”
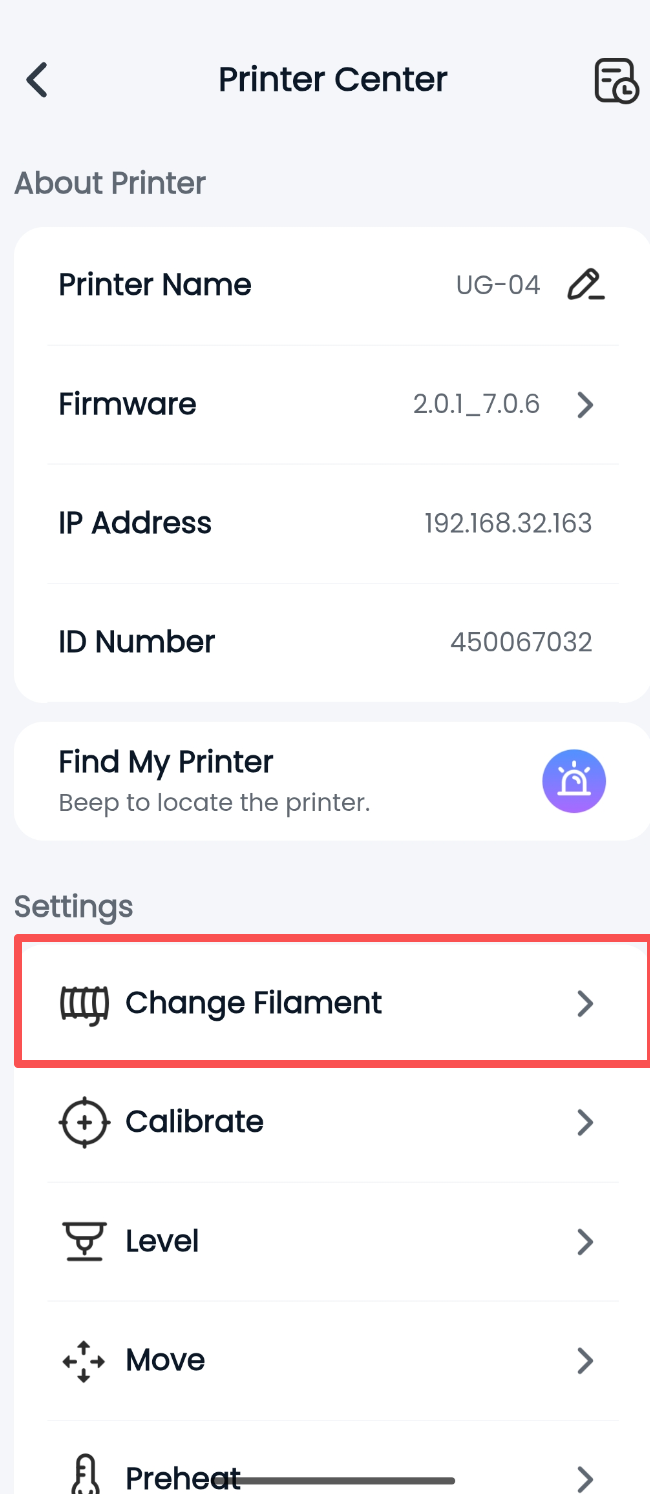
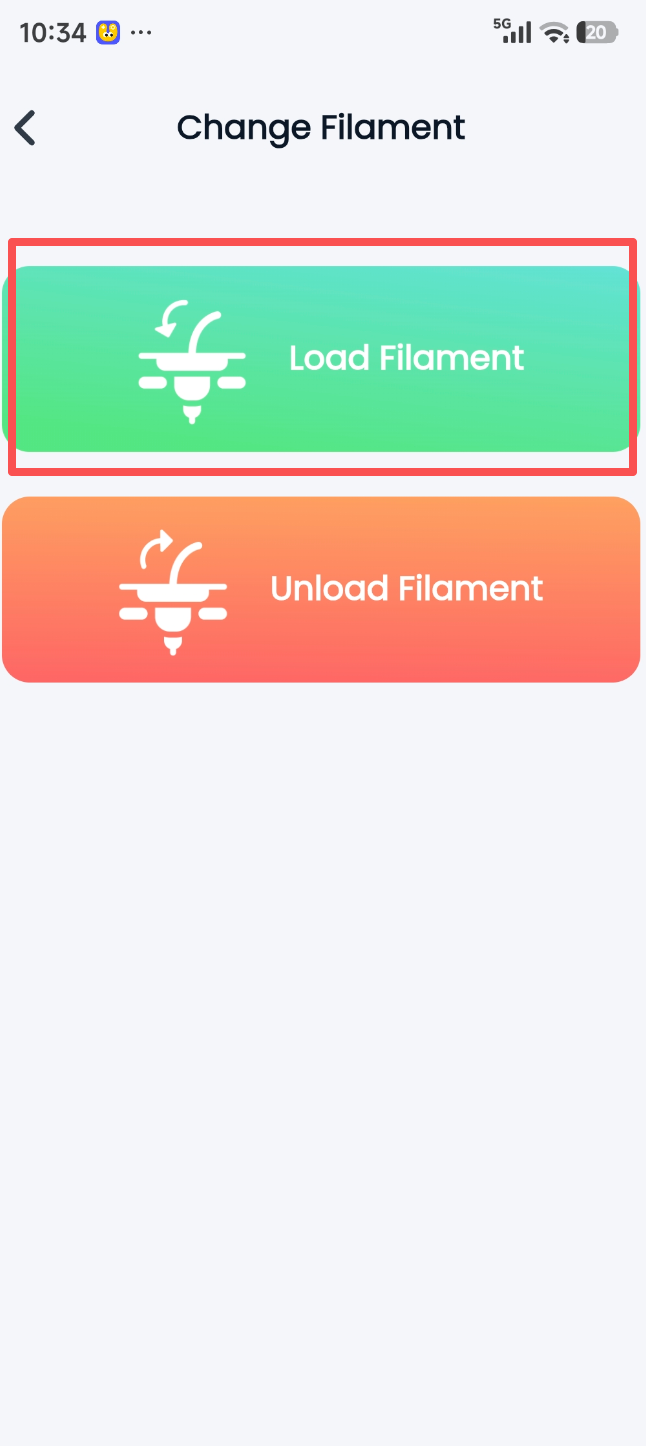
Action 2: After pairing successfully, while the printer is connected -> tap “Device” at the bottom -> tap “Settings” in the upper-right corner -> tap “Replace Filament” in the settings list -> tap “Load Filament.”
The filament-unloading steps are essentially the same as the loading steps.
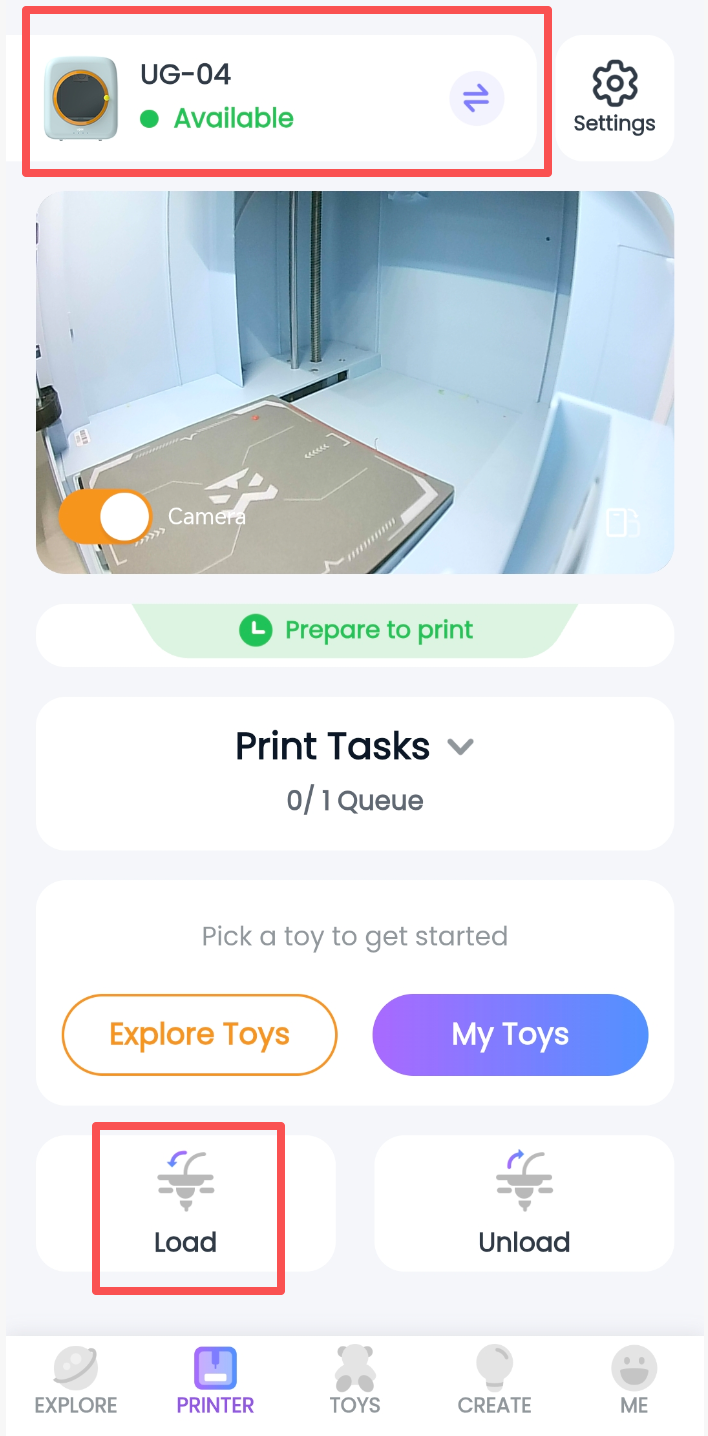
• Settings Button in the Upper-Right Corner
Tap “Settings” in the upper-right corner to open Section 2.4.3, Printer Control Panel Functions.
4.4.3 Printer Control Panel Functions — Settings Details in the Upper-Right Corner — Hardware Information
① About the Printer — Printer Information Settings
• Printer Name: Tap to set a custom name. You can then search for the printer using the new name.
• Firmware Information: When new firmware is available, the update screen opens automatically.
• IP Address: View the address used to connect the U-PRiNT slicing software.
• Ring: Tap to make the printer ring for about 10 seconds. Tapping again cannot stop it early.
② Settings (Maintenance) — Printer Settings
• Replace Filament: Load / unload filament.
• Calibration: Adjust the printer’s positioning parameters.
• Leveling: If the nozzle scrapes the build plate, use nine-point manual leveling.
• Preheat: Raise or lower the nozzle temperature.
• Replace Nozzle: Follow the guided process to replace the nozzle.
③ Controls (Toggle Options) — Printer Control Settings
• Interior Light: On/off control.
• Exterior Light: On/off control.
• Fan: On/off control.
• Resume After Power Loss: On/off control.
• Notification Sound: On/off control.
• Filament Runout Detection: On/off control.
• Filament Tangle Detection: On/off control.
④ Remove Printer
• Disconnect the currently connected printer.
Note:
Q1: If I remove the printer, will the app be unable to reconnect to it?
A1: Yes. Removing the printer clears this printer’s connection information from the account. To reconnect, manually select the printer and connect it again.
⑤ Restore Factory Settings
• Clear all connection configuration information from the printer.
Note:
Q1: When should I restore the factory settings?
A1: If the printer repeatedly fails to connect, use this function and clear the printer’s pairing information. This can resolve most recurring connection failures. (Connection problems are generally caused mainly by network instability.)
⑥ Print History
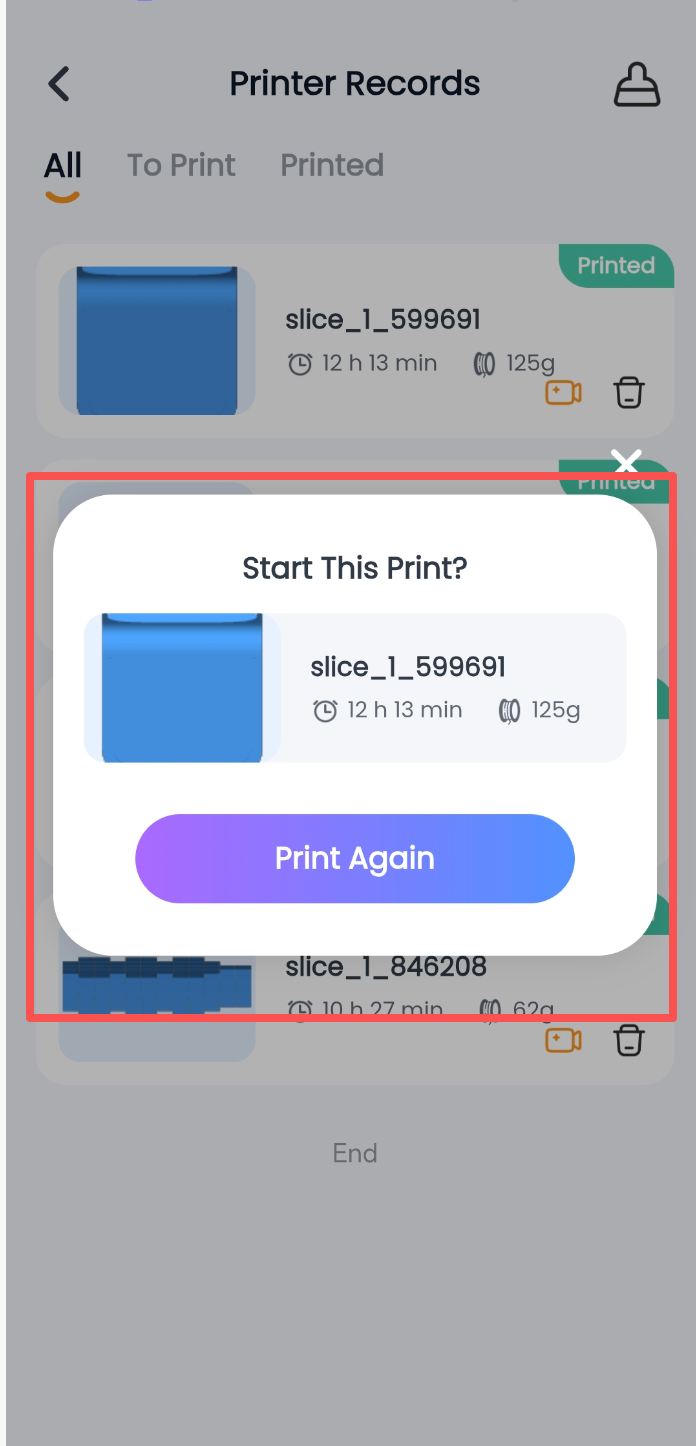
• Tap “Print History” in the upper-right corner to view an approximately 15-second time-lapse video of each completed print.
• Tap any model record to print it again.
4.5 CREATE — Tap the Create button at the bottom
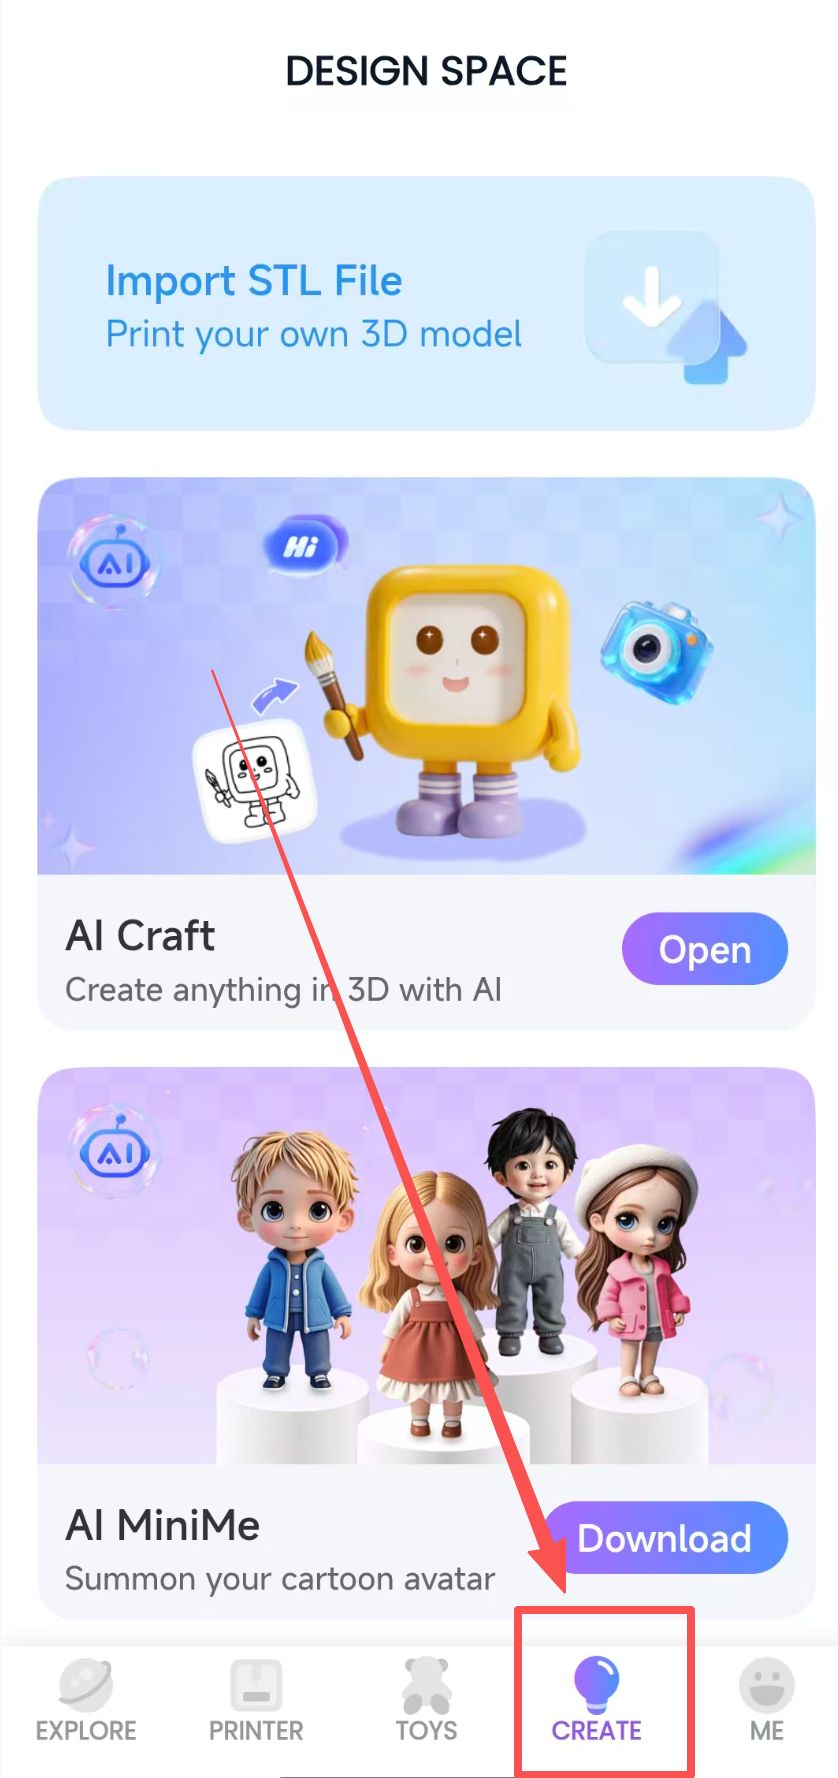
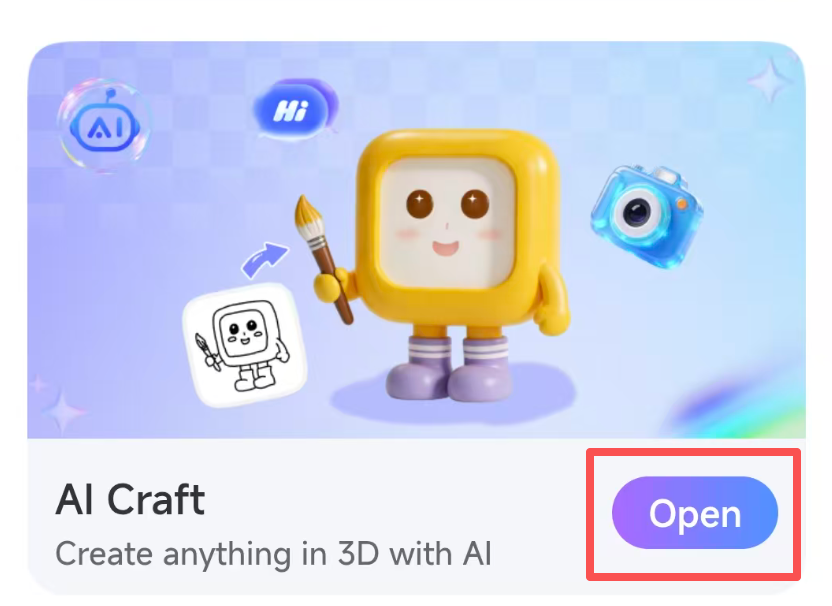
The Create module includes three child-friendly game design tools that make the design process simple and enjoyable. It also supports importing external models for printing. To use an AI creation feature, you need available coins and must download that feature first.
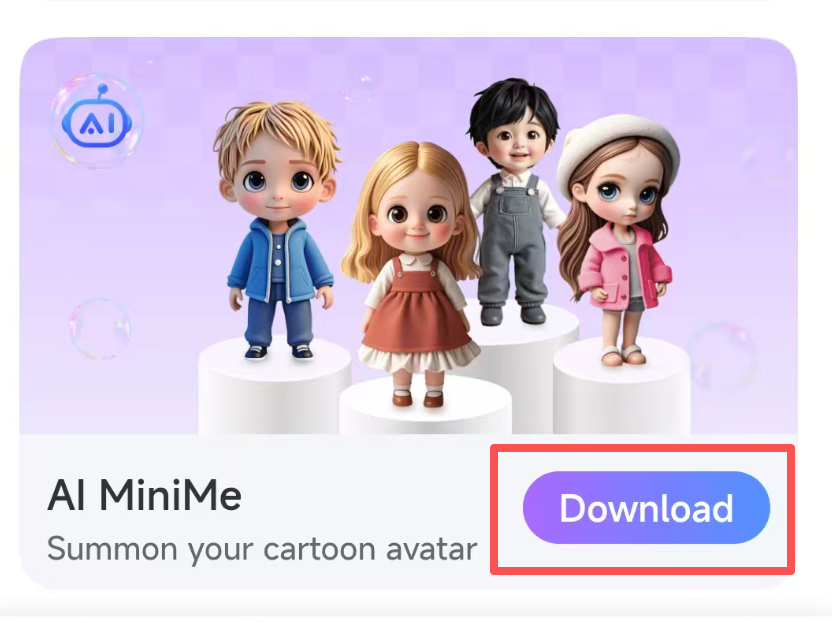
Note:
Q1: What should I do if AI generation produces a blank image but my coins have already been deducted?
A1: If the network is slow, a blank image may be generated after coins are deducted because the current connection is poor. The expected content will appear after the network returns to normal. If generation fails, the deducted coins will be replenished within two days.
Q2: How much do UFun App coins cost?
A2: You can purchase UFun App coins in the following amounts:
Coins
Price (USD)
50 Coins
$2.99
100 Coins
$4.99
350 Coins
$14.99
800 Coins
$34.99
① Import an STL File:
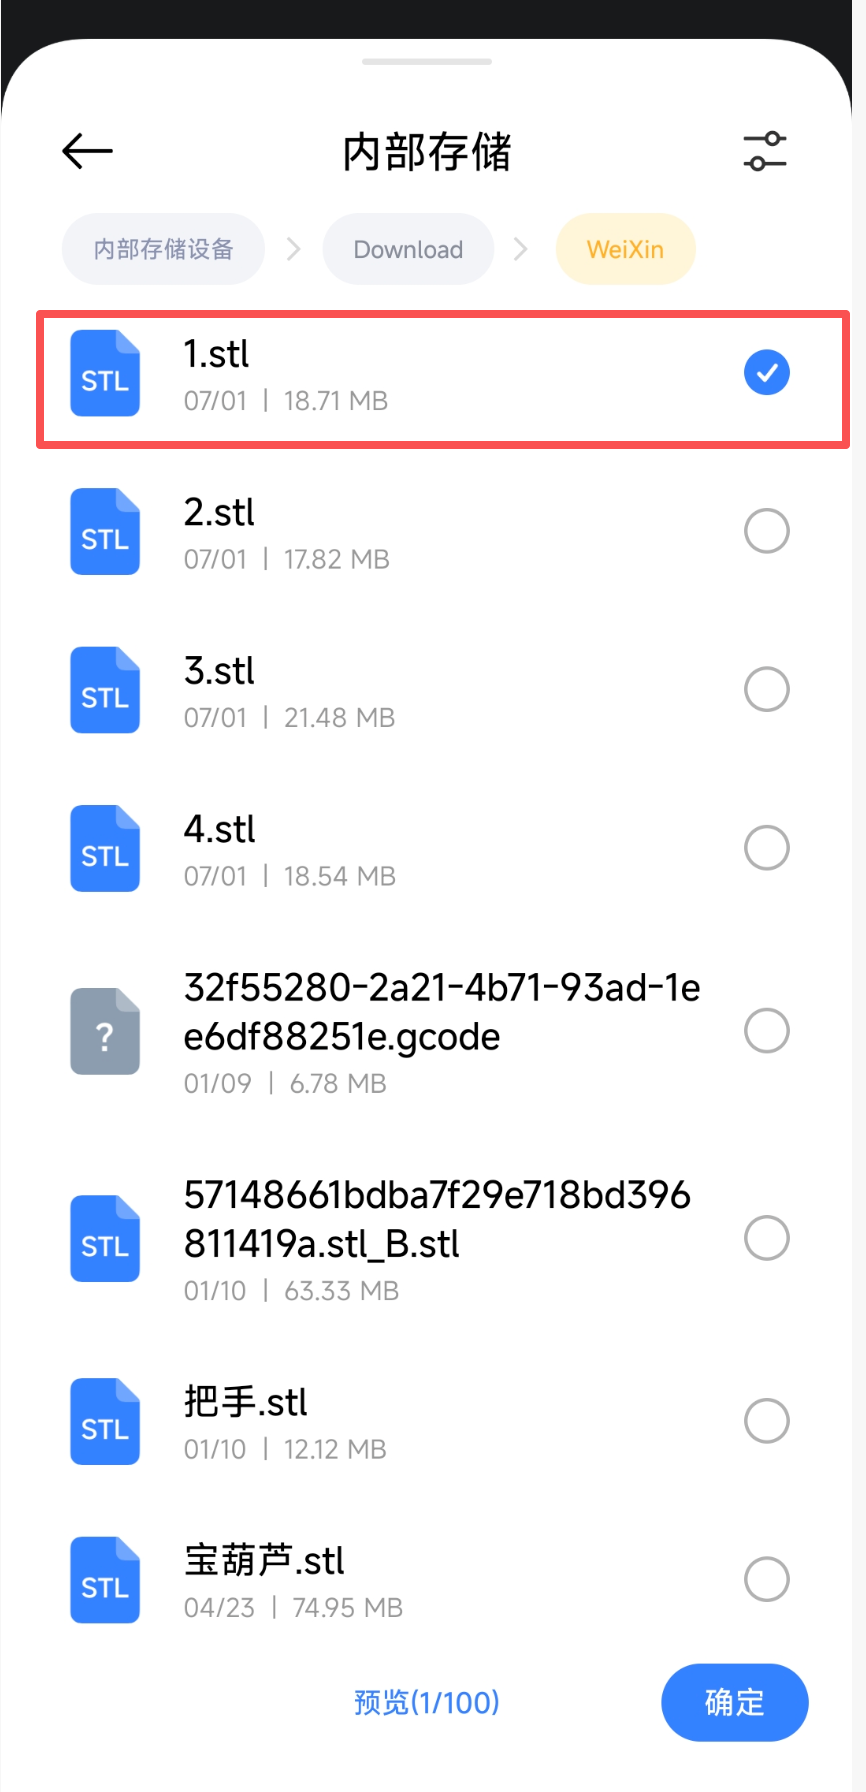
- You can import external .stl models for printing. Currently, only this format is supported, and the file must be smaller than 20 MB.
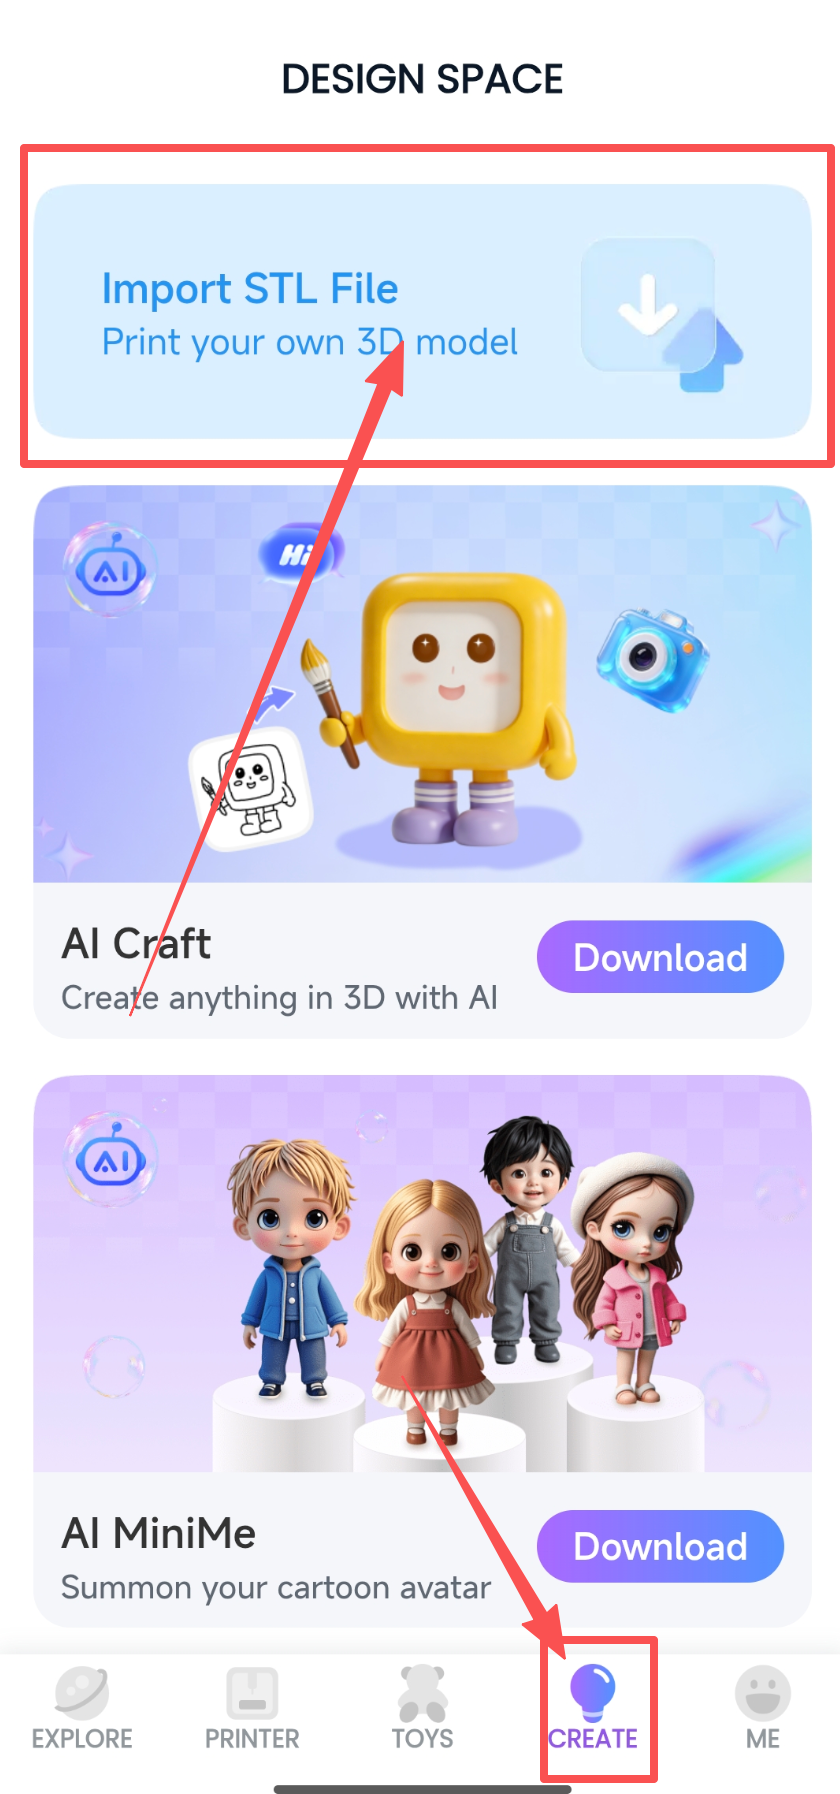
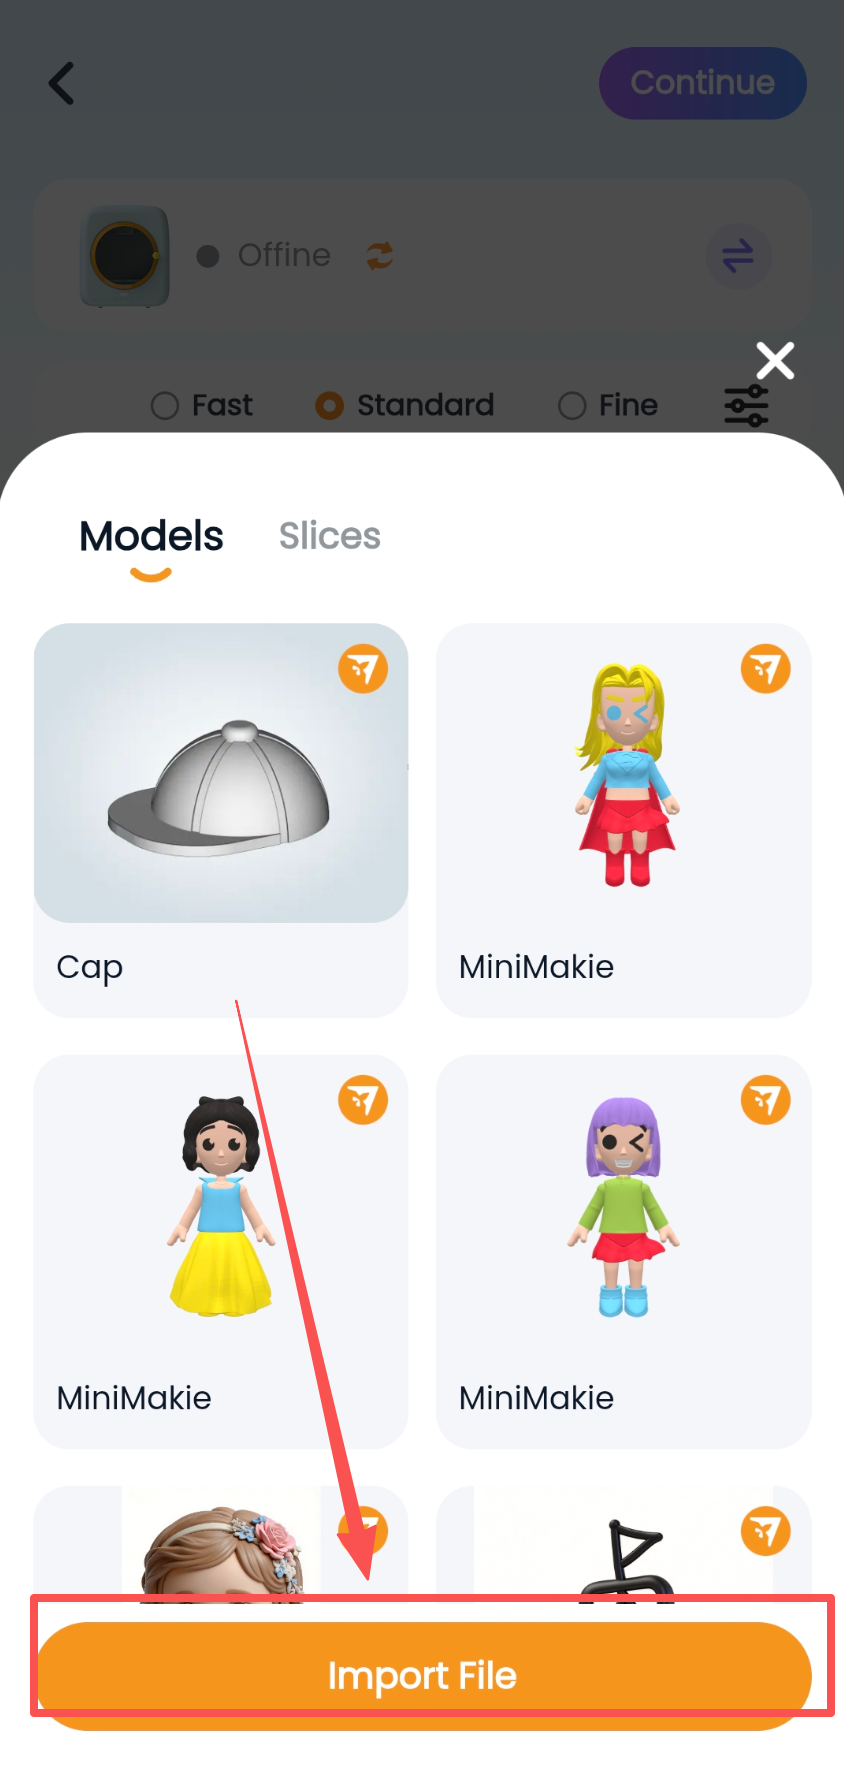
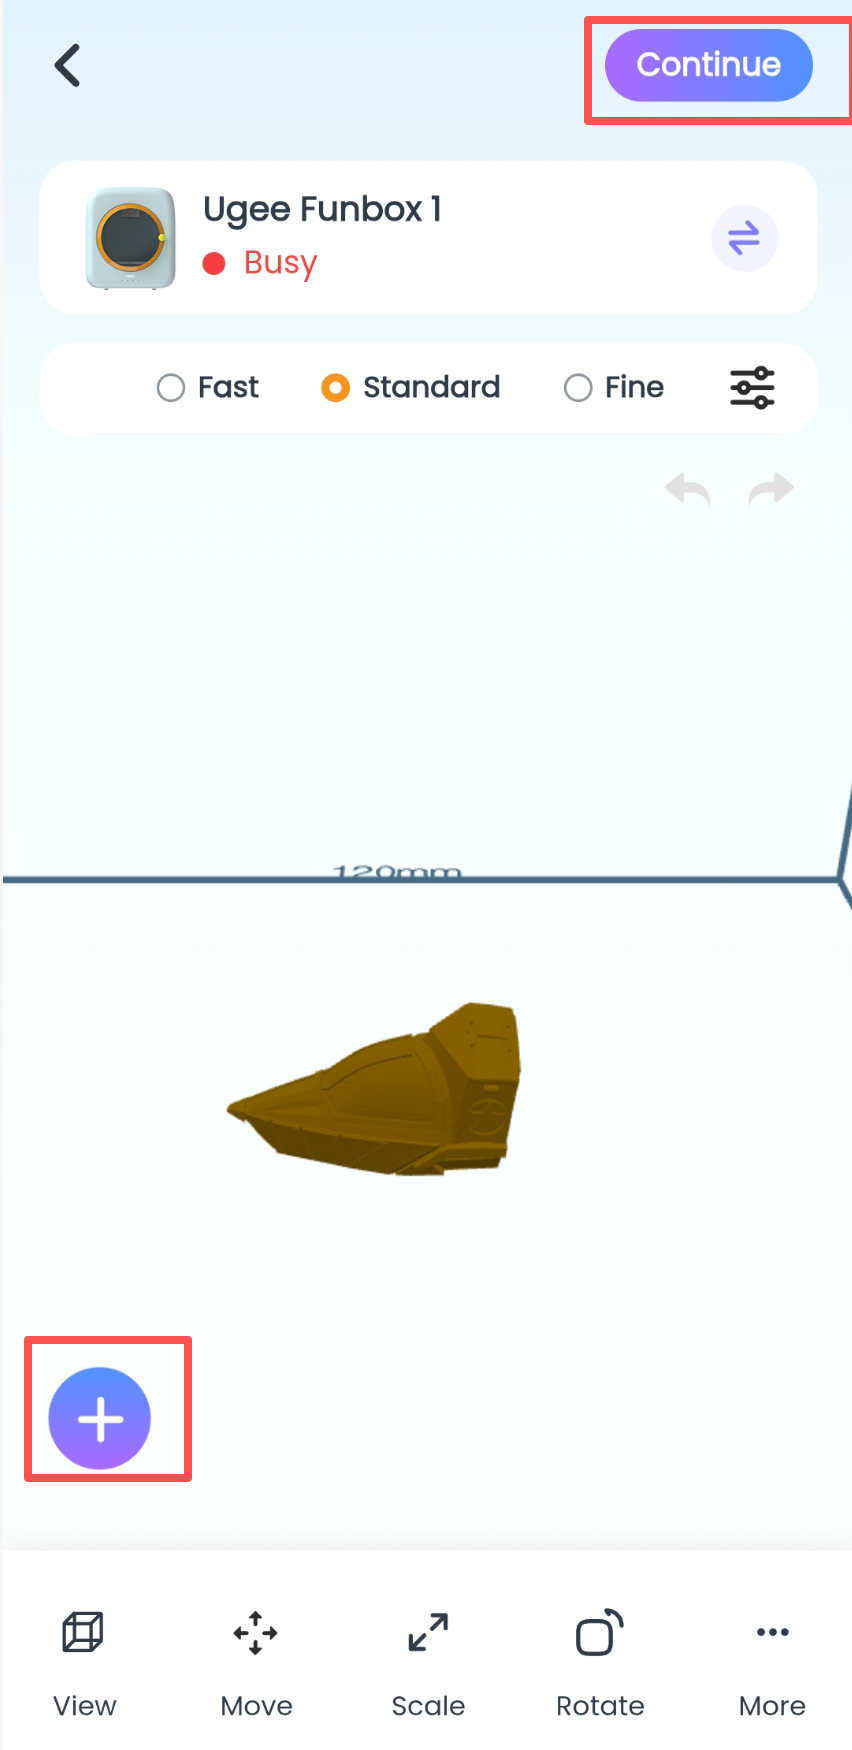
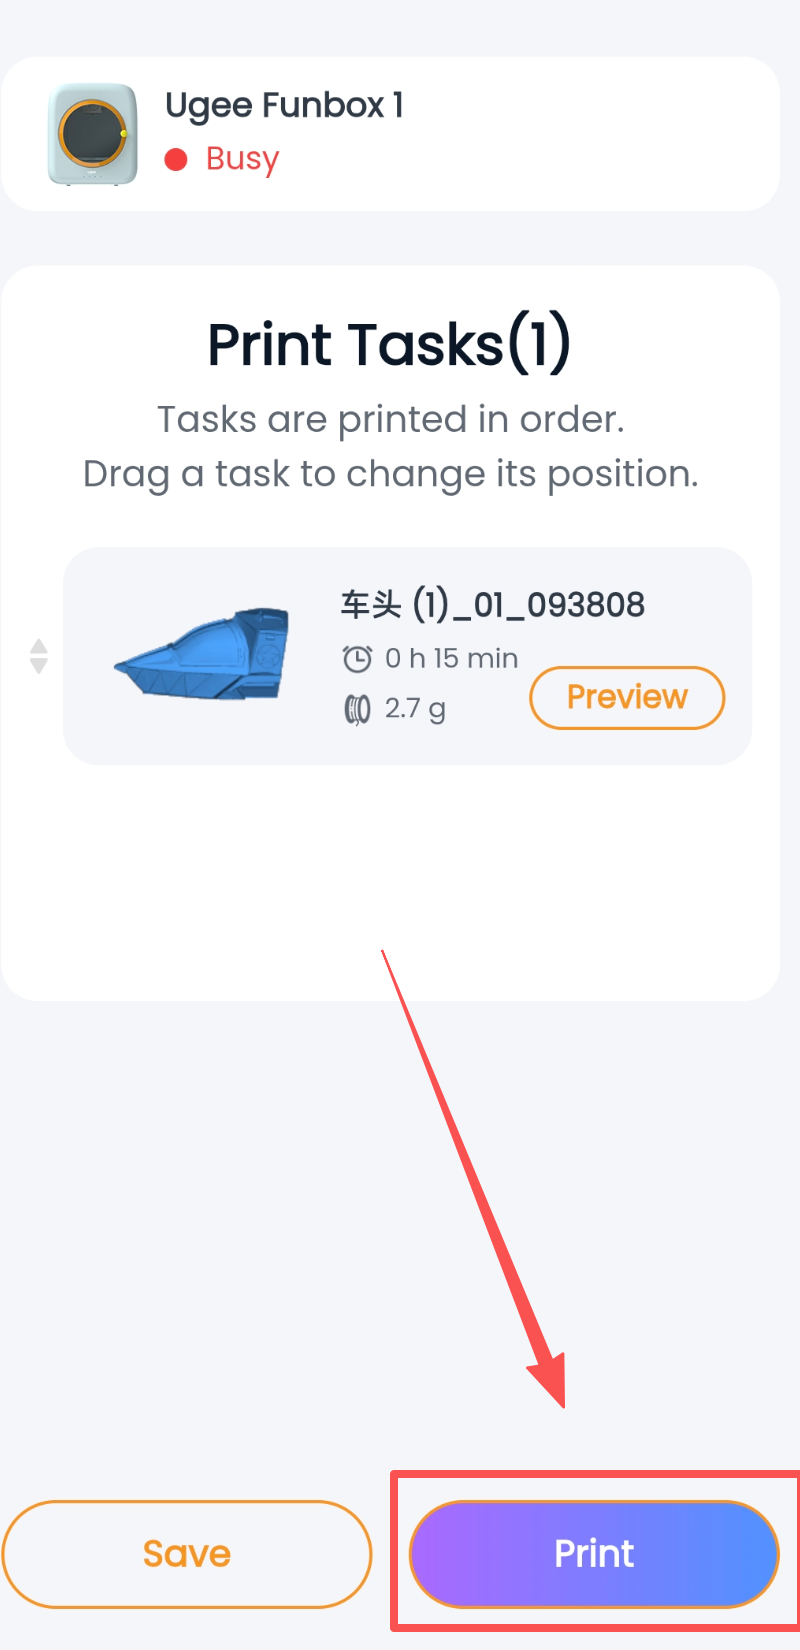
Procedure: Tap “Create” at the bottom -> select “Import 3D File” -> select “Import Local Model” -> choose an STL file -> tap “Confirm” in the lower-right corner -> enter the 3D editing preview page -> to import another model, tap “+” in the lower-left corner -> when ready to print, tap “Next” in the upper-right corner.
Note:
Q1: Why can’t the file be imported?
A1: File import currently supports only .stl files smaller than 10 MB. Files that are too large will fail to import. Also check the network connection, as poor network conditions can significantly reduce import reliability.
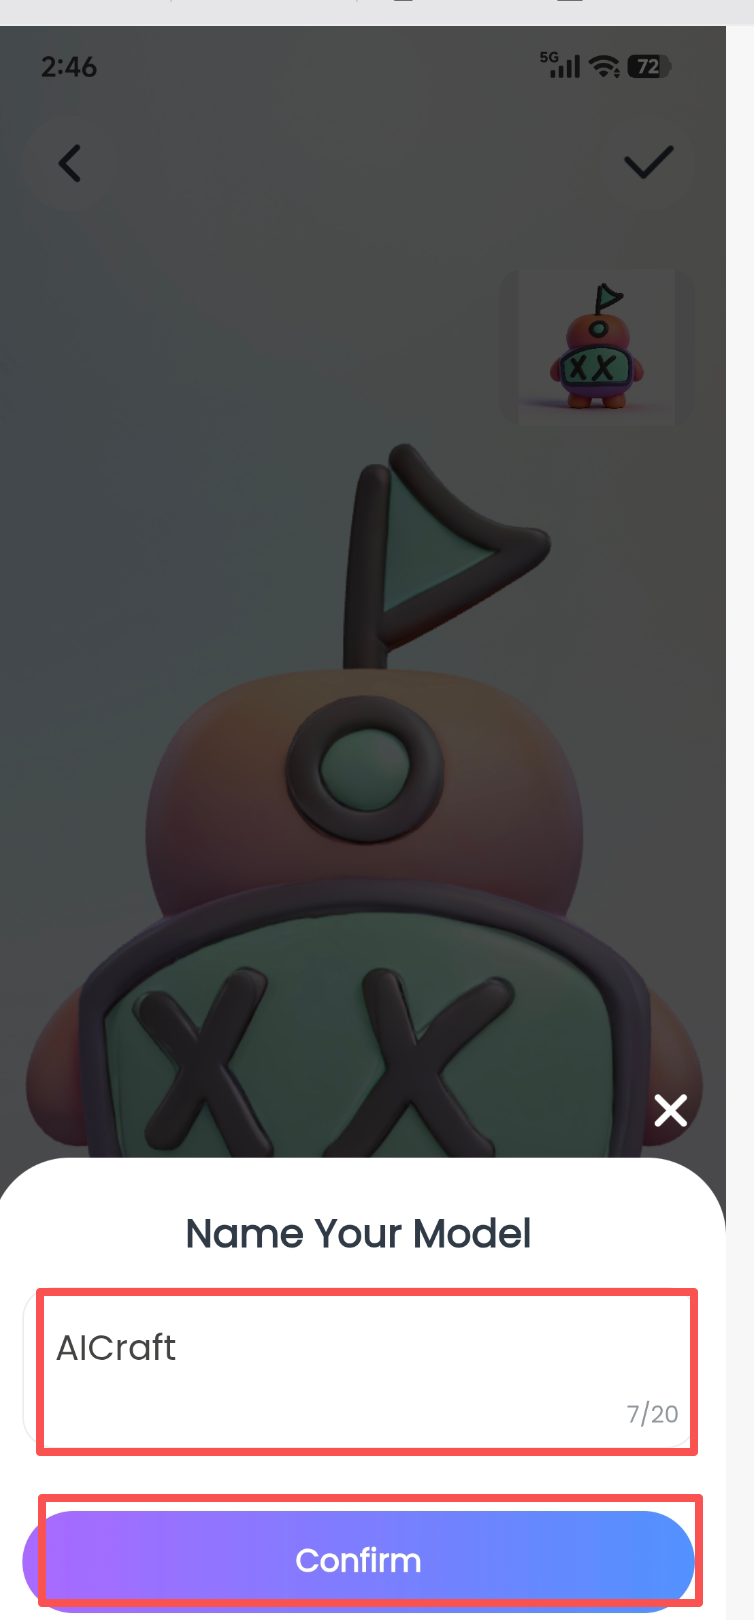
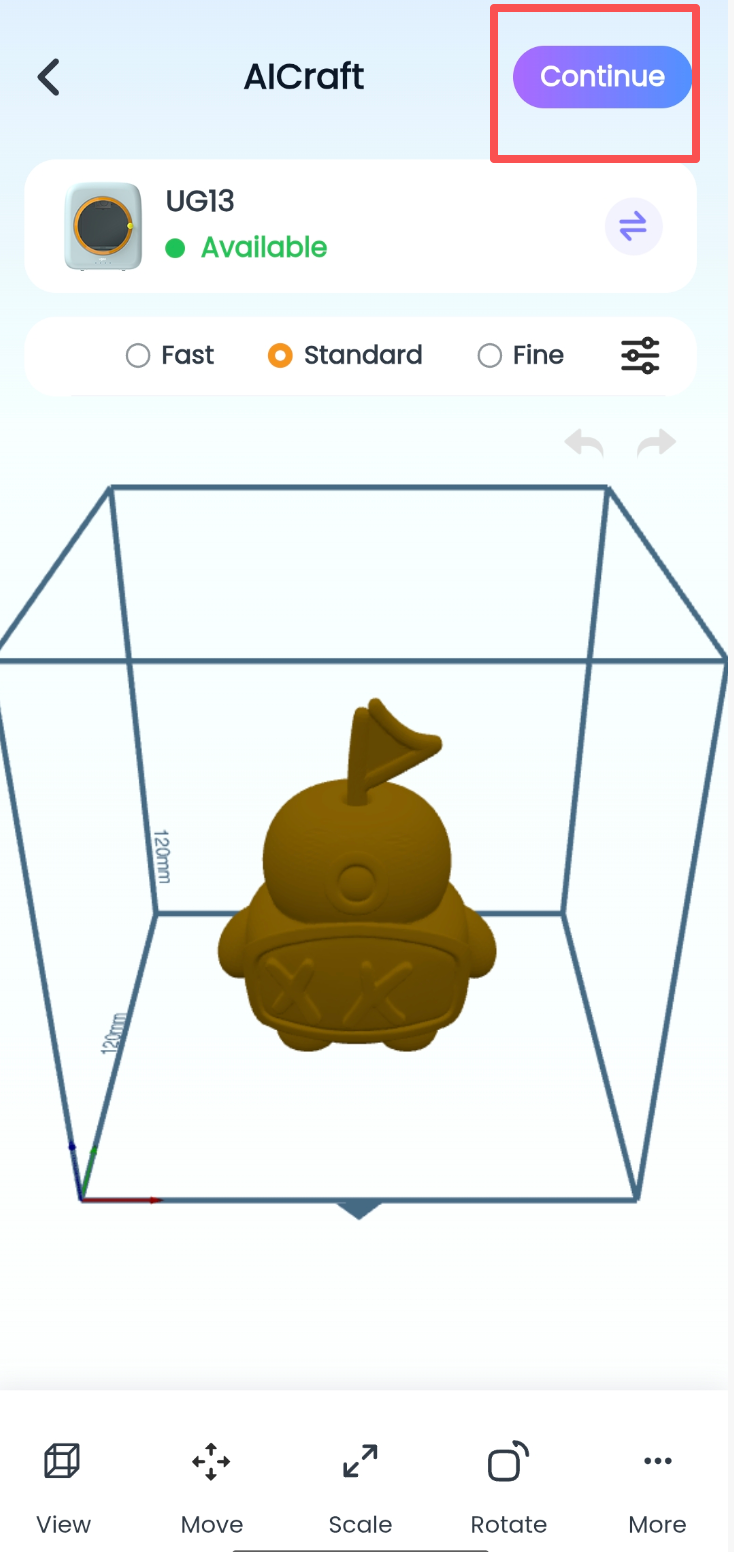
② AI Craft:
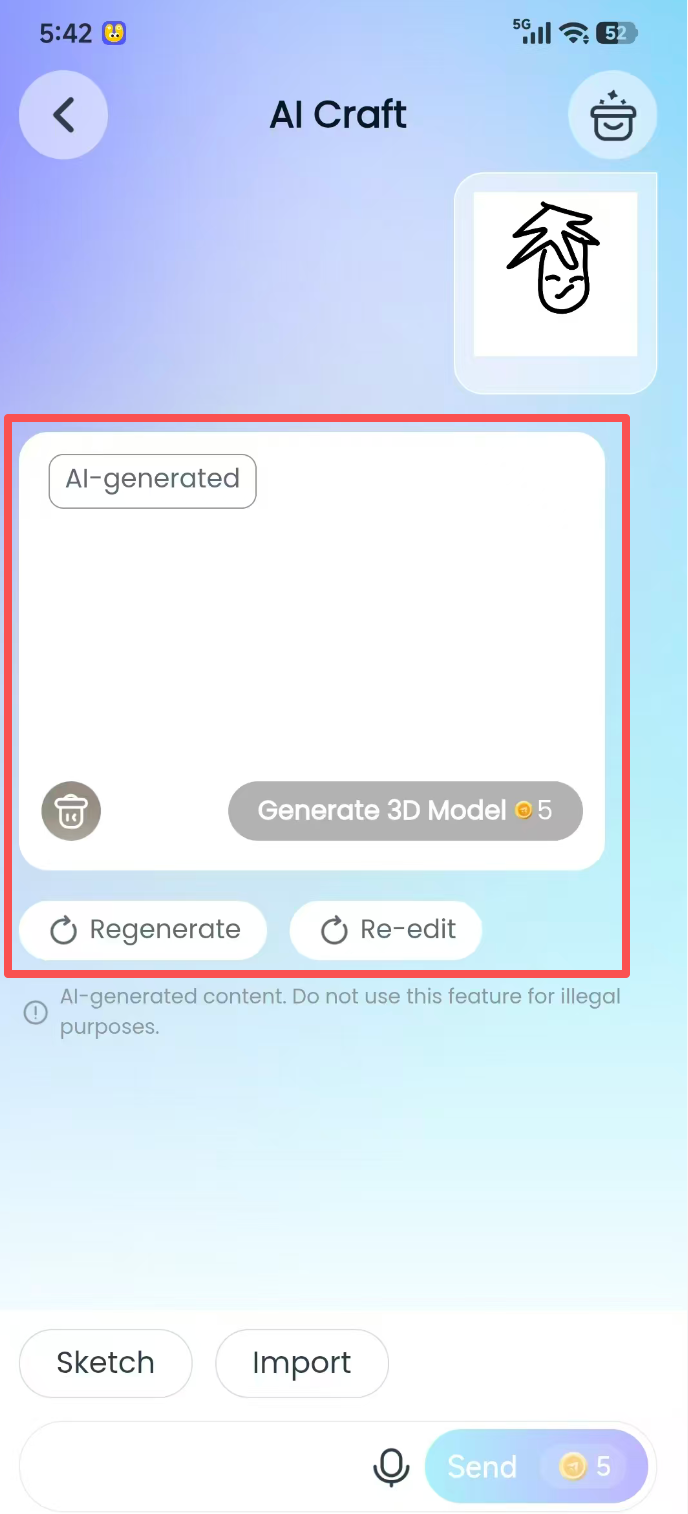
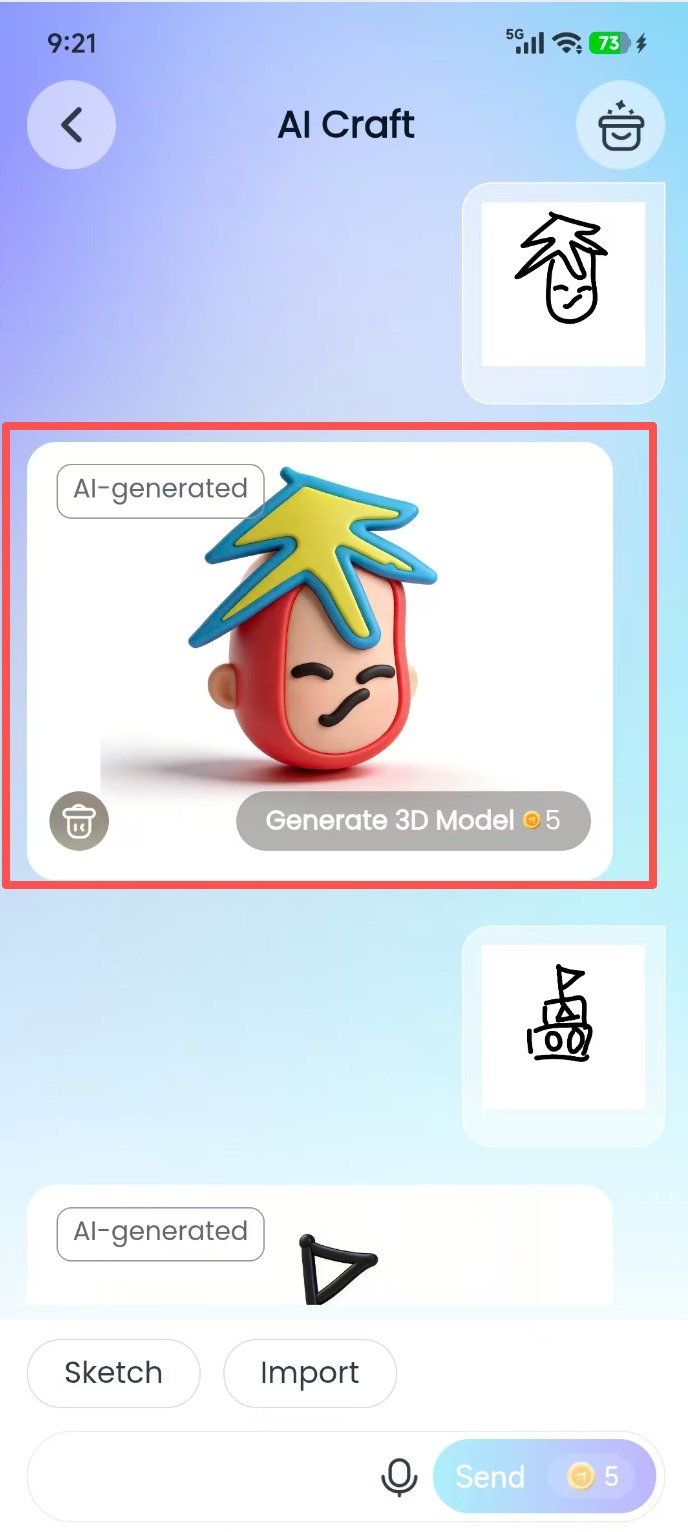
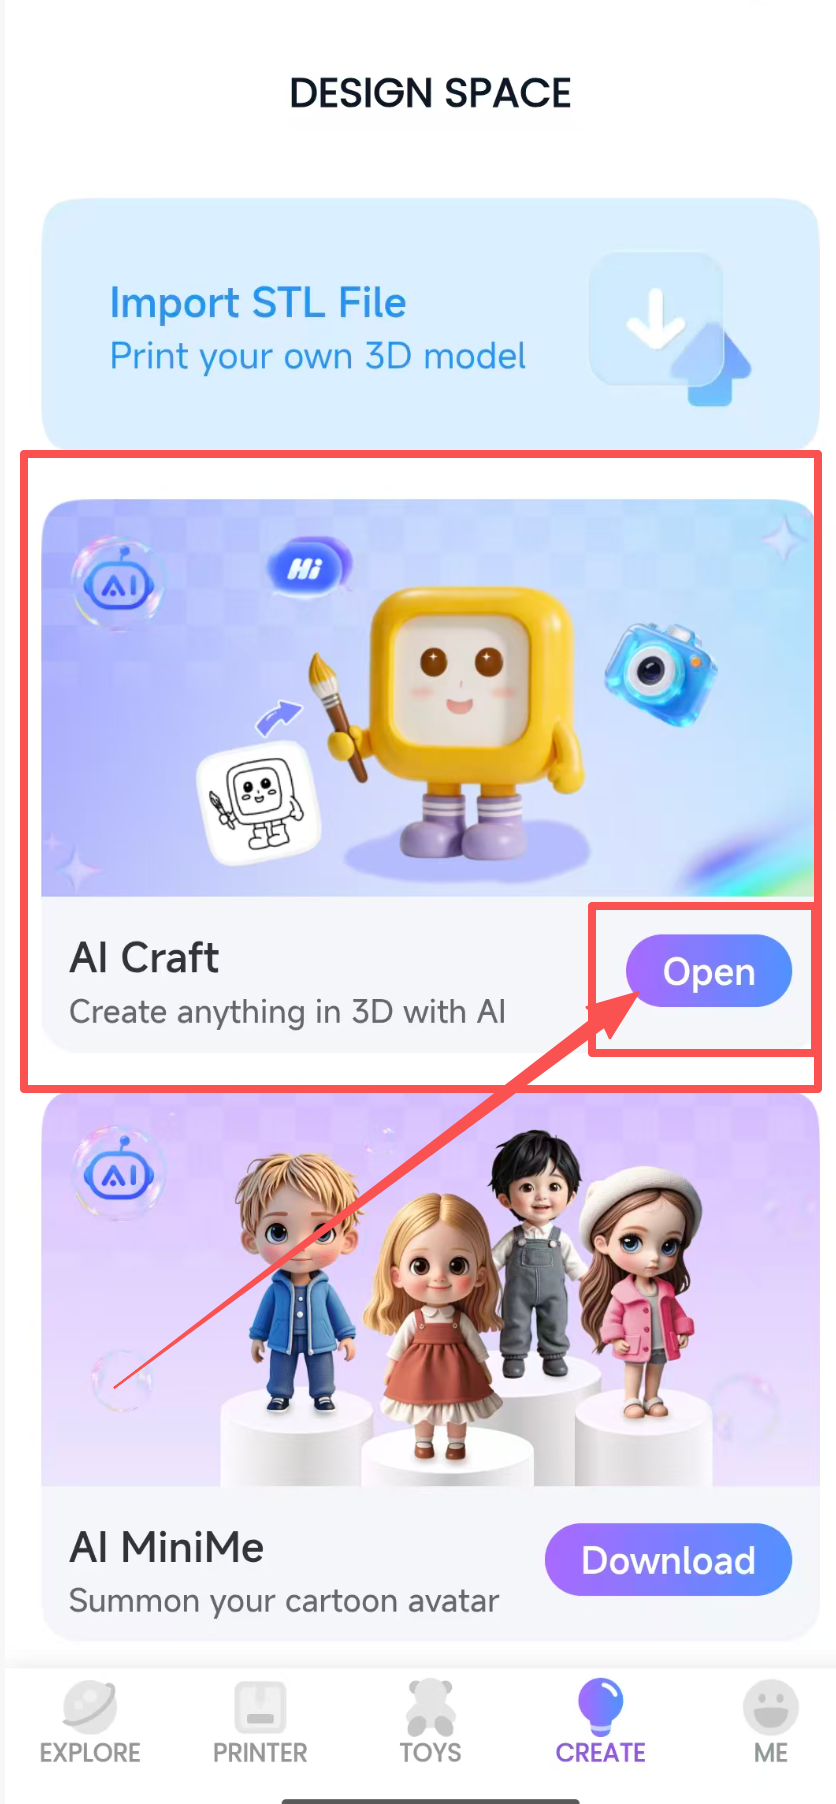
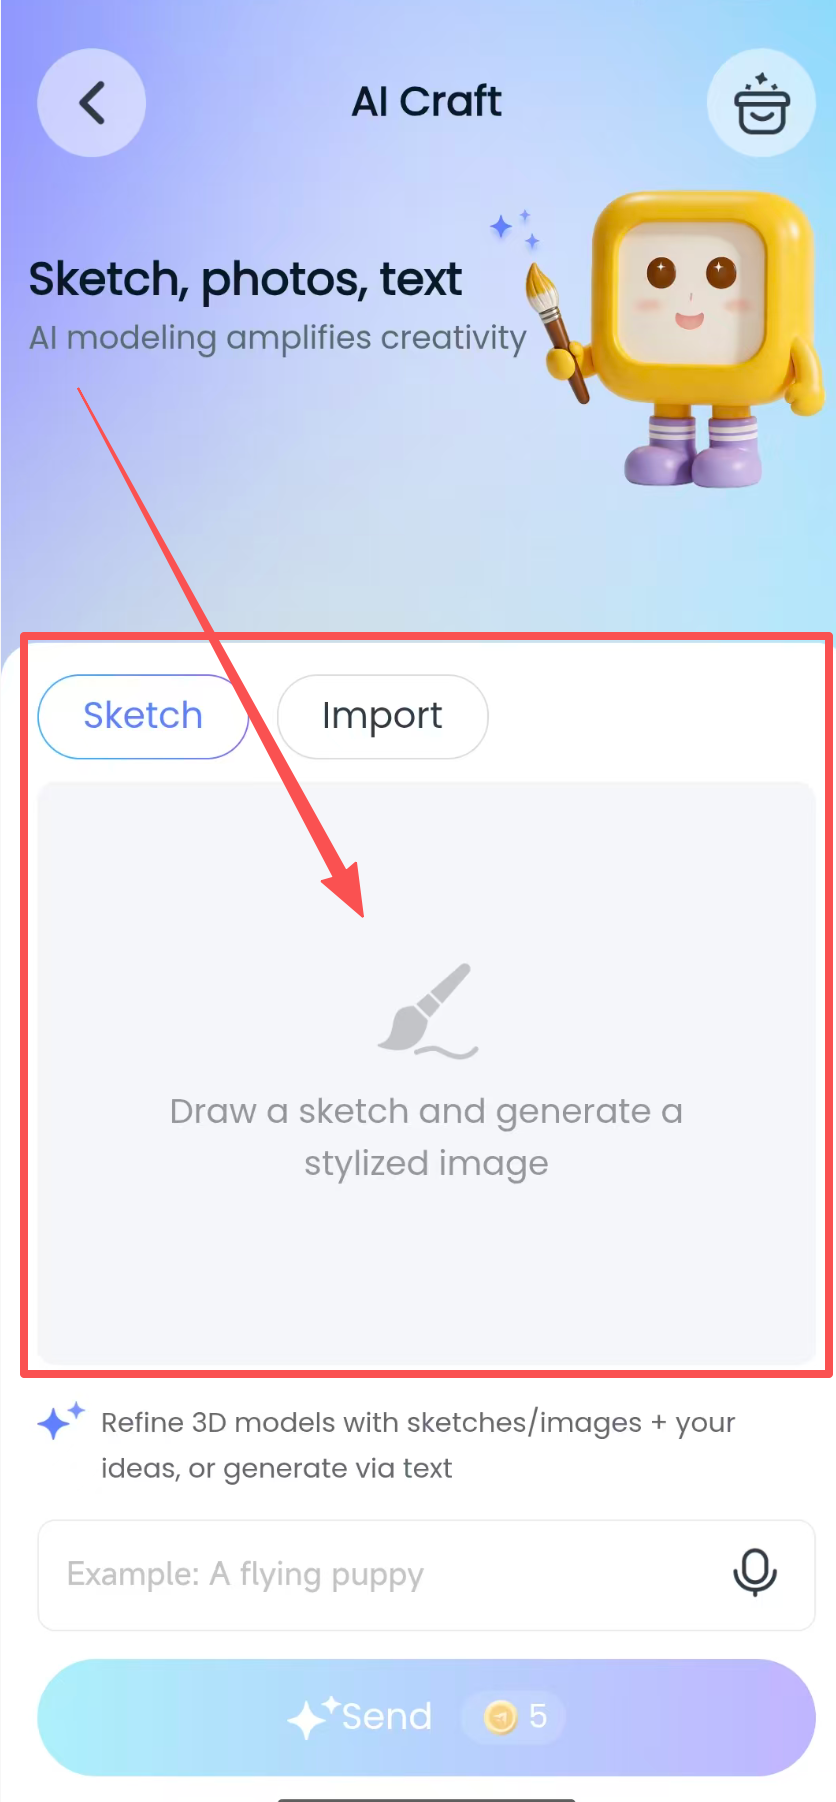
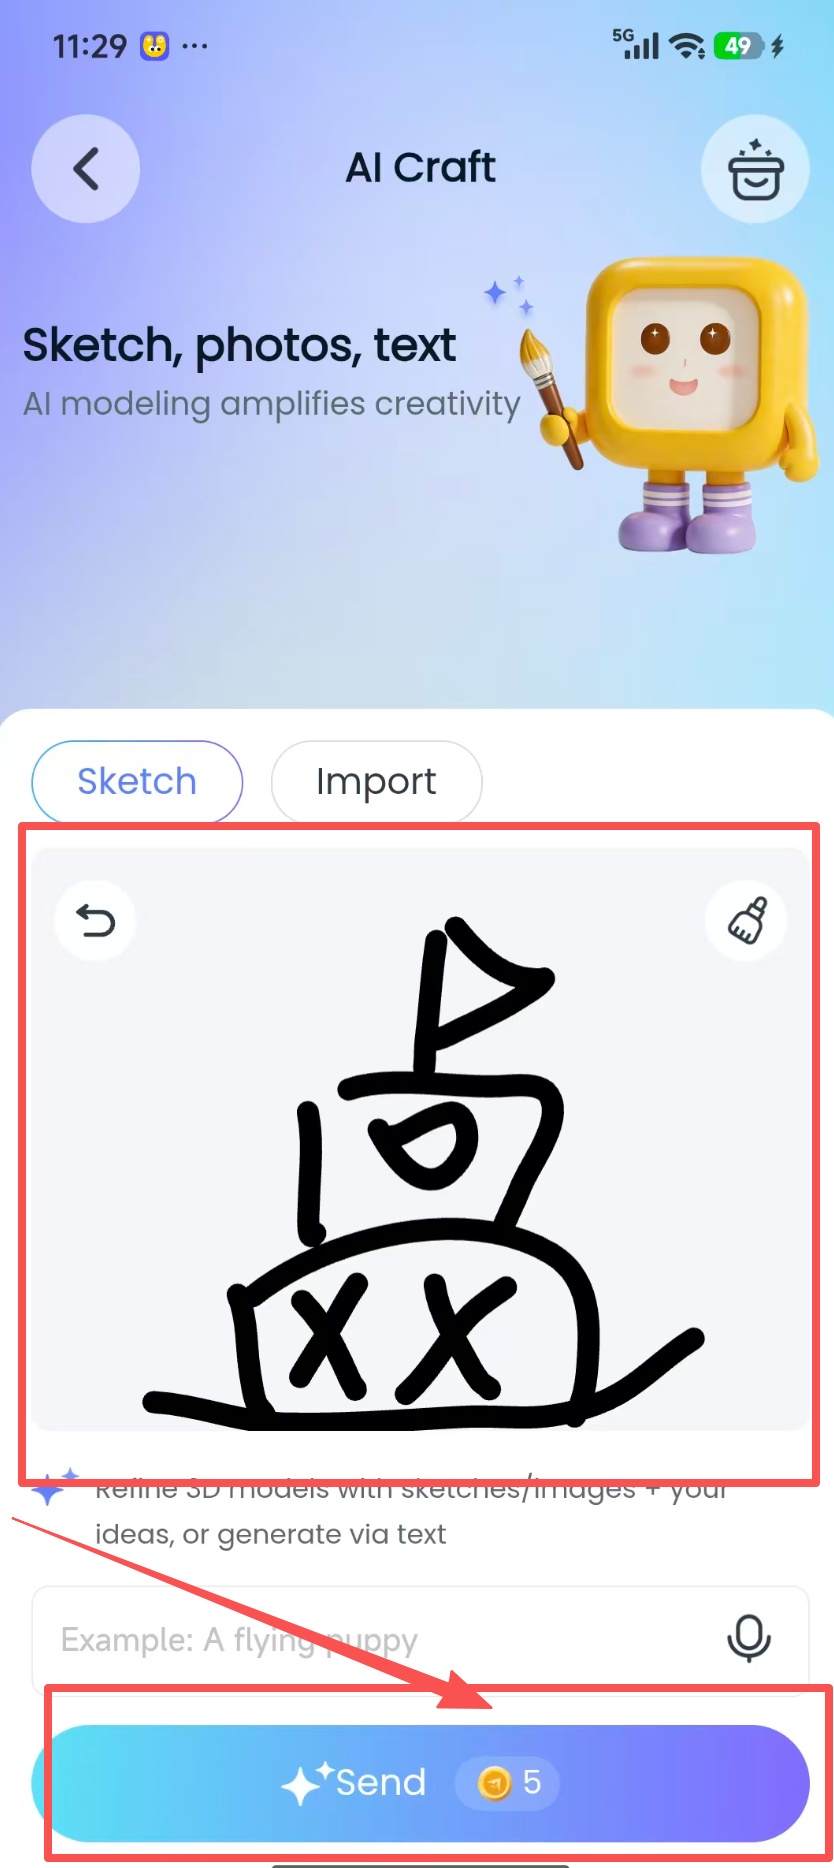
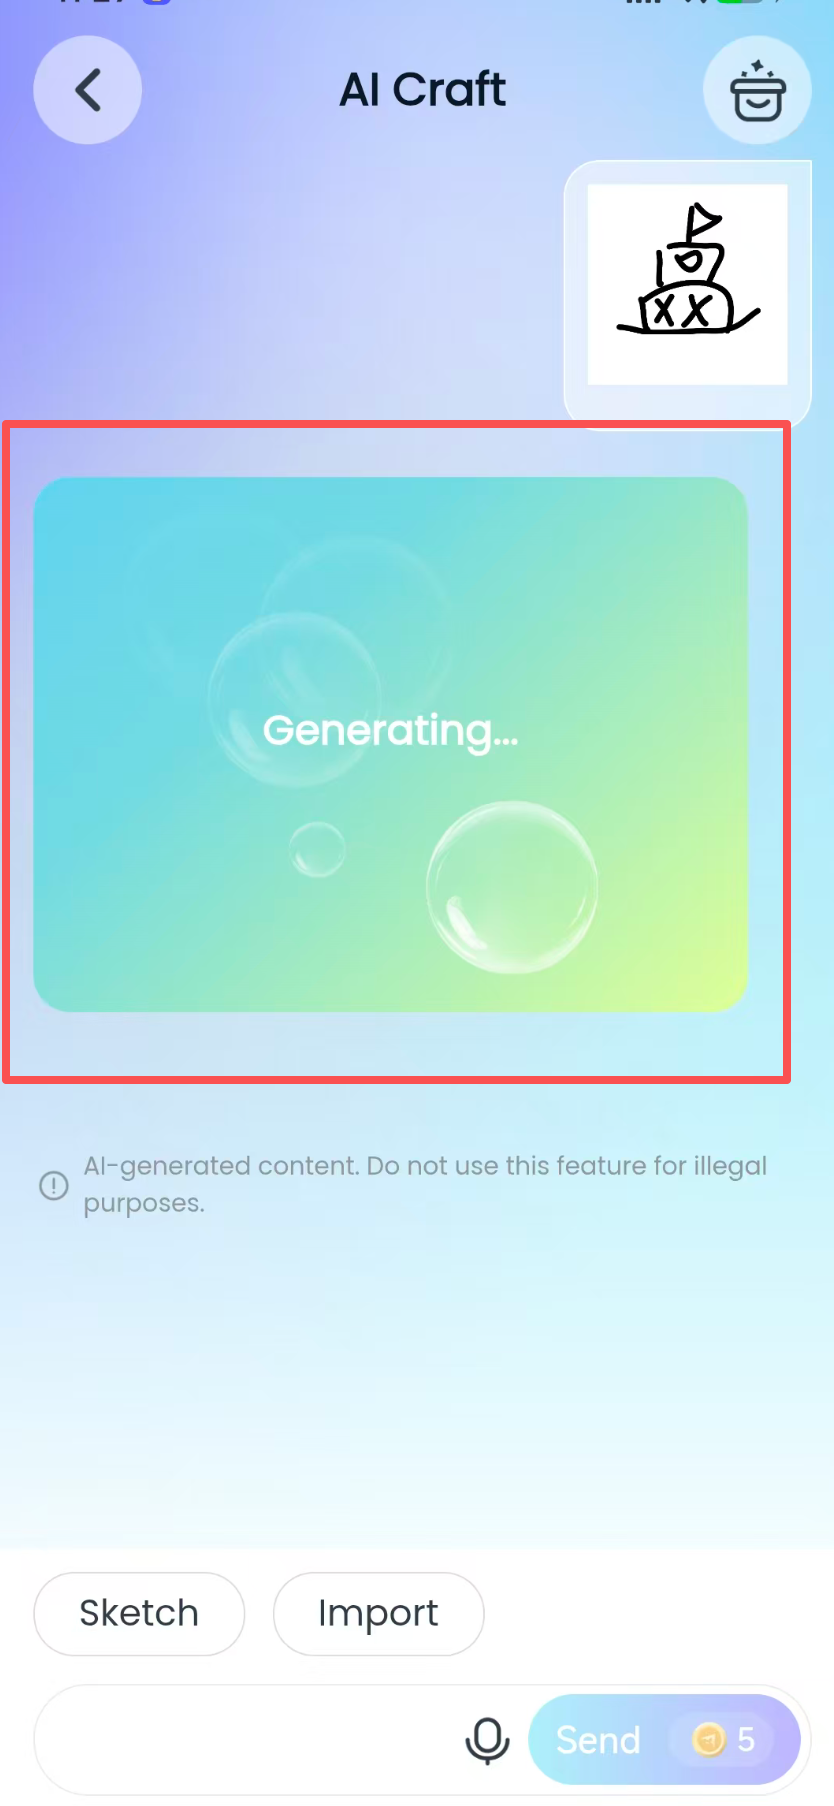
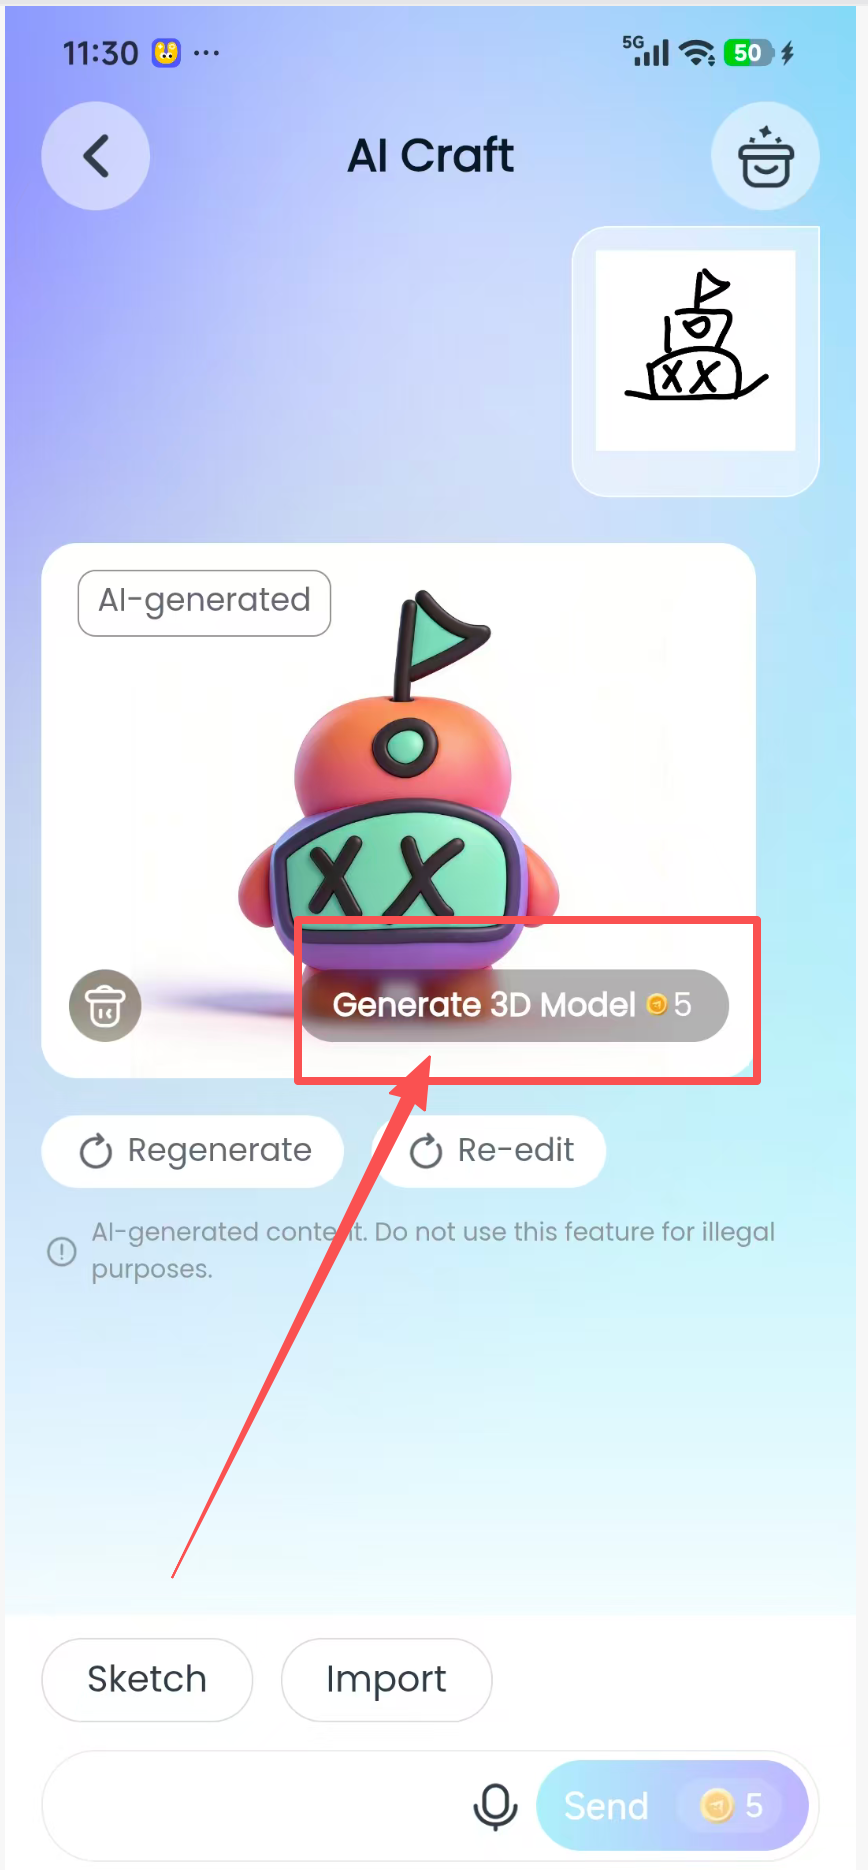
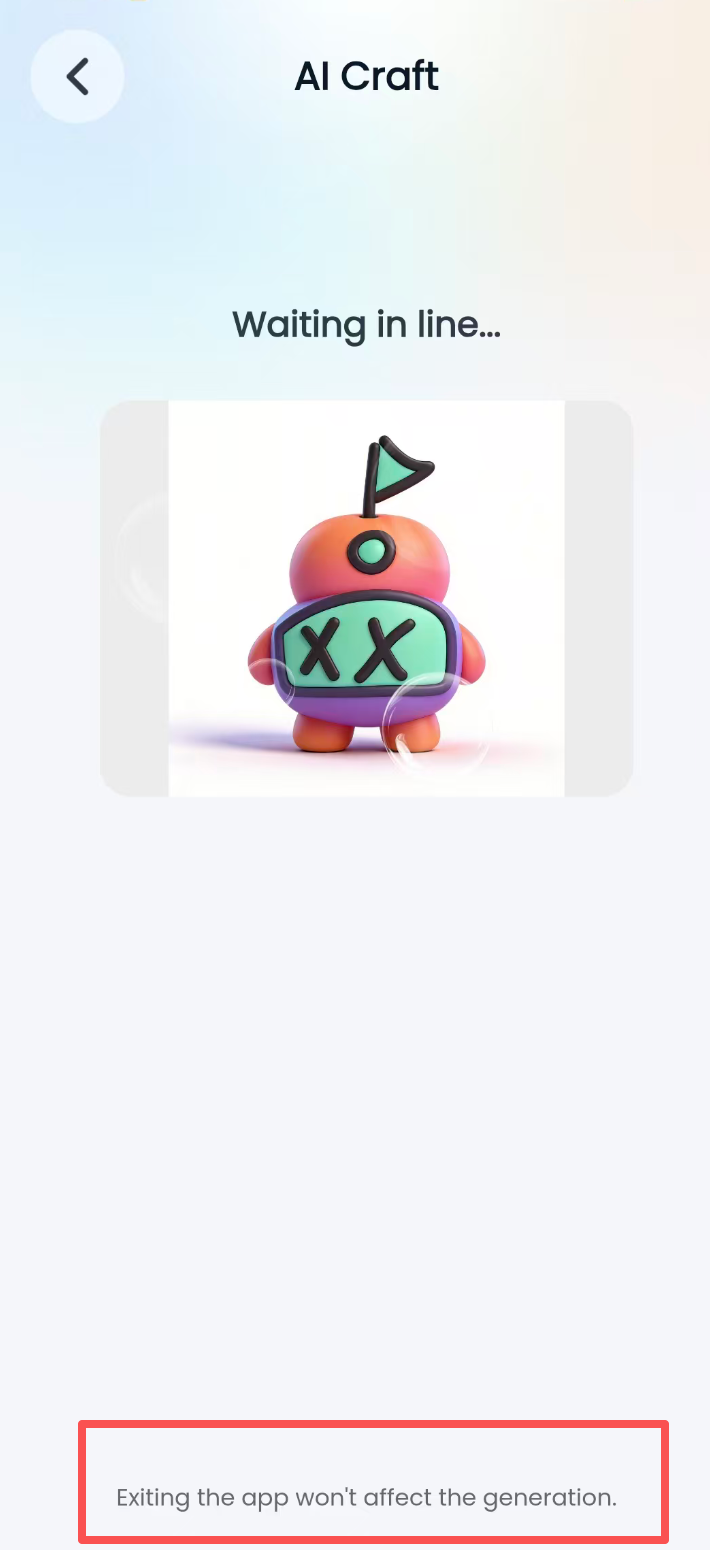
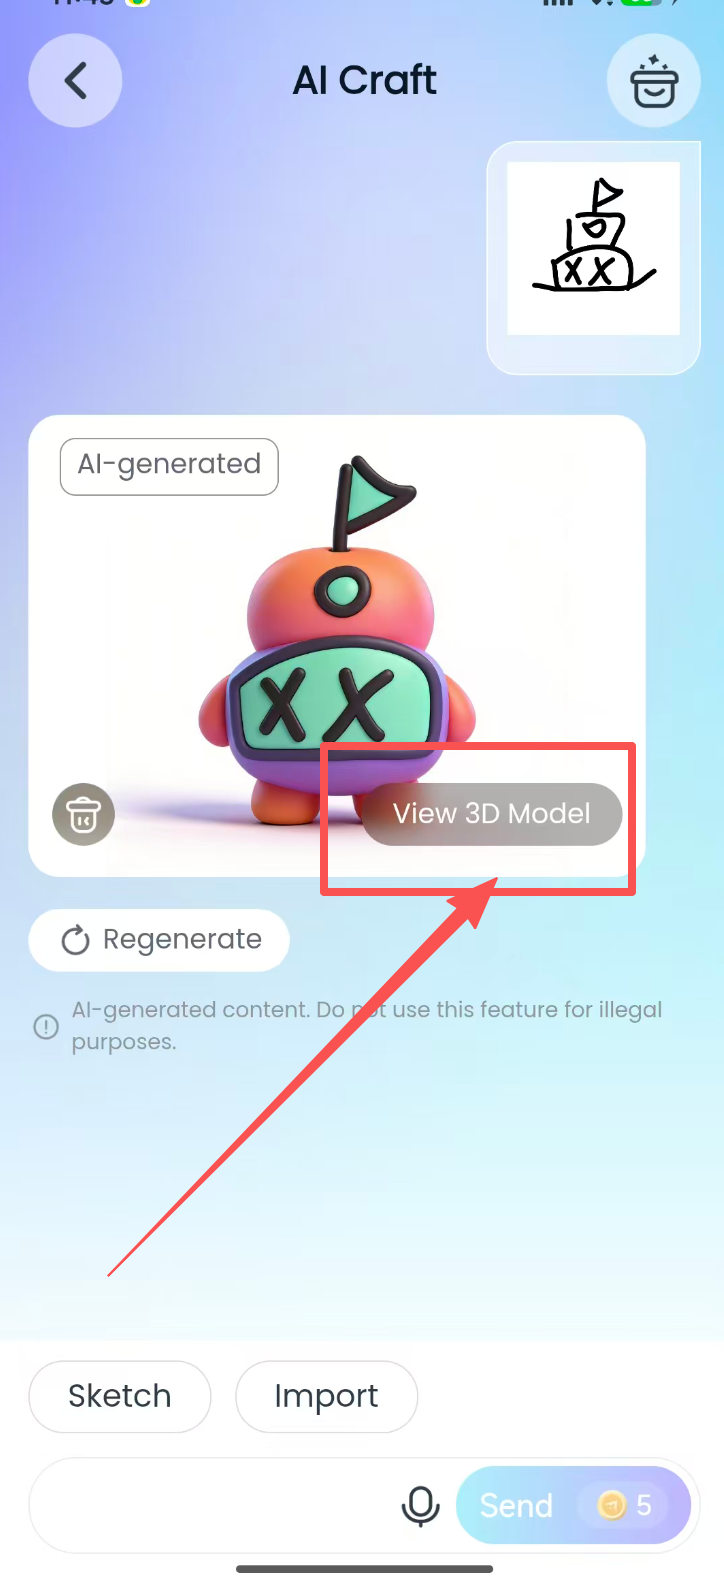
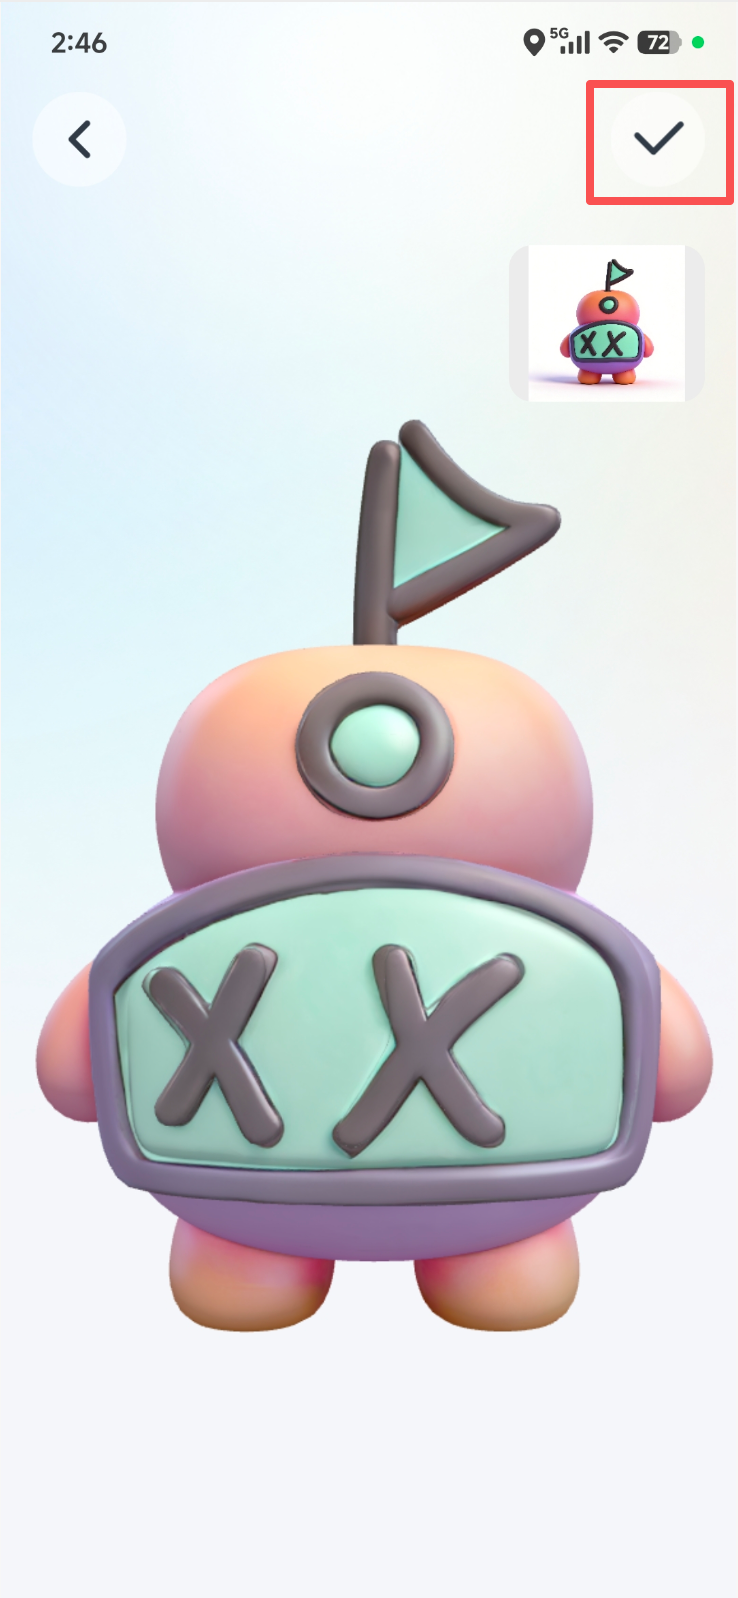
- Four input methods are supported: doodling, voice input, image import, and text input. The system first generates a 2D image preview from the input. If the image meets your expectations, tap “Generate Model” to convert it into a corresponding 3D model with one click. The following example uses “Doodle.”
- Procedure: Tap “Create” and download the module -> after the download, the button changes to “Open” -> open AI Craft -> select “Doodle” -> draw on the canvas with your finger -> tap “Send” -> wait while the model image is generated -> if the generated image meets your requirements, tap “Generate Model” -> wait while the 3D model is generated -> tap “View Model” to open the model preview page -> tap “√” in the upper-right corner to open the print editing page -> sele
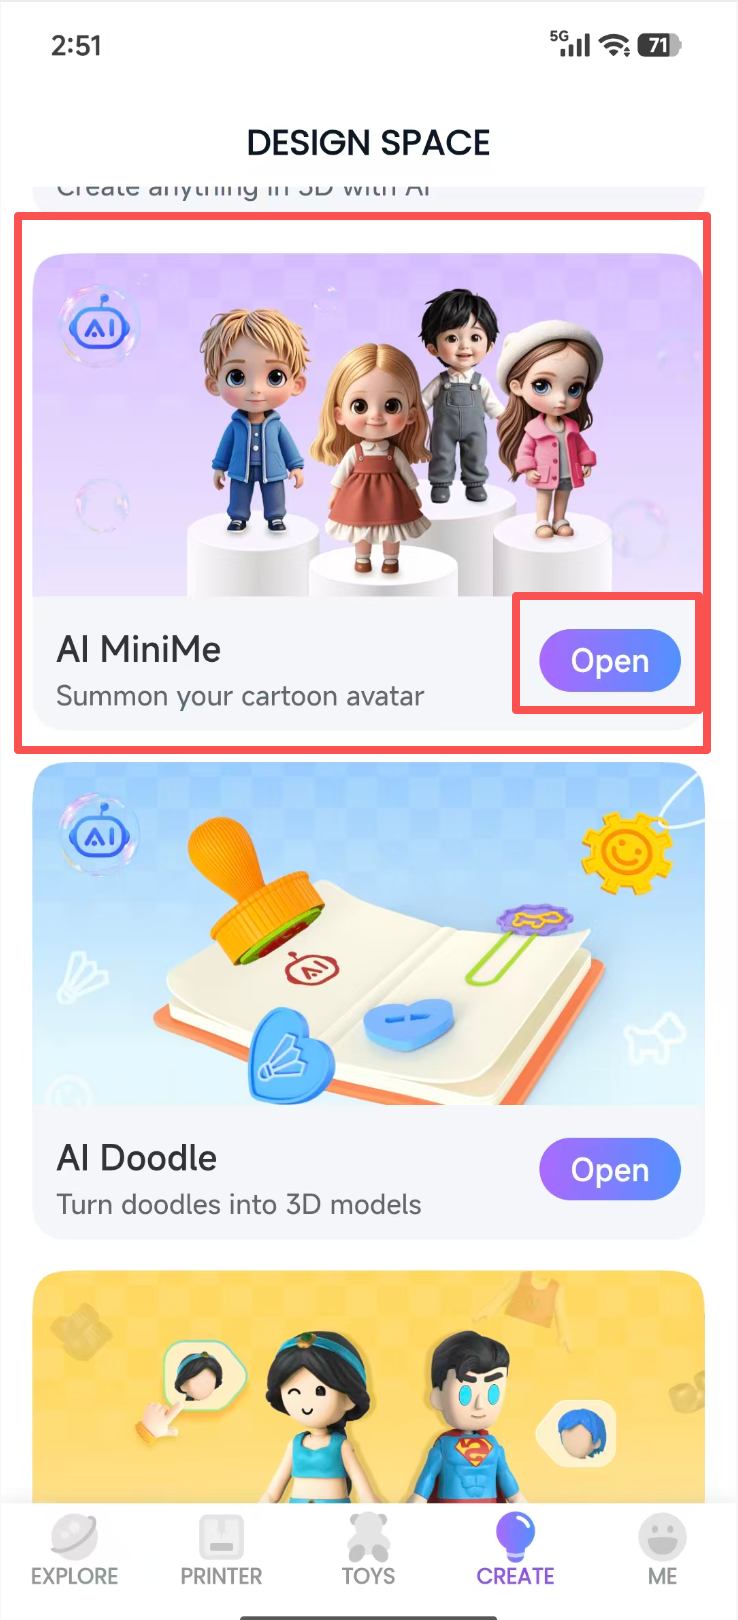
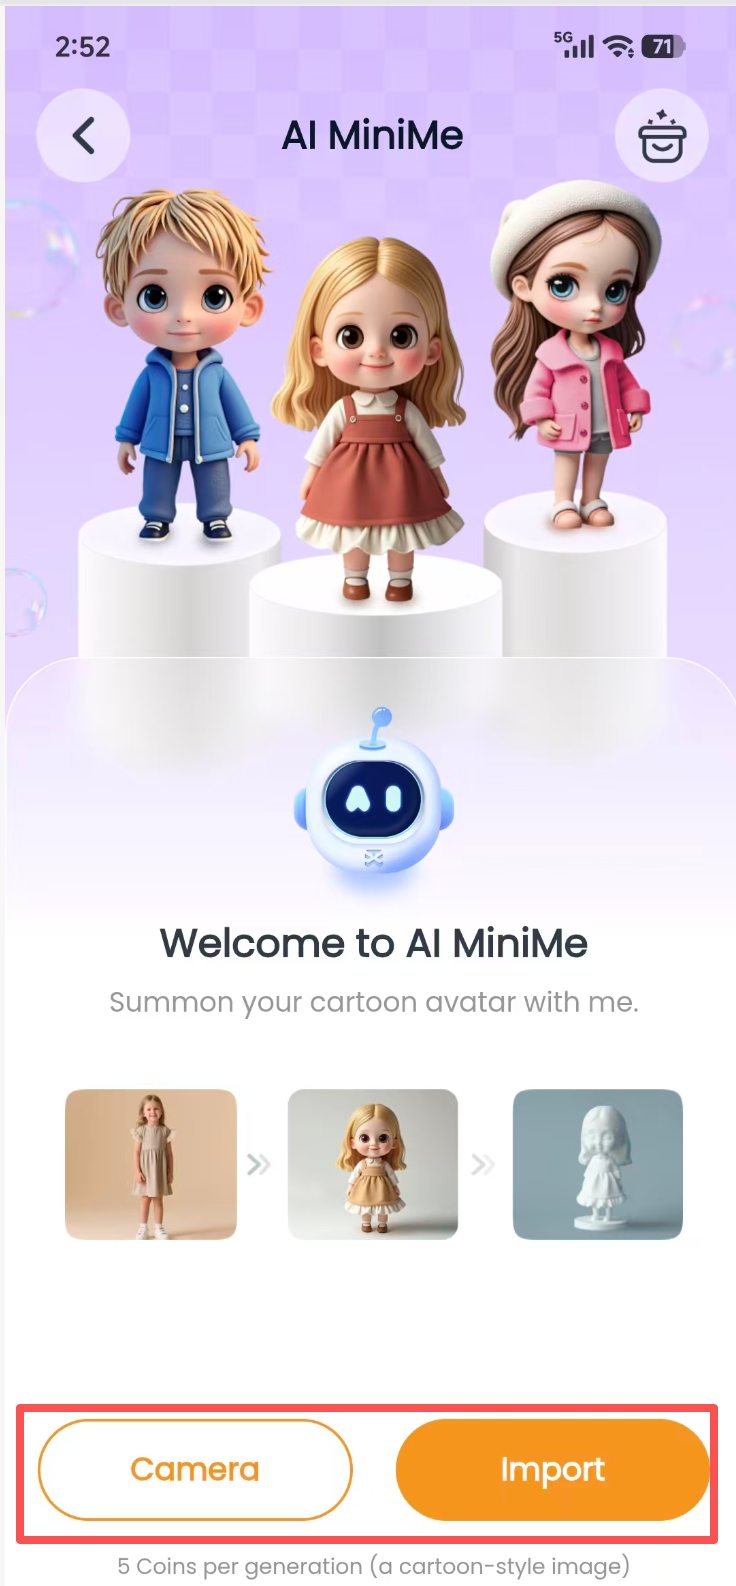
③ AI MiniMe:
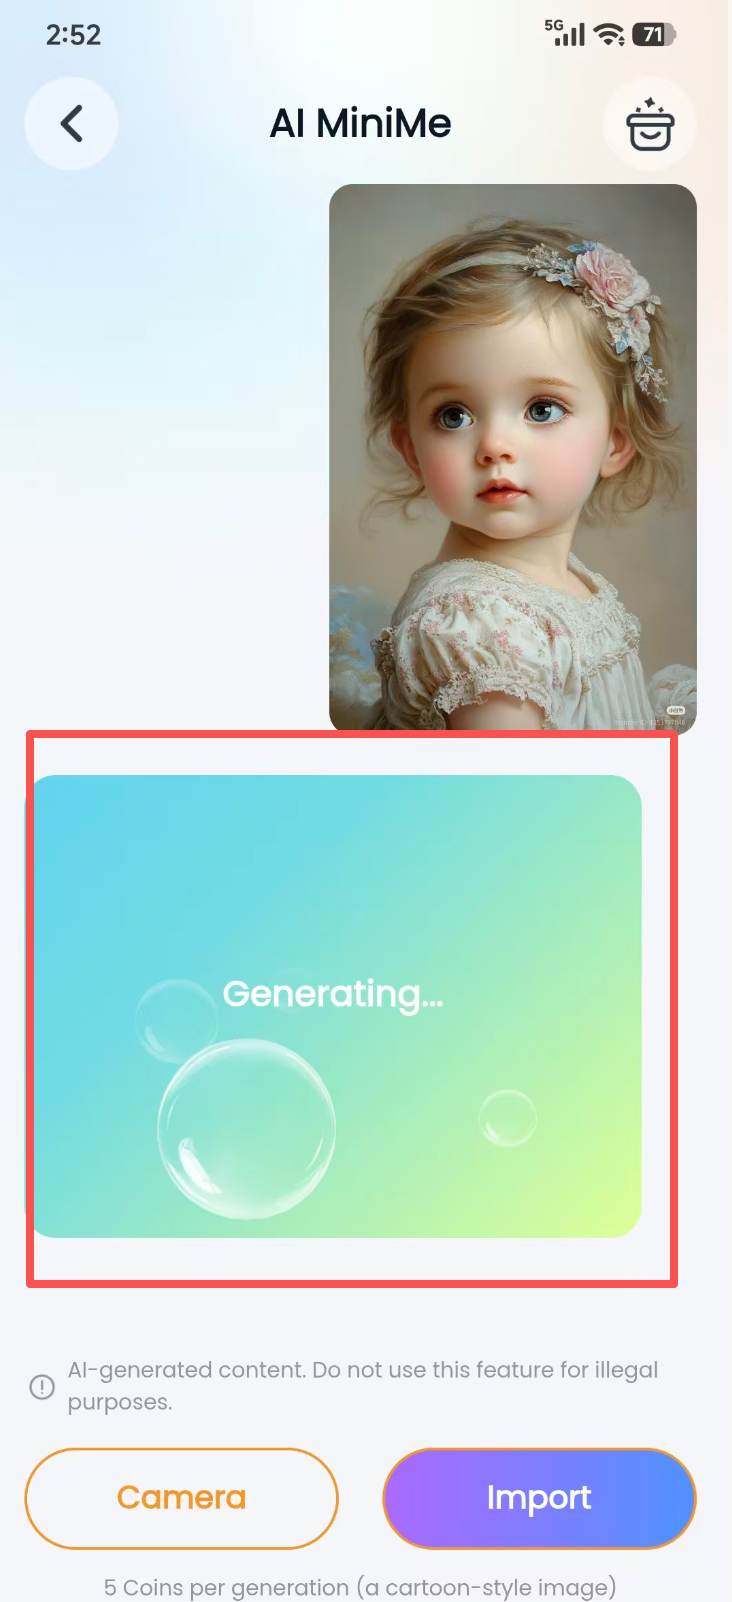
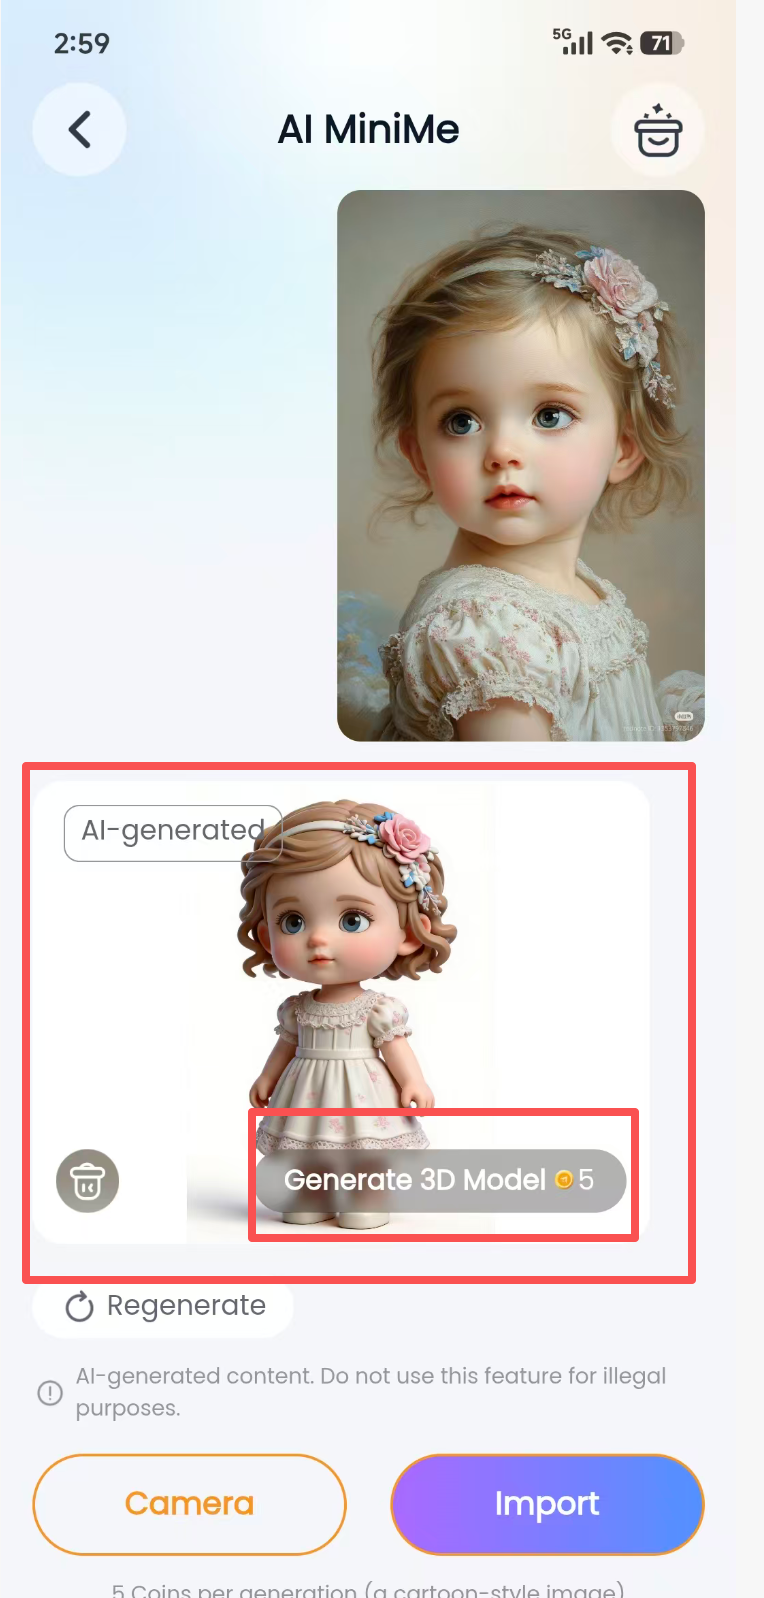
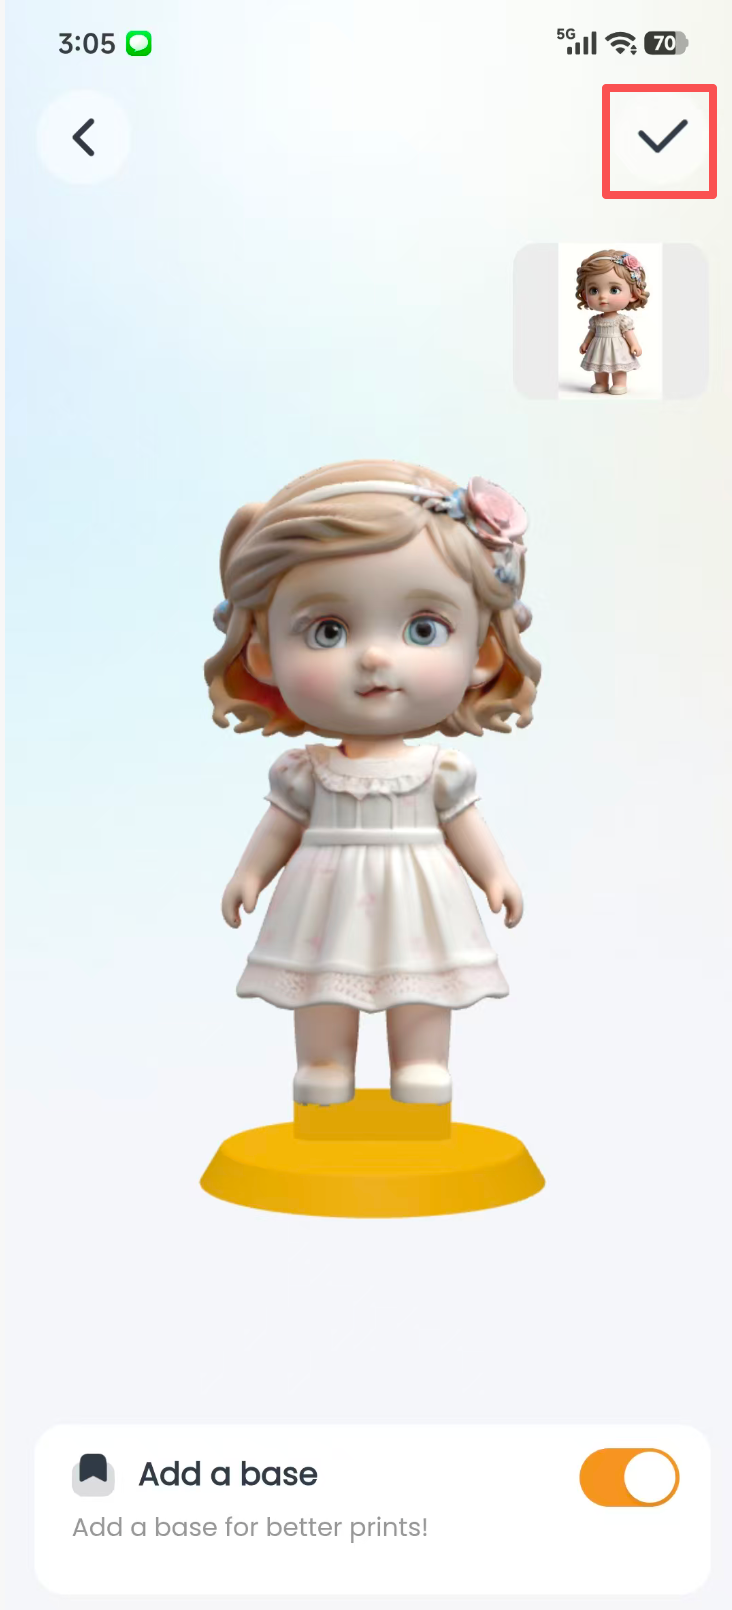
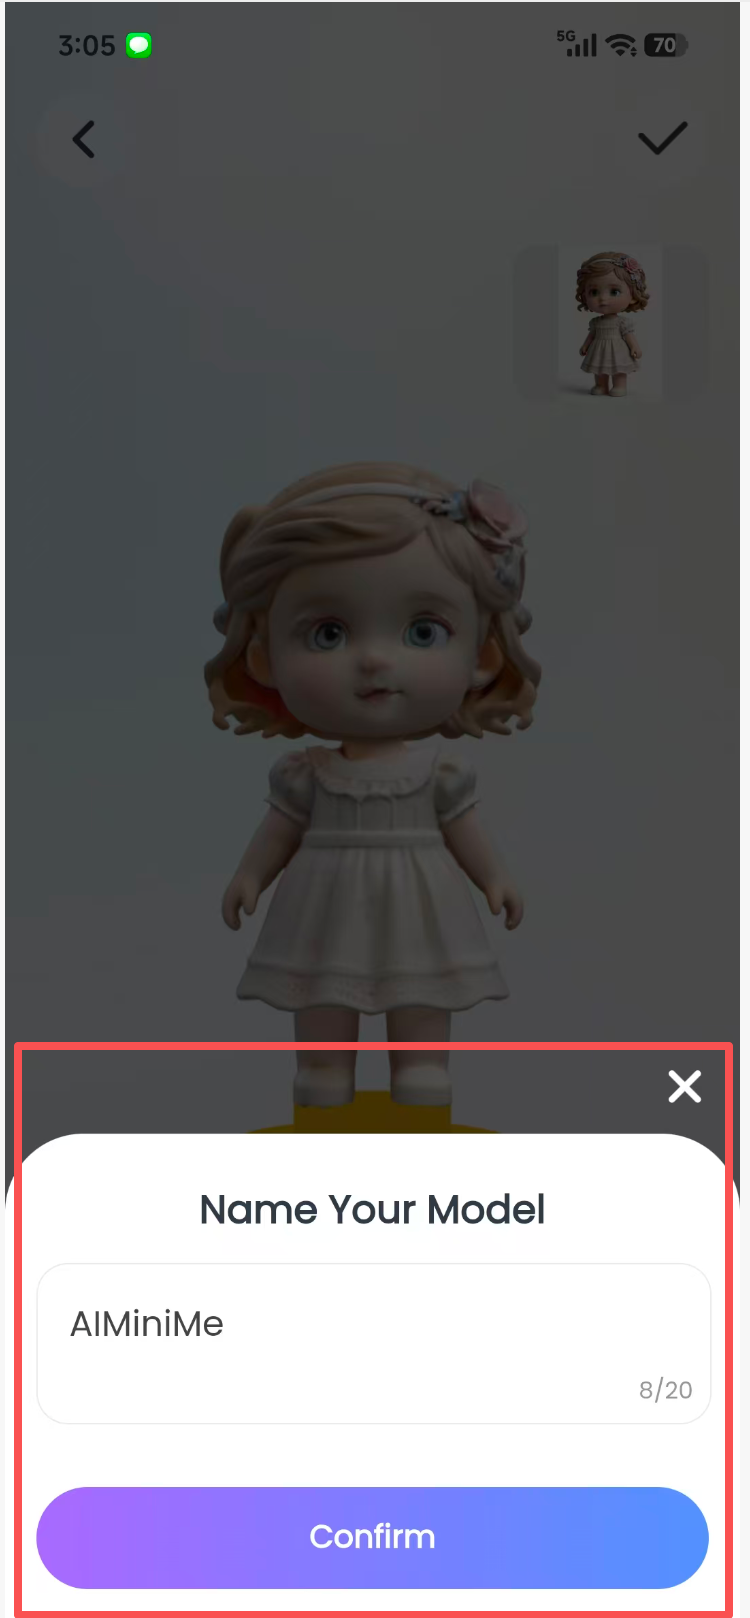
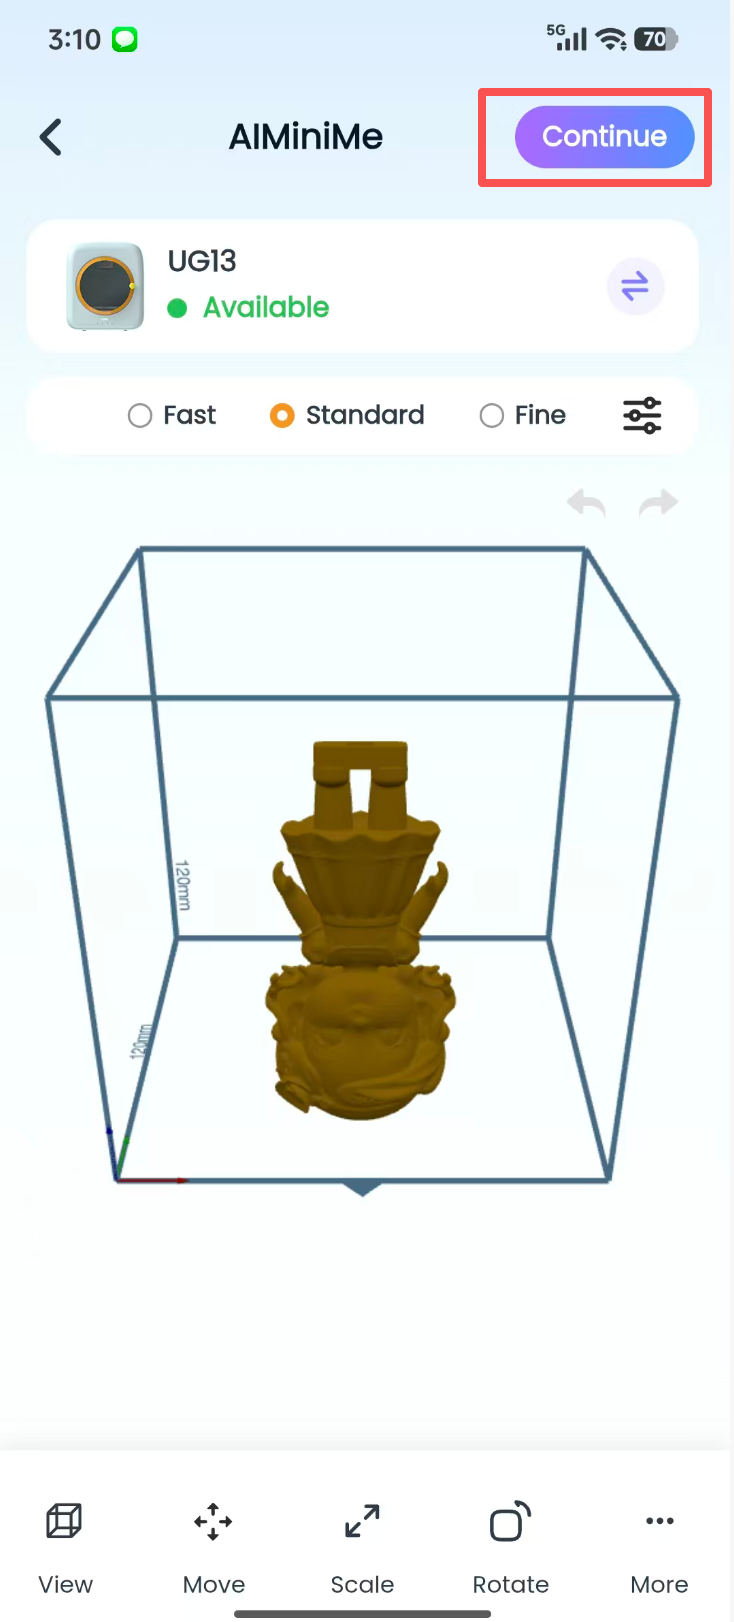
- Take a photo or import a portrait from the photo album. The system automatically recognizes it and generates a preview of a 3D character resembling the person. If you are satisfied with the preview, confirm to generate a printable, personalized 3D character model with one click—your own mini figurine. The following example uses “Import.”
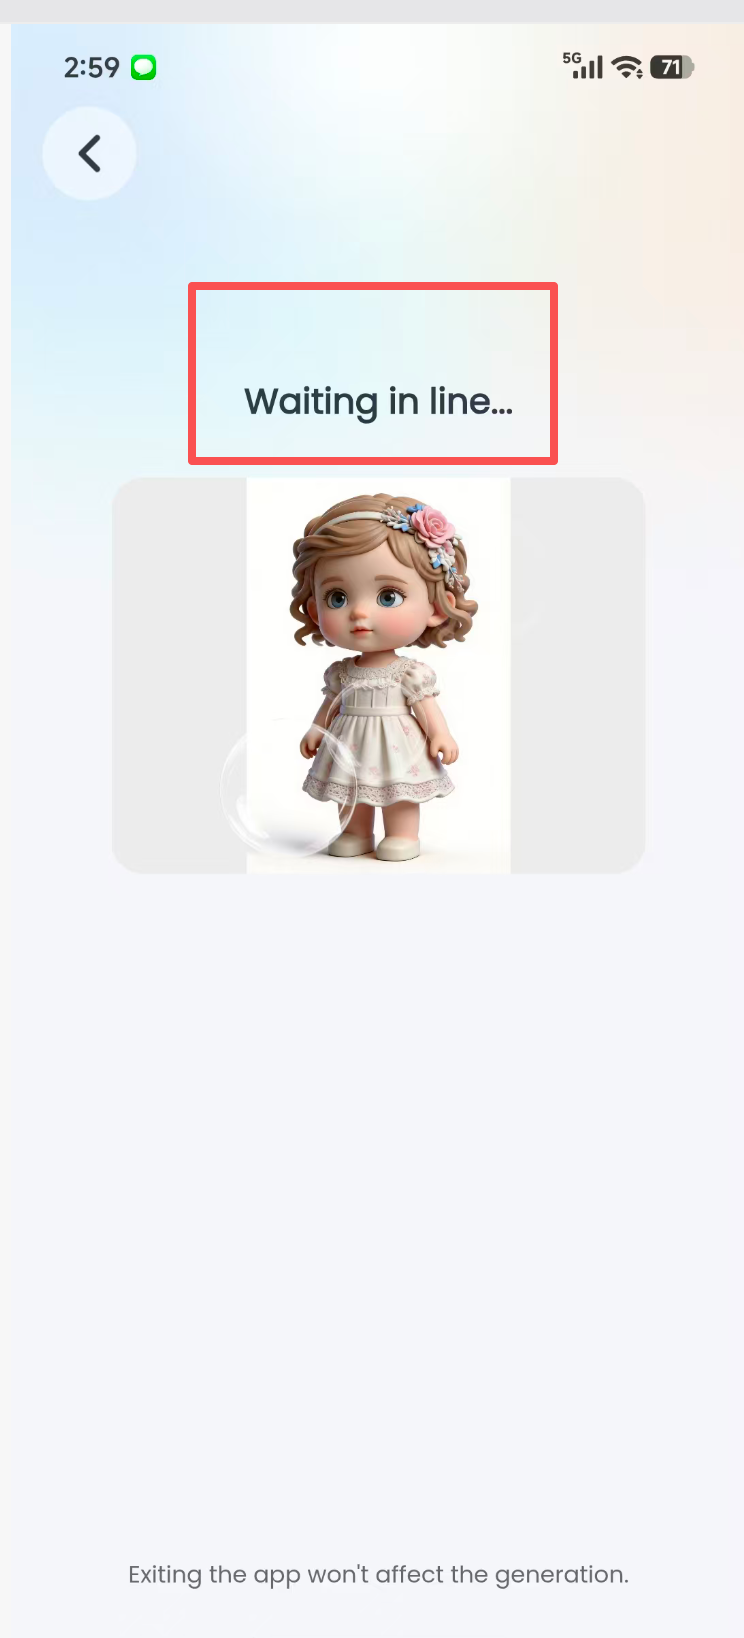
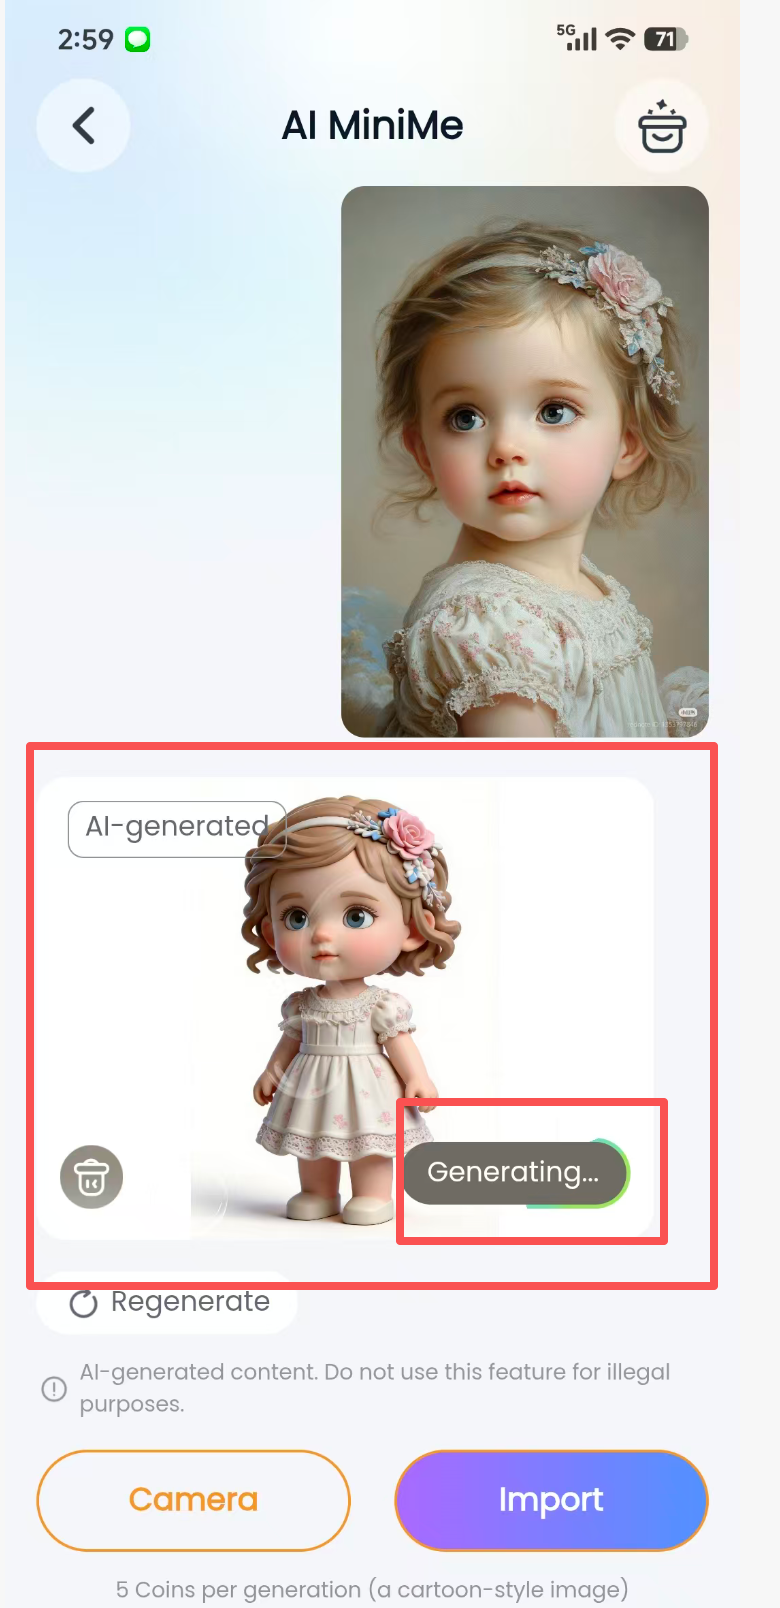
- Procedure: Select AI MiniMe and tap “Open” -> select “Import Image” -> choose a photo -> wait while the model image is generated -> if the generated image meets your requirements, tap “Generate Model” -> wait while the 3D model is generated -> tap “View Model” to open the model preview page -> tap “√” in the upper-right corner to open the print editing page -> select “Next” and “Continue” to start printing.
④ AI Doodle:
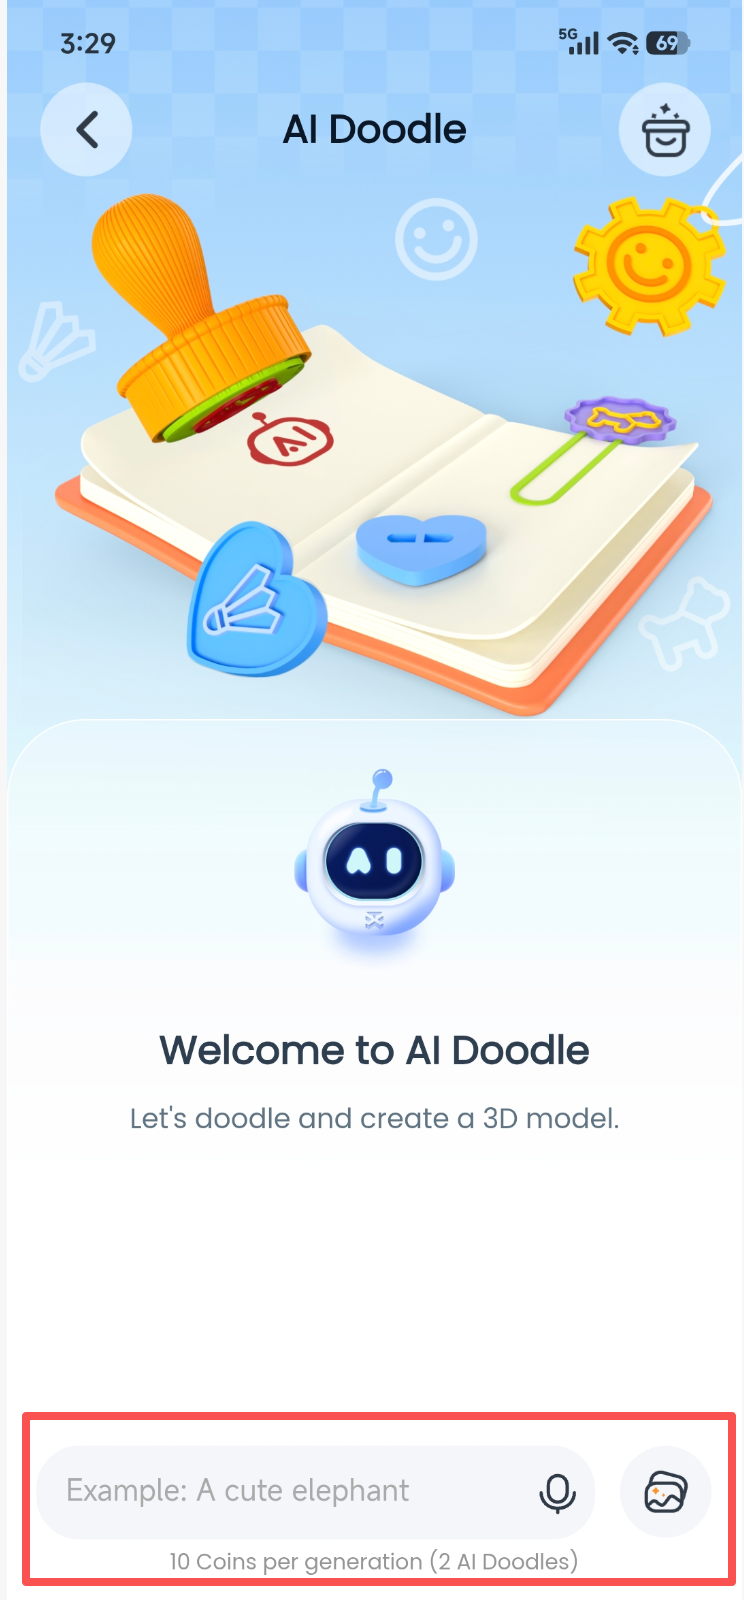
- Three input methods are supported: voice input, text input, and importing an existing pattern. The system automatically creates a personalized stamp design from your input. After confirming the design, generate the corresponding physical stamp as a 3D model and proceed directly to printing. The following example uses “Text Input.”
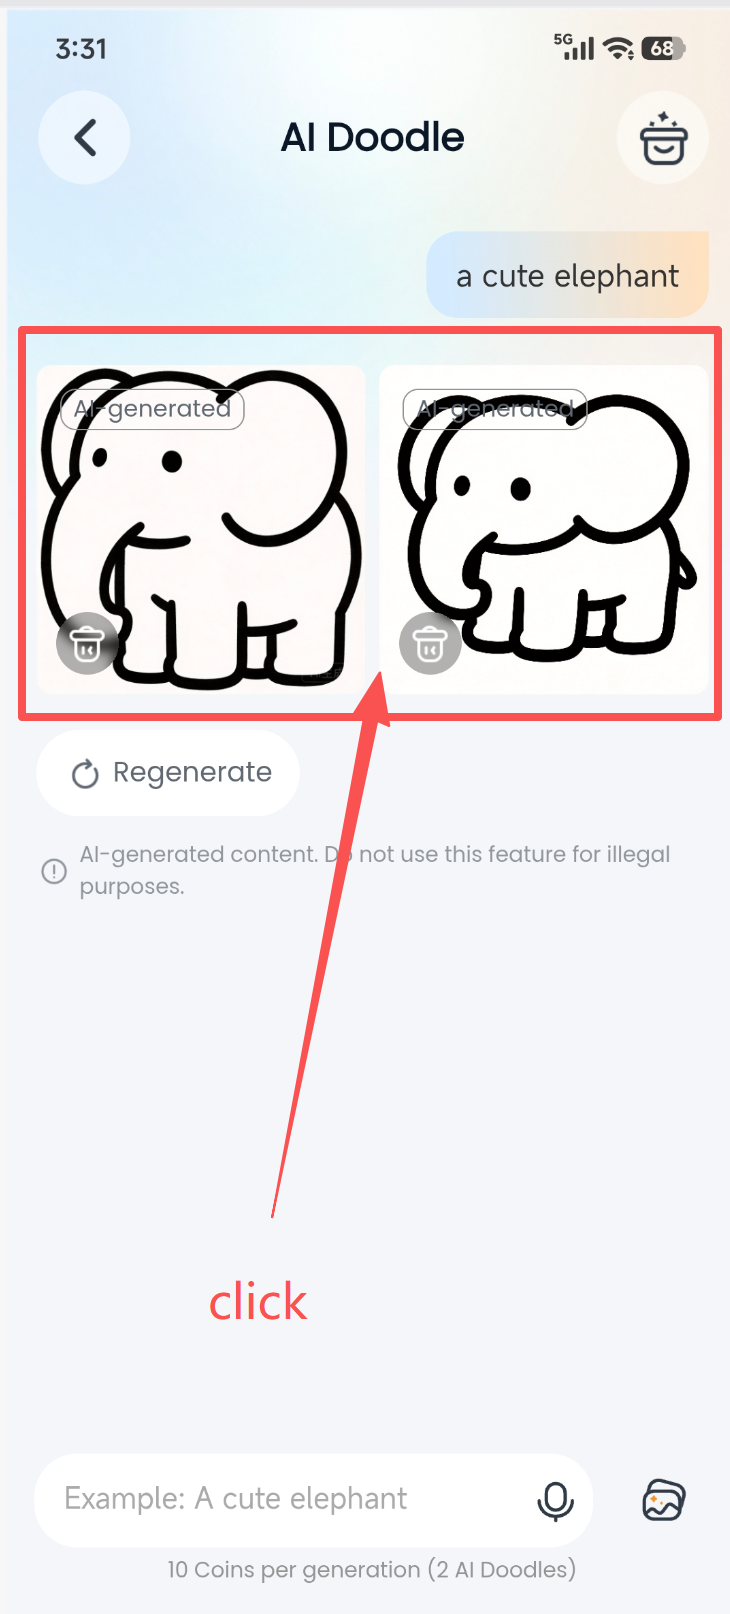
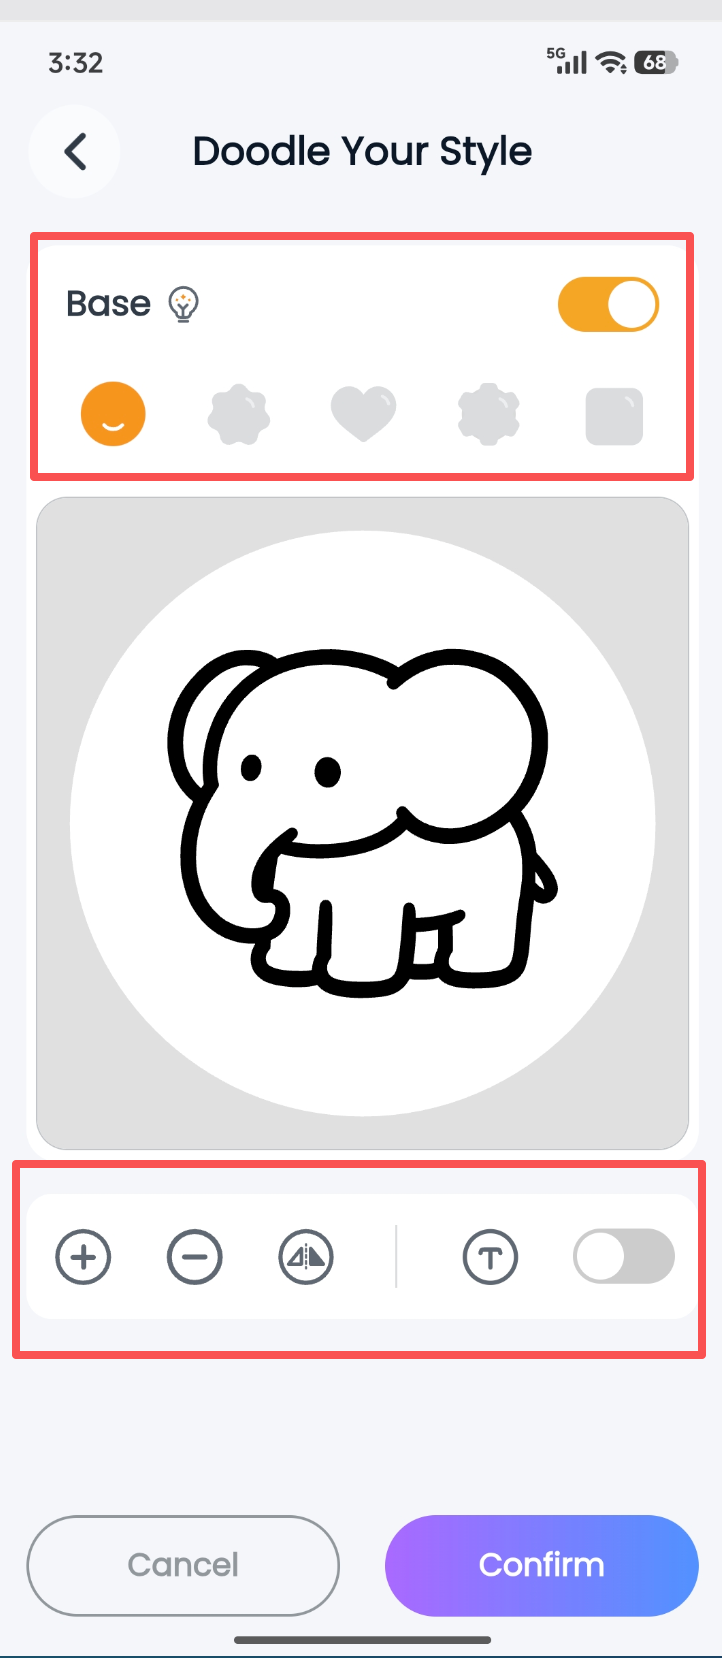
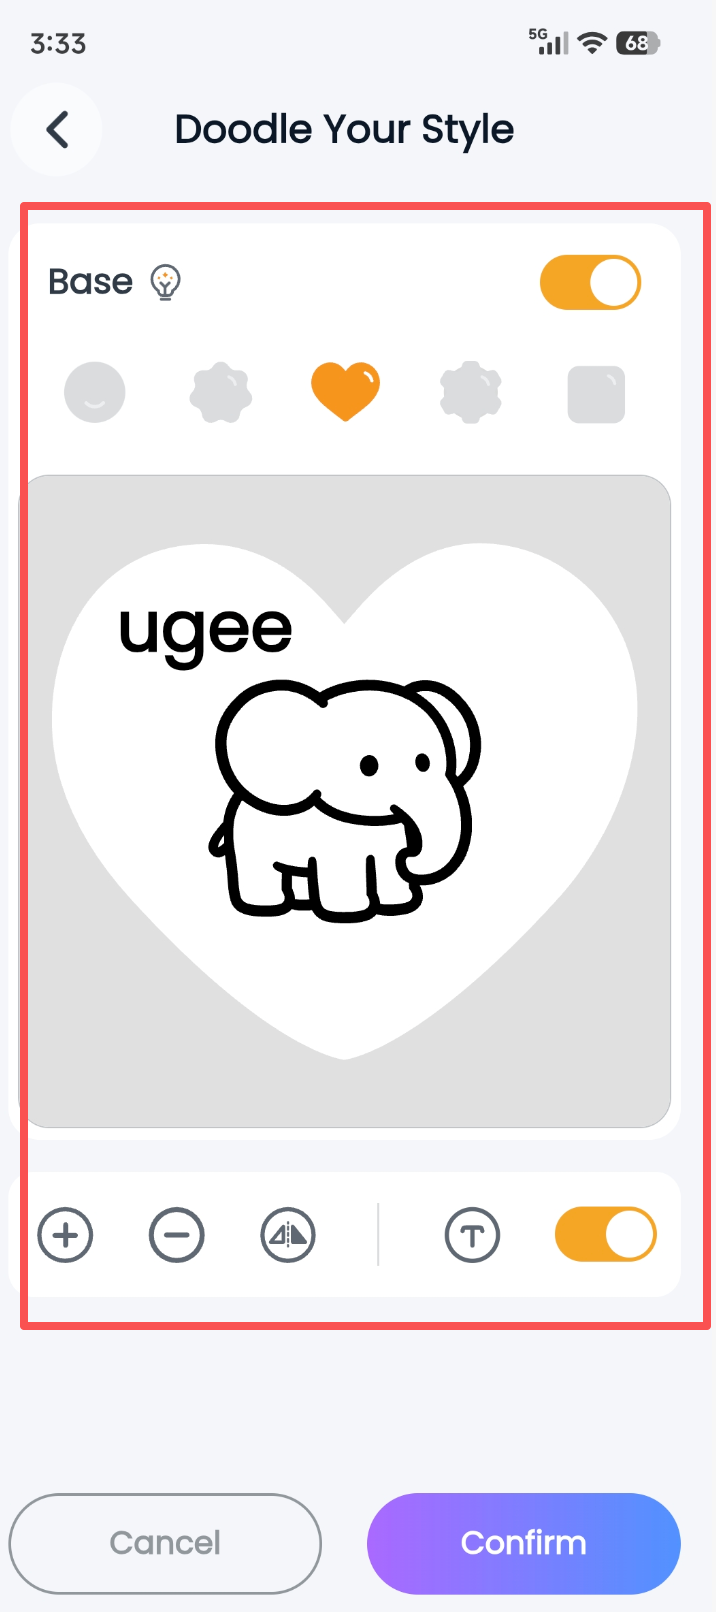
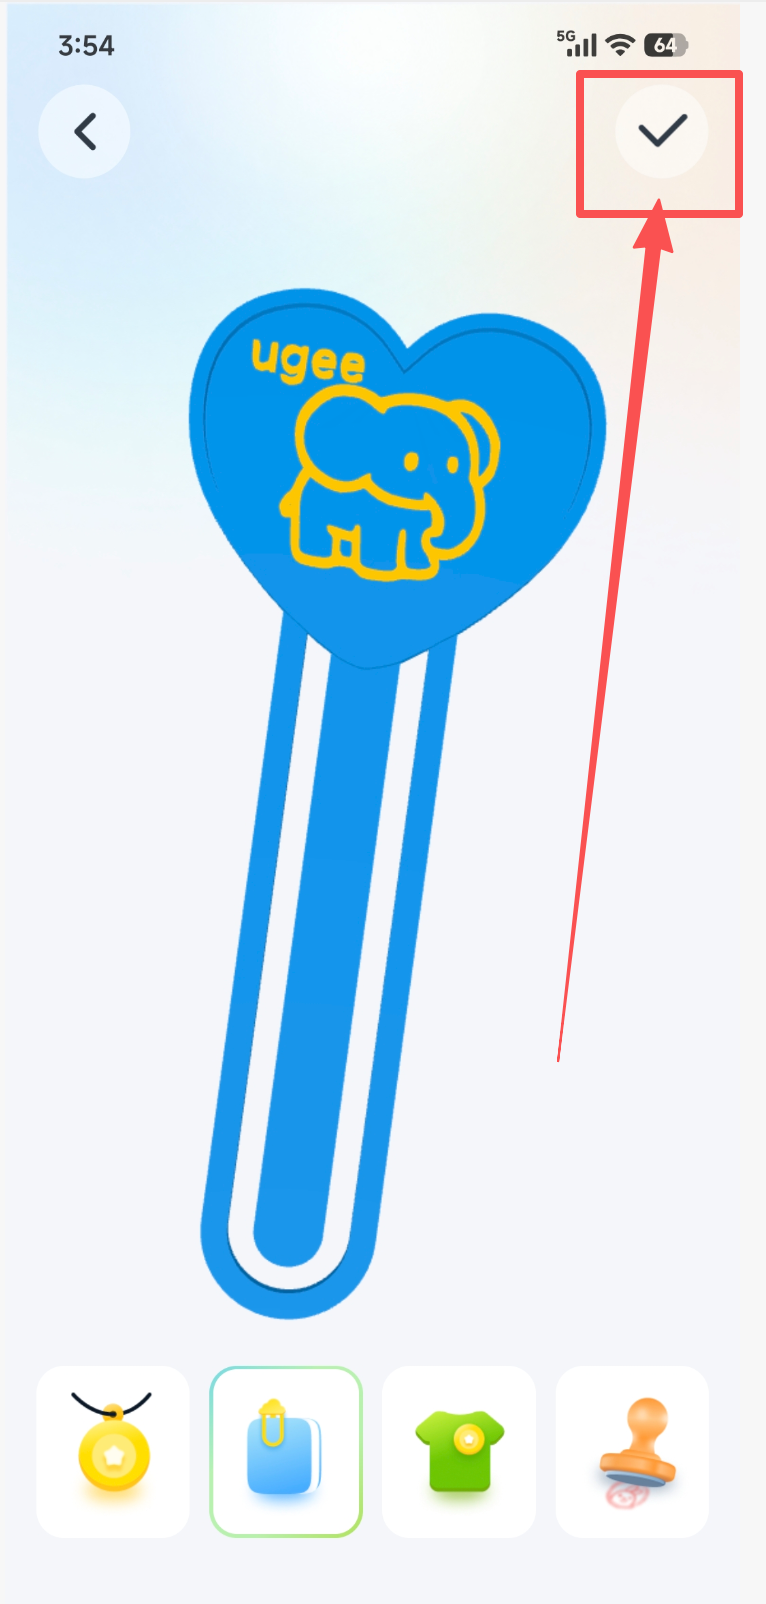
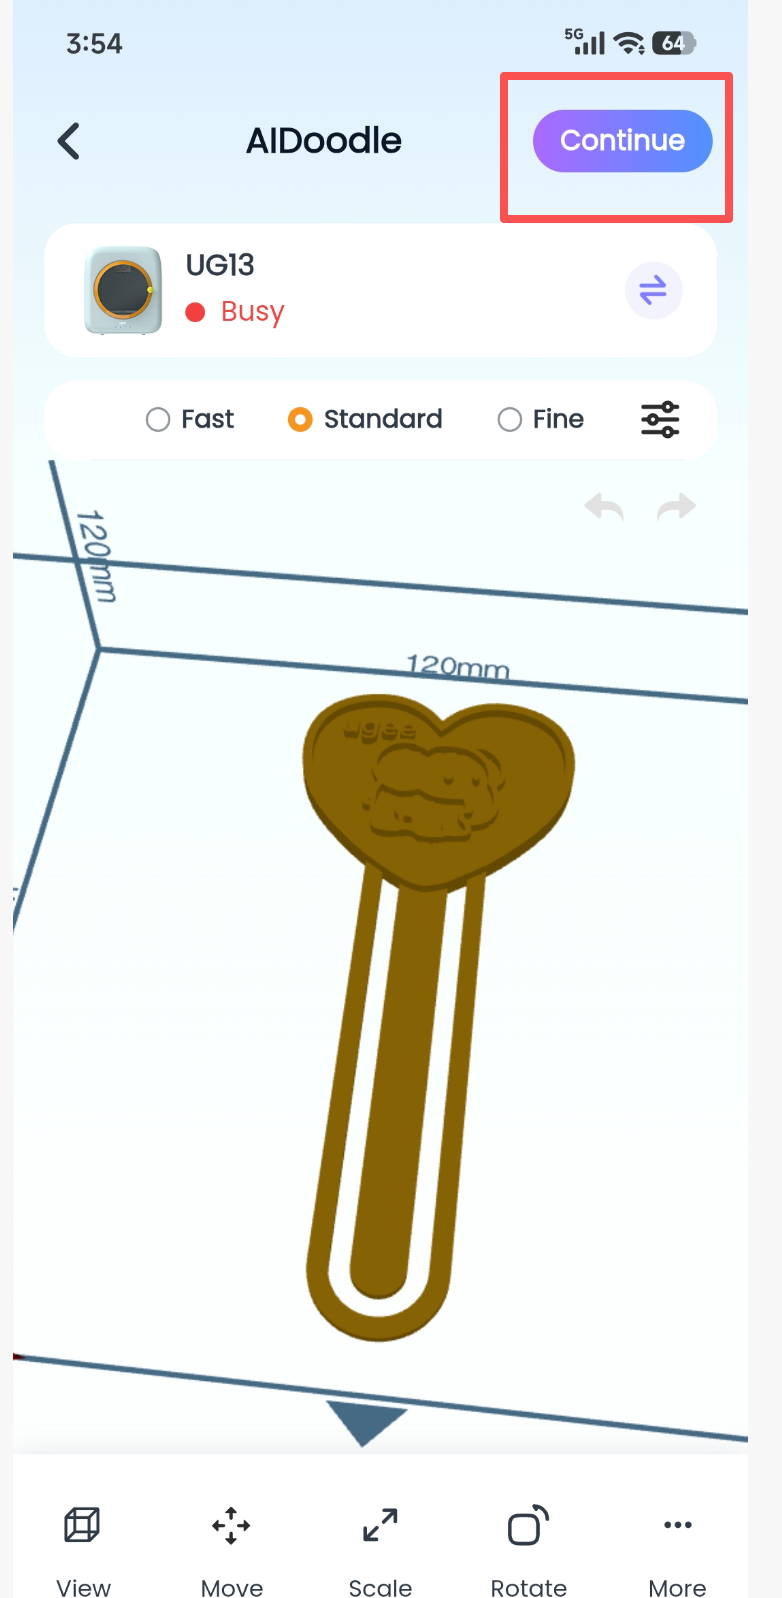
- Procedure: Select the AI Doodle module and tap “Open” -> enter the model-generation screen -> enter the desired model text -> after the results are generated, select a pattern -> on the image preprocessing page, flip the image, add text, or choose a base -> tap “Confirm” -> select “Necklace,” “Brooch,” “Bookmark,” or “Stamp” -> tap “√” in the upper-right corner to open the print editing page -> select “Next” and “Continue” to start printing.
⑤ MiniMakie:
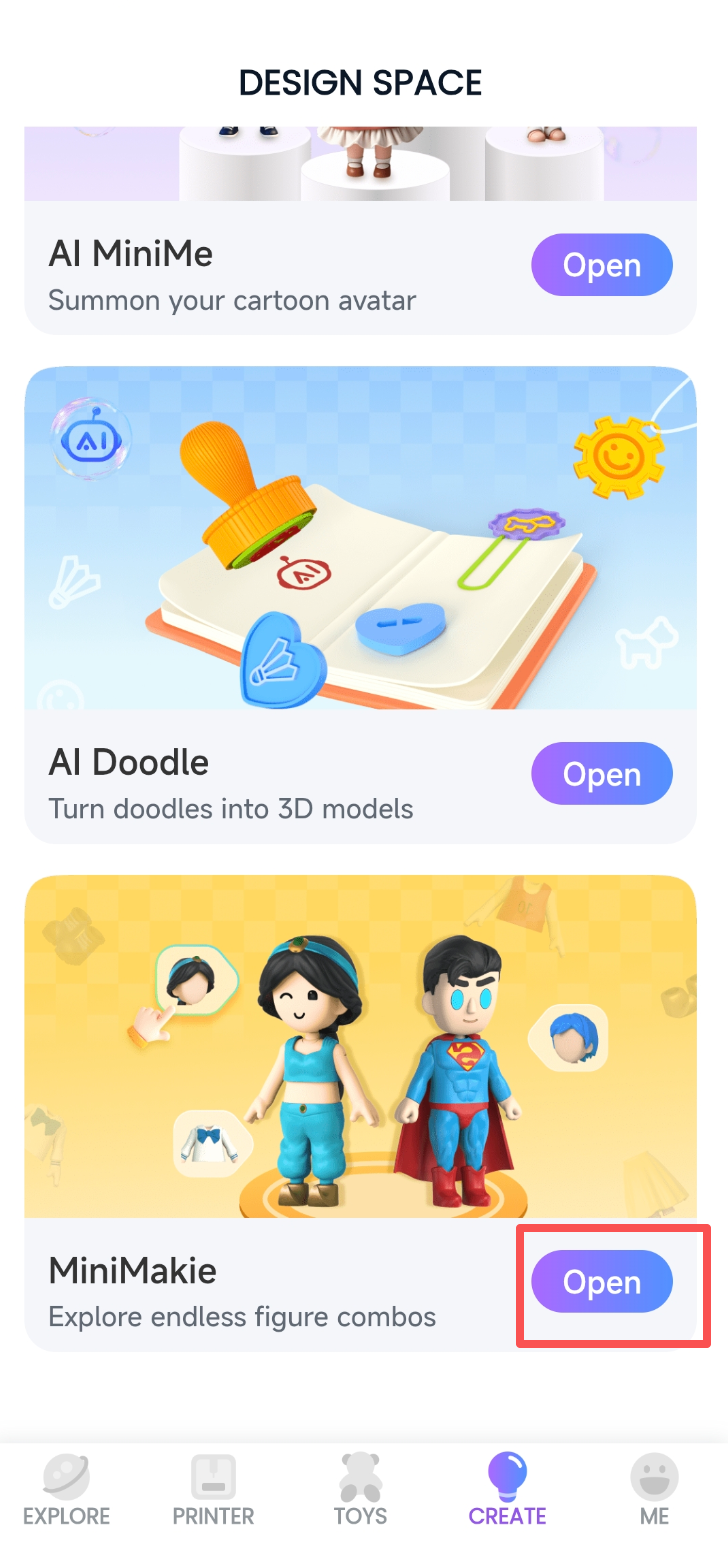
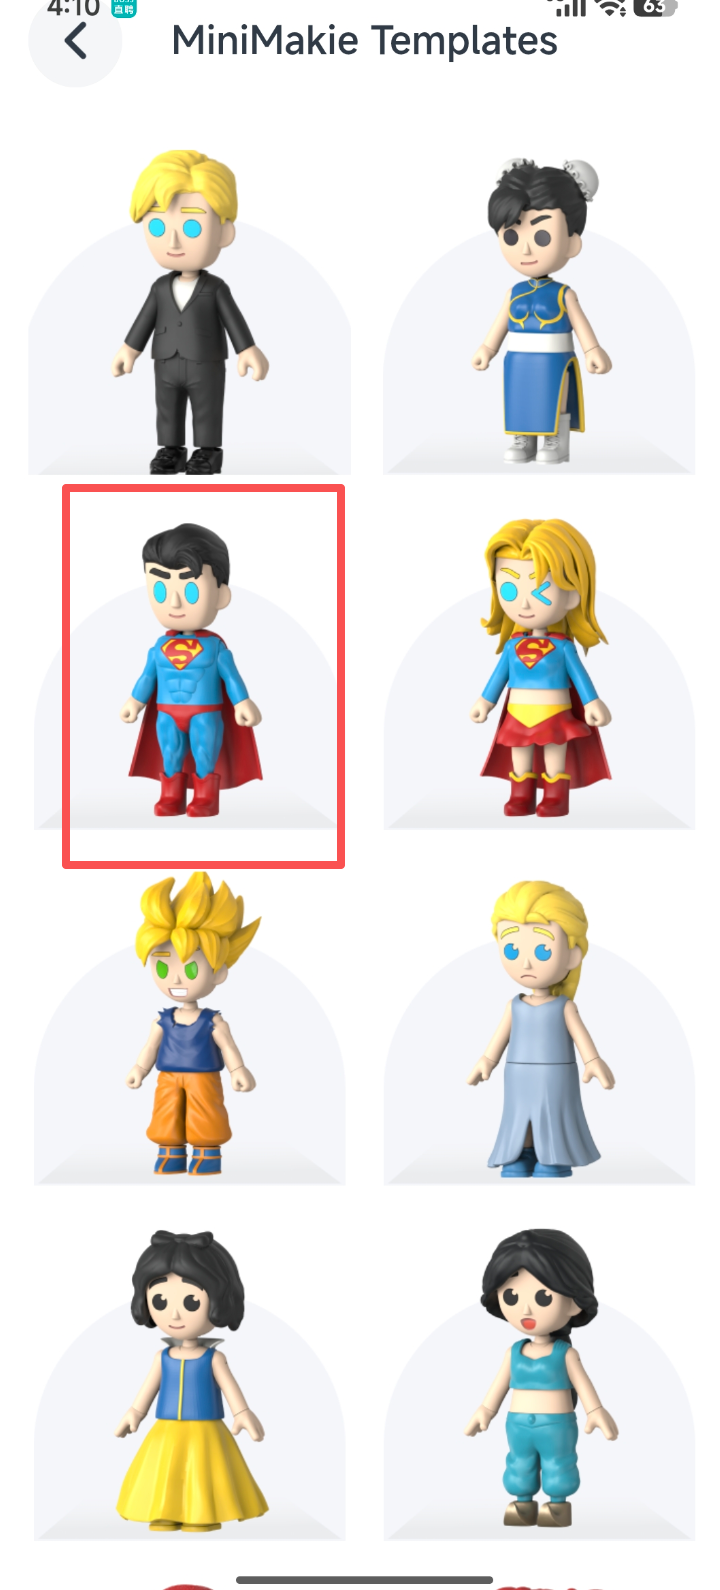
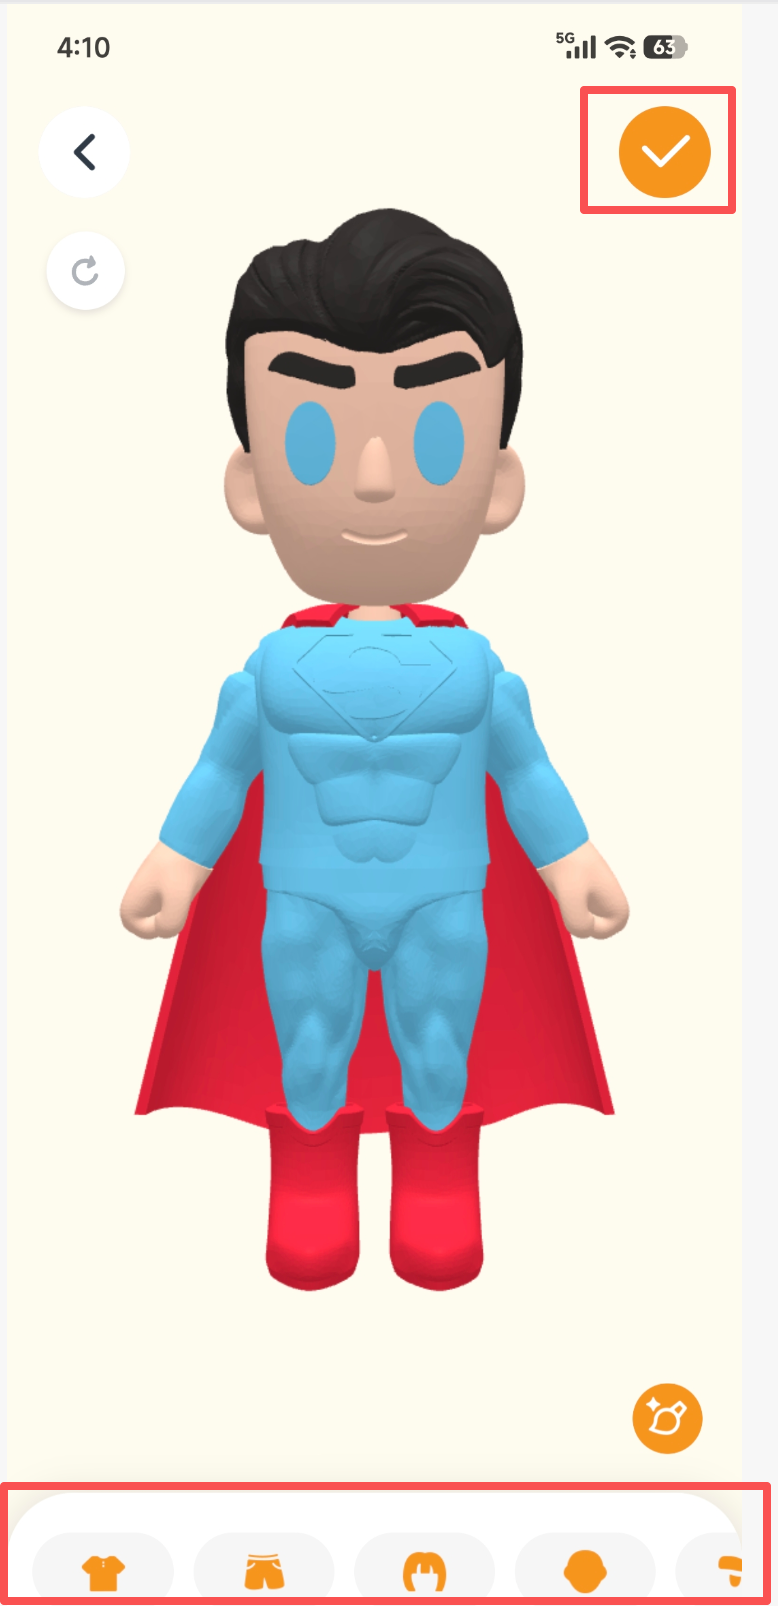
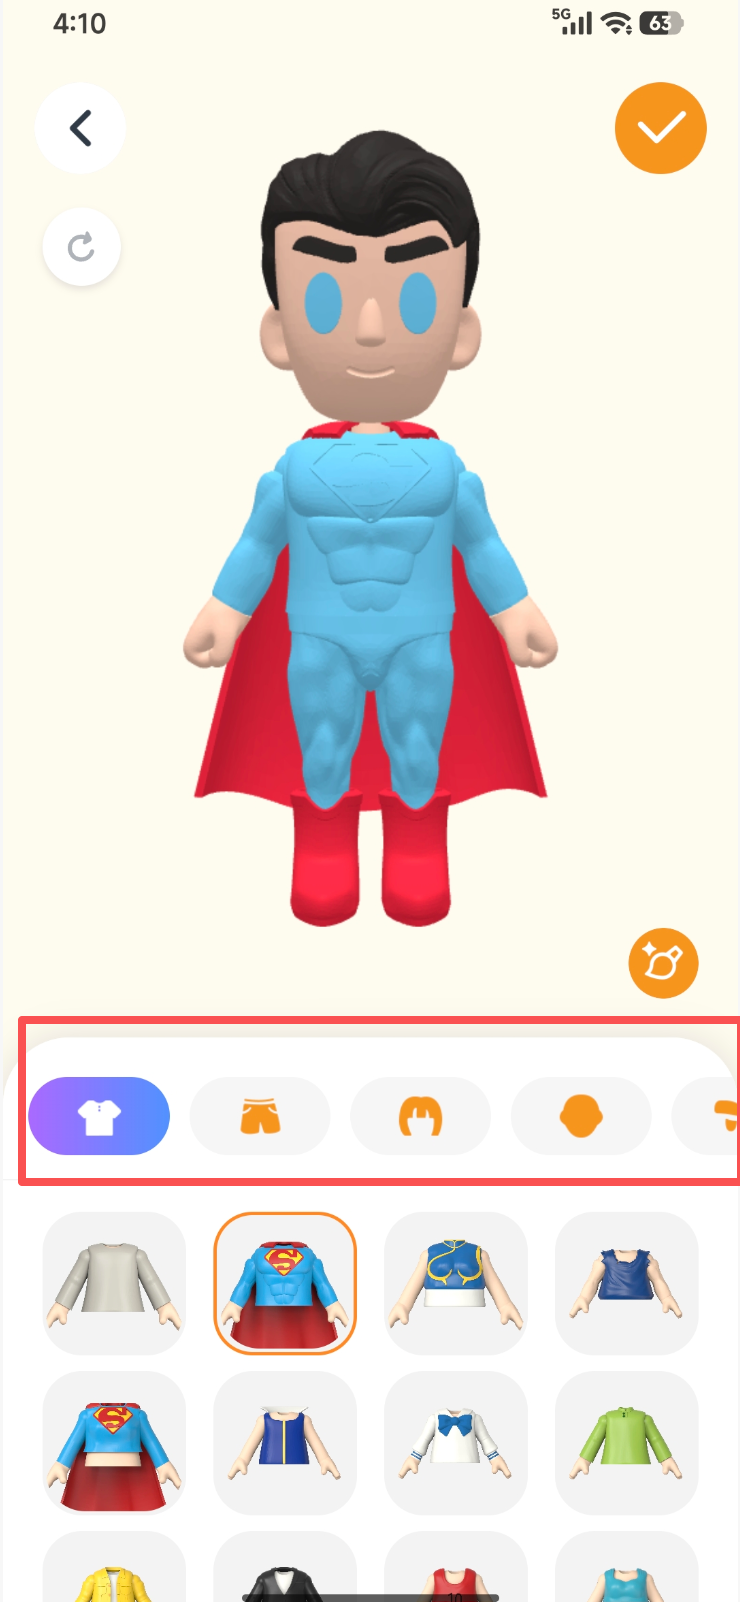
- In the doll customization feature, first select a base doll body from the model library. Then freely replace the hair, eyebrows, nose, mouth, clothes, hands, feet, shoes, and other components to create a personalized doll. When the design is complete, print it with one click and turn the virtual design into a physical doll.
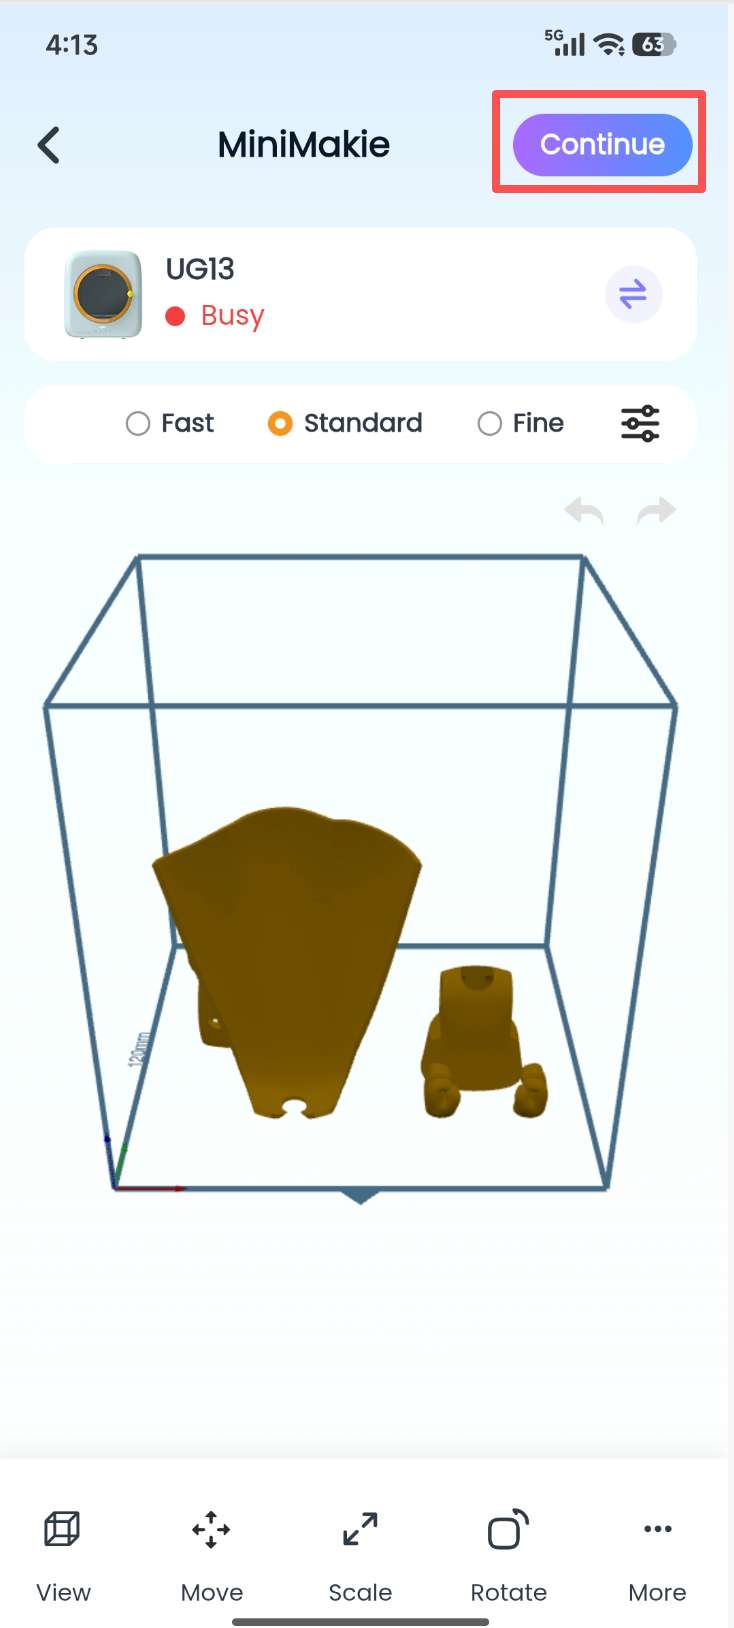
- Procedure: Open MiniMakie -> select a template -> modify individual components -> tap “√” in the upper-right corner -> enter the print preparation page and tap “Prepare to Print” -> enter the print editing page -> select “Next” and “Continue” to start printing.
4.6 EXPLORE — Tap the Explore button at the bottom
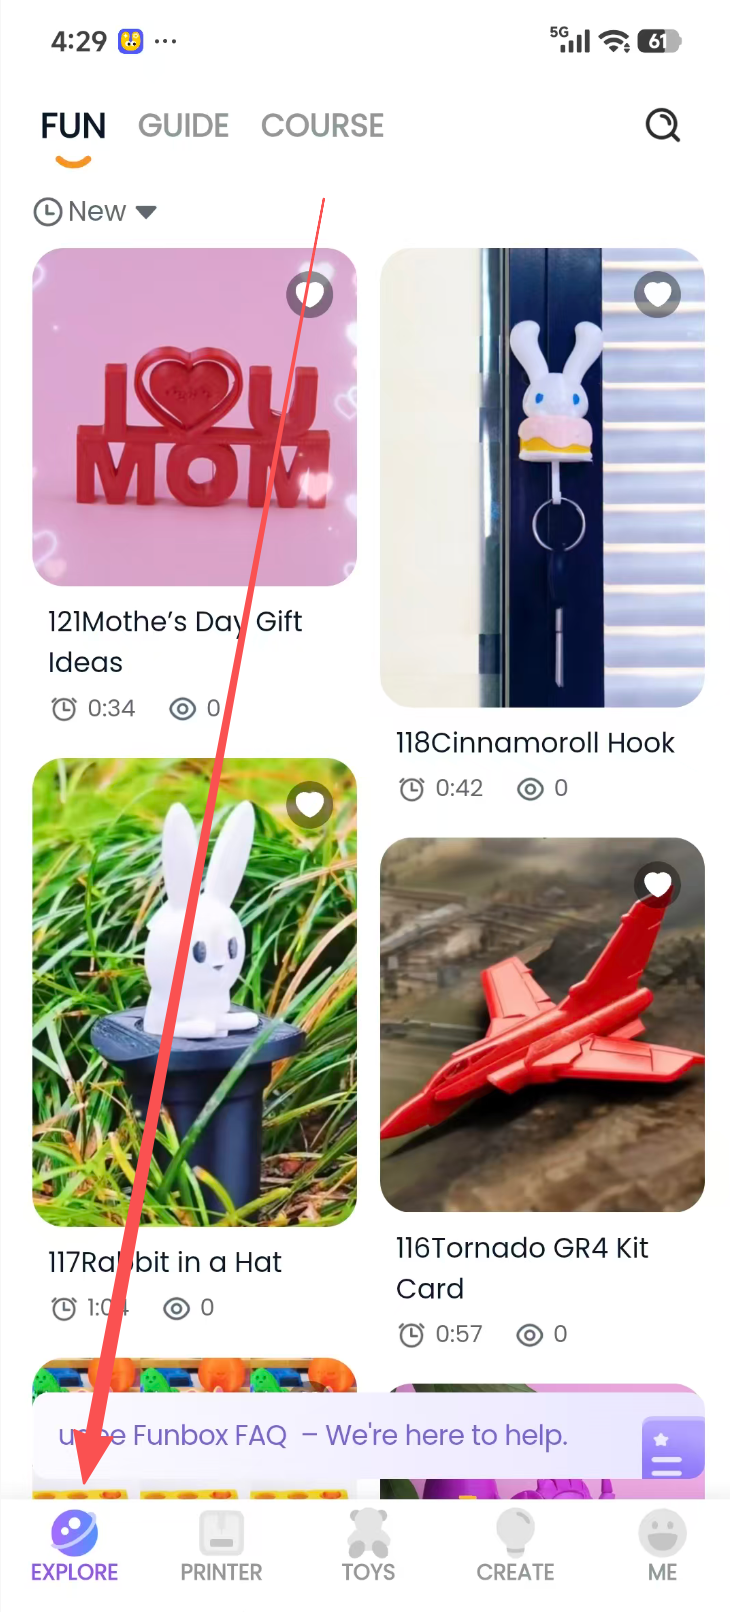
The Explore module provides rich learning and entertainment resources:
① Fun Ideas:
- Provides videos showing creative ways to use different models, demonstrating a variety of printing ideas and techniques to inspire users.
② Tutorial Guides:
- Provides detailed guidance for the software features in the app, with clear operating instructions that help users get started quickly.
③ Premium Courses:
- Courses are divided into three difficulty levels—L1, L2, and L3—and progress from beginner to advanced, systematically teaching users to print models proficiently with the tools.
④ FAQ Help Link:
- Provides answers to common questions so users can troubleshoot and resolve problems on their own.
05/Tablet Software (ugee Ufun HD) Introduction
5.1 Tablet Download Methods
Download Method
International Version
Keyword Search
Search for “ugee Ufun HD” in the App Store or Google Play to download it.
Official Website Download Link
https://www.ugee.com/funbox-app-download
Scan the Tablet App QR Code to Download
iOS Version: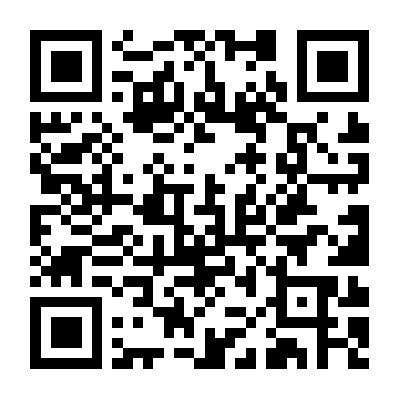
Android Version:
5.2 Four Functional Modules (Homepage)
The homepage is divided into four core sections:
Module
Name
Core Function Summary
TOY
TOYS
A vast library of child-friendly models in many categories, including toys, animals, robots, architecture, holidays, and education.
Search models (keyword search and voice input), sort them (Random / Popular / Latest), and filter them (print duration and number of parts).
Select a model to begin one-click printing.
PRINTER
PRINTER
Printer connection and pairing.
Print process management (printer selection, fine parameter adjustment, live monitoring, resume, pause, stop, filament loading, filament unloading, and print task queue).
Printer settings (printer information, printer settings, printer control settings, and removing the printer).
EXPLORE
EXPLORE
Fun Ideas (introduces creative ways to use various toys).
Tutorial Guides (videos addressing common issues during printer use).
Premium Courses (introductory modeling courses organized by difficulty level).
Theme
THEME
A no-experience-required 3D creativity workshop. The built-in “Theme Park” requires no drawing skills: just like playing a dress-up game, you can “change skins” and “assemble parts” to create a 3D-printable model that is uniquely yours.
Fifteen themes are available: Transforming Top, Fidget Spinner, Badge, Airplane, Whistle, Bamboo Dragonfly, Drawing-to-Model, Vase, Hinge Generator, Building Blocks, Clockwork Sprite, Letter Generator, Stick Figure Generator, Car, and Room Design.
Difference between tablet and mobile: The import function differs. The Create page on mobile provides generative AI features, while the tablet version replaces it with a Theme page featuring theme-based experiences.
5.3 Tablet Model Import Function (Different from Mobile) — Tap the Device button on the left side of the interface
Tap PRINTER. When the printer is in the Not Printed or Idle state, the printer control area displays a model import button. Tap “Import Toy” to import a model file.
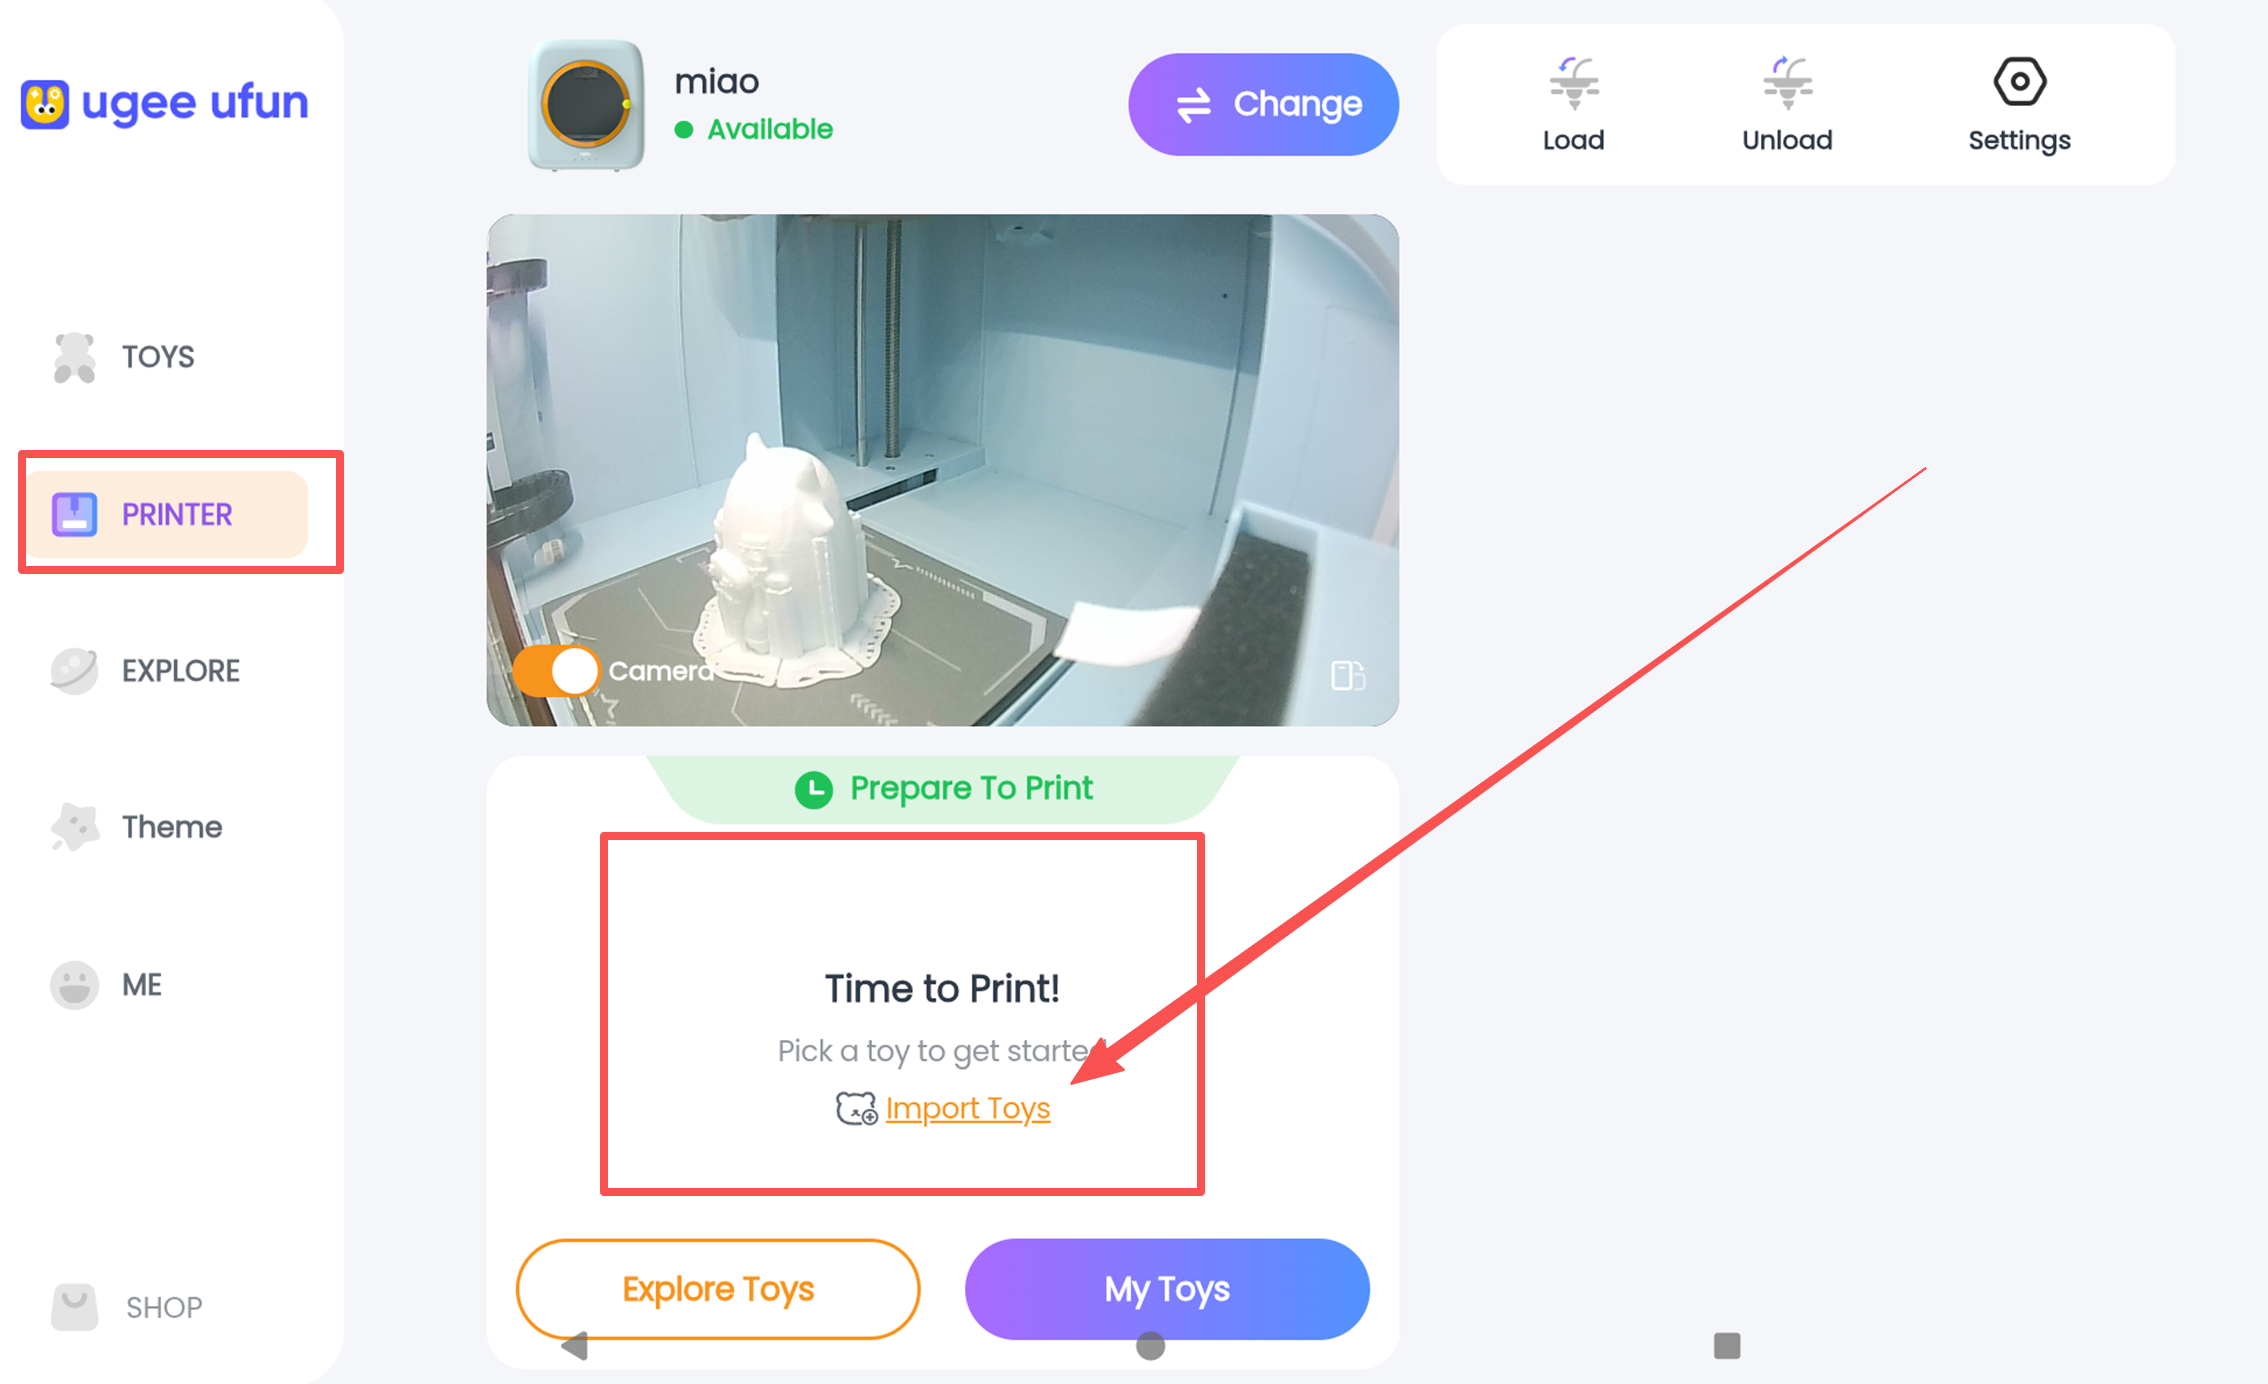
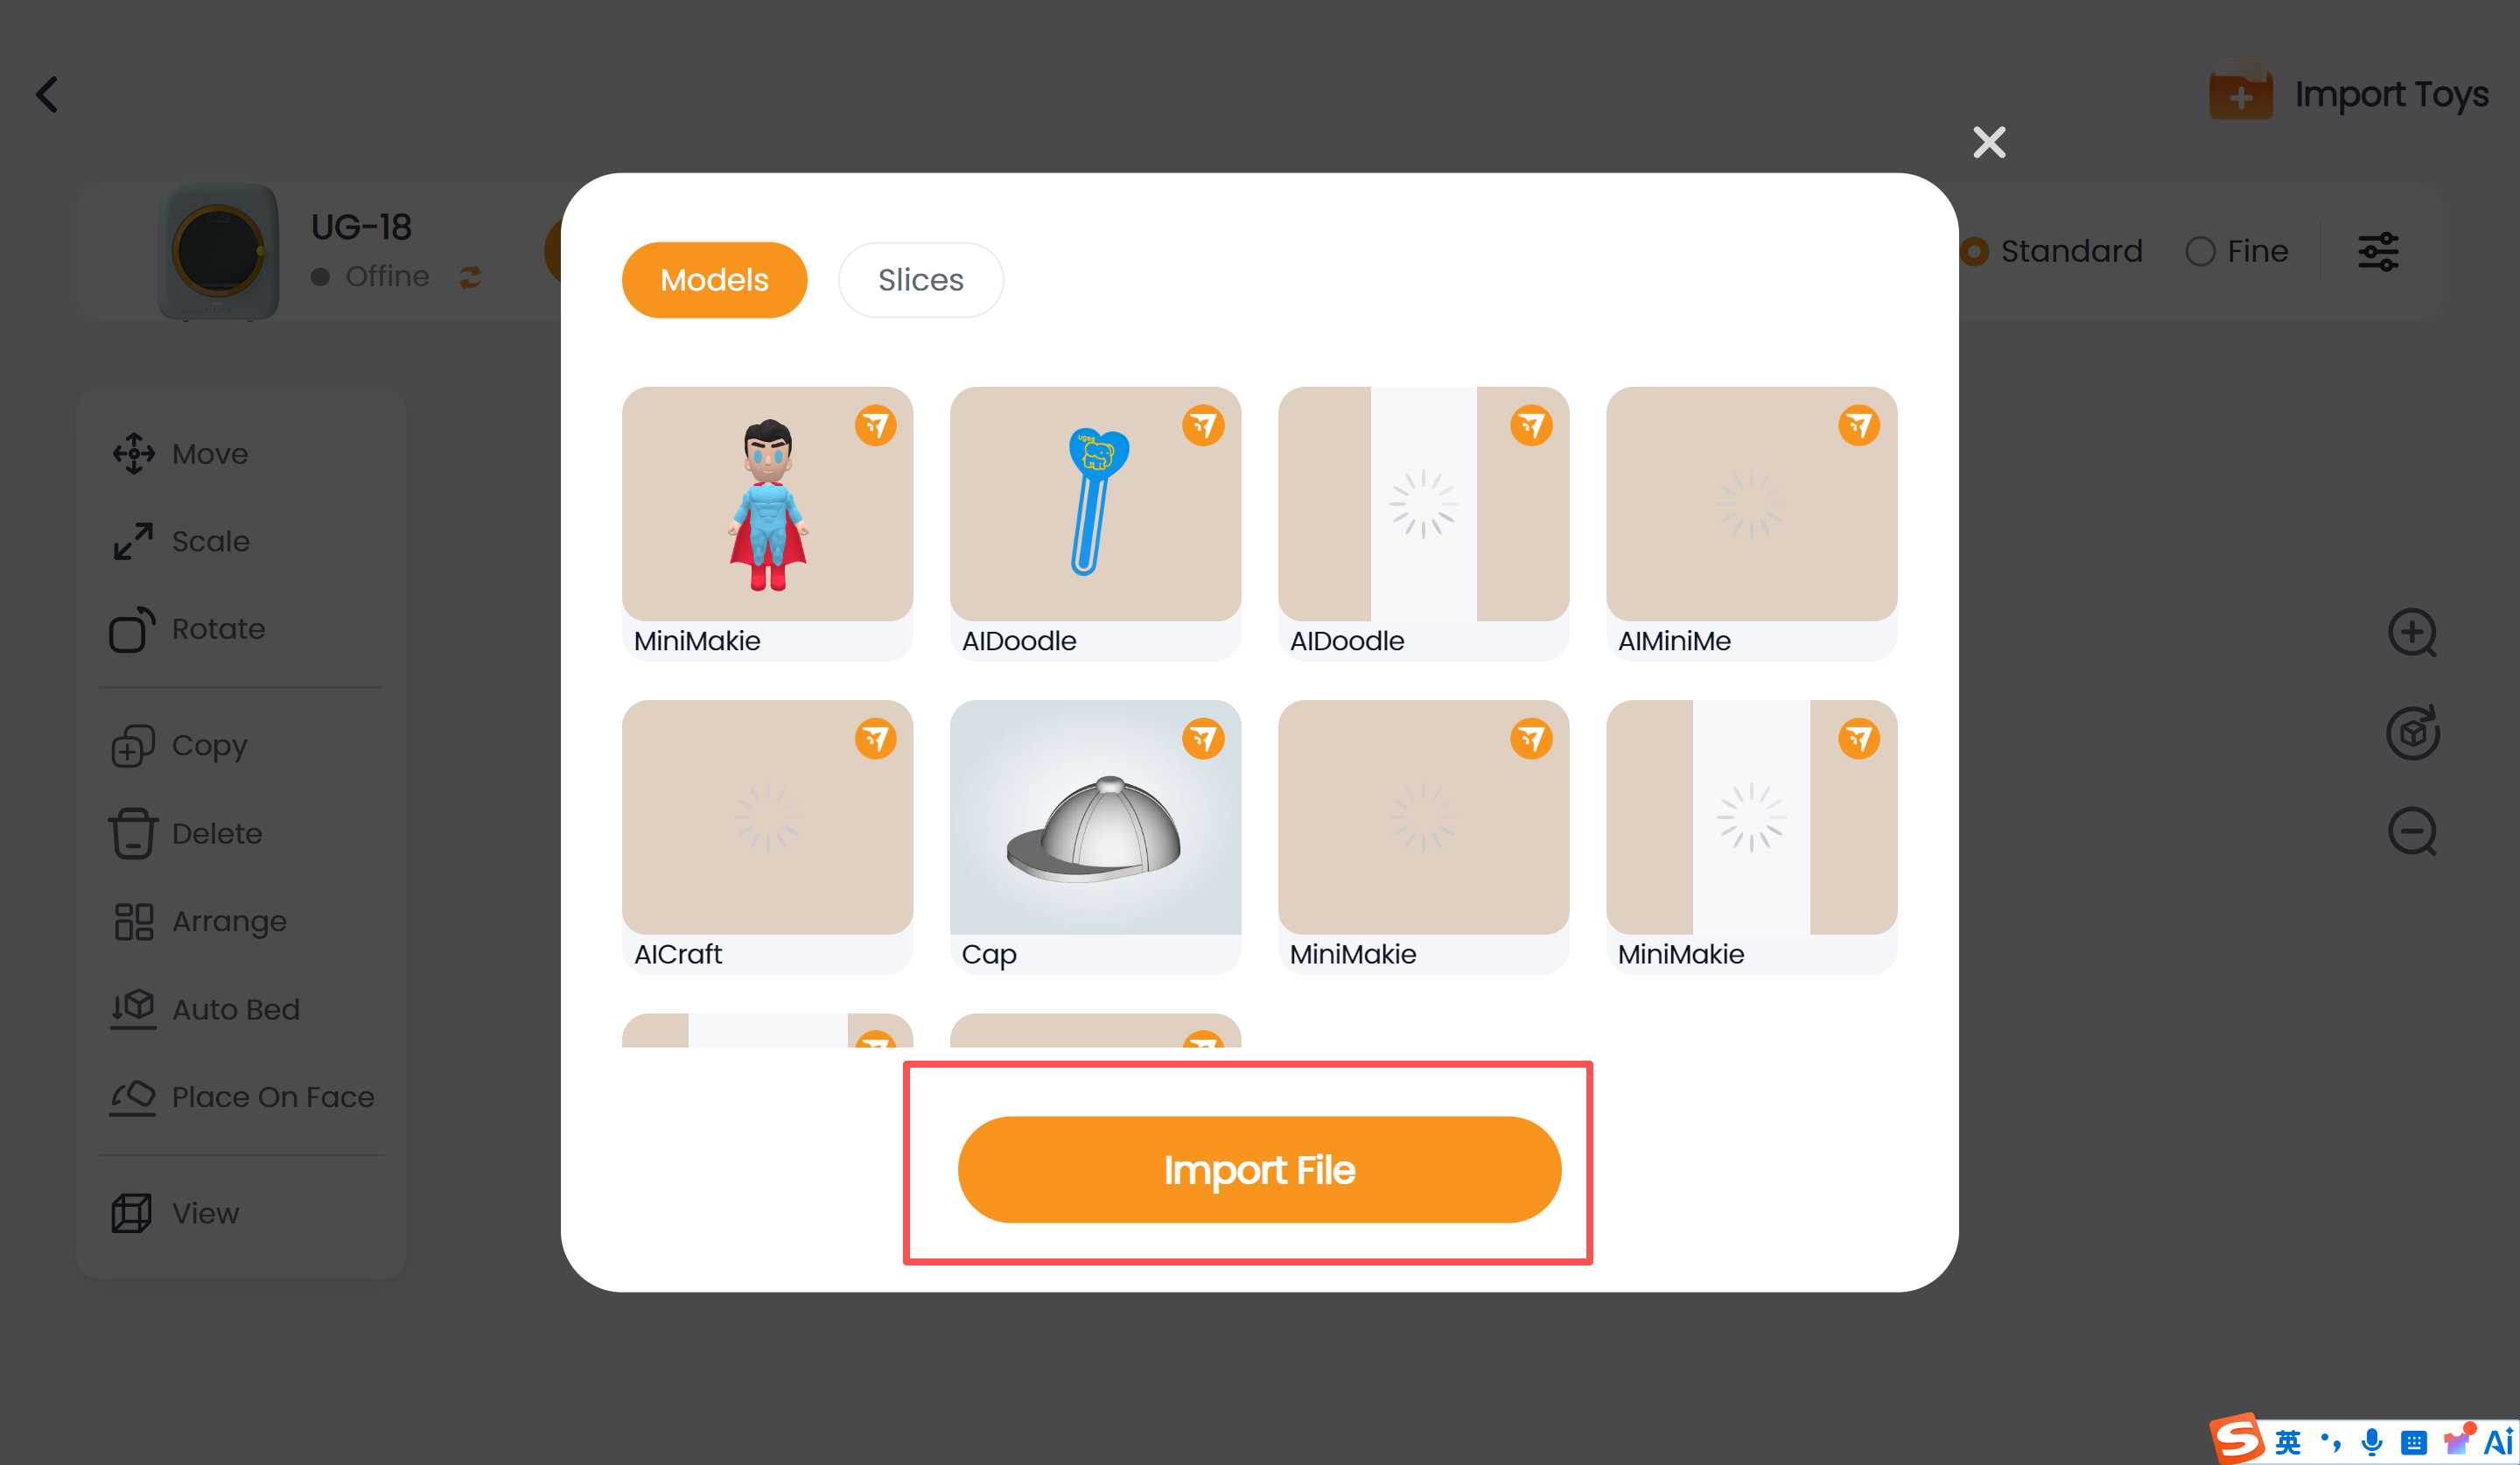
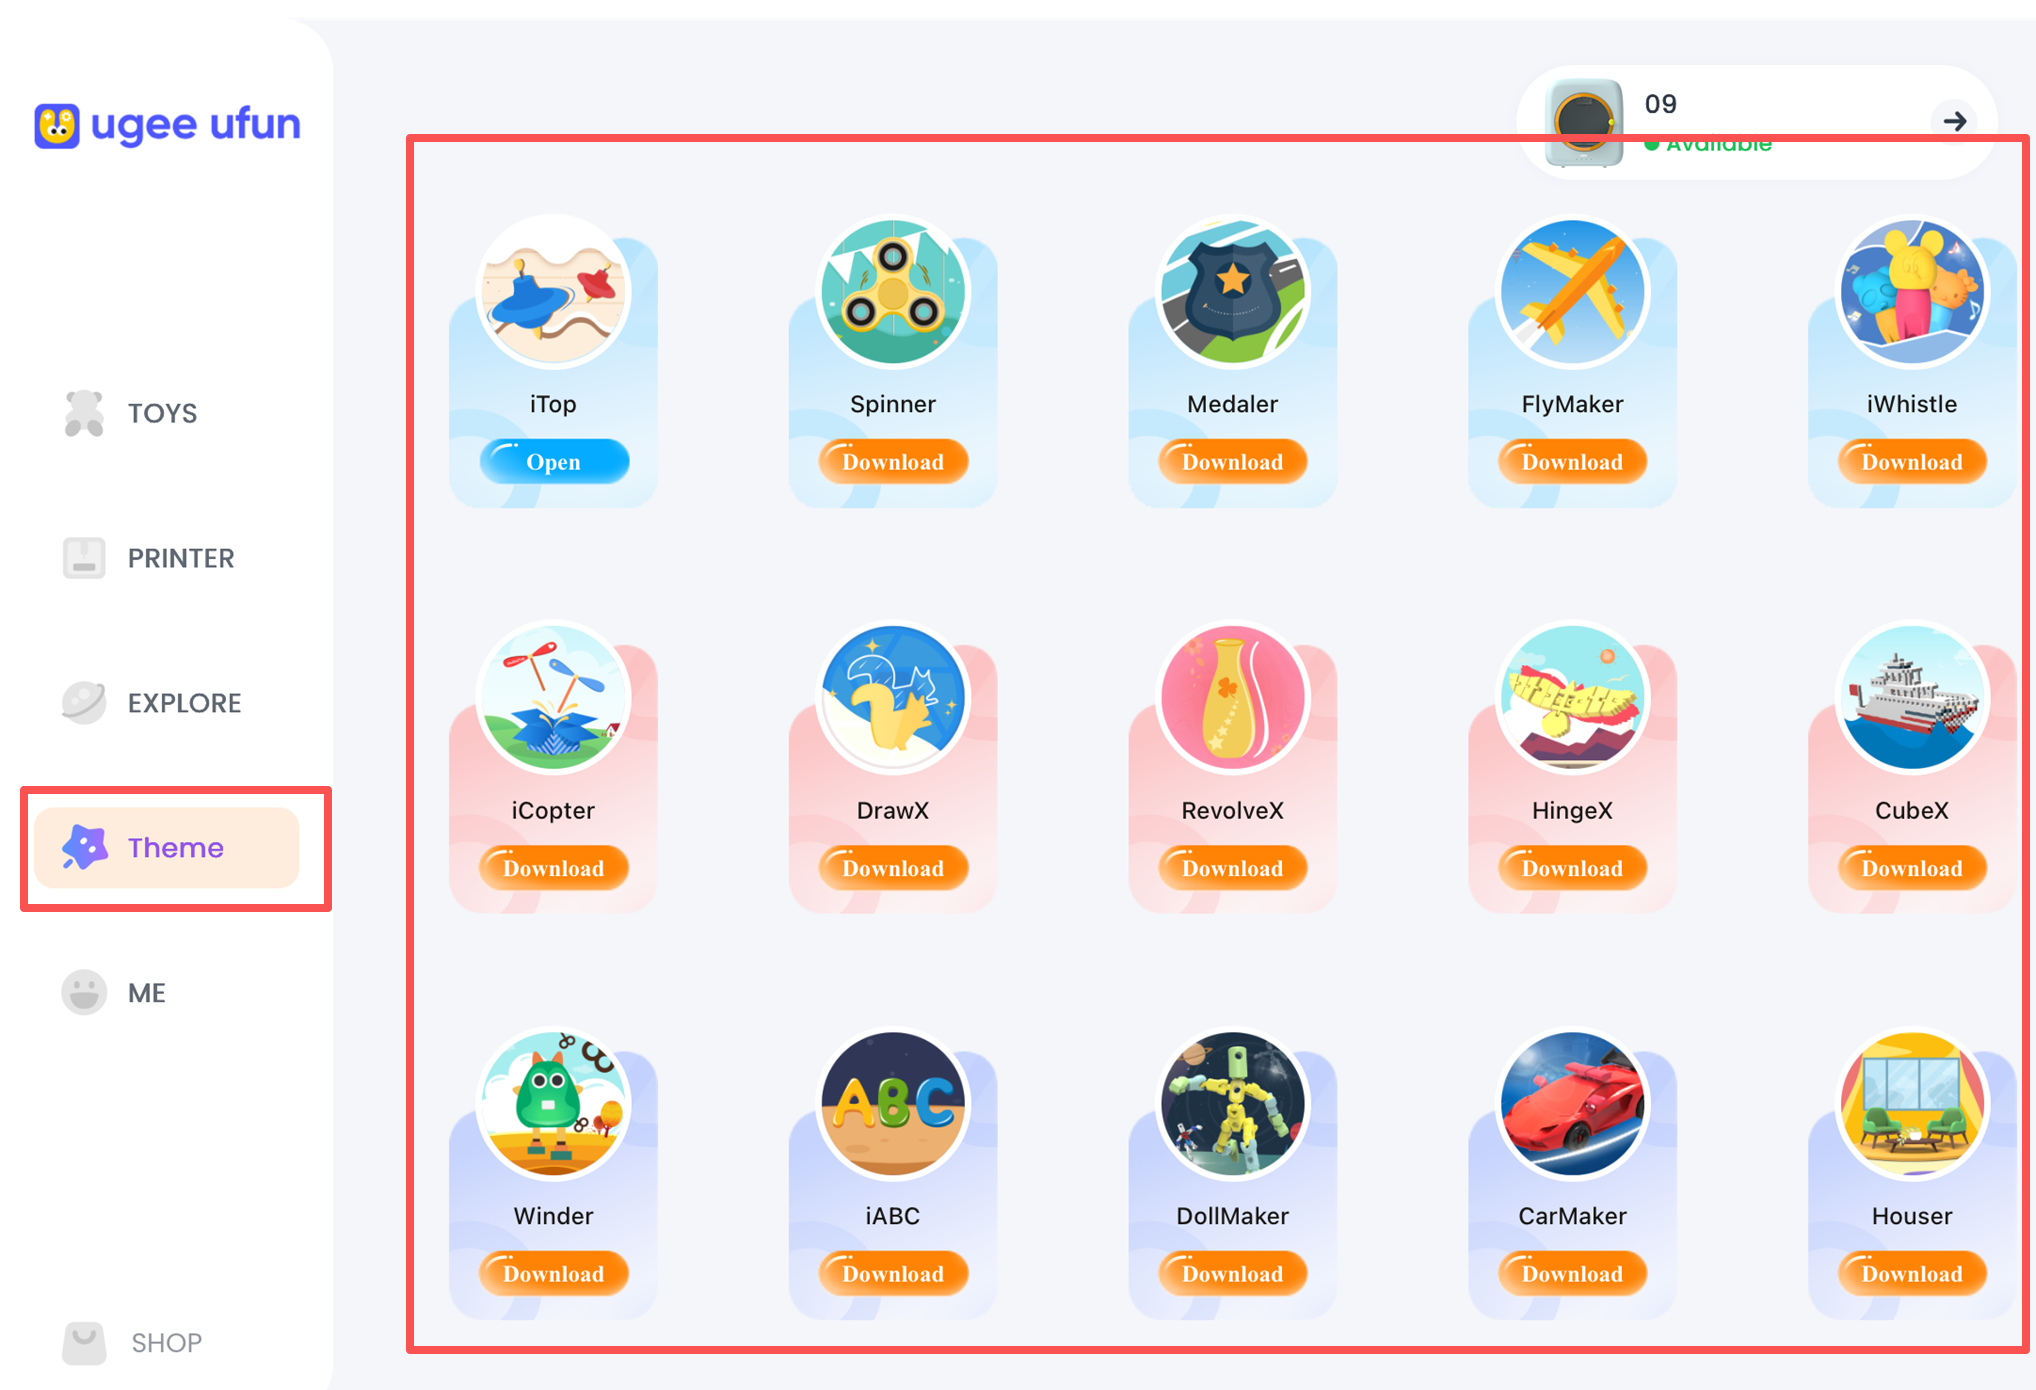
5.4 Theme Generator — Tap the Theme button on the left side of the interface
• Theme Generator: Every theme must be downloaded before use. Their functional structure is essentially the same; Flight Master is used here as an example.
• Operation Process:
a. Click “Theme” on the left to open the Theme page, select a theme, and click “Open” -> enter the Flight Master page.
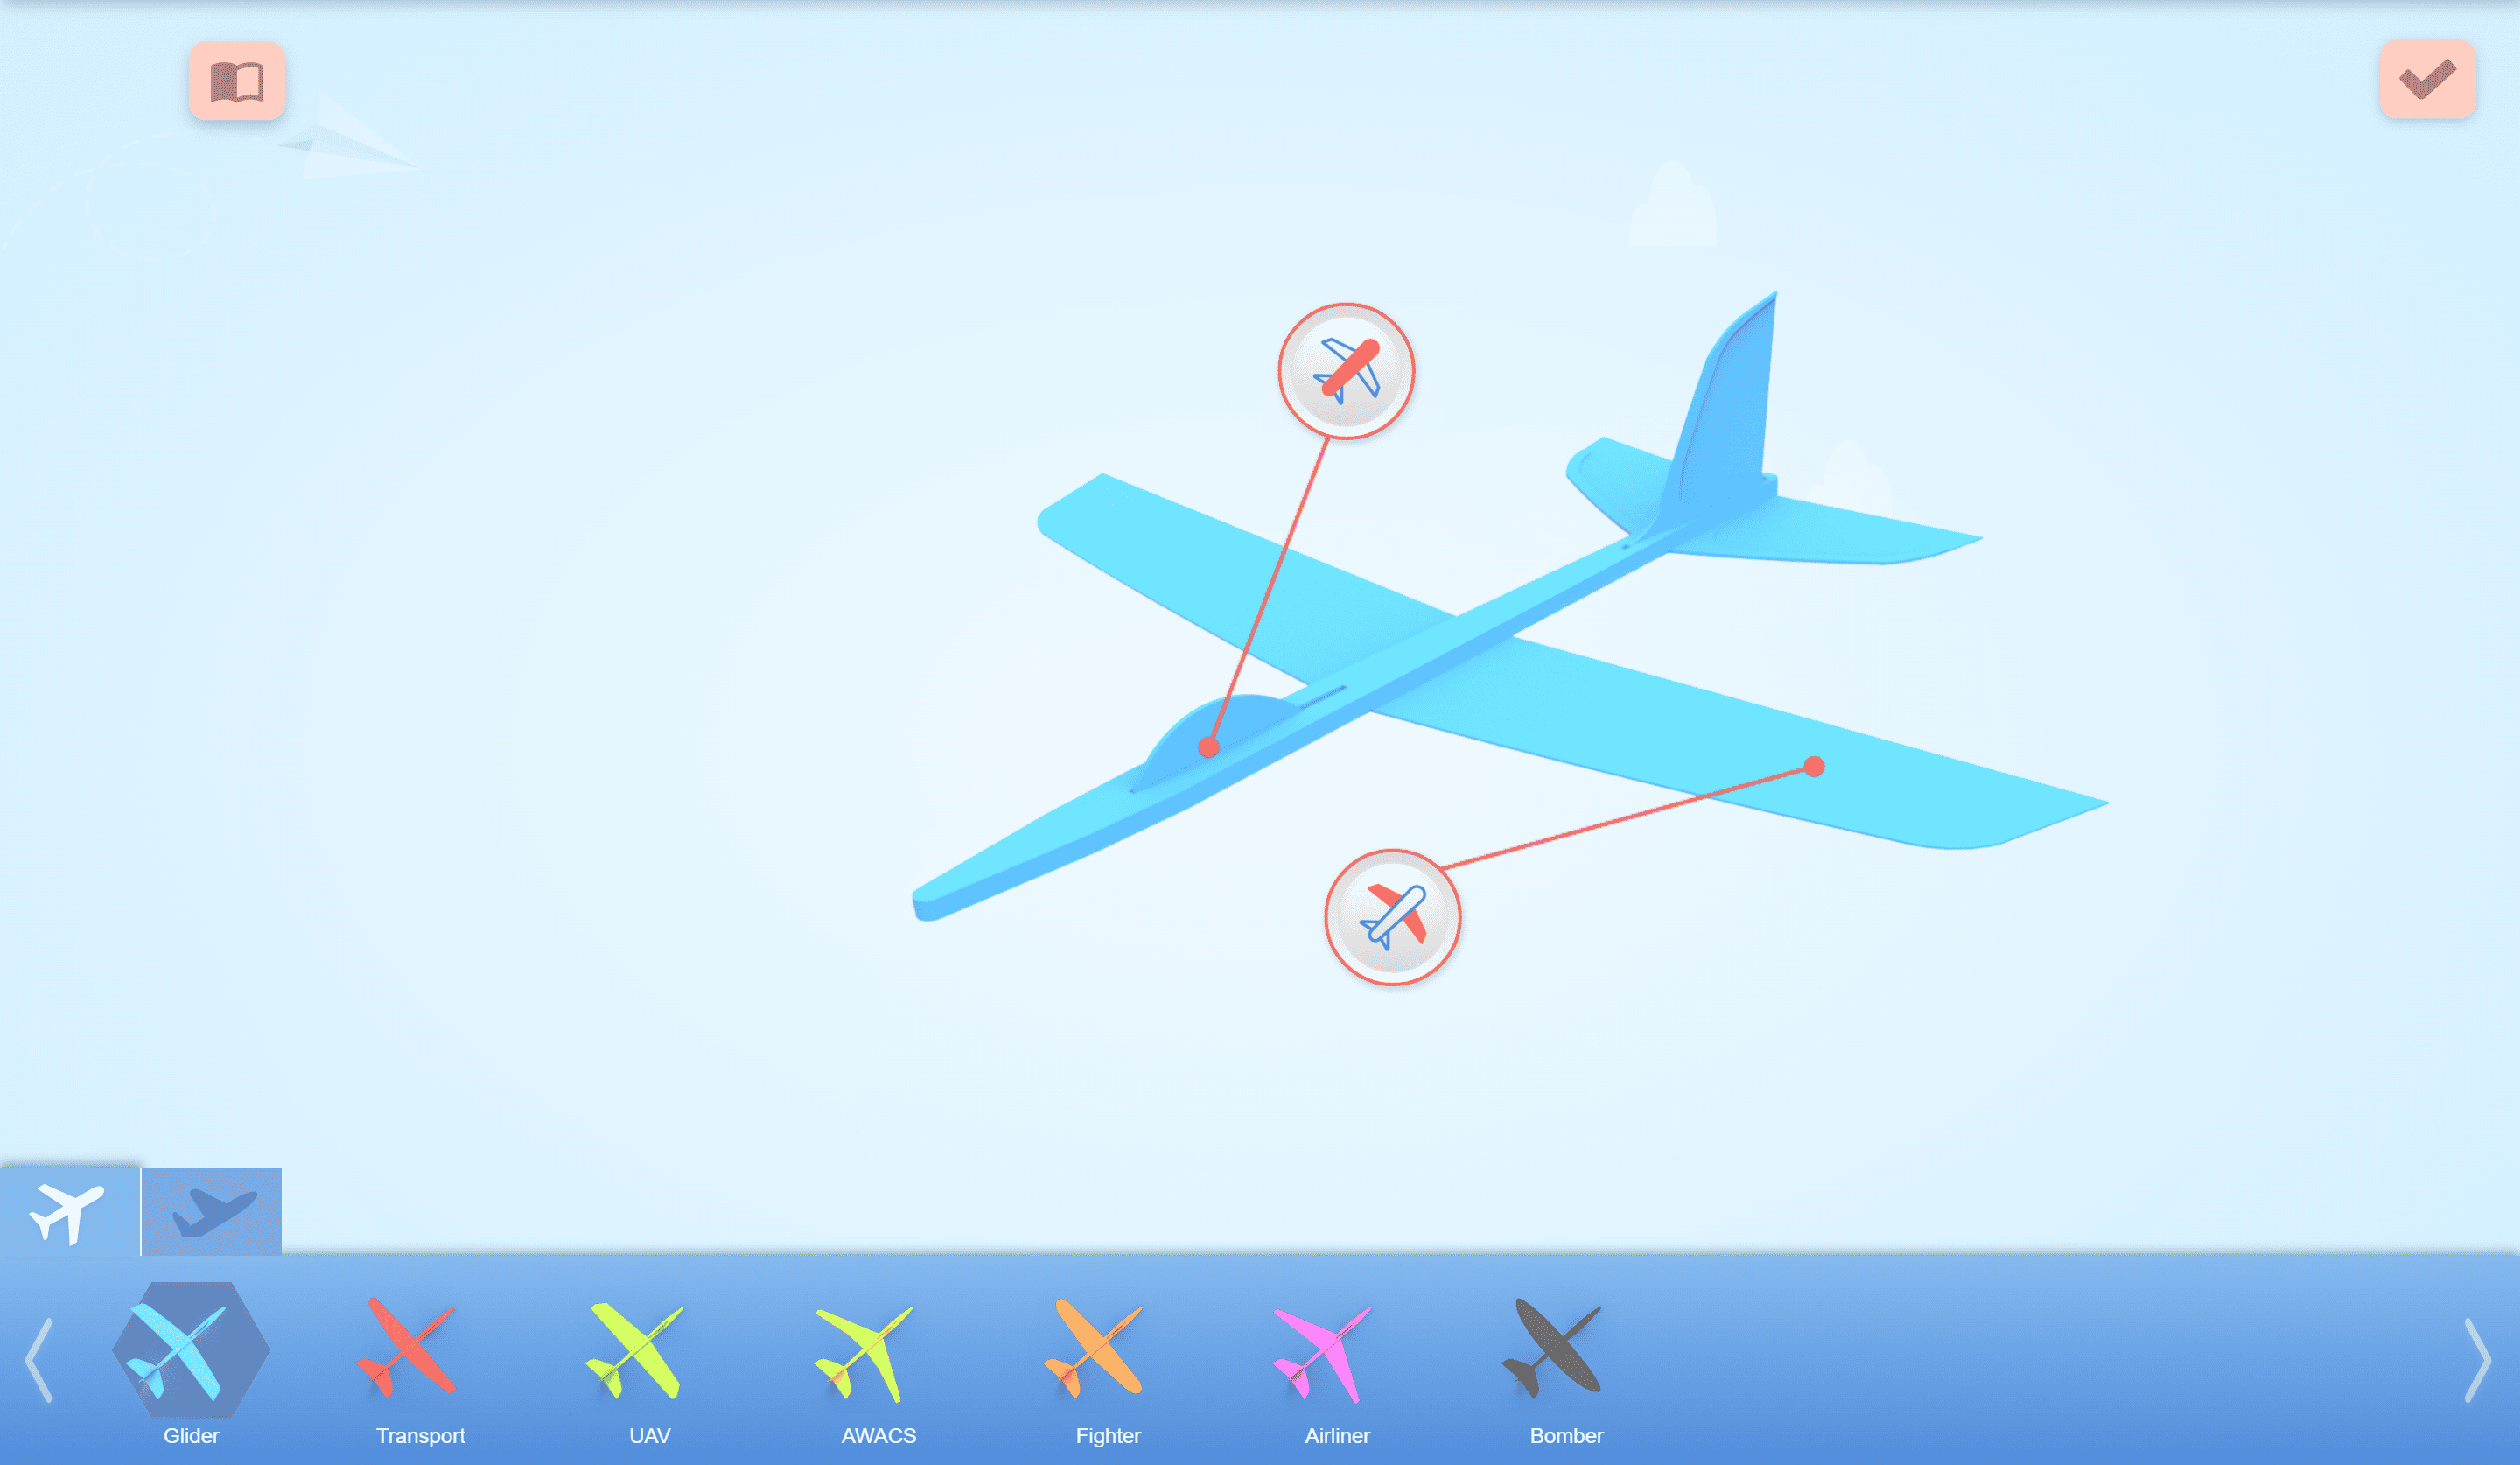
b. "Airplane Master" Page Operation Instructions
- Back: To return to the homepage, click the house icon in the upper-left corner.
- Feature Introduction: To view an introduction to the features, click the book icon in the upper-left corner.
- Model Display: The model content in the center of the interface can be displayed according to the model type you select;
• Airplane Fuselage Button: Click to open the fuselage editing page.
• Airplane Wing Button: Click to open the wing editing page.
- Model Categories: Select a model category at the bottom of the interface.
- Next Button: Click it in the upper-right corner to proceed to the next step.
- Model Category Function: Click any model you want to select.
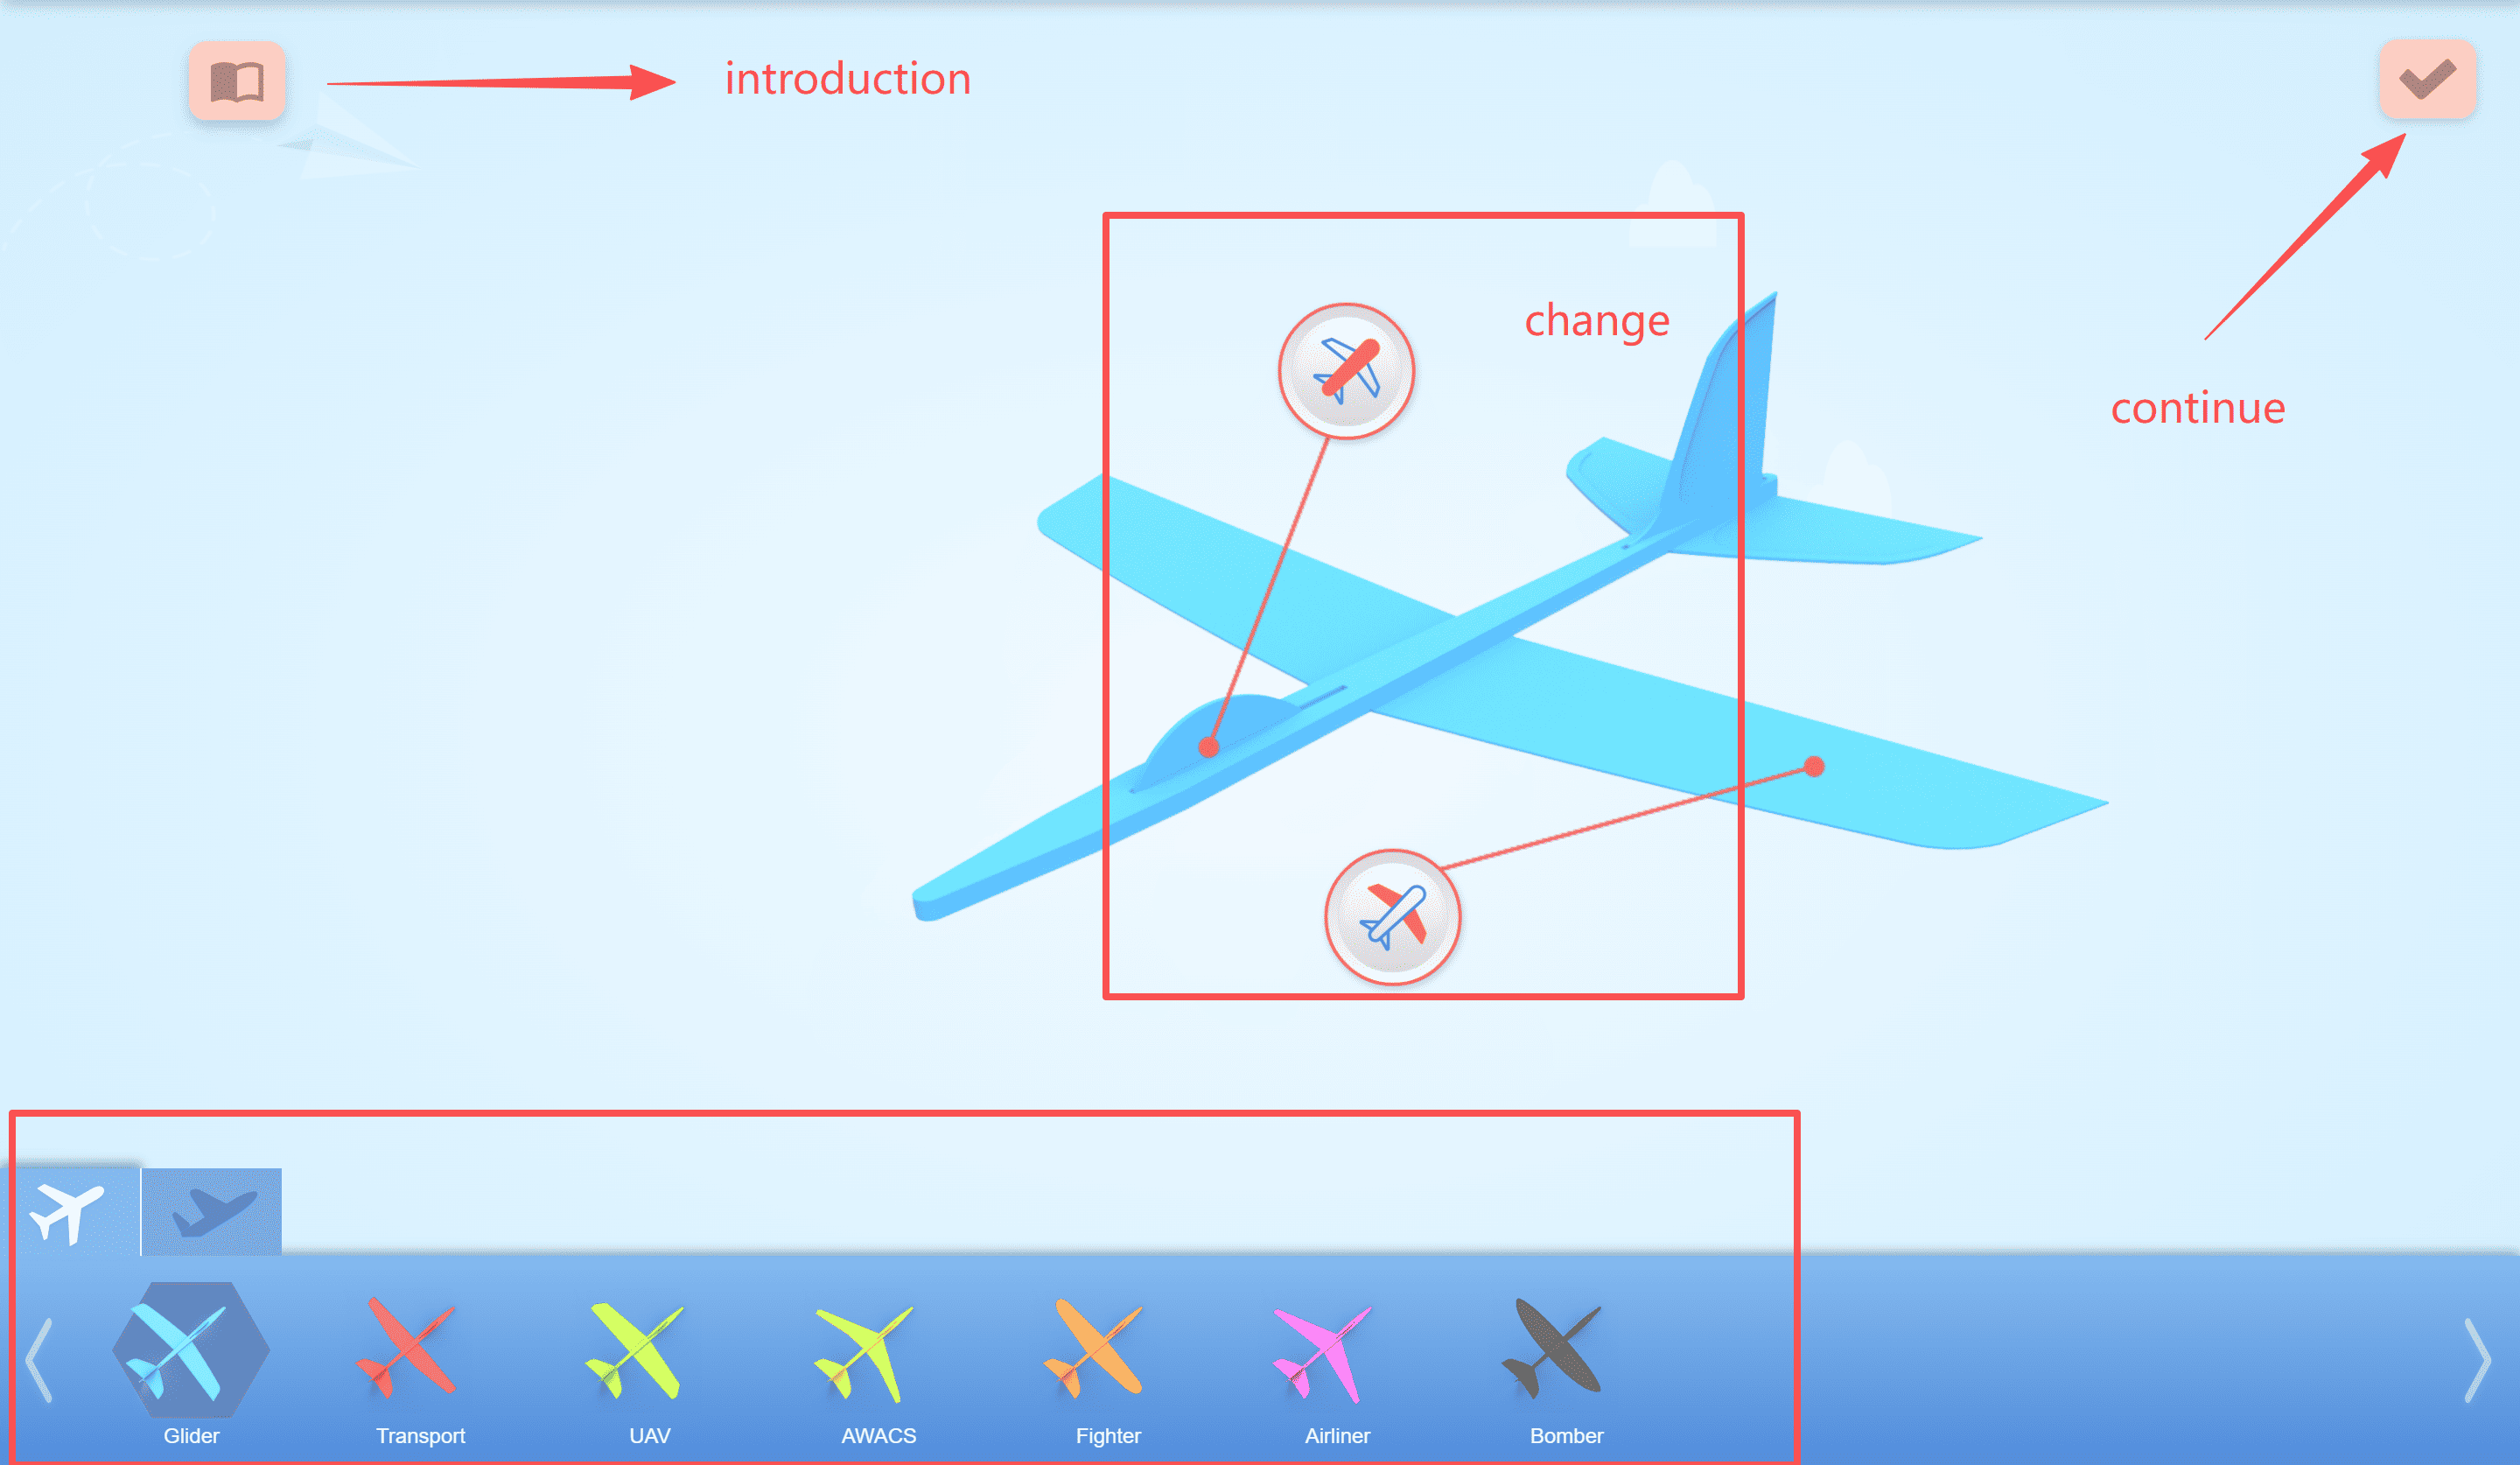
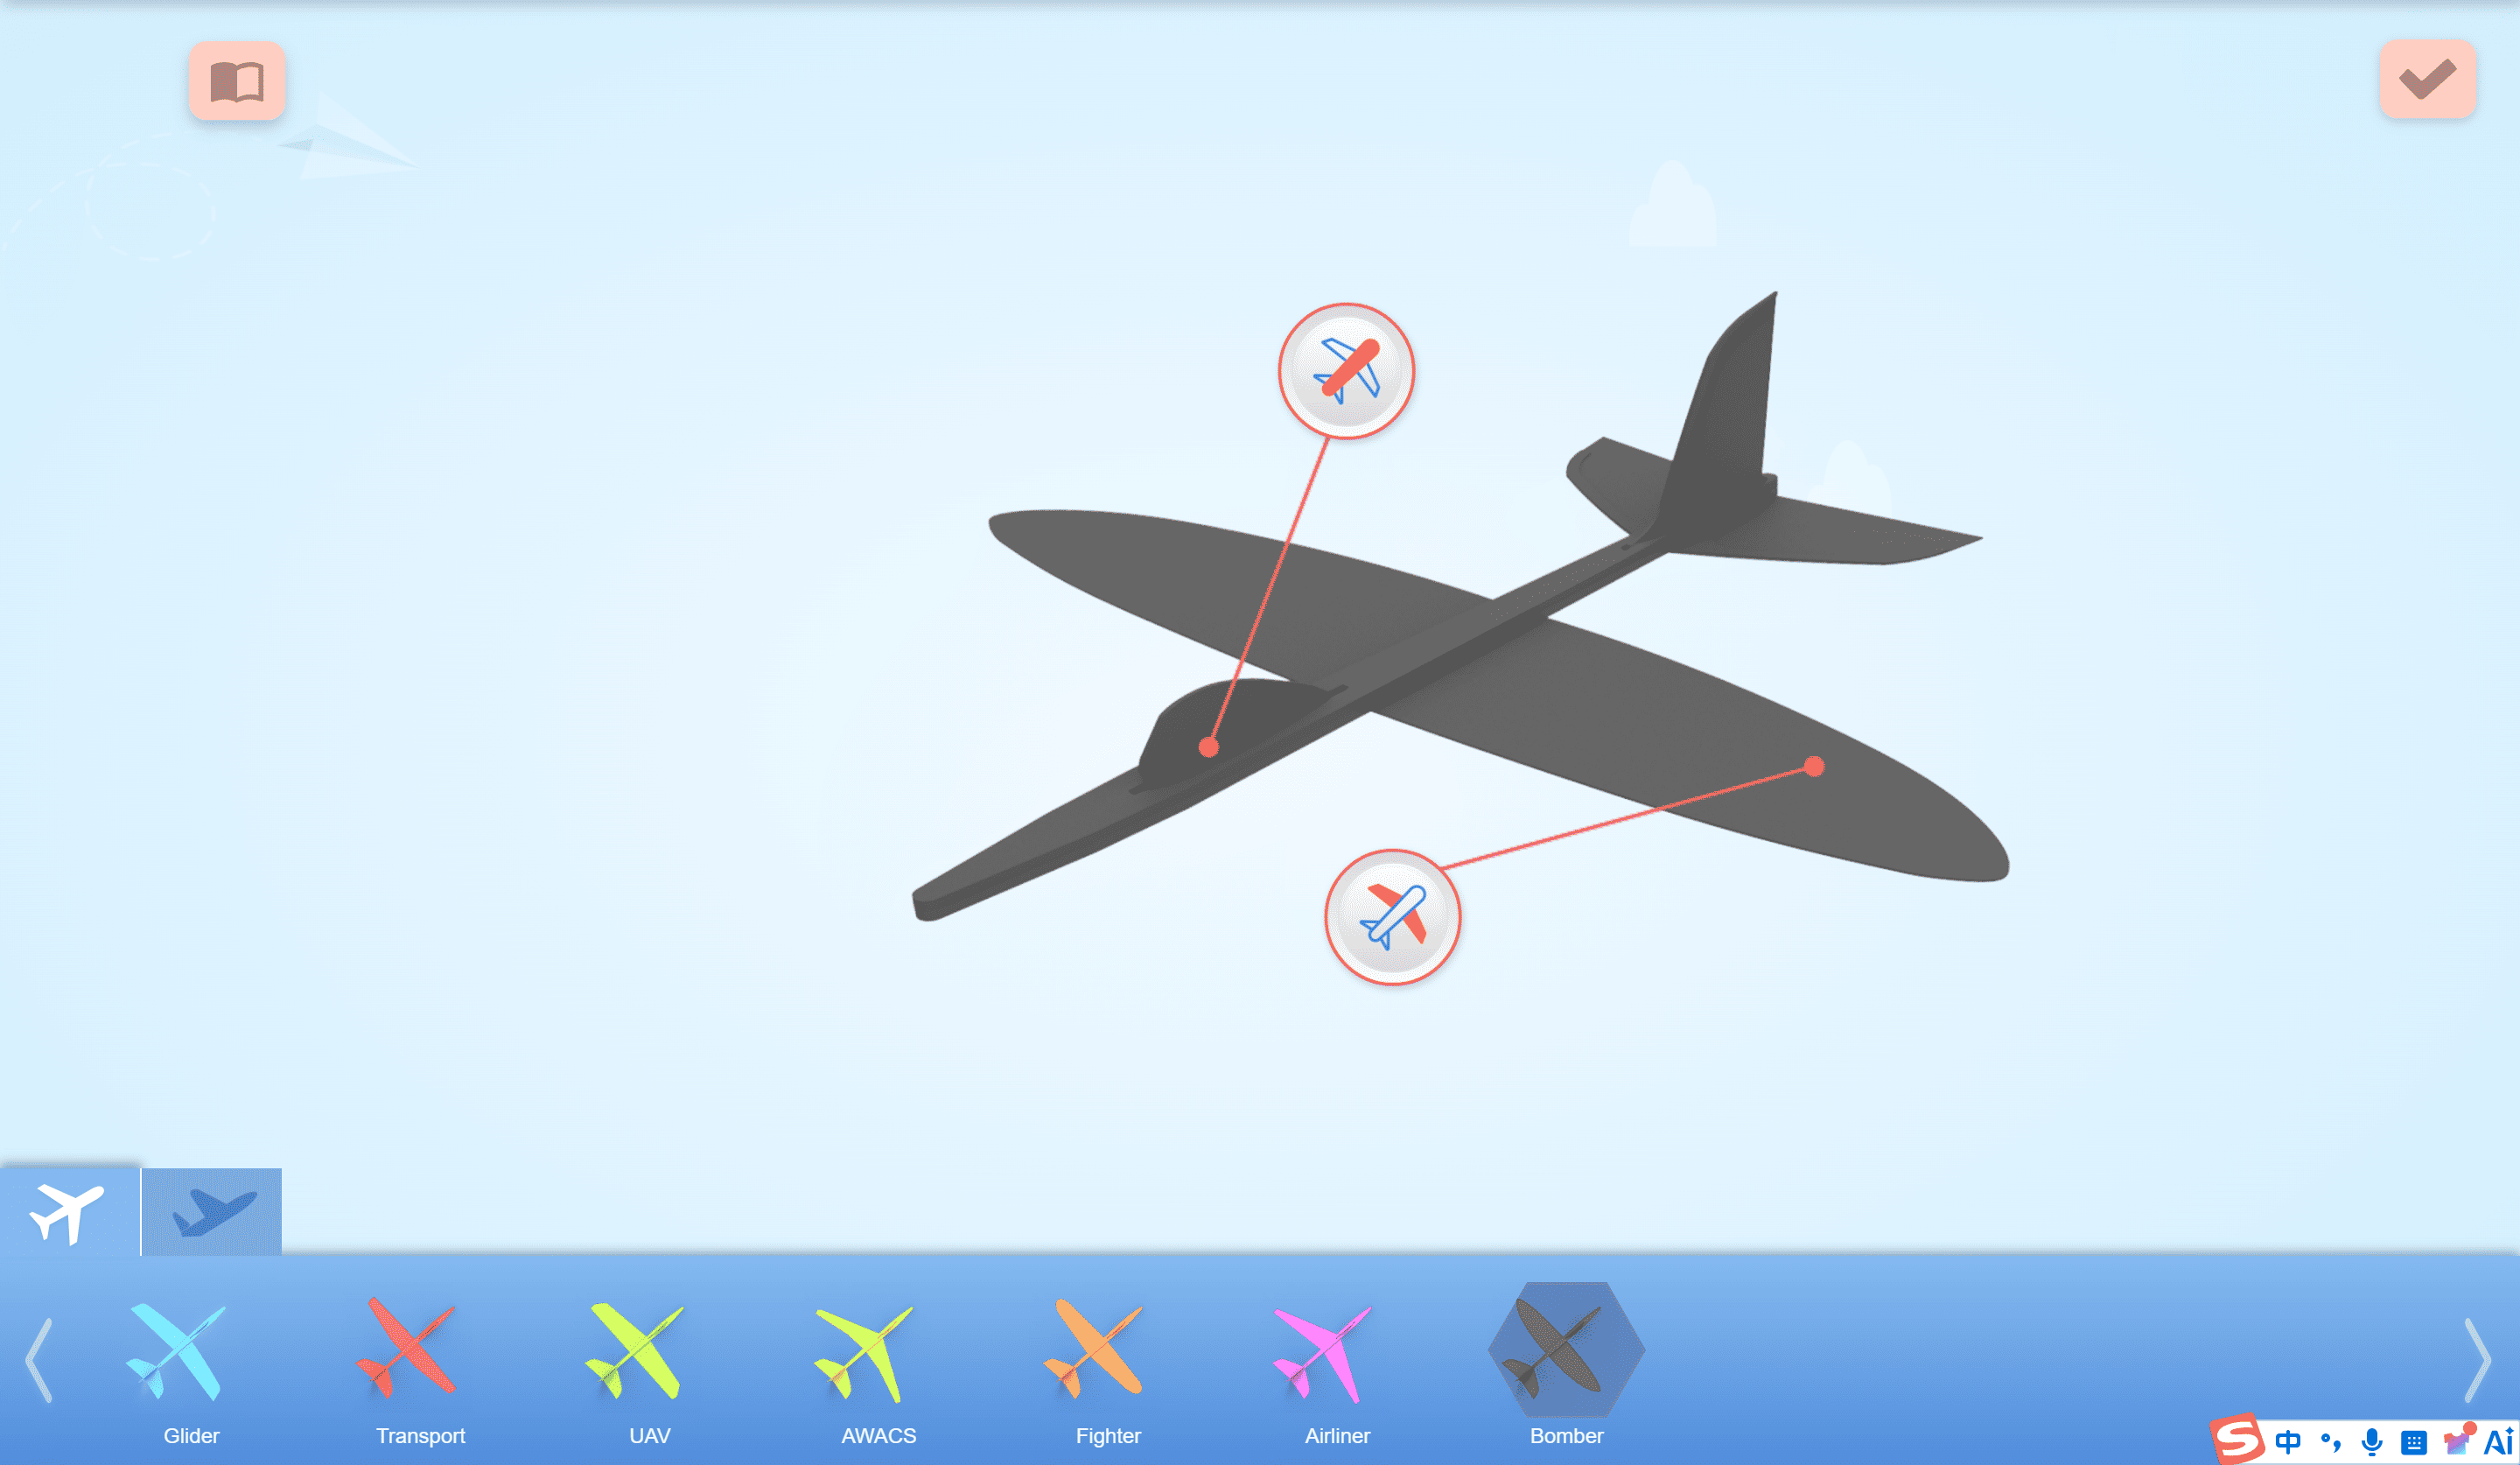
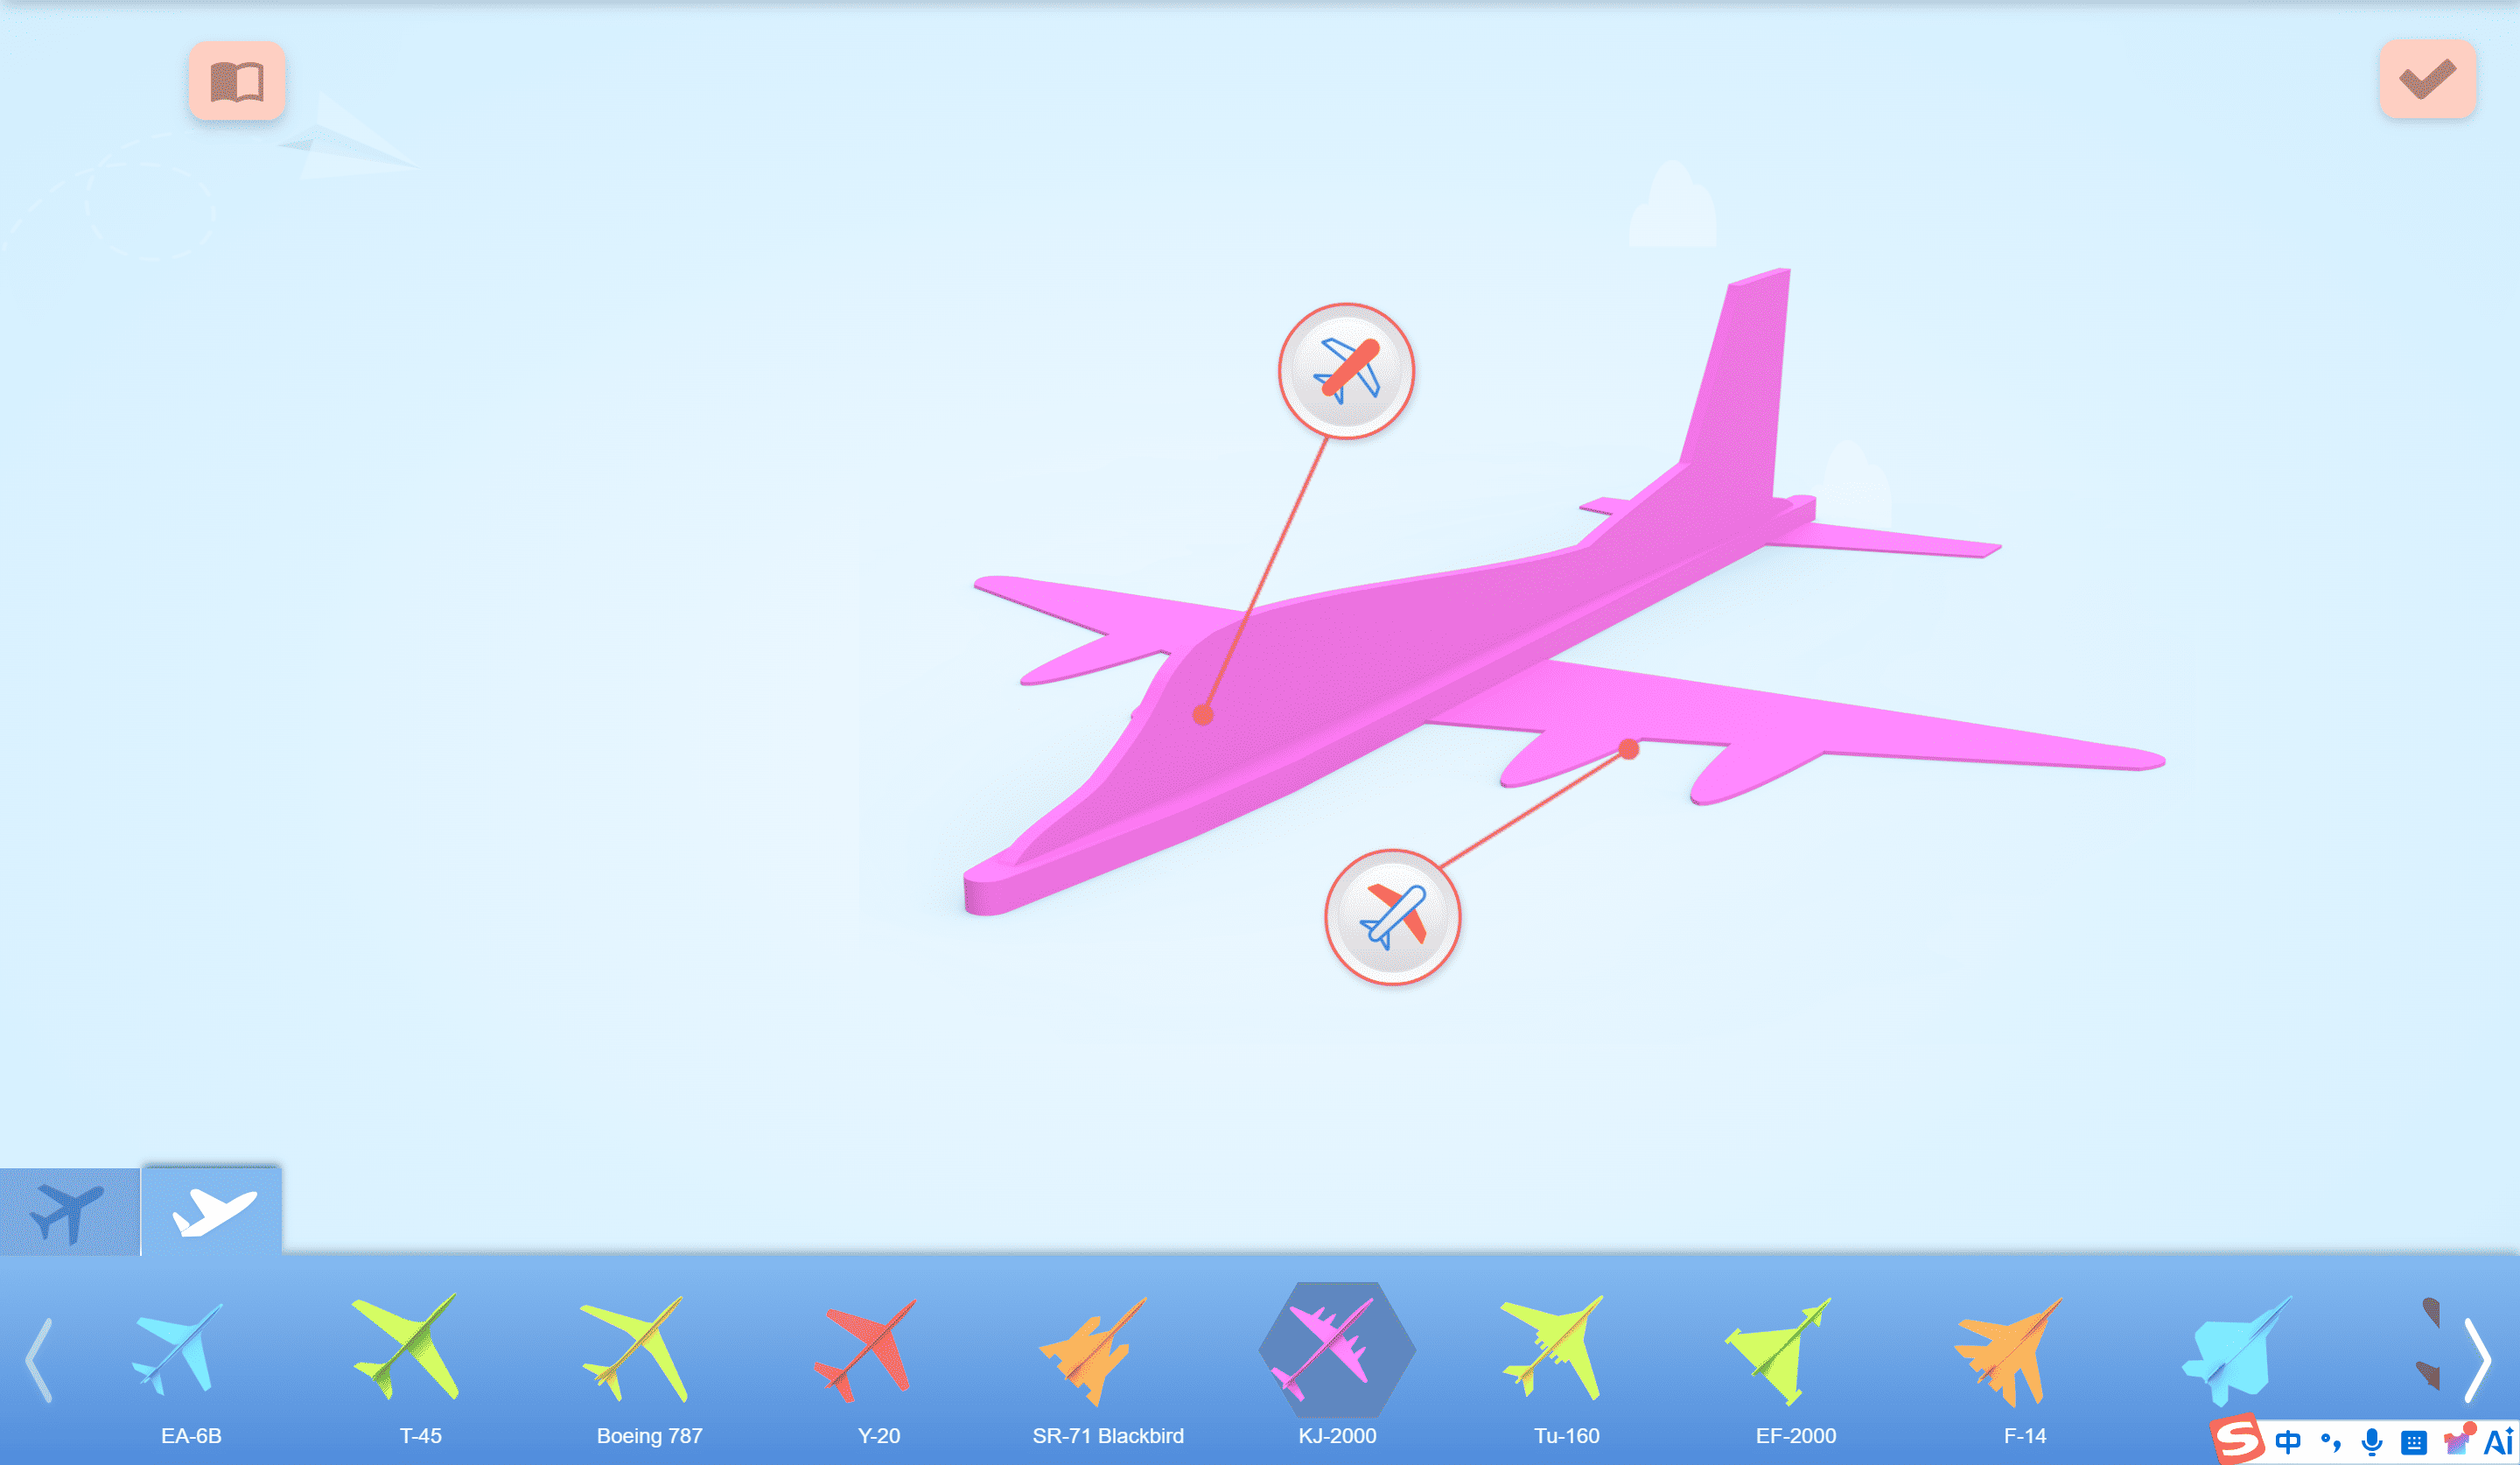
- Model Display — Airplane Fuselage Button
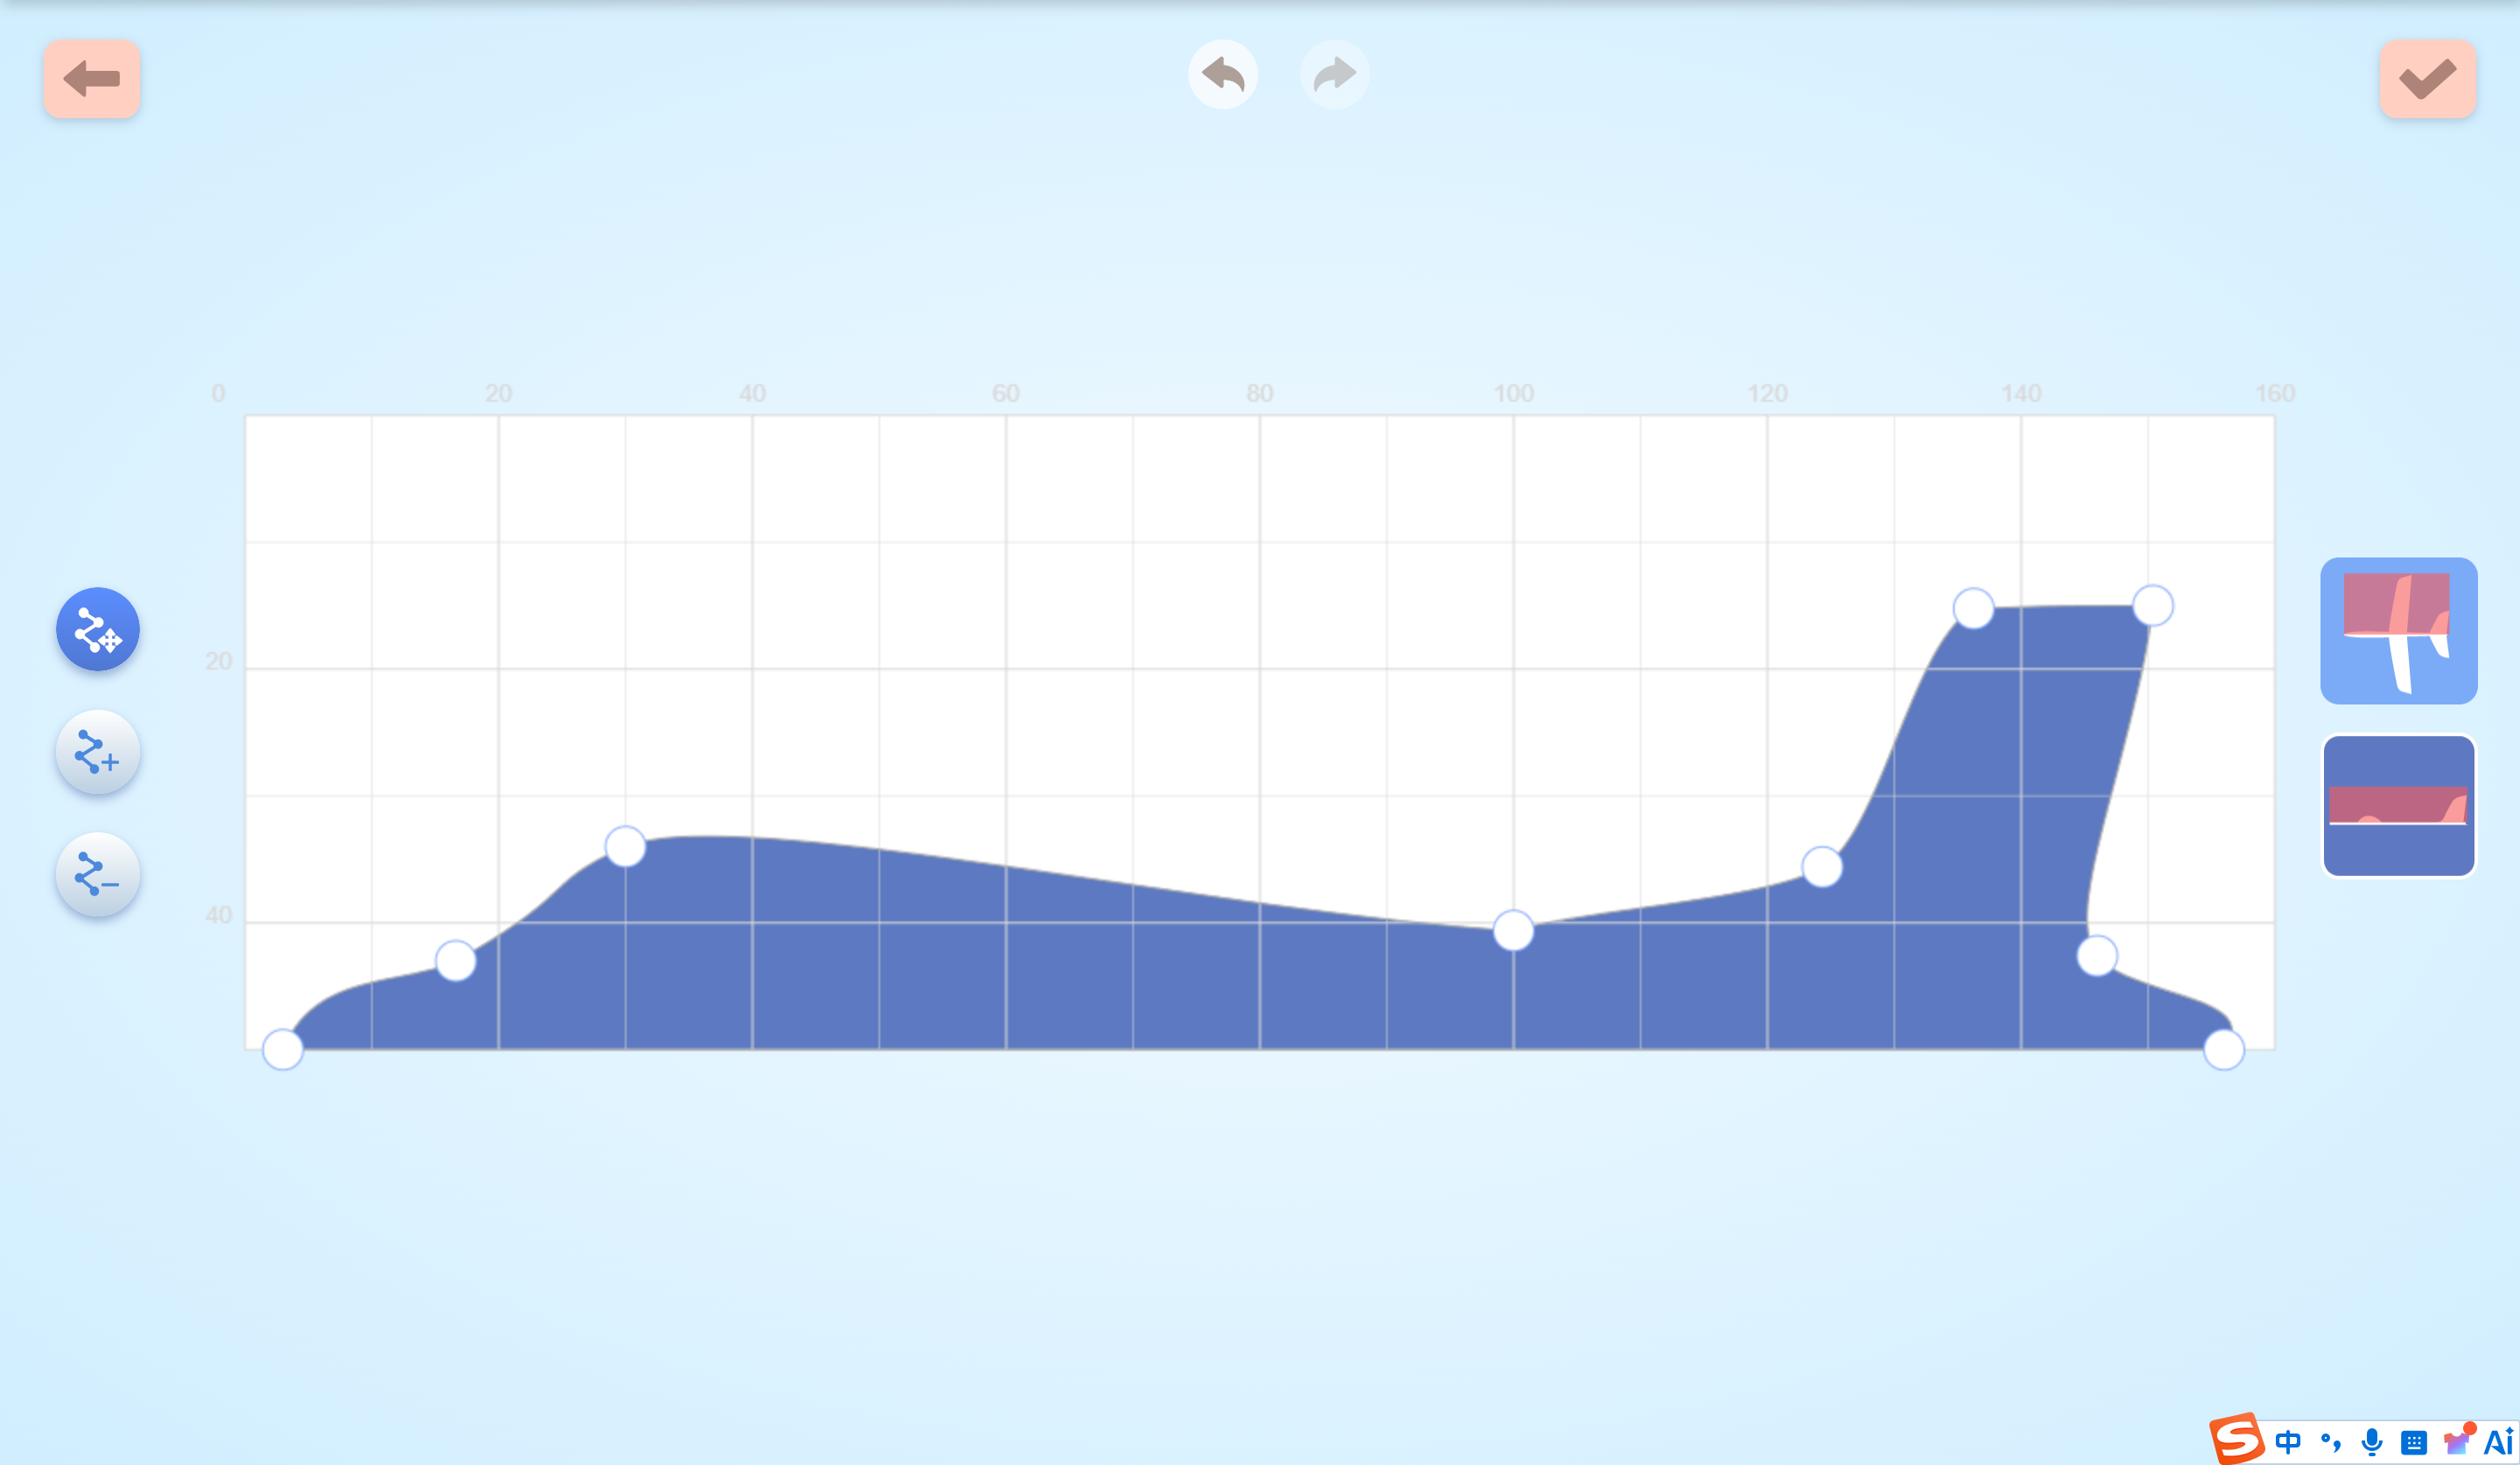
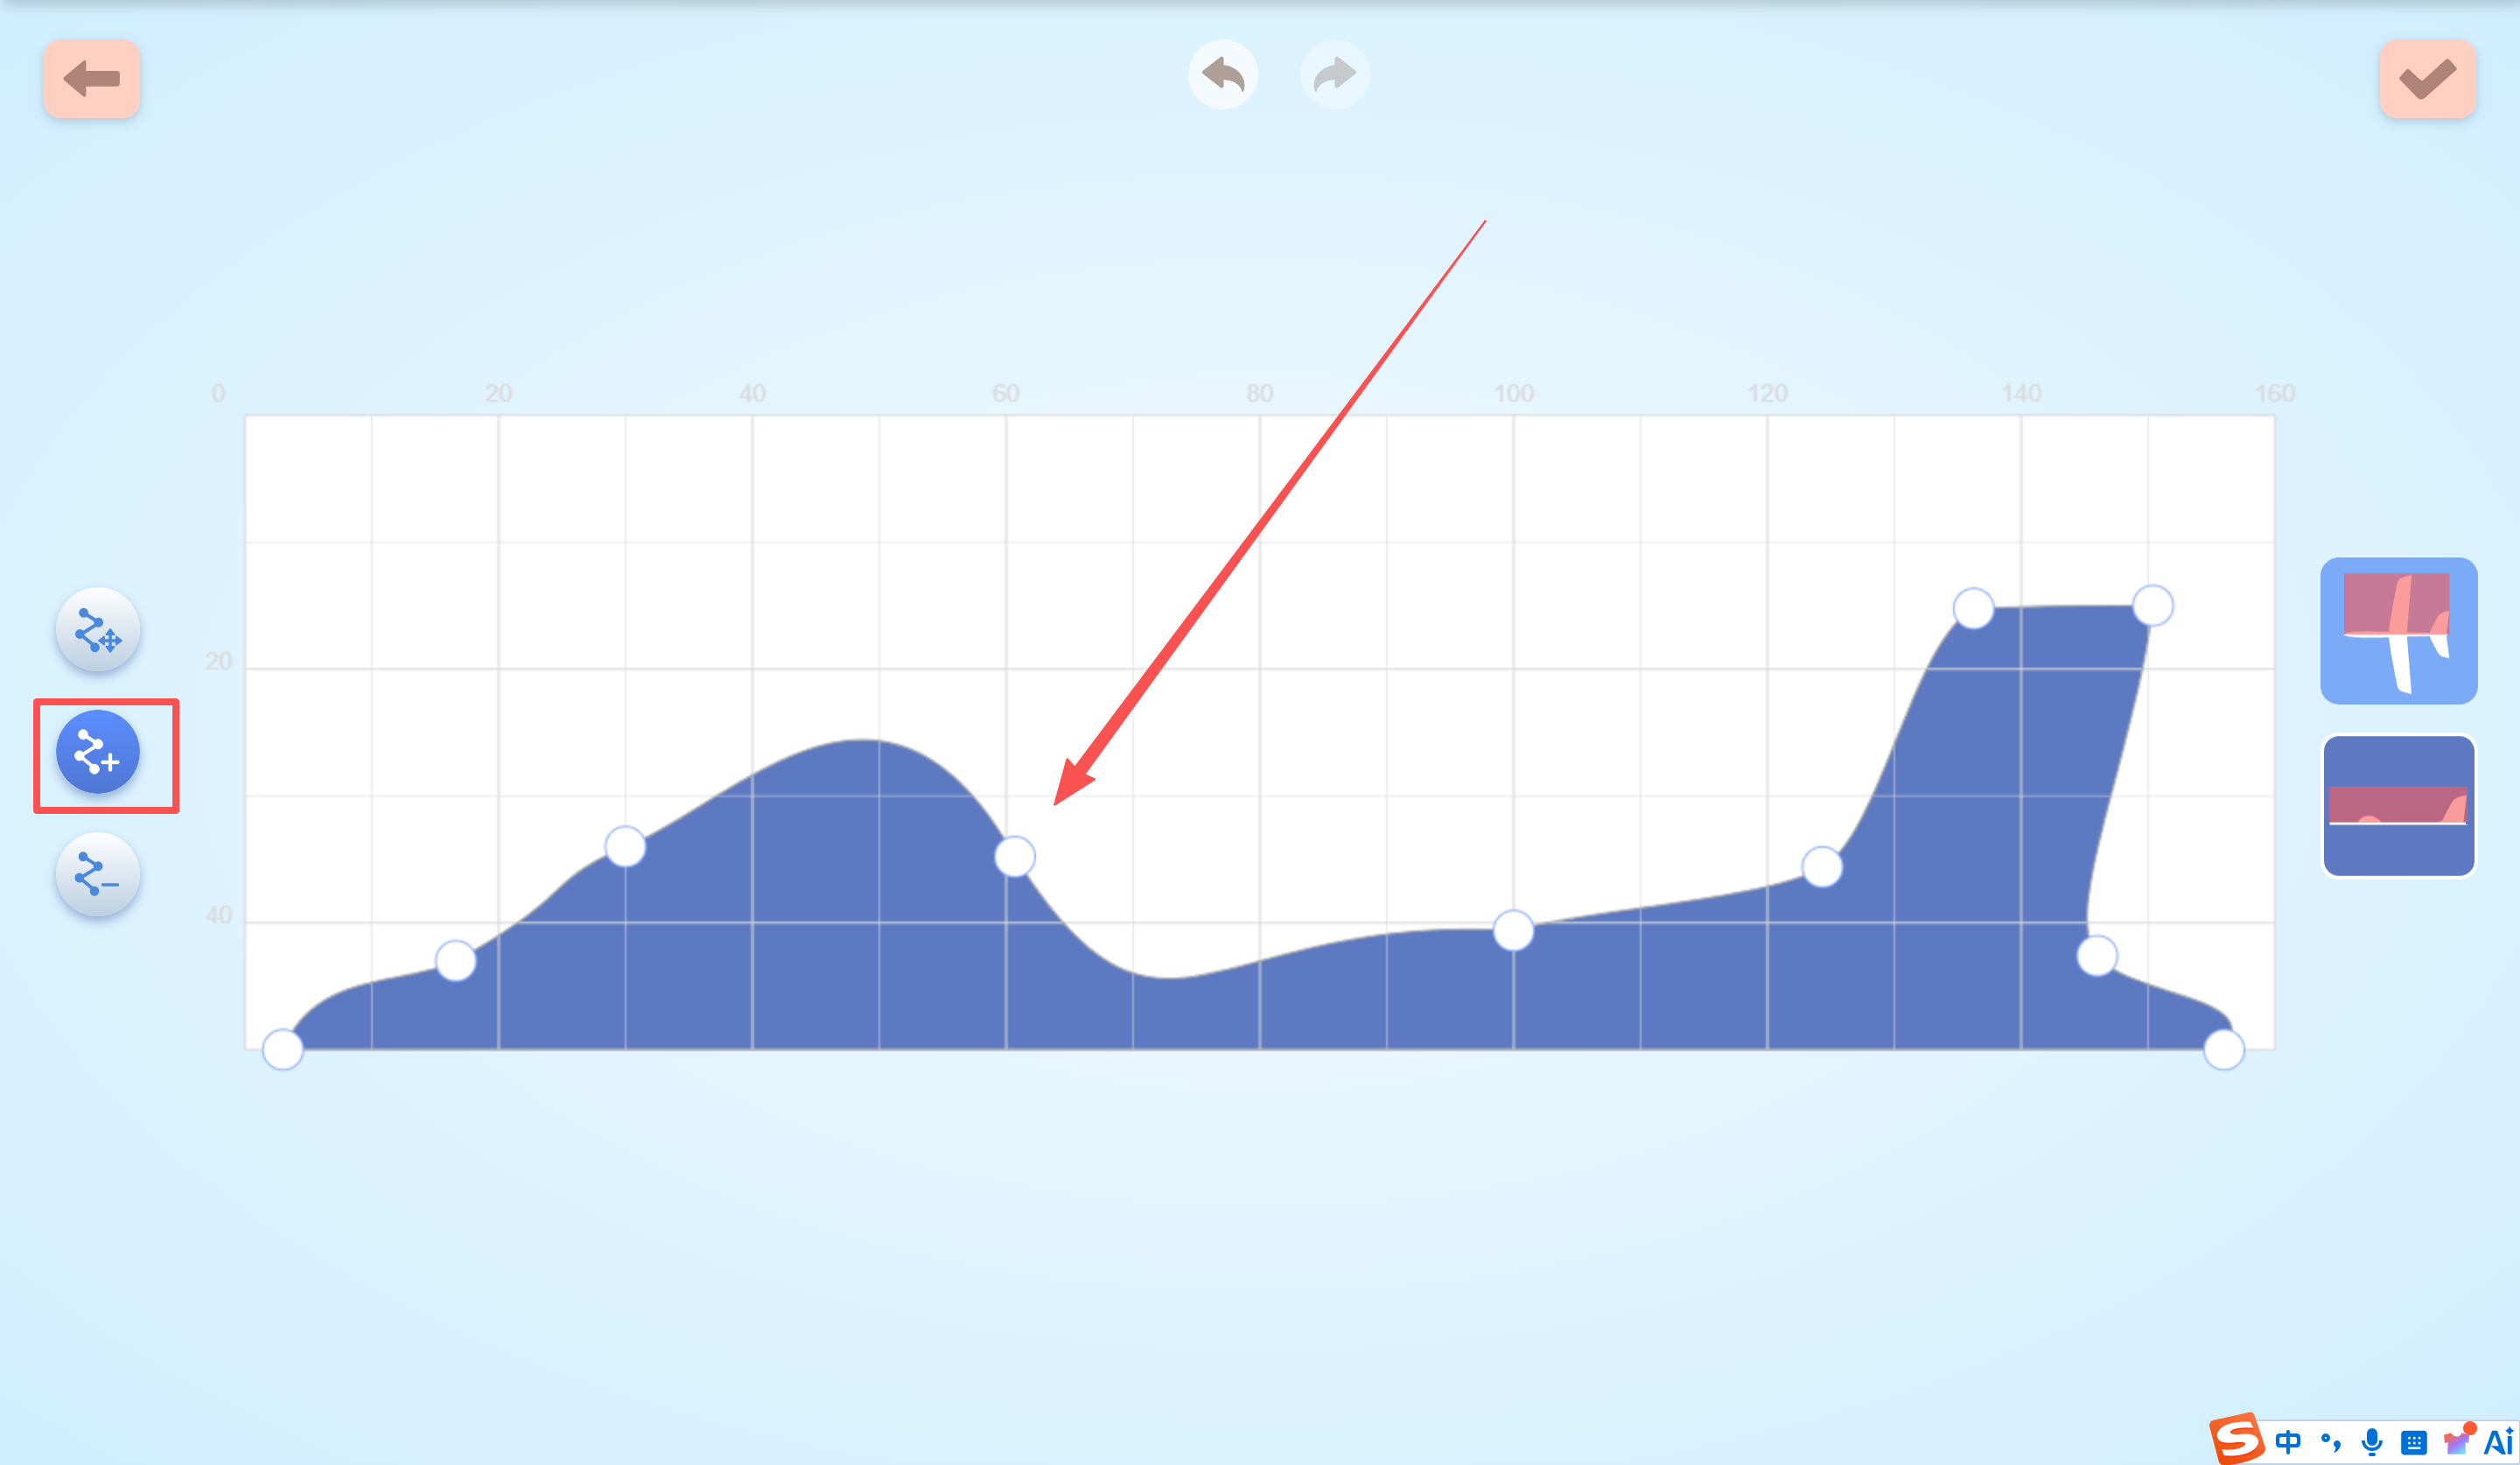
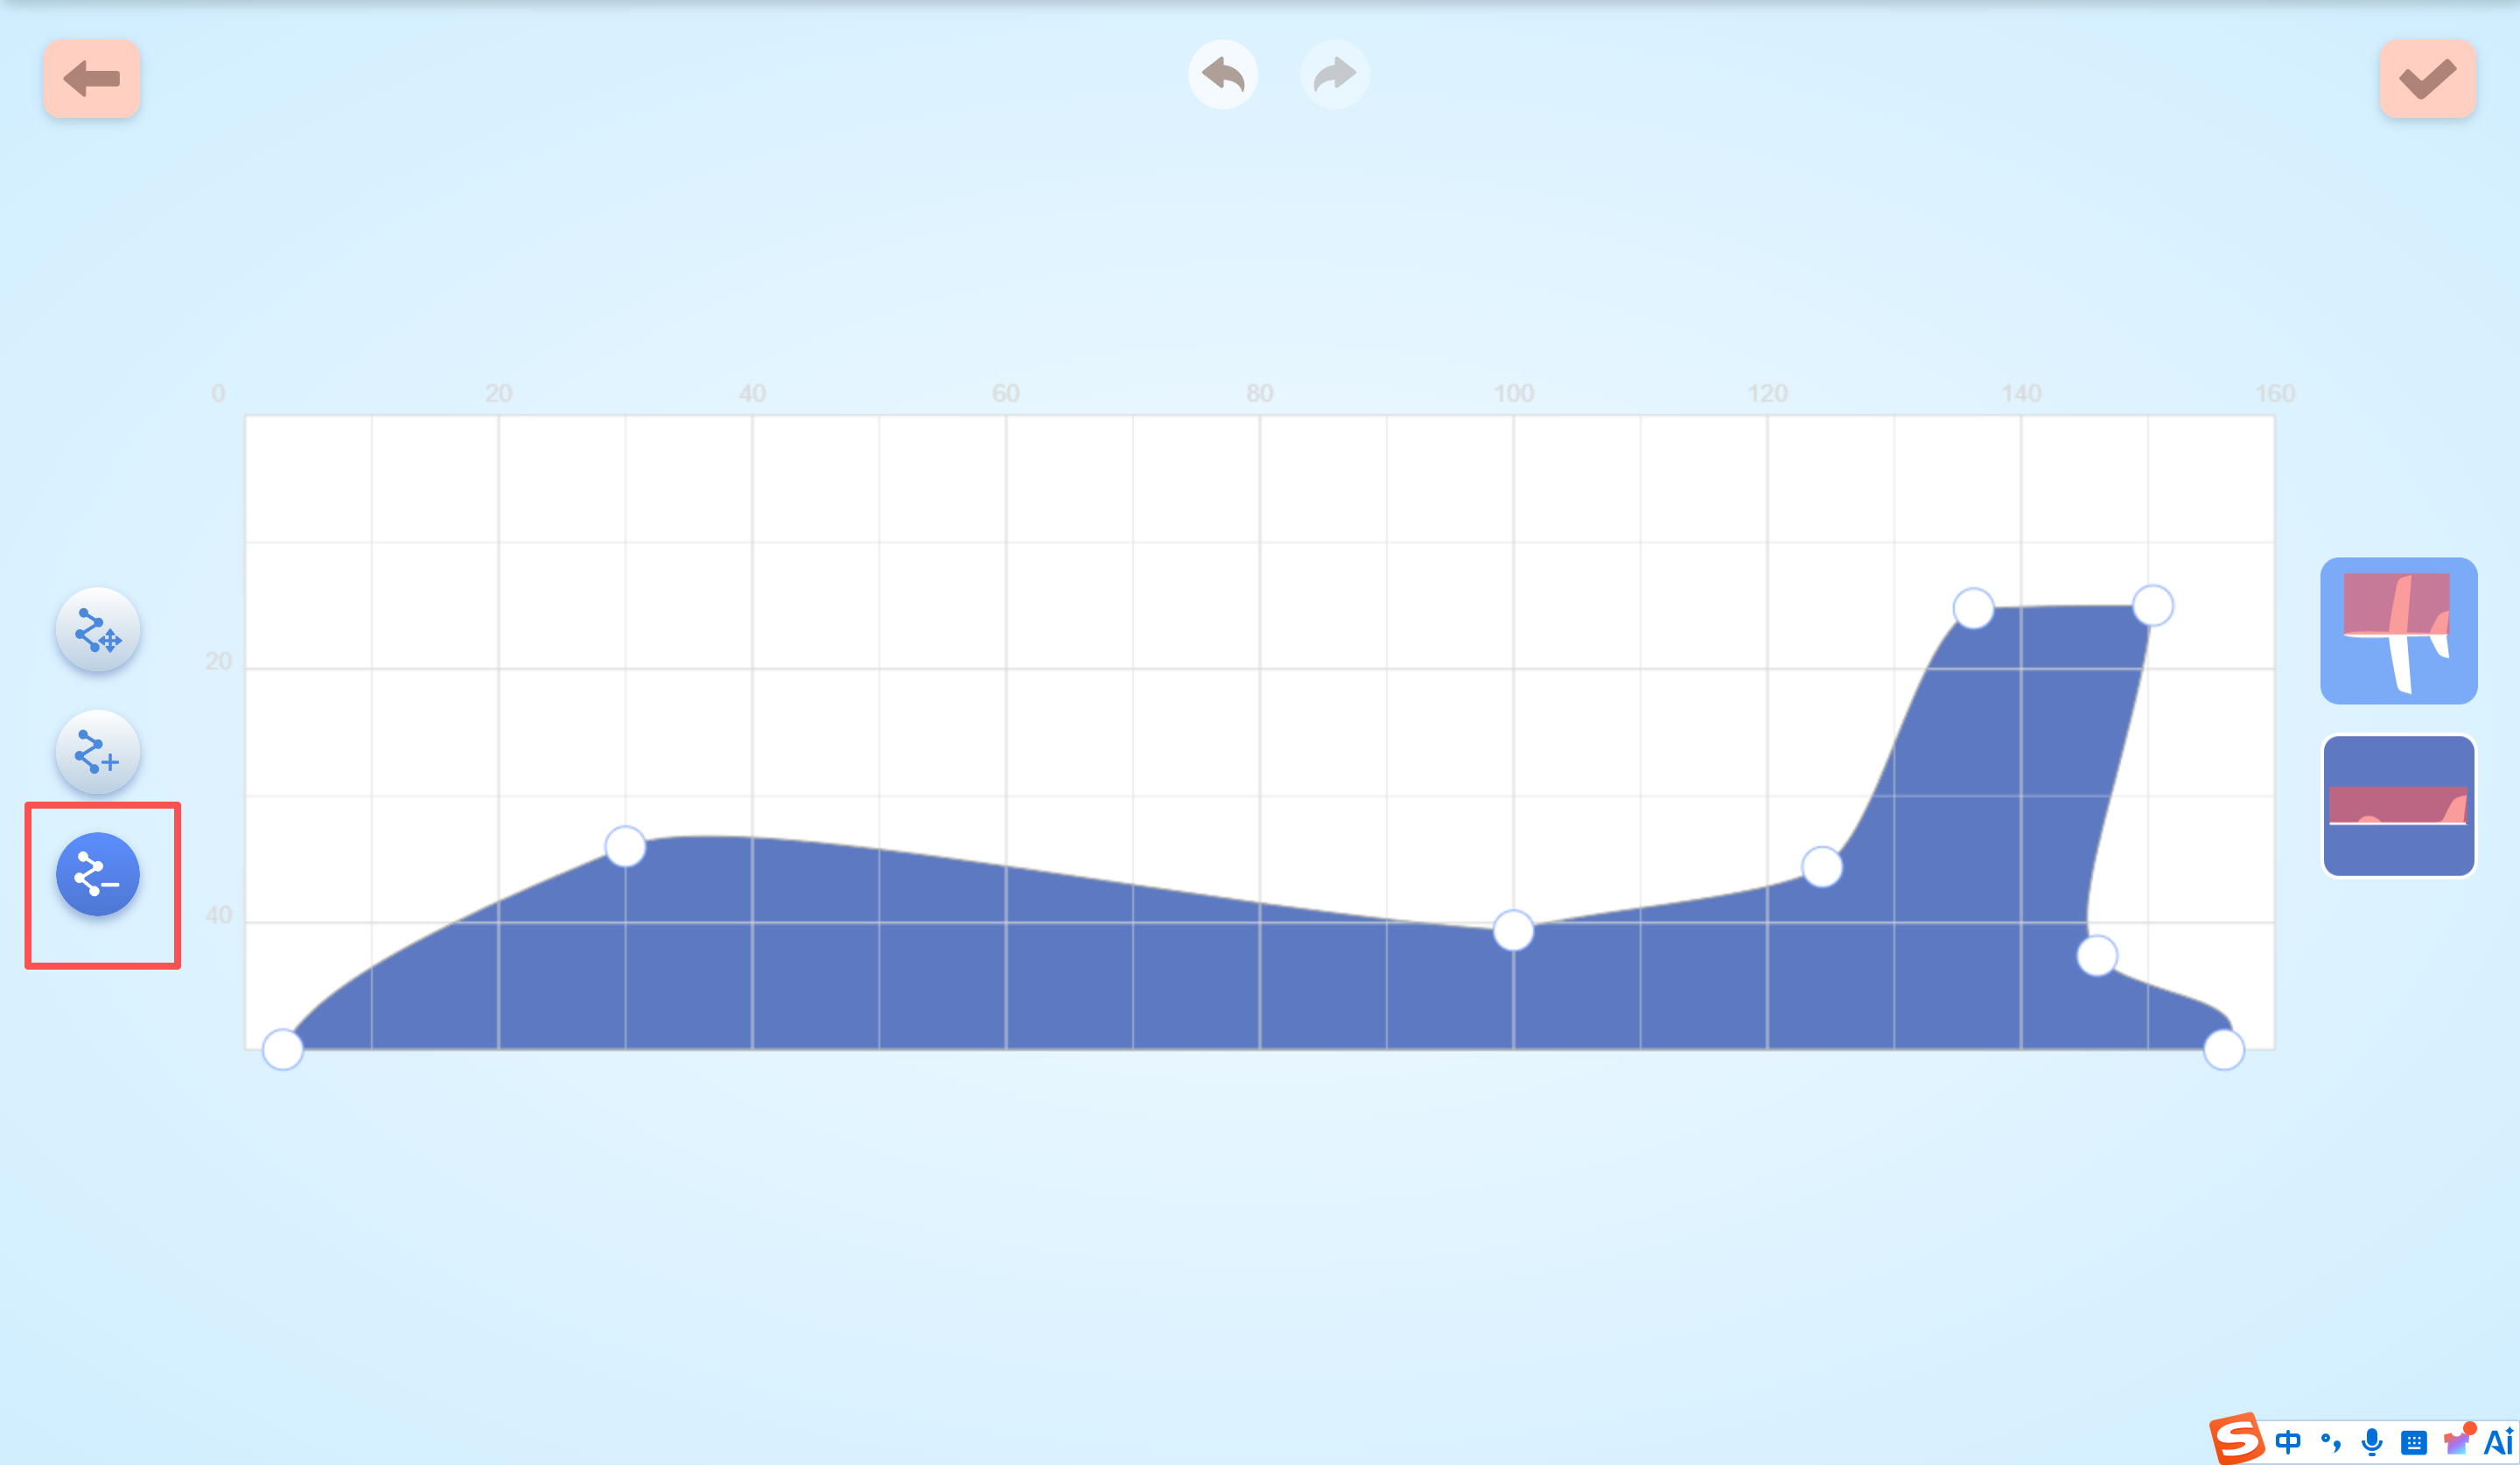
c. Theme “Model Editing Page”
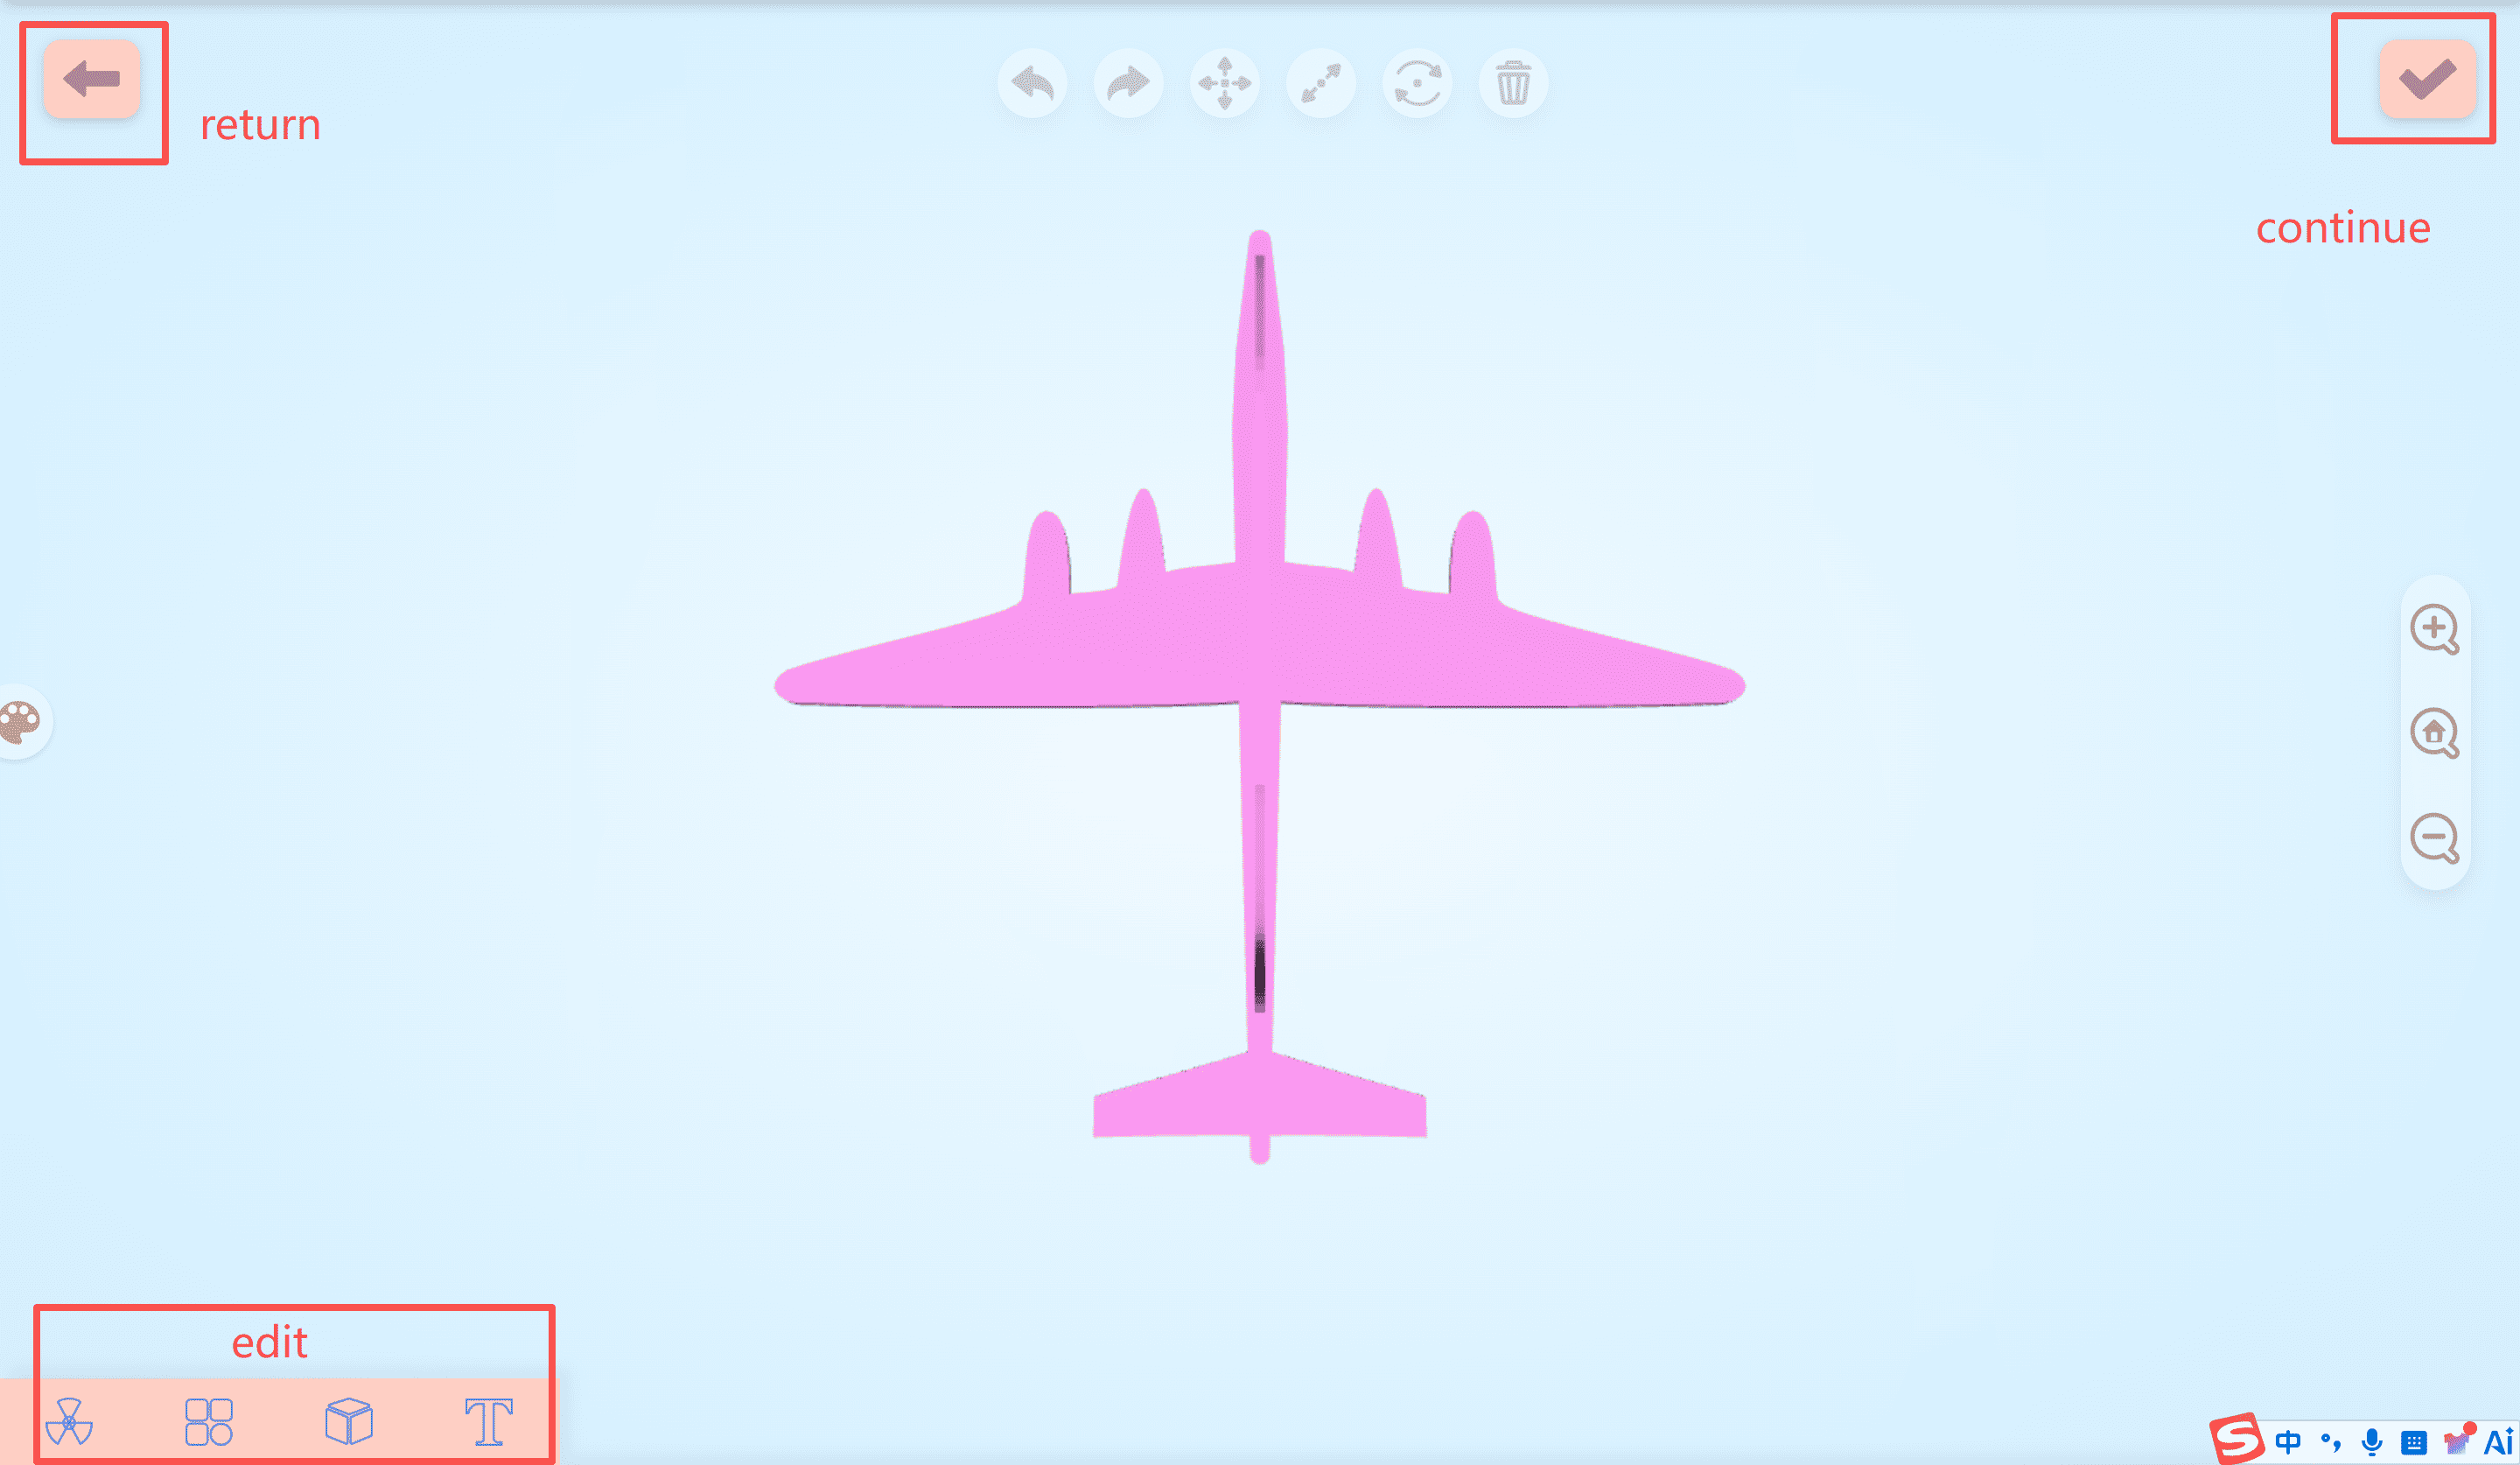
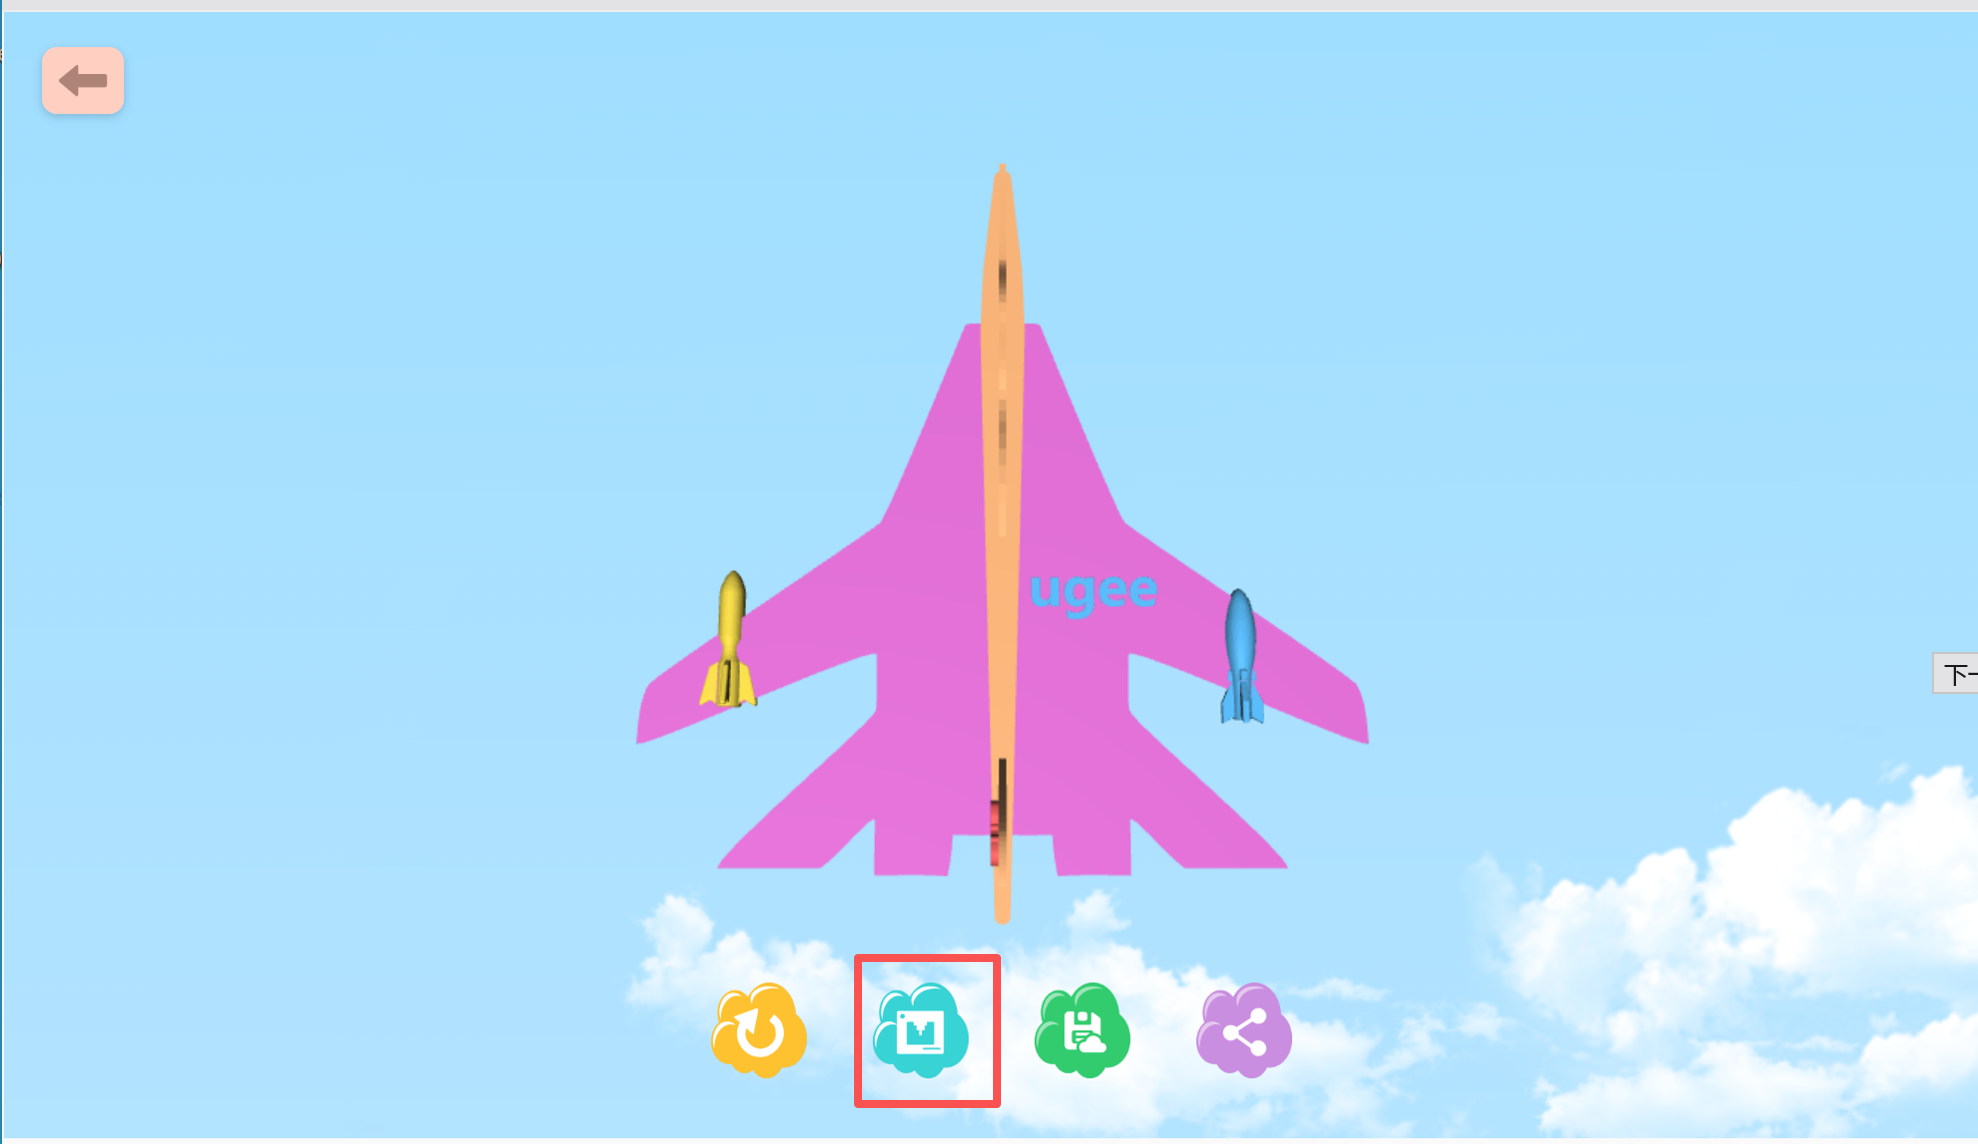
d. After editing the model as desired, click Next to open the airplane preview page.
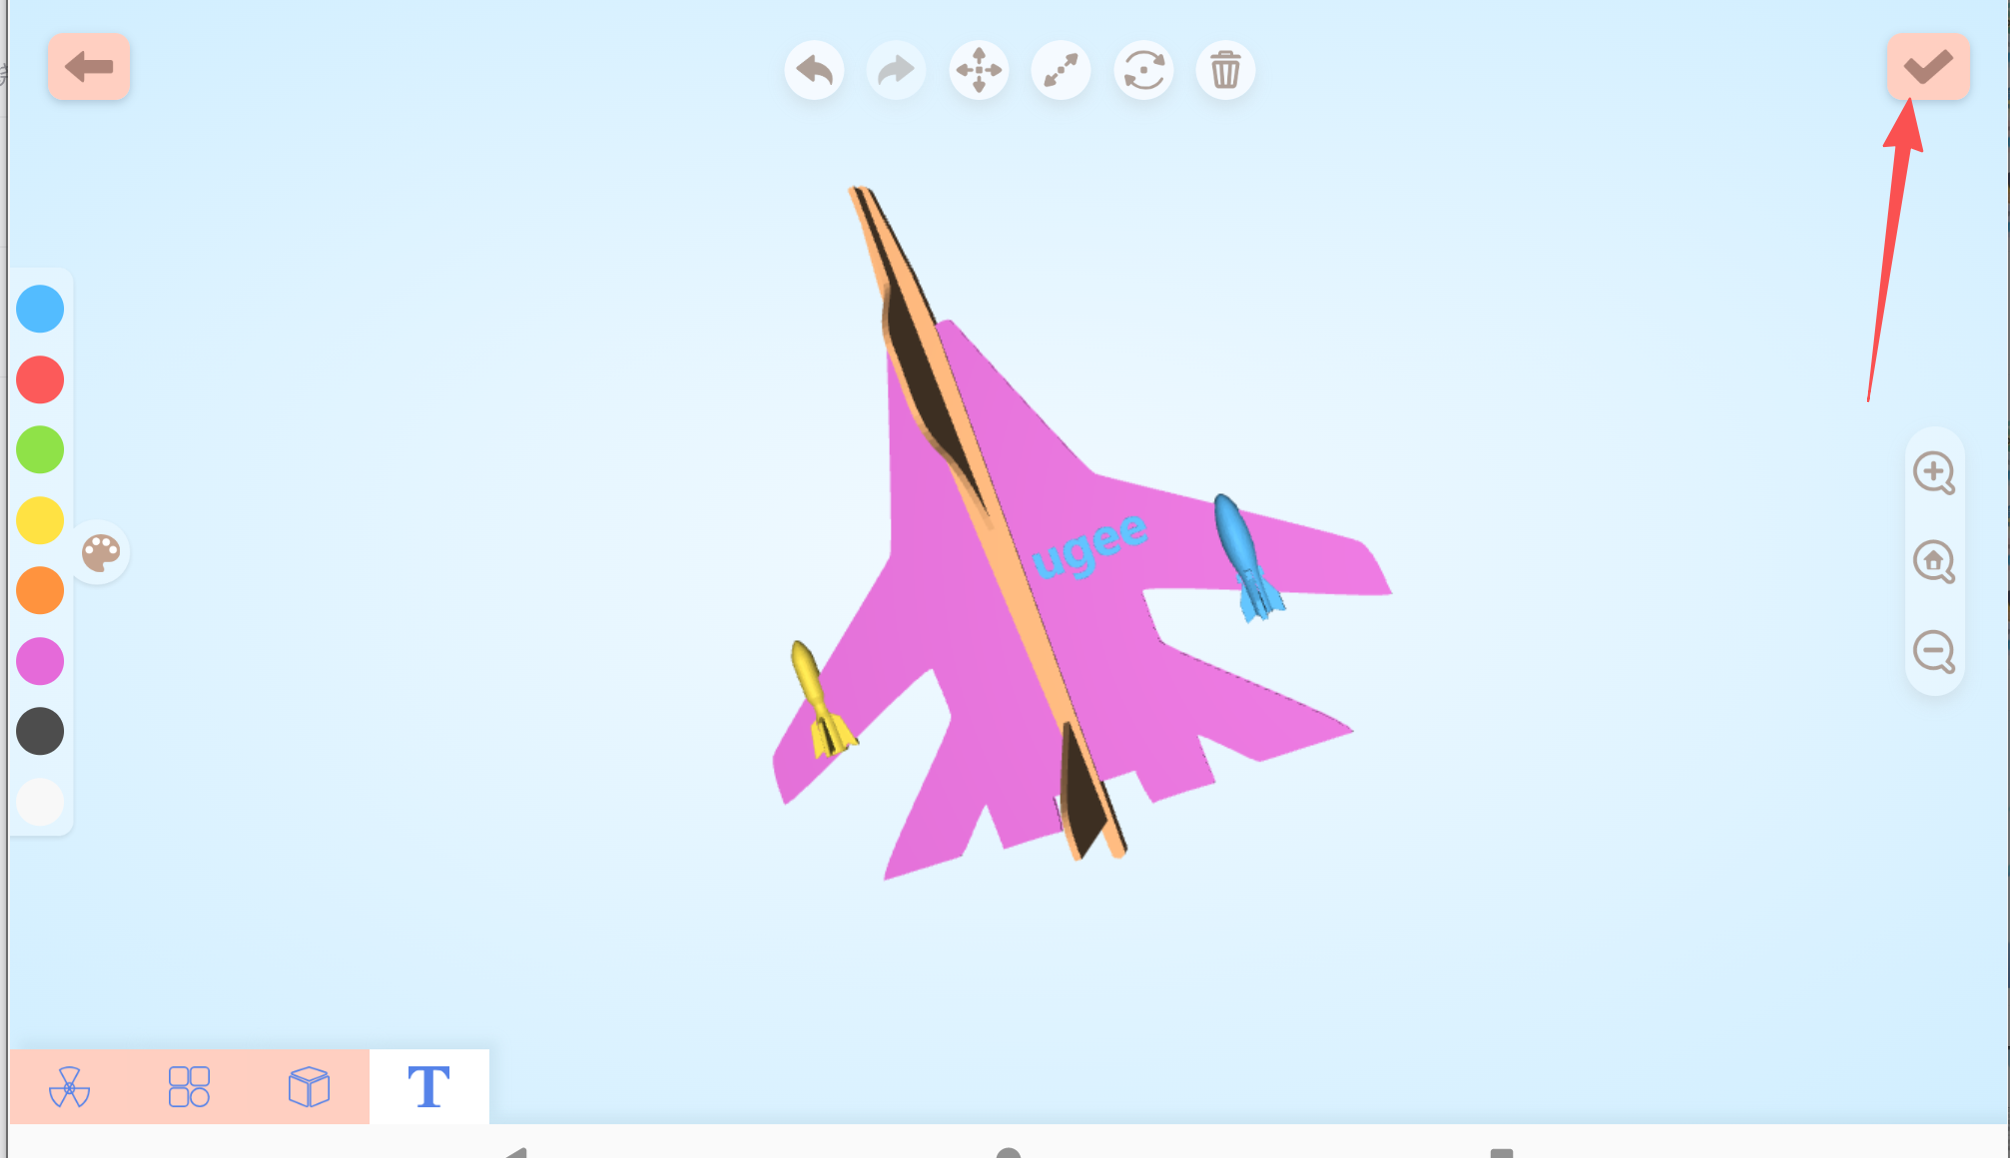
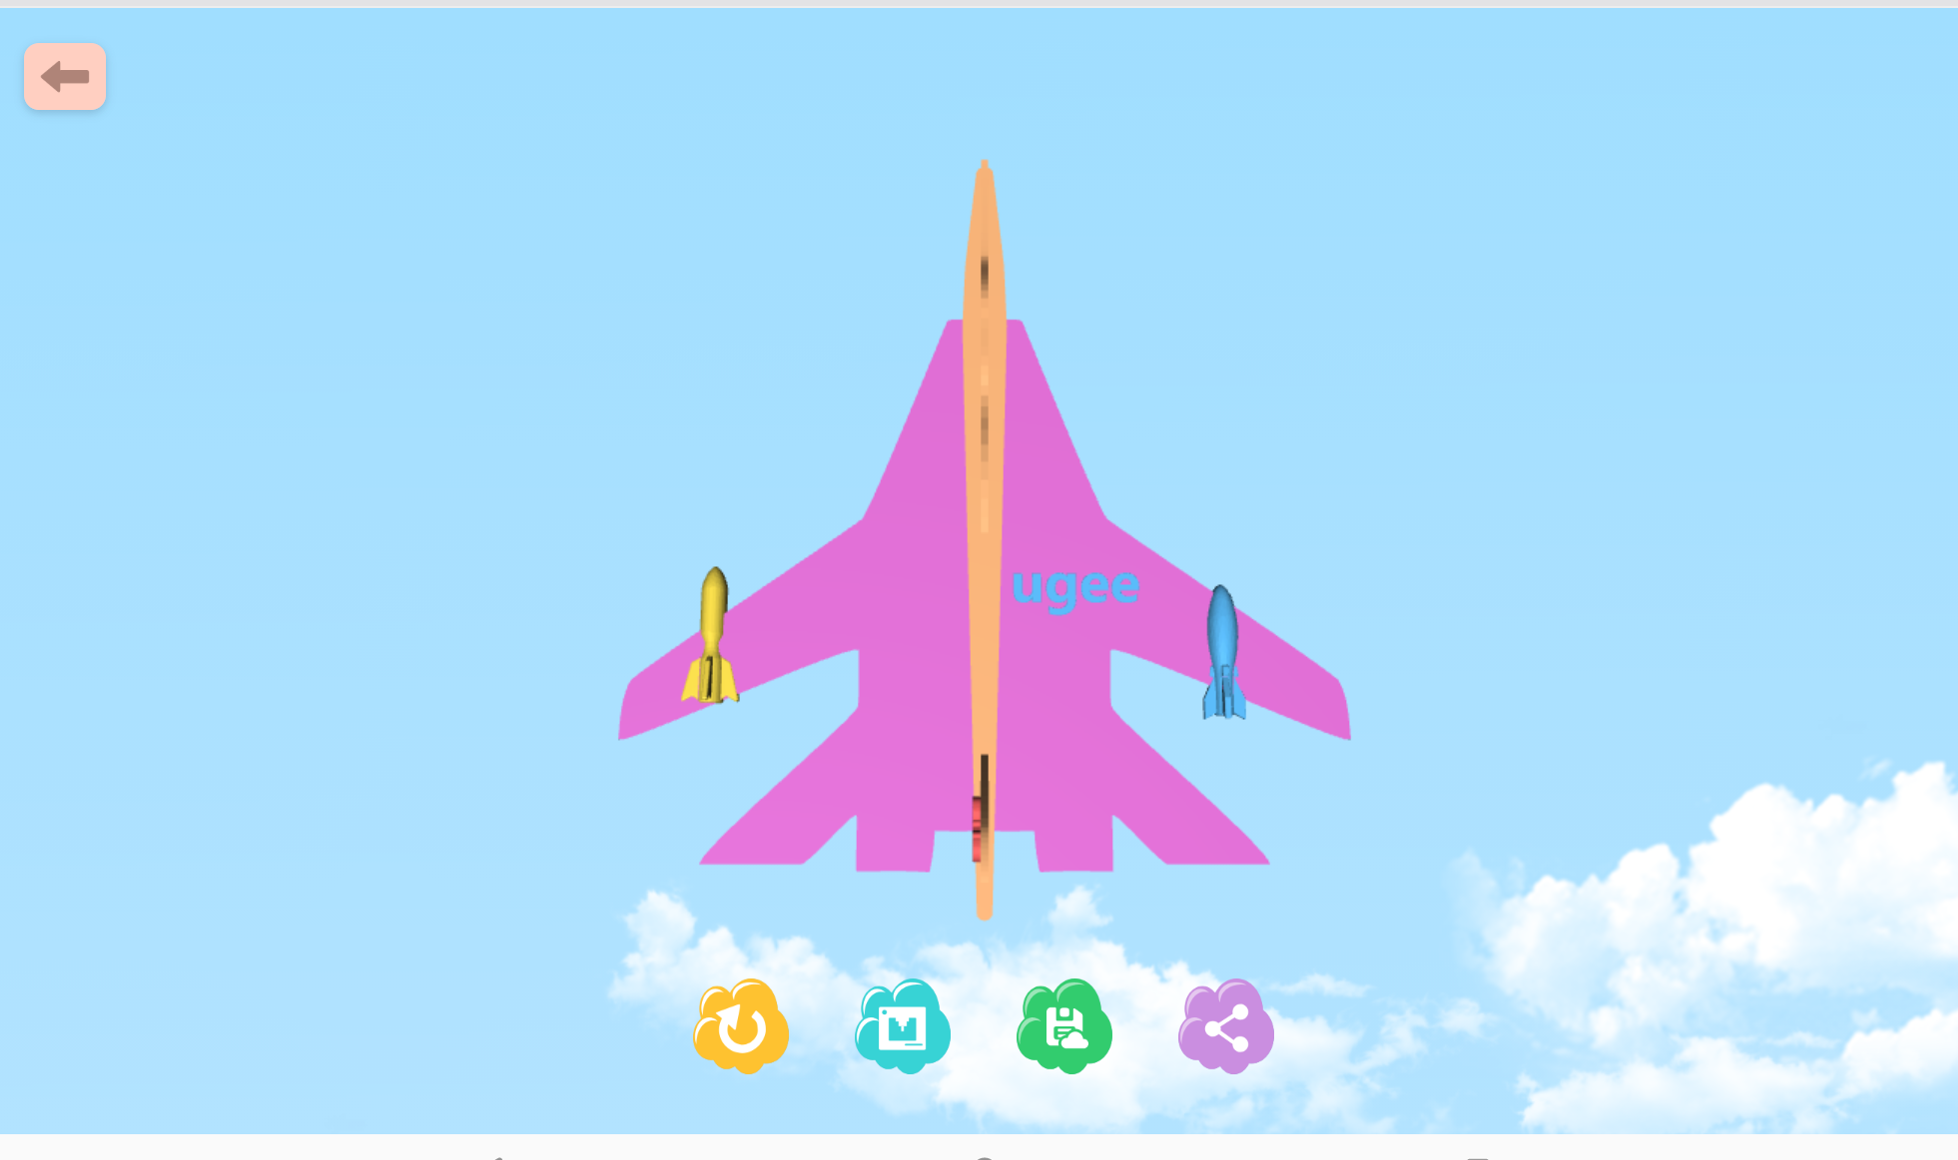
e. Click Print to open the printing screen.
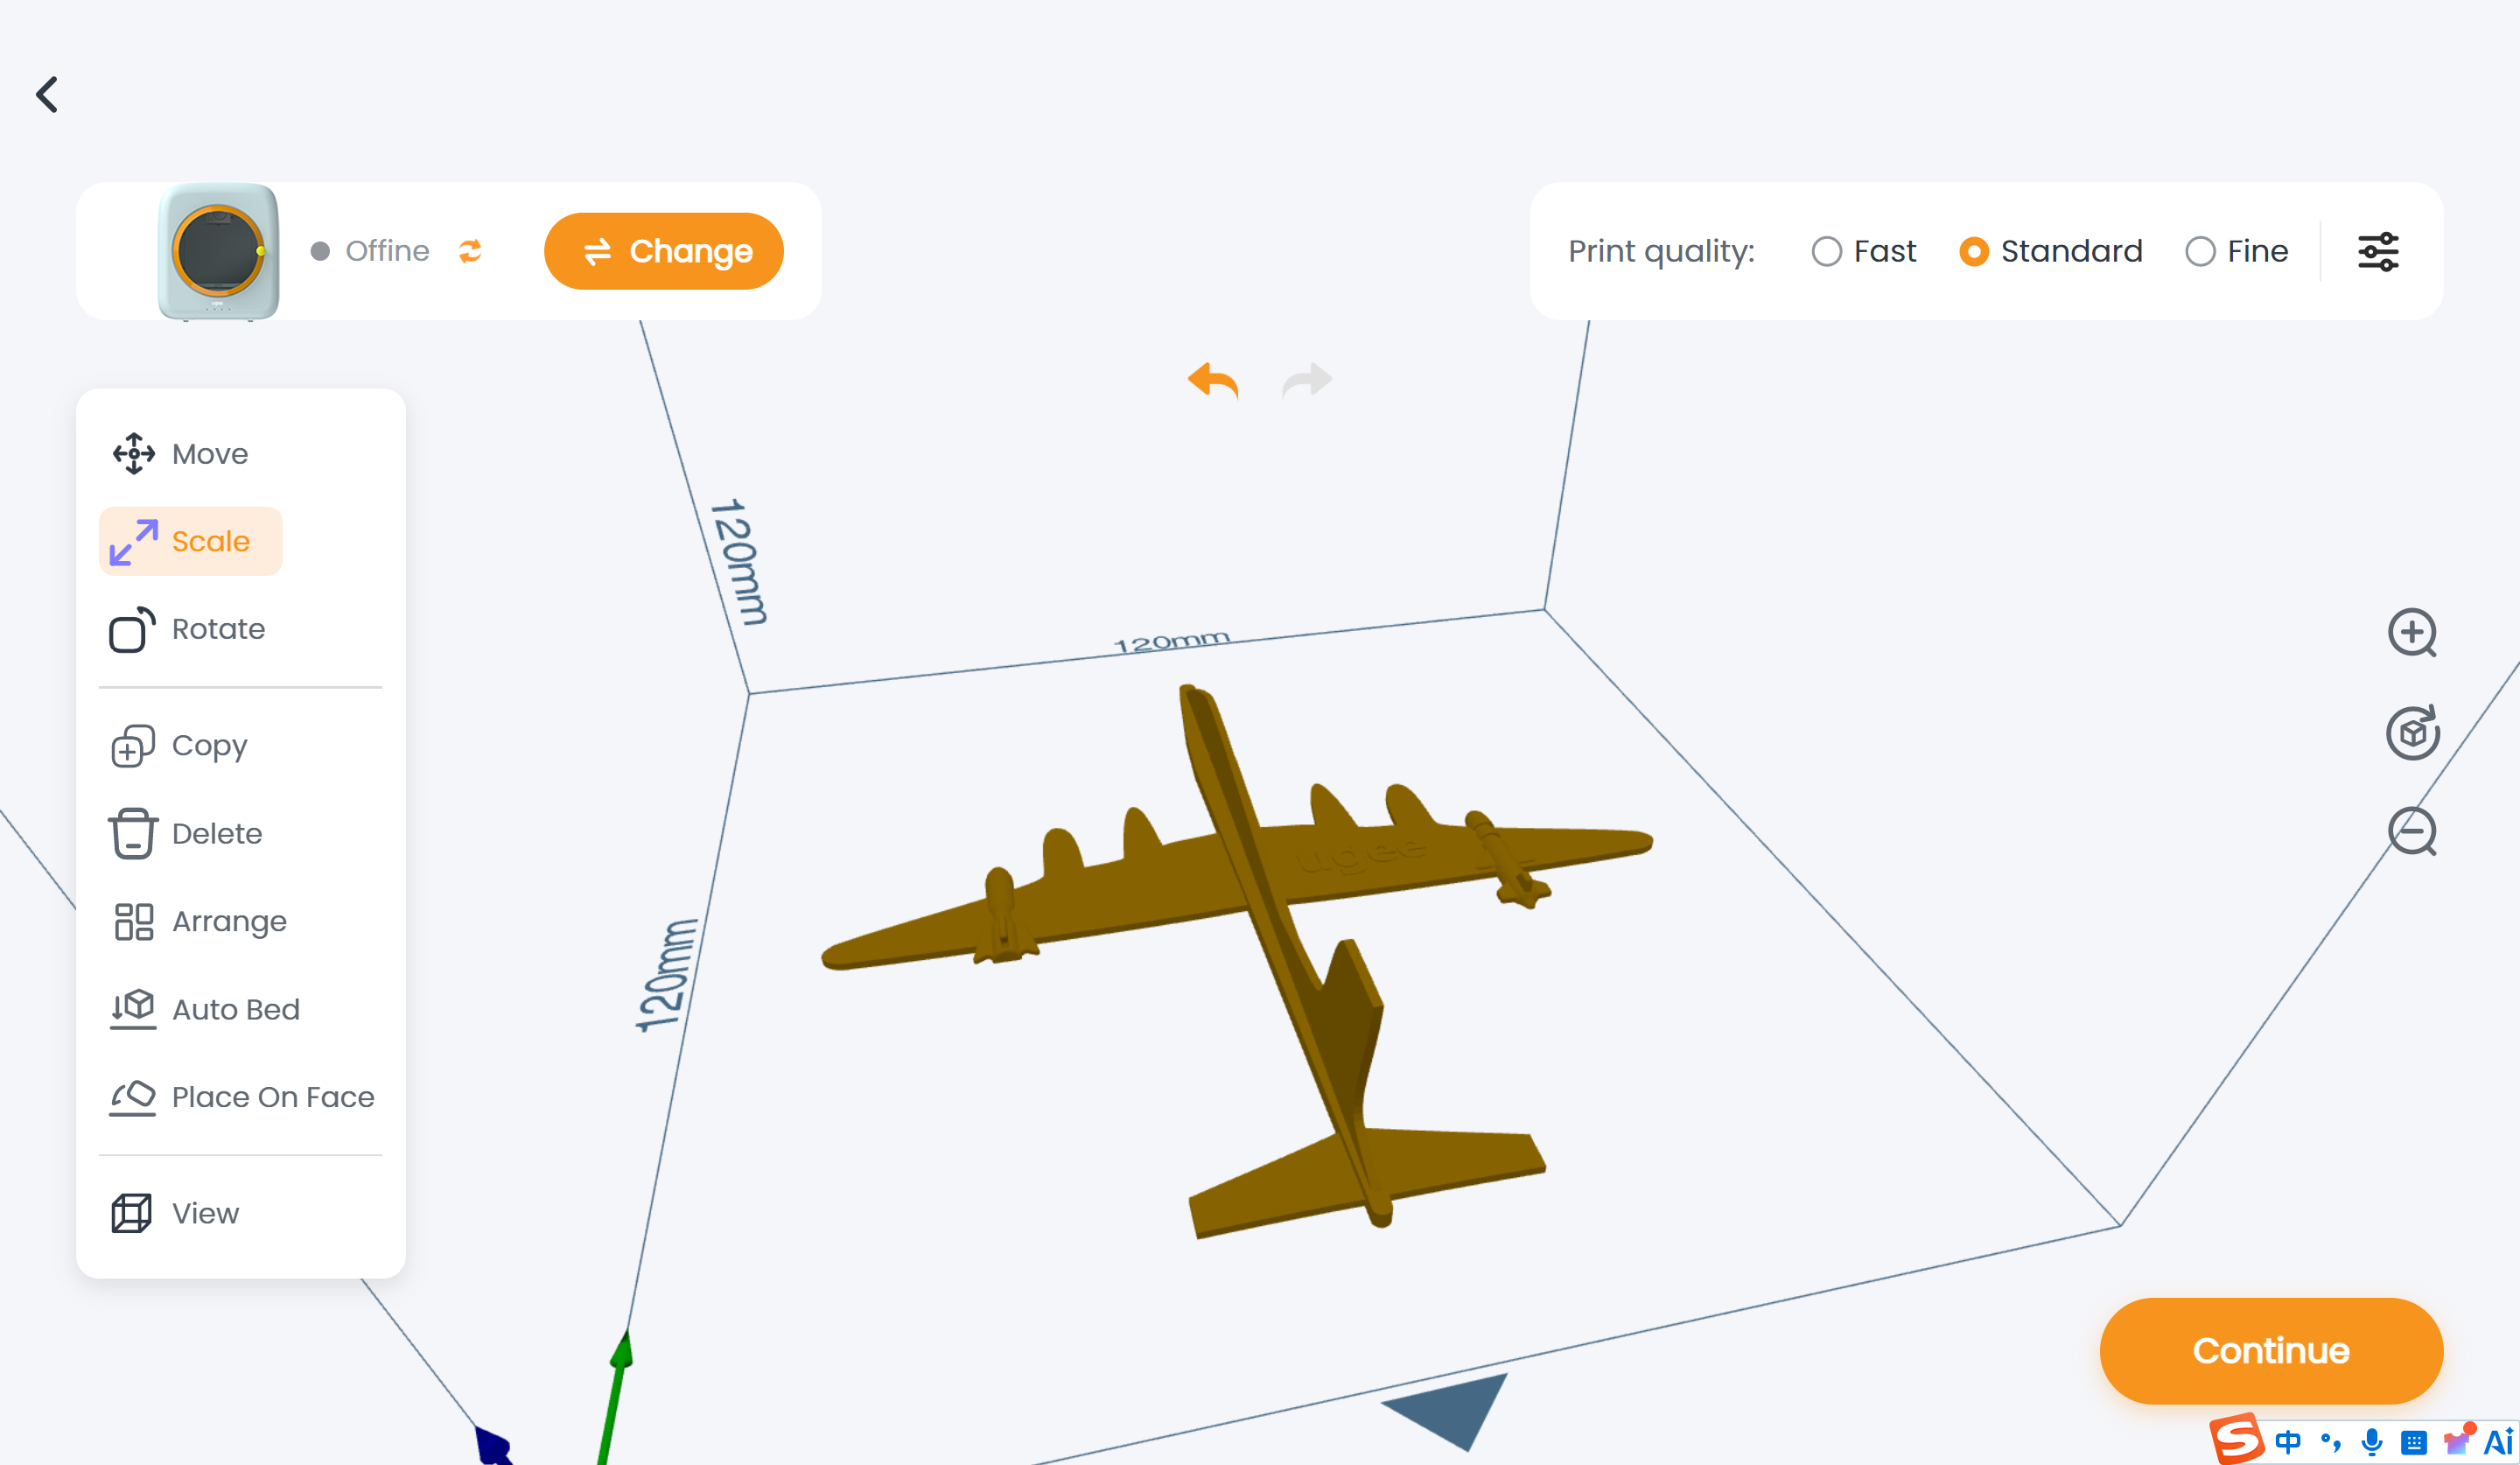
06/Desktop Software (ugee Ufun) Introduction
6.1 Desktop Download Methods
Download Method
International Version
Official Website Download Link
https://www.ugee.com/funbox-app-download
6.2 Five Functional Modules
The homepage is divided into five core sections:
Module
Name
Core Function Summary
TOY
TOYS
A vast library of child-friendly models in many categories, including toys, animals, robots, architecture, holidays, and education.
Search models (keyword search and voice input), sort them (Random / Popular / Latest), and filter them (print duration and number of parts).
Select a model to begin one-click printing.
PRINTER
PRINTER
Printer connection and pairing.
Print process management (printer selection, fine parameter adjustment, live monitoring, resume, pause, stop, filament loading, filament unloading, and print task queue).
Printer settings (printer information, printer settings, printer control settings, and removing the printer).
EXPLORE
EXPLORE
Fun Ideas (introduces creative ways to use various toys).
Tutorial Guides (videos addressing common issues during printer use).
Premium Courses (introductory modeling courses organized by difficulty level).
Theme
THEME
A no-experience-required 3D creativity workshop. The built-in “Theme Park” requires no drawing skills: just like playing a dress-up game, you can “change skins” and “assemble parts” to create a 3D-printable model that is uniquely yours.
Fifteen themes are available: Transforming Top, Fidget Spinner, Badge, Airplane, Whistle, Bamboo Dragonfly, Drawing-to-Model, Vase, Hinge Generator, Building Blocks, Clockwork Sprite, Letter Generator, Stick Figure Generator, Car, and Room Design.
CREATE
CREATE
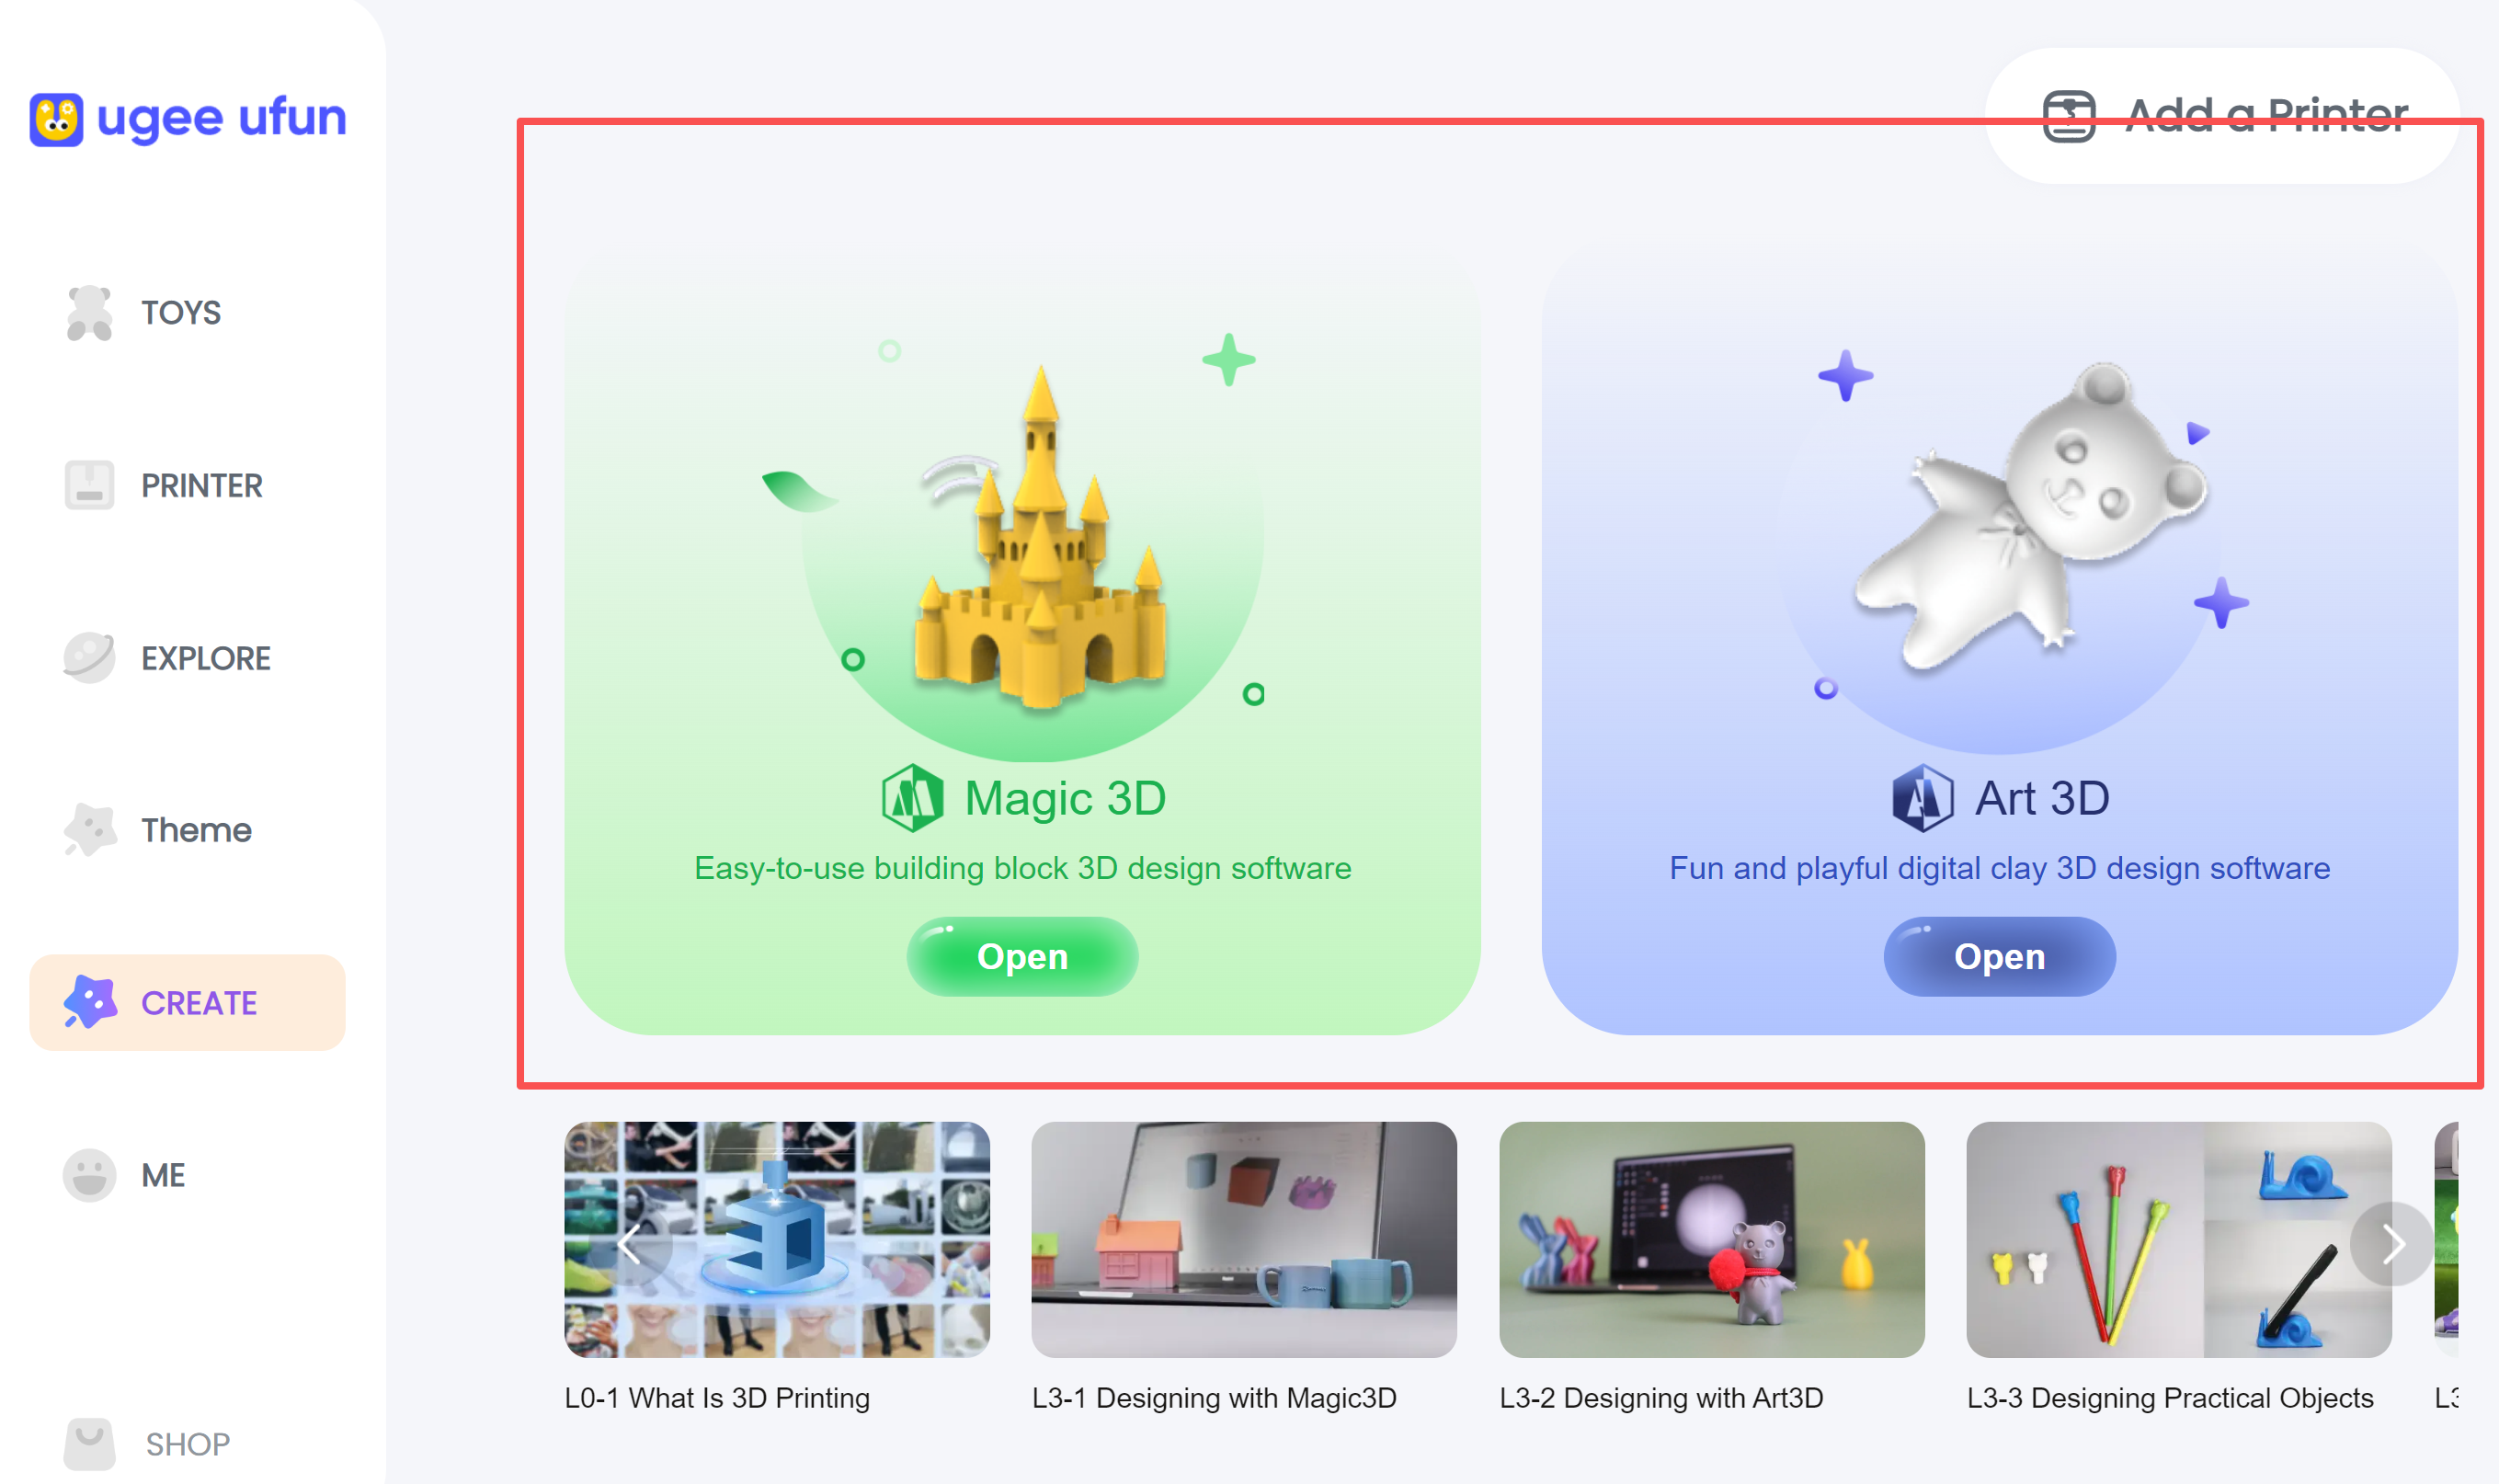
Magic 3D: Magic 3D is an entry-level 3D design tool that combines basic 3D geometric shapes with 2D sketches. It supports Boolean operations and spatial transformations, making it ideal for introducing core three-dimensional design concepts. Its clean, intuitive interface and simple operation help beginners and middle-school students build spatial awareness and foundational 3D modeling skills.
Art 3D: Art 3D is a digital art and 3D sculpting tool designed for beginners and middle-school students. It combines familiar tools from traditional art, such as brushes and sculpting functions, helping users transition naturally from drawing to 3D creation. Its clean interface and practical toolset are designed to inspire creativity and encourage artistic exploration.
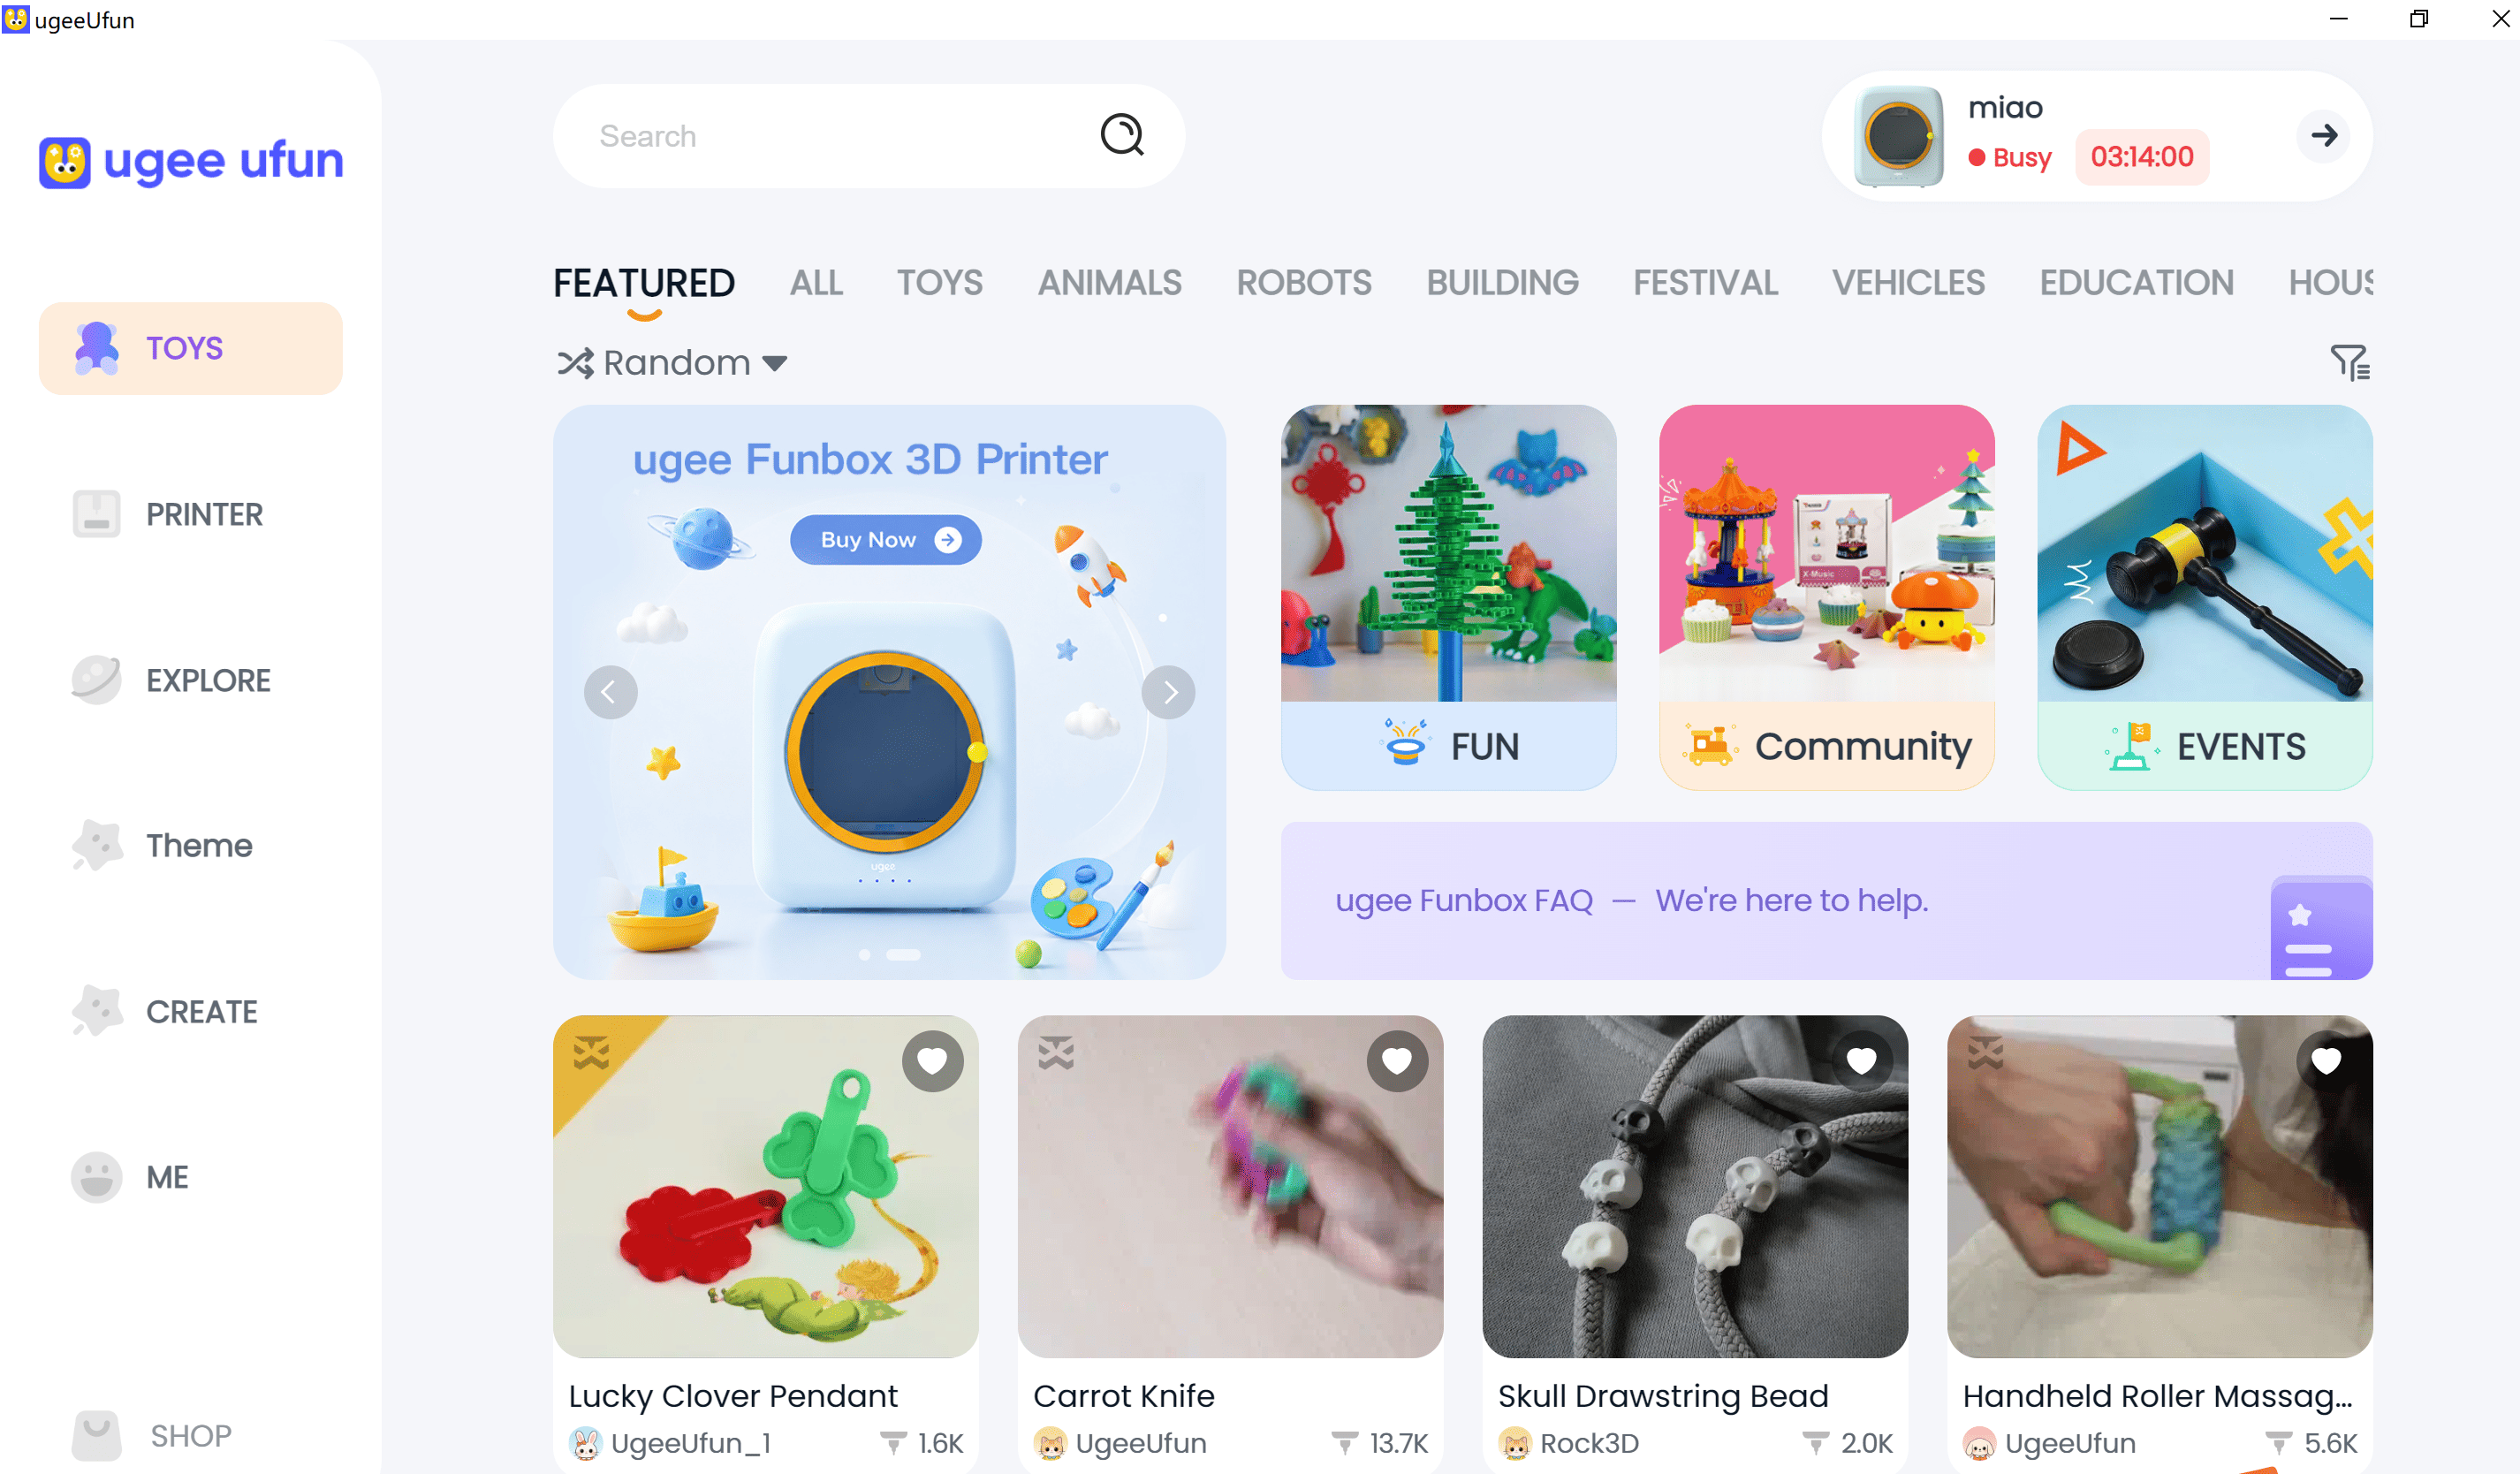
Difference between tablet and PC: Magic 3D+ and Art 3D have been added. Try each feature according to your needs.
07/Slicing Software (U-PRiNT) Introduction
7.1 Introduction
U-PRiNT is “translation software” for 3D printing.
A 3D printer cannot understand an attractive 3D model you see on your phone or computer, such as a small toy or a pen holder.
U-PRiNT “translates” the model into instructions the printer can understand—just like translating Chinese into English.
After the translation is complete, the printer can follow the instructions to build the object one layer at a time.
In 3D printing, this process is called “slicing.” Think of it as cutting a loaf of bread into slices; the printer then stacks those slices layer by layer to create a three-dimensional object.
7.2 Desktop Download Methods
Download Method
International Version
Official Website Download Link
https://www.ugee.com/funbox-app-download
7.3 Features:
7.3.1 Device Connection
Step 1: To connect U-PRiNT to the printer, first connect the printer to Wi-Fi using a phone or tablet (for example, Wi-Fi 1).
Step 2: When using U-PRiNT, the computer and printer must be connected to the same network.
Step 3: Open U-PRiNT, click Device Connection in the lower-left corner, select the printer’s IP address or name, and click it to connect.
How do I find the printer’s IP address?
Connect the phone to the printer, open PRINTER -> tap Settings in the upper-right corner to view the printer’s IP address and name.
7.3.2 Import a Model — Bring In Anything You Like
U-PRiNT supports many common 3D model formats, including STL, XSTL, OBJ, XCODE, and GCODE. Whether the model was downloaded online or designed by you, it can be imported easily. Simply click “Add Model” or drag the file directly into the software interface.
7.3.3 Edit and Adjust — Make the Model Look the Way You Want
After importing a model, you can adjust it freely, just like building with blocks:
① Move:
• Place the model in the desired position.
② Scale:
• Increase or decrease the model’s size.
③ Rotate:
• Adjust the model’s angle.
④ Duplicate:
• If one is not enough, duplicate it and print several at once.
⑤ Optimize Layout:
• Let the software automatically arrange multiple models neatly.
⑥ Lay Flat by Face:
• Click a face of the model, and the software automatically rotates that face to the bottom so it rests flat on the build plate.
7.3.4 Slicing Settings — Tell the Printer How to Print
After selecting the model, click Start Slicing to open the slicing settings page.
① Parameter Template: Fast / Standard / Fine (one-click gear switching)
- Fast Mode (Draft): Prioritizes speed. Suitable for prototypes, trial and error, or internal structural parts that do not require a fine surface. The layers are thicker and layer lines are visible, but printing takes less time.
- Standard Mode (Balanced): The ideal balance between speed and quality. Recommended for everyday prints such as toys, decorations, and practical tools. It provides good surface smoothness with a moderate print time and is the most commonly used mode.
- Fine Mode (High Definition): Prioritizes maximum detail. Extremely thin layers produce a very smooth, refined surface. Suitable for figurines, portraits, and other artistic pieces. Printing takes longer than in Fast or Standard mode.
If the preset does not meet your needs, open Advanced Settings for more precise adjustments.
② Layer Height: Can be understood as the "thickness of sliced bread".
- Smaller value (for example, 0.1 mm): Thinner layers create a smoother, more refined surface with minimal visible stepping, but increase print time.
- Larger value (for example, 0.3 mm): Thicker layers reduce print time, but produce obvious layer lines and a rougher surface. (For beginners, the standard 0.18 mm setting is the safest choice.)
③ Wall Thickness (Shell Layers): This is the "thickness of the walls".
- This determines the model’s strength. Greater wall thickness creates a harder, stronger shell that is more resistant to damage, but excessive thickness wastes material and adds weight. For ordinary models, 2–3 shell layers are usually sufficient.
④ Infill Density: This is the "honeycomb structure density" inside the model.
- 0%: The model is hollow and extremely light, but can be crushed easily.
- 20%–30%: Recommended for everyday use. The internal honeycomb provides enough support and strength while saving material.
- 100%: The model is solid, heavy, and strong like a rock, but requires a great deal of material and time.
⑤ Speed Parameters (controlling the printer's "throttle")
- Print Speed (Outer Wall Speed): The “normal driving speed.” This is the speed at which the printer moves while extruding material. The outer wall, which forms the model’s visible surface, should be printed more slowly for a smooth, refined finish.
- Infill Speed (Internal Speed): The “highway speed.” This is the speed used to print the invisible internal honeycomb. Because it is not visible from the outside, it can be printed faster to greatly reduce total print time.
- Travel Speed (Non-Printing Speed): The “return speed of an empty vehicle.” This is the speed at which the nozzle moves through the air from point A to point B without extruding material. It is generally set to match the print speed; otherwise, missed steps and layer shifts may occur.
⑥ Support Parameters (Build “Scaffolding” for Overhanging Parts)
When a model has overhanging arms or protruding platforms with no support underneath, direct printing will cause collapse. In such cases, "supports" are needed.
- Support Strategy: The software automatically detects overhanging areas. You can choose to add supports to all overhanging areas or only to specific local areas.
- Full Support: Add scaffolding beneath every overhanging area of the model.
- Local Support: Add scaffolding only beneath selected overhanging parts of the model.
- No Support: Do not add any scaffolding.
- Support Structure: The "shape of the supports".
- Tree Support: Branches grow upward from a base like a tree and split toward each overhang. Highly recommended for beginners. The small contact points are easy to remove and leave almost no marks. Support strength is moderate but adequate for everyday use. Best for most models, especially decorations and figurines with high surface-quality requirements.
- Linear Support: A row of straight vertical columns—the most traditional support type. It is strong and stable, but may leave small circular marks on the model after removal. Best for large flat overhangs and mechanical parts requiring strong support.
- Zigzag Support: The support surface rises and falls in a wave-like zigzag. Its pointed contact areas are somewhat easier to remove than linear supports, but the structure is more complex. It is a compromise between linear and tree supports.
- Grid Support: Multiple support columns interweave like a fishing net. It covers a large area and provides very even support, making it suitable for broad overhangs. It is slightly harder to remove than linear support. Best for large flat overhangs such as bridges and ceiling structures.
- Triangular Support: The support cross-section is triangular. It uses the stability of a triangle to resist lateral forces and is suitable for models with inclined overhanging surfaces.
- Concentric Support: Supports form concentric rings. Suitable for circular or curved overhangs, with evenly distributed contact points. Best for round domes and curved overhangs.
- Cross Support (X-Shaped): Support columns cross into X shapes, improving overall stability and resistance to wobbling. Best for tall, thin overhanging structures that must remain stable during printing.
- Spiral Support: Supports rise in a spiral like a spring. Contact points are minimal and very easy to remove, but support strength is relatively low. Best for detailed models and small overhanging contact areas.
- Critical Angle (Overhang Threshold): The angle at which supports start to be added.
- Set to 30° -> Supports are added to slopes steeper than 30°. This provides more support and greater stability, but uses more time and material.
- Set to 45° -> Supports are added only to slopes steeper than 45°. This provides a moderate amount of support and is the default for most users.
- Set to 60° -> Supports are added only to very steep slopes over 60°. This saves material but increases the risk of collapse.
⑦ Other Parameters: Build Plate Strategy (putting "shoes" on the model)
- Build Plate (Brim/Raft): This is the first layer of "glue" that adheres to the print platform.
- No Base: The model has no “shoes” and sits directly on the platform with only its own contact surface. Use this when the model has a large, stable bottom area. The advantage is a smooth bottom surface that is ready to use after removal.
- Skirt: Draws a thin line around the model without touching it, like a border. It is mainly used to test whether extrusion is smooth and whether the first line flows evenly—essentially a warm-up before printing.
- Base: Adds a layer of “glue” beneath the model. Highly recommended. It firmly anchors the model to the platform and prevents warping during printing.
7.3.5 Upload & Print
After slicing is complete, click Upload and Print. When the upload succeeds, printing begins. You can view the print progress on mobile or tablet.
Please select your country/region
North America
South America
Oceania
Europe