


Quick Search
Digital Drawing Tablet
Drawing Monitor
Drawing Pad
Accessories
Language
Please select your country/region
North America
South America
Oceania
Europe
Quick Search
Digital Drawing Tablet
Drawing Monitor
Drawing Pad
Accessories
Please select your country/region
North America
South America
Oceania
Europe
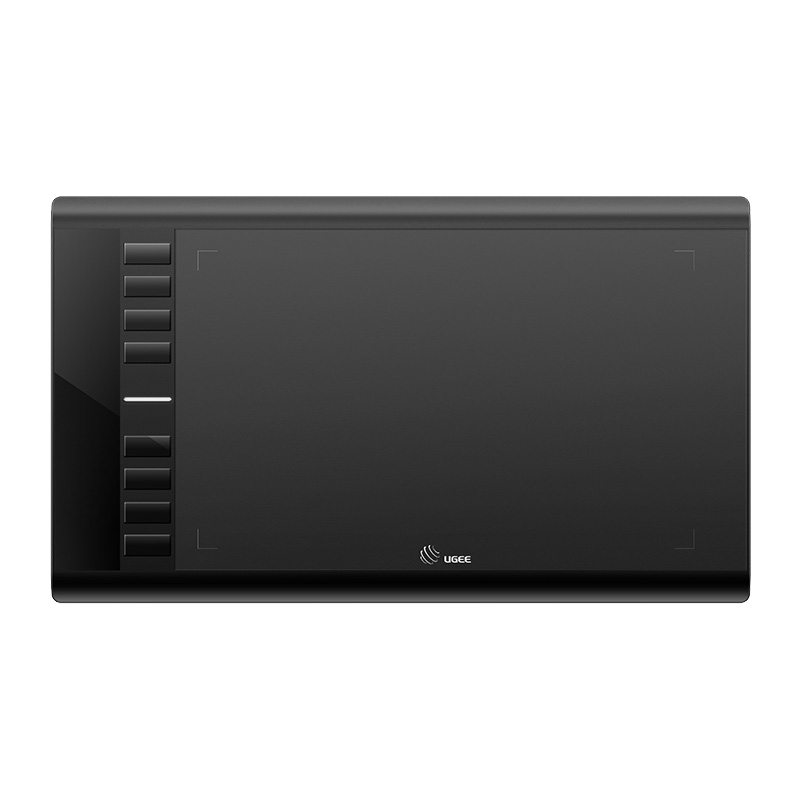
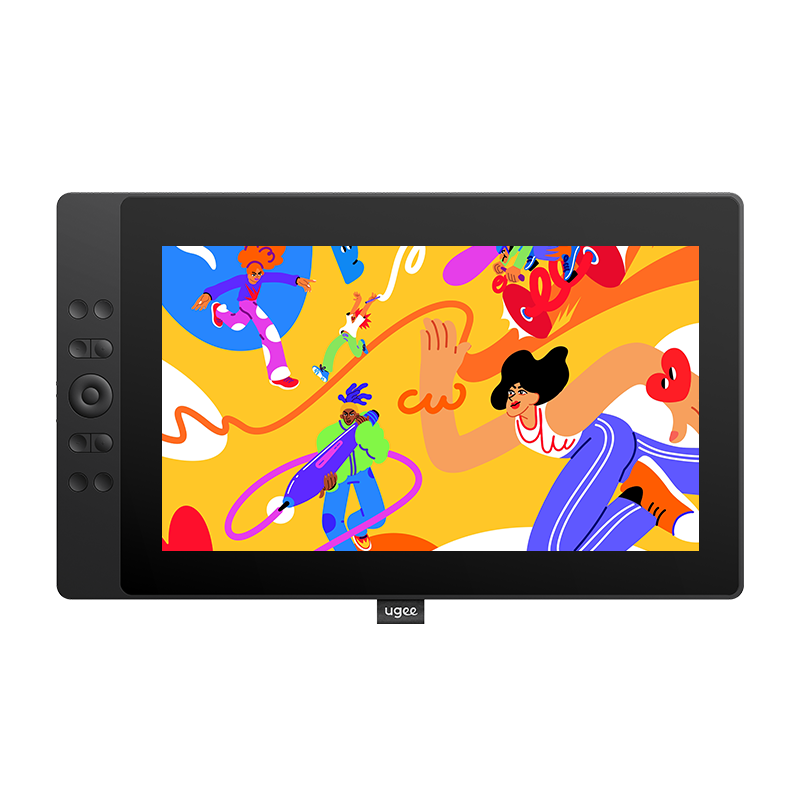
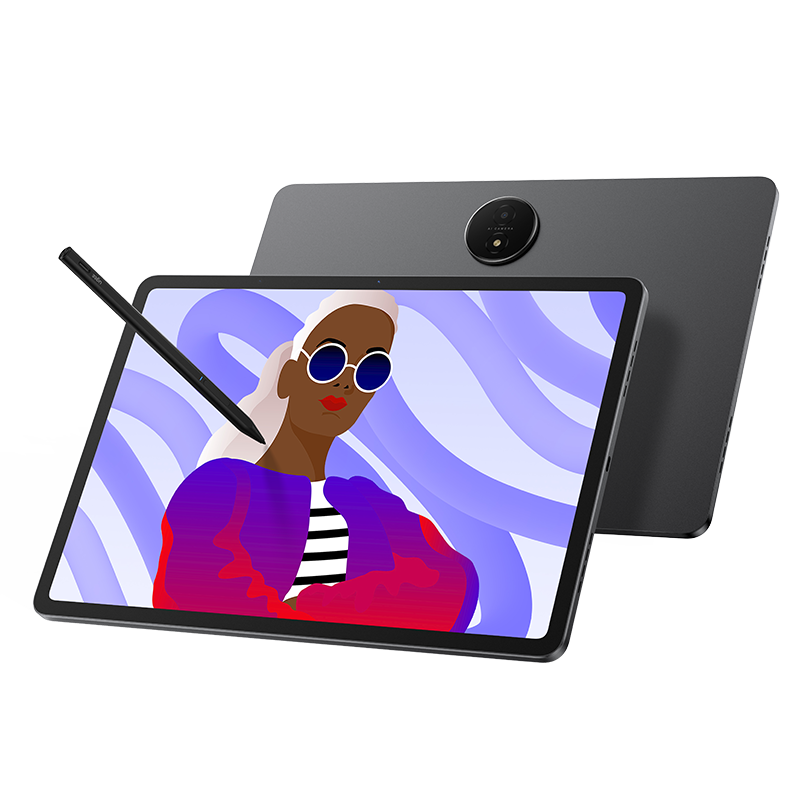
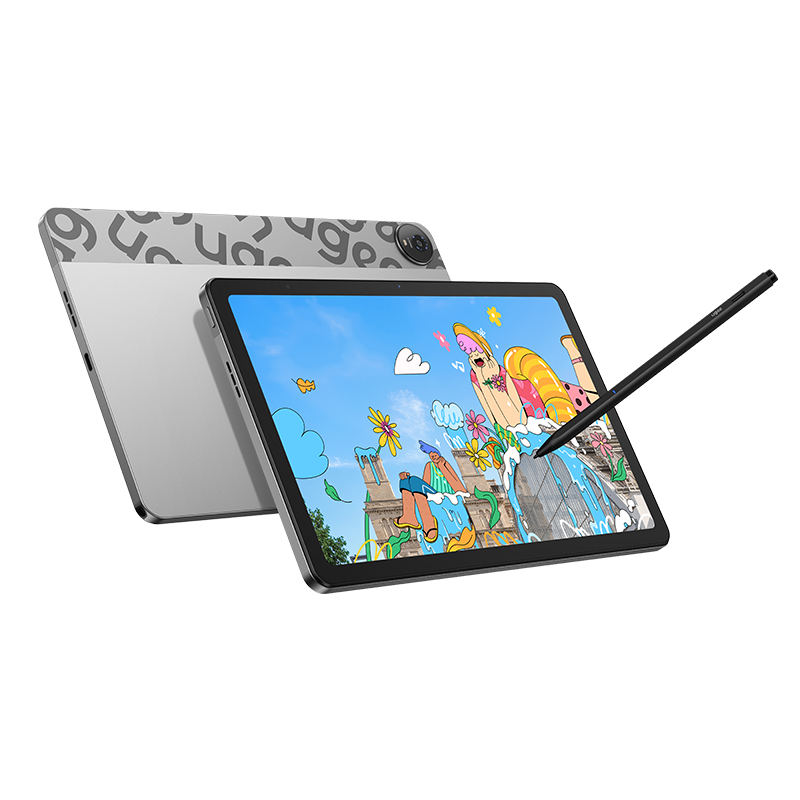
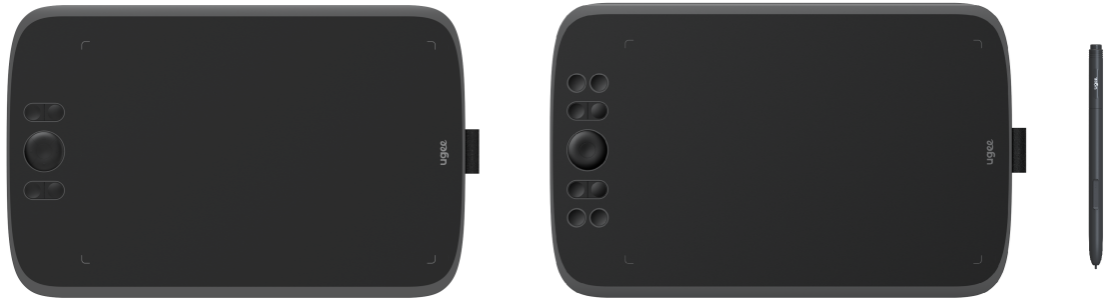
M808/M908 Digital Drawing Tablet
1. Introduction
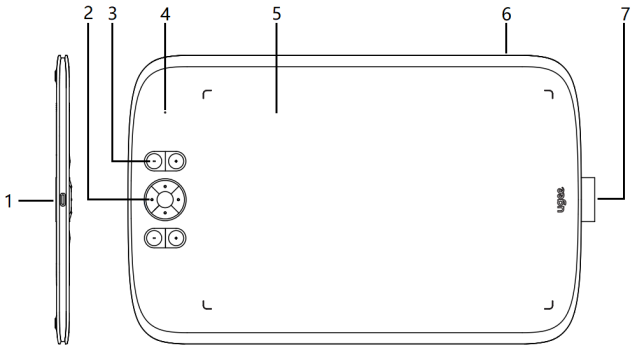
2. Product Overview
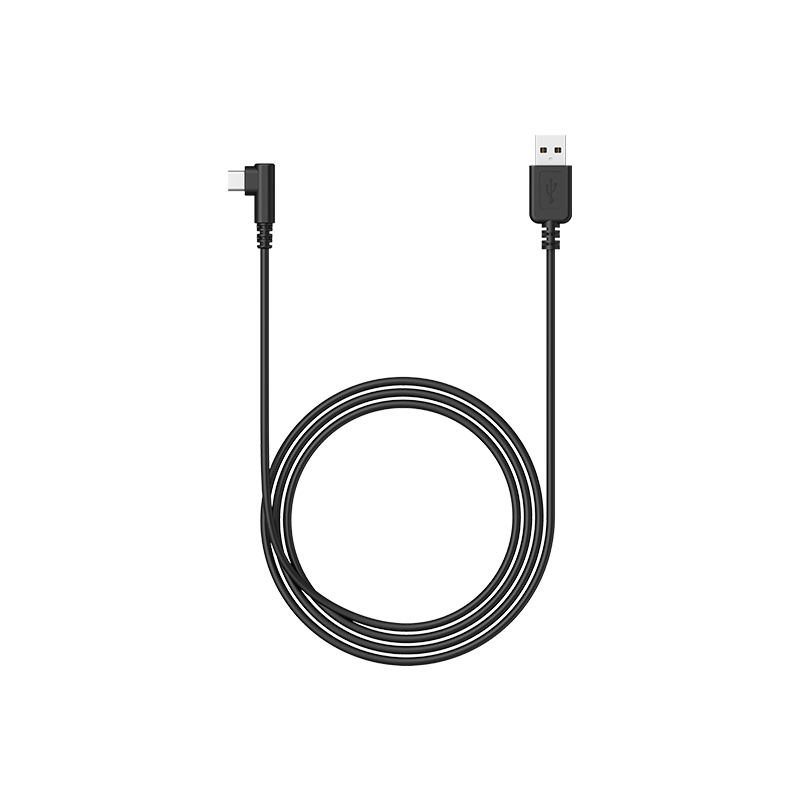
3. Wired connection of the digital drawing tablet
4. Driver Download
5. Driver Installation
6. How to Use Driver
6.1 Connect to Device
6.2 Pen Settings
6.3 Digital drawing tablet
6.4 Driver Settings
6.5 Applications and Others
7. Uninstallation
8. FAQs
Thank you for chosing ugee digital drawing tablet. To get the most out of this product and prolong its life, please read this manual carefully before use and follow the instructions for maintenance and protection of the product.
The appearance, color and accessories of the product may vary due to the latest product improvements. Please refer to the actual product. We reserve the right to upgrade the product technology and modify this manual without prior notice.
Note: All images in the manual are for illustrative purposes only. Please refer to the actual product.
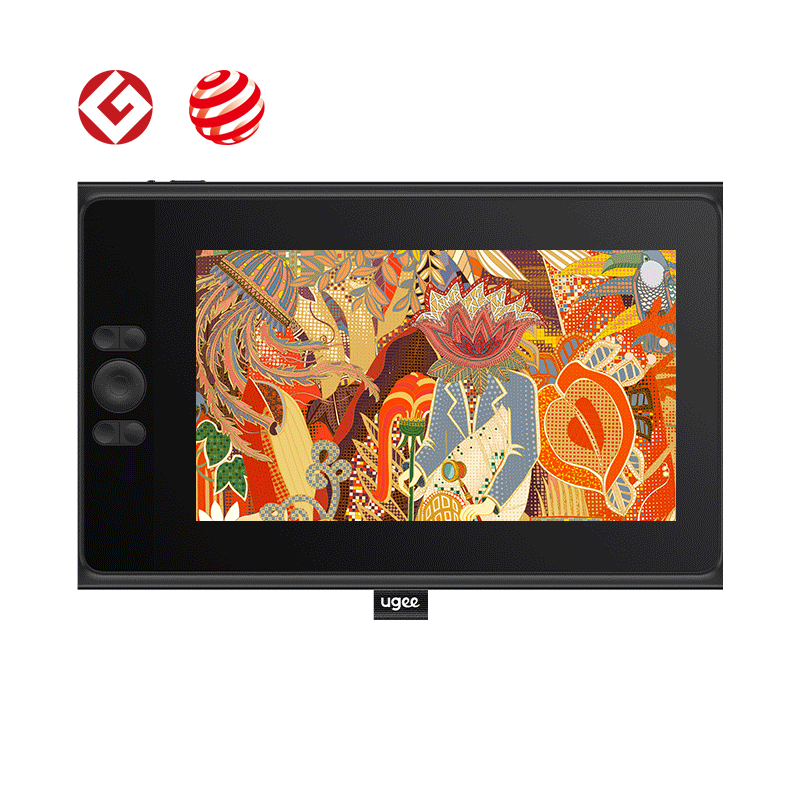
M808
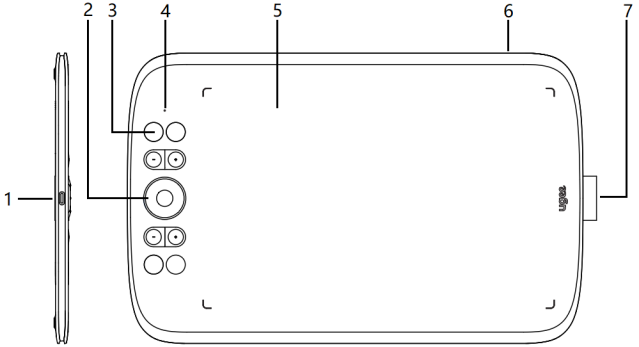
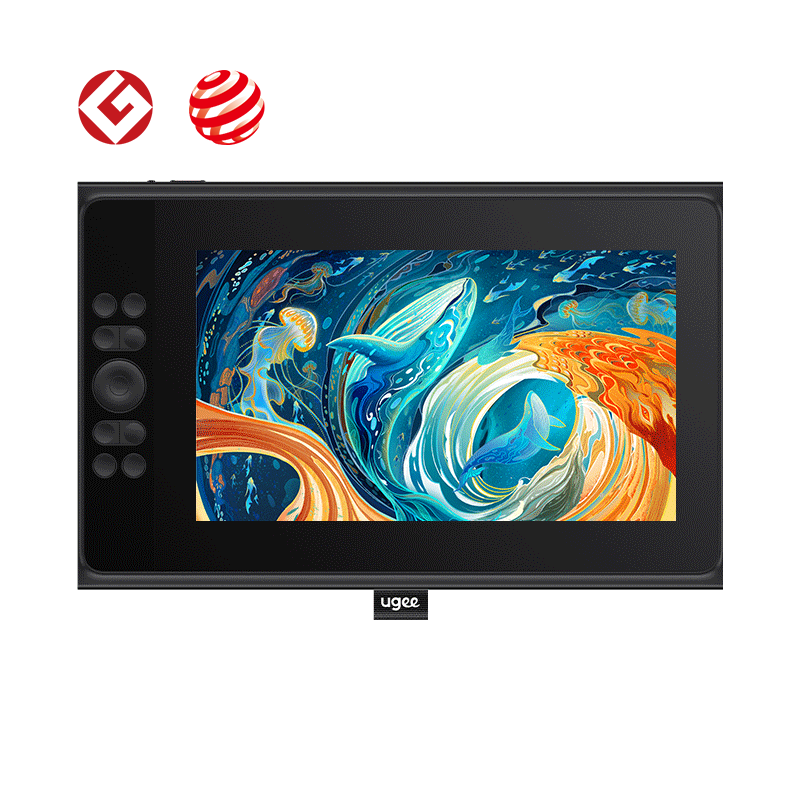
M908
(1) USB-C port
(2) Directional key(M808)/Wheel(M908)
(3) Shortcut keys
(4) Status shown by the white indicator:
Flashing: The stylus is in the active area, but not touching the digital drawing tablet
Steady on: The stylus is touching the active area
Off: The stylus is outside the active area
(5) Active area
(6) Lanyard hole
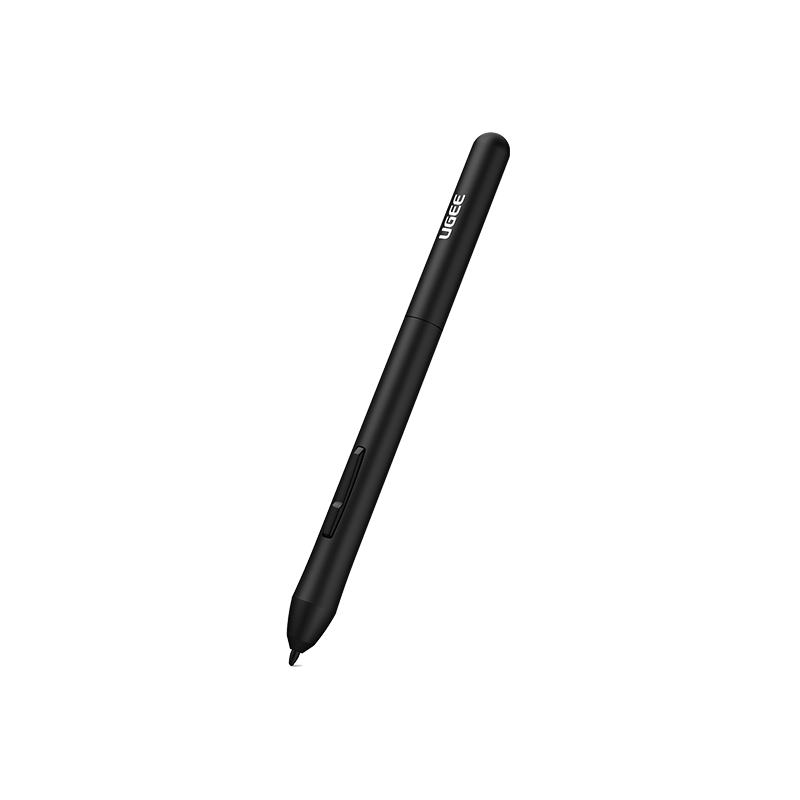
(7) Stylus holder
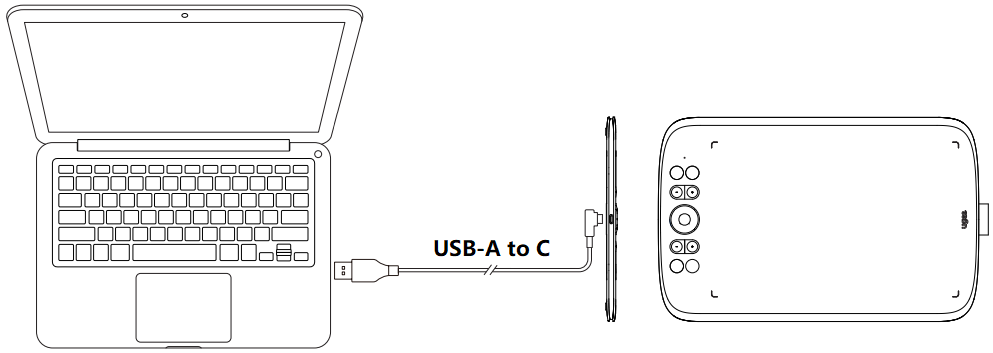
After connecting the digital drawing tablet to your computer via USB cable, check if you can use stylus to control the cursor.
Go to the ugee website (www.ugee.com) and download the driver for the appropriate operating system based on the product model you have purchased.
Notes:
Before installing the driver, turn off all antivirus software and graphics software.
Uninstall drivers (if any) of other brands digital drawing tablets/monitors before the installation.
For optimal experience, restart your computer after the installation is completed.
For the best performance for your device, we recommend you install the latest driver.
5.1 Windows
Compatible with Windows 7 or later.
Unzip file. Run the ".exe" file as administrator, and follow the prompts to complete the installation.
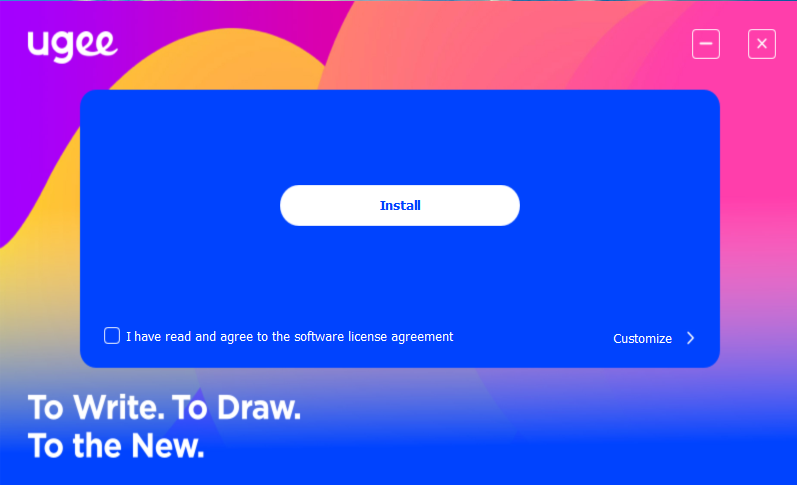
Windows driver installation interface

Windows driver installation process

Windows driver installation complete
5.2 Mac OS
Compatible with Mac OS X 10.12 or later.
After the download is completed, run the".dmg" file. Follow the steps below to install the driver.

Step 1: Continue
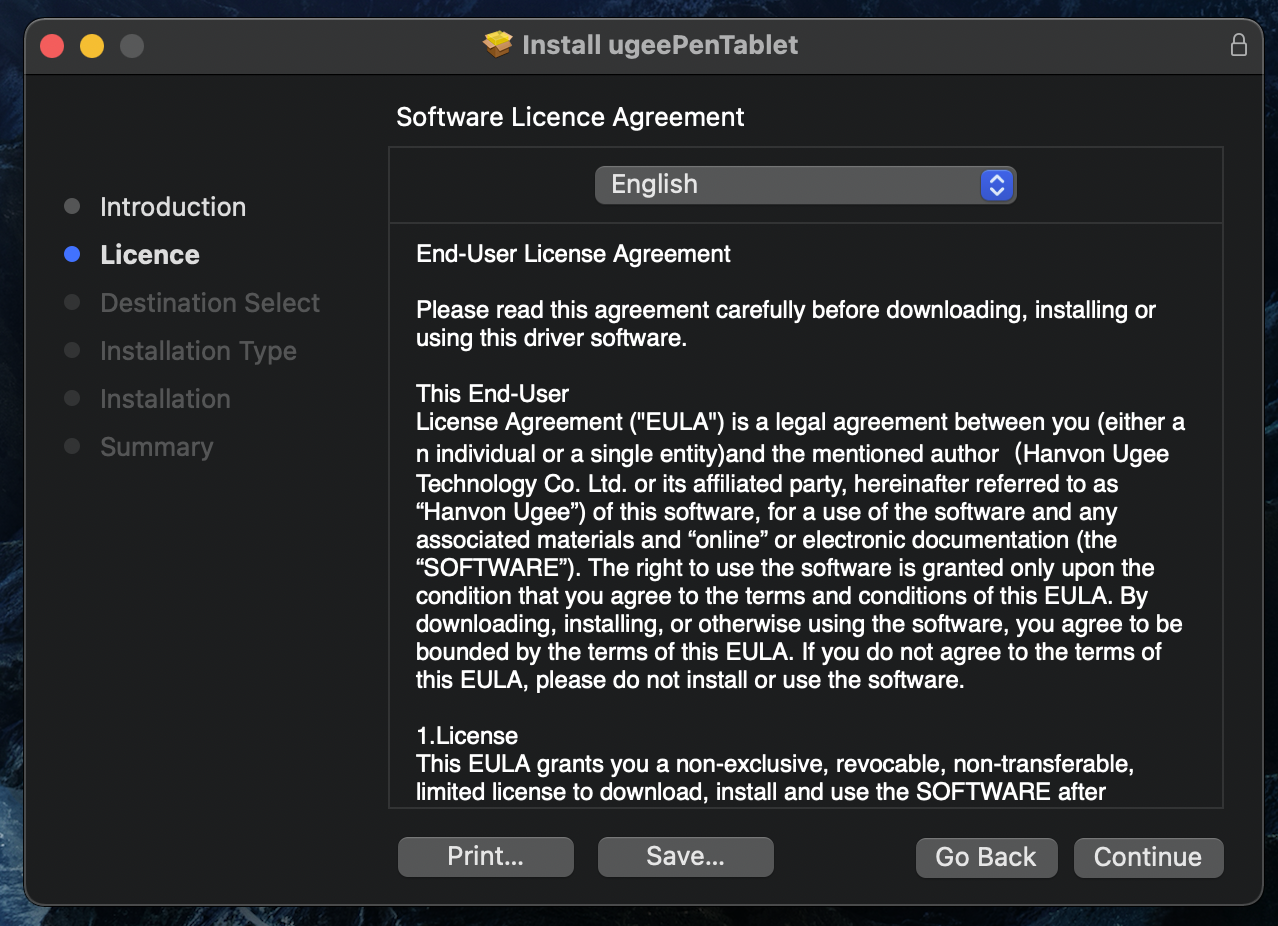
Step 2: Continue
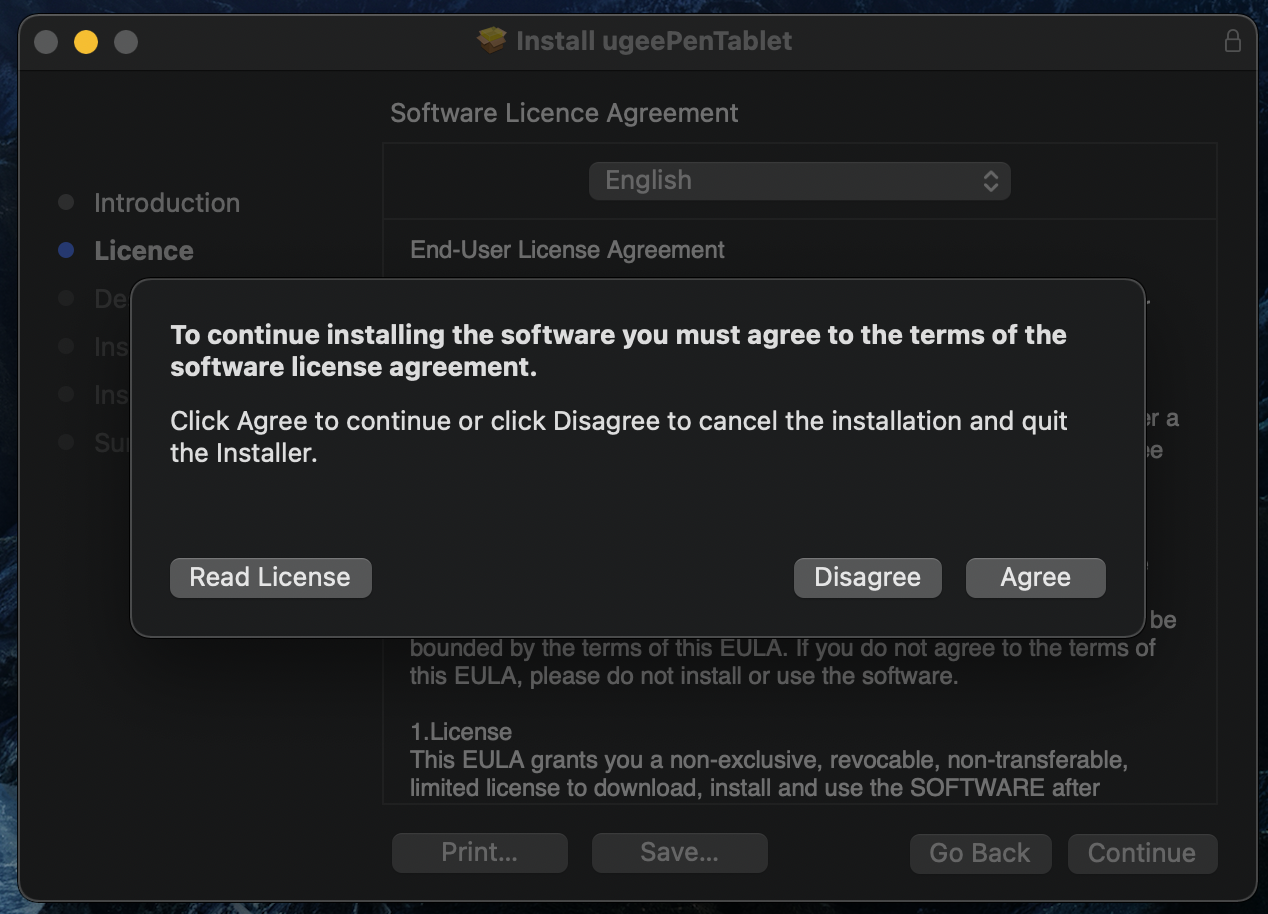
Step 3: Accept
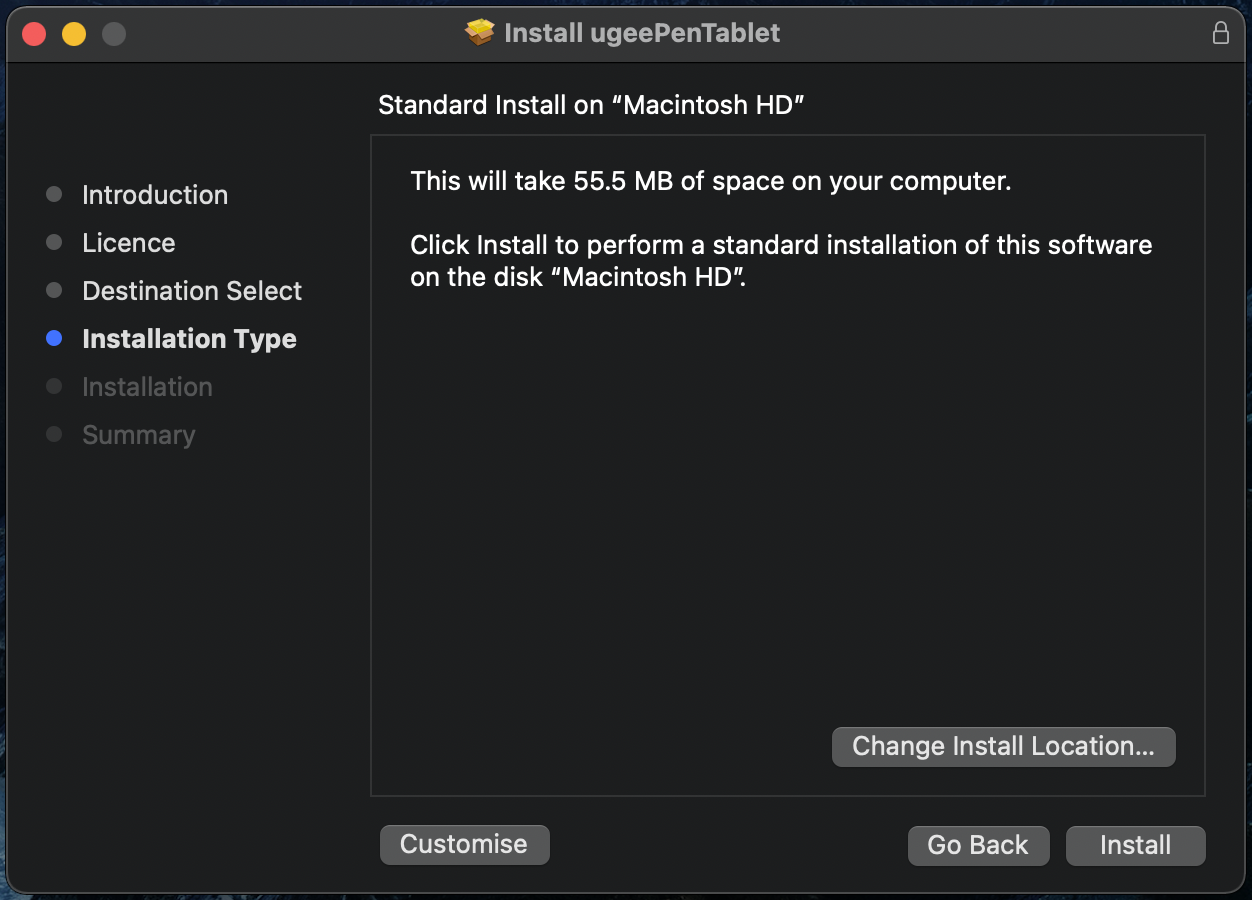
Step 4: Install
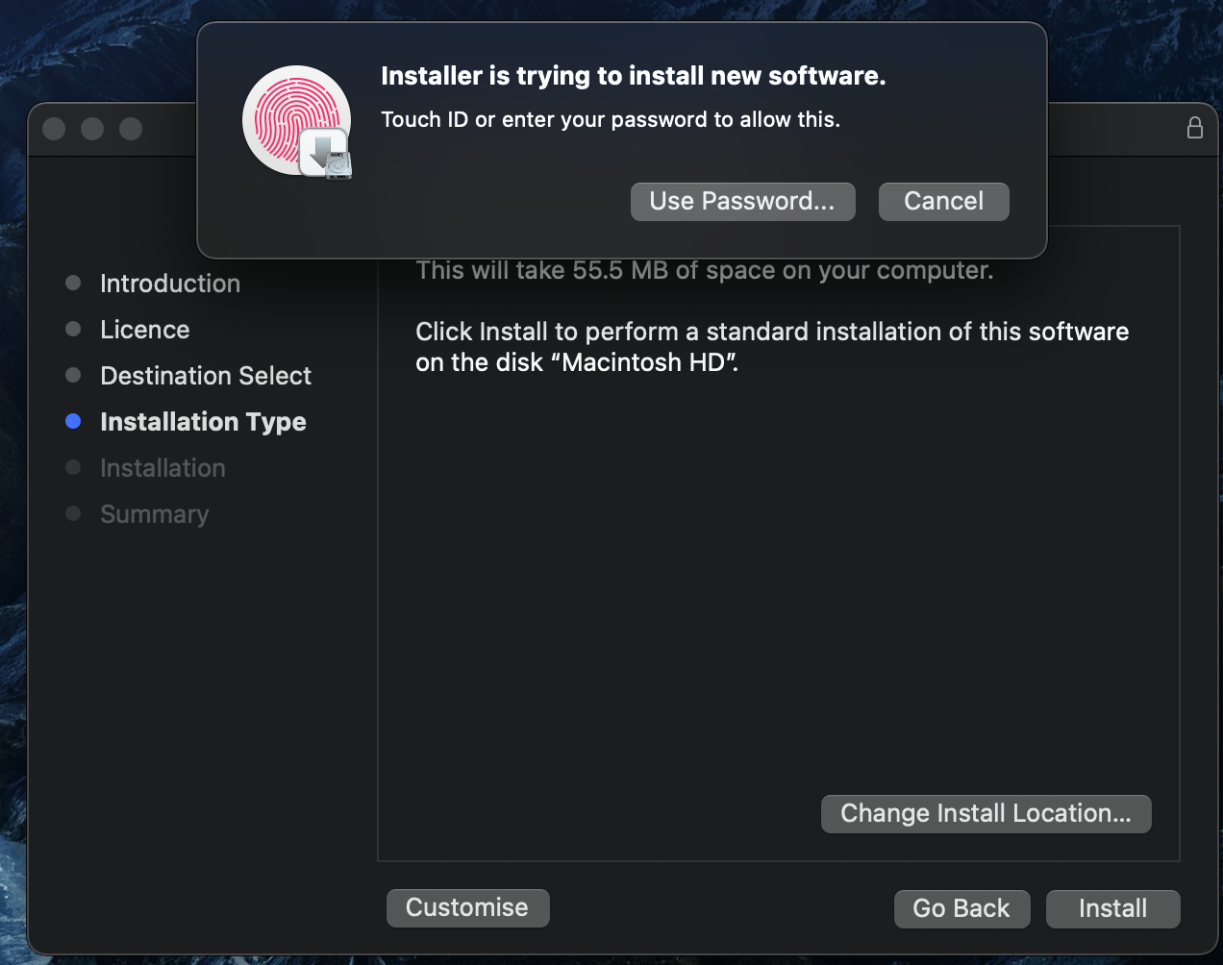
Step 5: Enter password
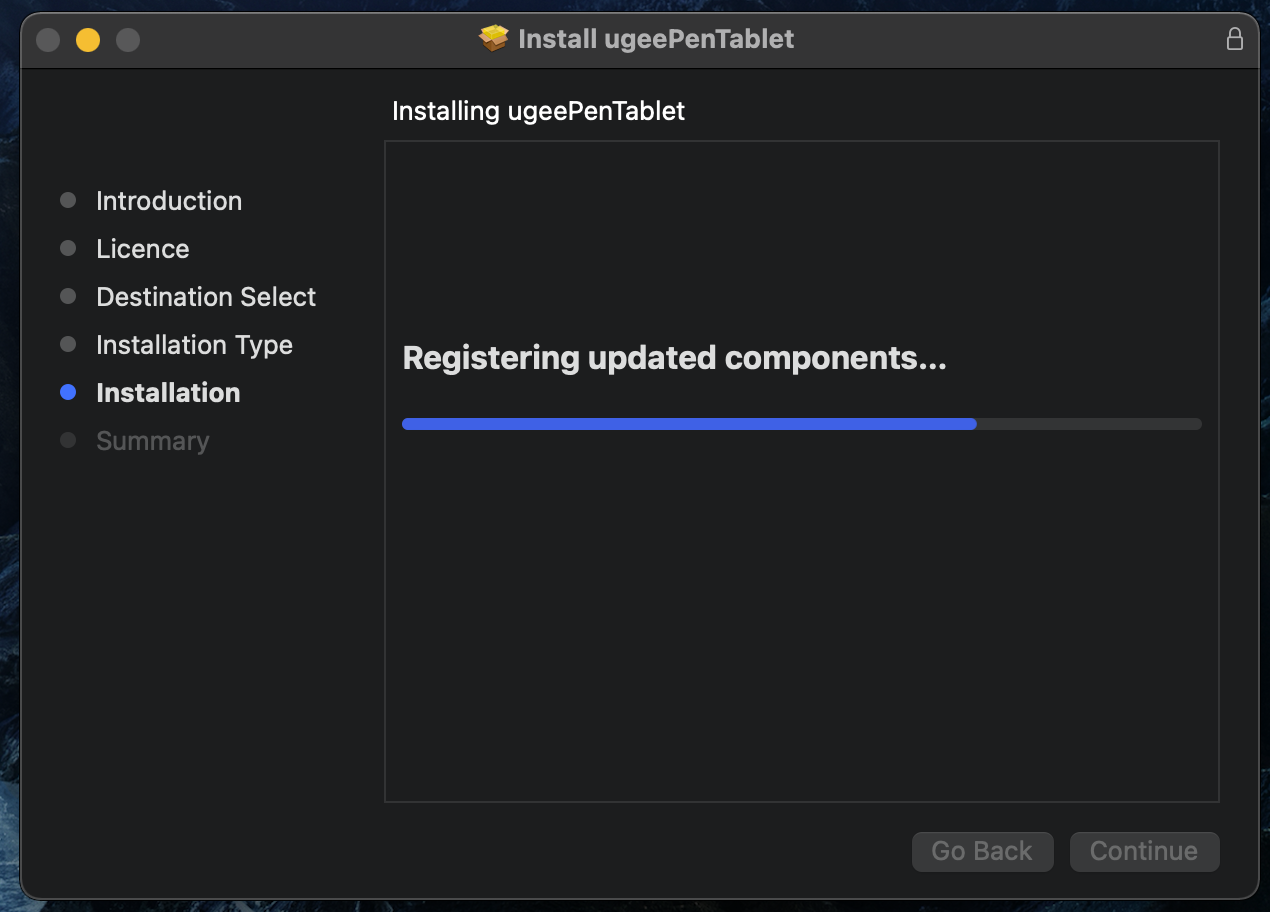
Step 6: Install driver
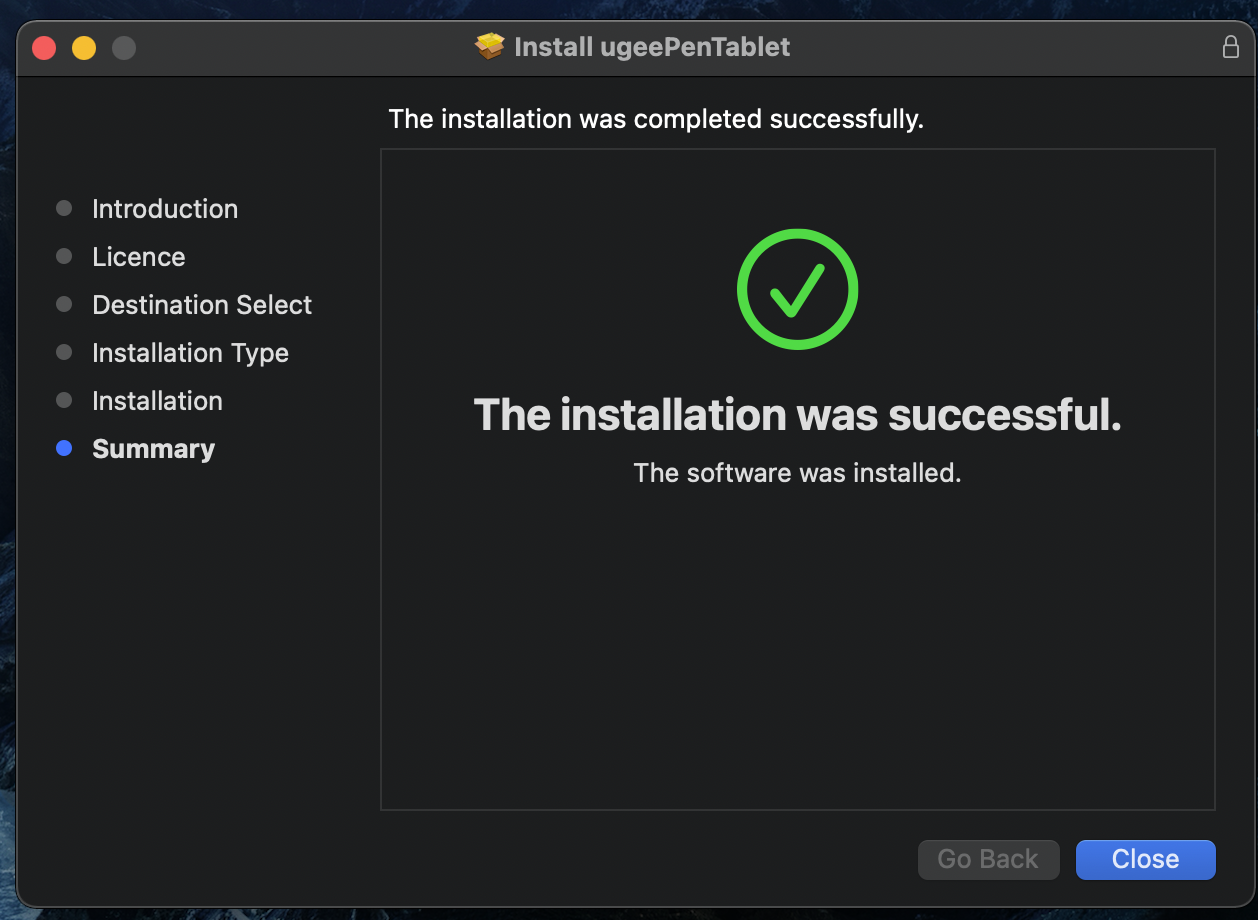
Step 7: Installation complete
5.3 Linux
Deb: Enter command "sudo dpkg -i". Drag installation file to window and execute command.

Rpm: Enter command "sudo rpm -i". Drag installation file to the window and execute command.
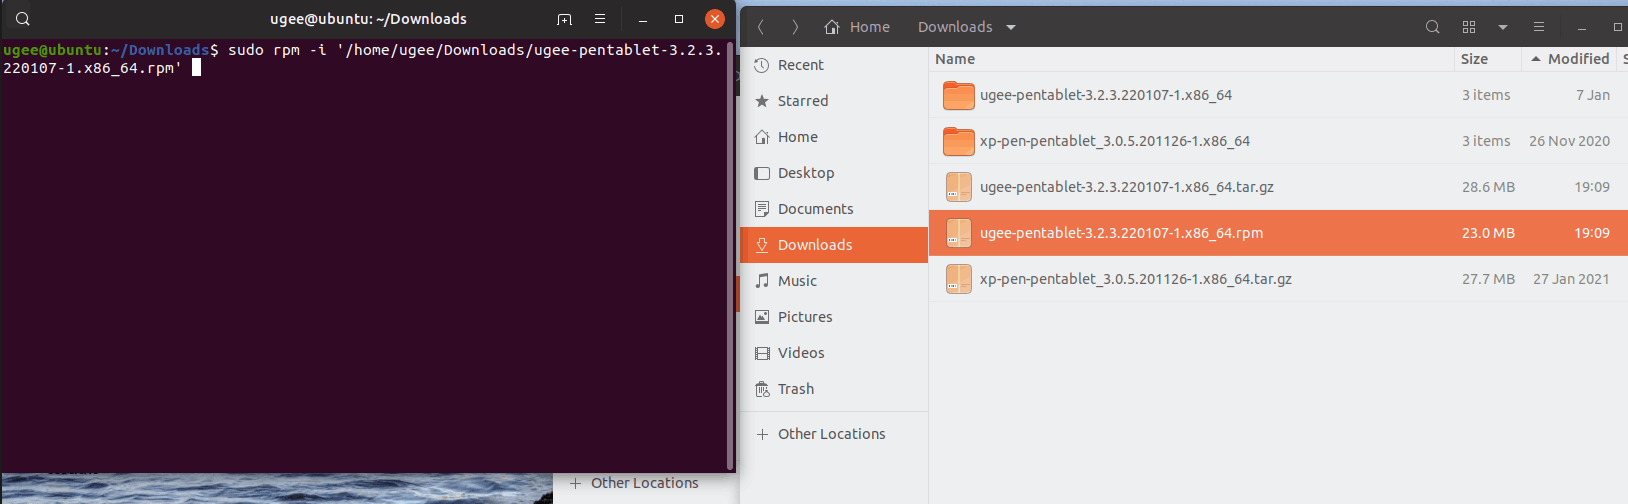
Tag.gz: Unzip file. Enter command "sudo". Drag “install.sh” to the window and execute command.
6.1 Connect to Device
The driver will run automatically after being installed. If it does not run automatically, go to the driver folder to run it manually.
Windows program path: Start→ugeeTablet
Mac program path: Application→UgeePenTablet→ugeeTablet
If the device is not connected or the connection fails, you will see the following prompt. In this case, restart your computer or the driver to connect it again or contact our service staff for support.
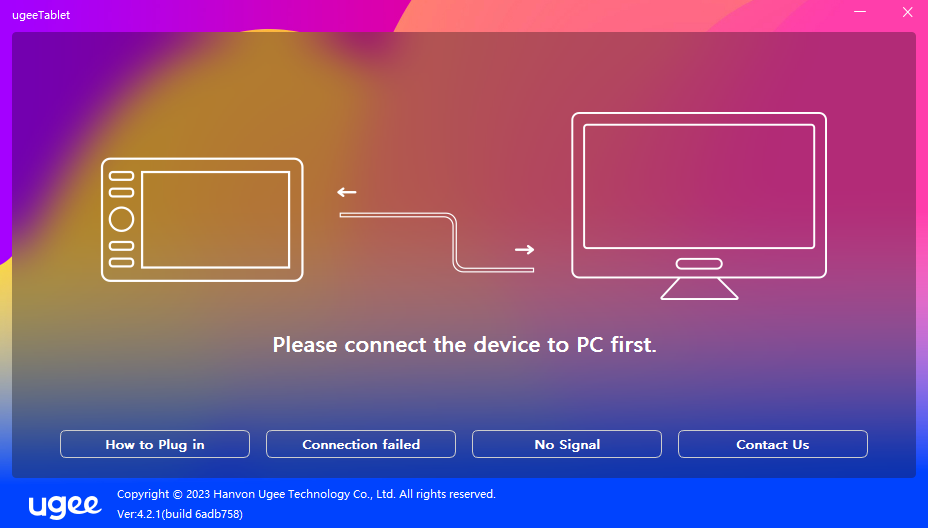
If you have any questions about the connection, click the How to Plug in, Connection failed, or No signal for FAQs. If you can't find a solution there, you can click Contact Us for customer service.
If the device is connected successfully, its product model will be displayed on the bottom right corner of the display, for example, M908 as shown in the image.
You can connect up to three devices via the driver at the same time. Click on drop-down menu to select device to activate. Customize the device's settings after switching to that device. All changes apply only to that device.
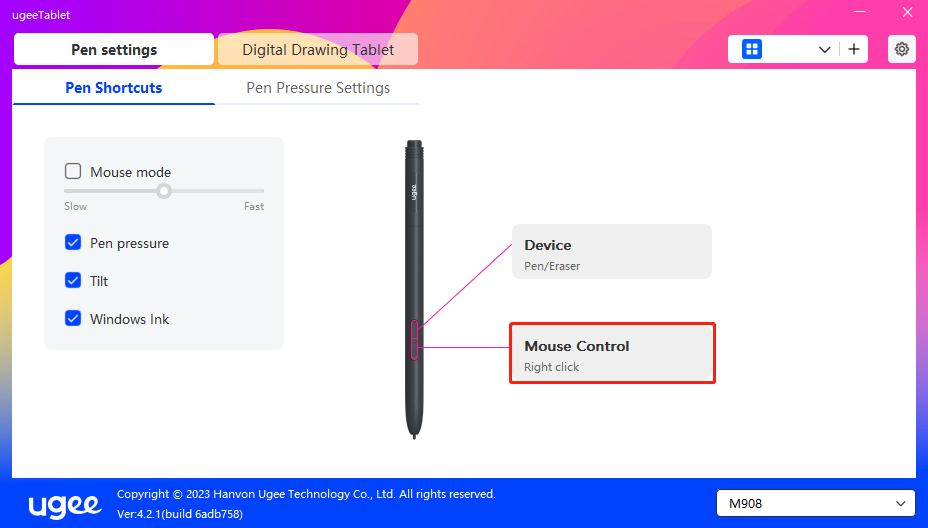
6.2 Pen Settings
6.2.1 Pen Shortcut Key
Click Mouse Control to customize key functions. You can select 7 types of shortcut keys, such as keyboard, mouse control, device, run application, system function, multimedia, and disable.
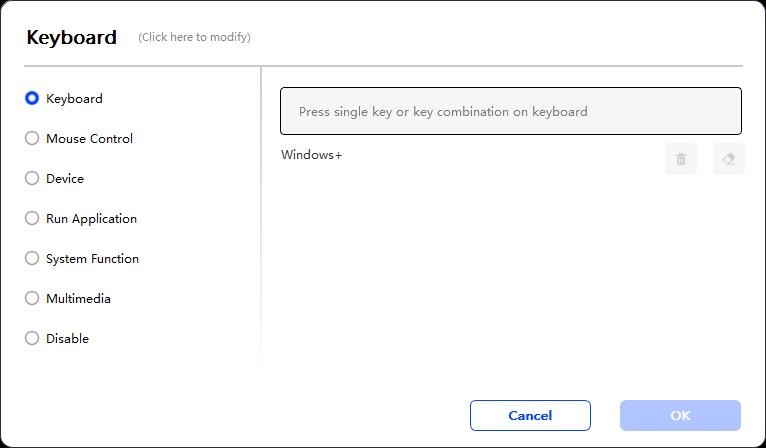
Keyboard:
Set keyboard shortcut, for example, set it as Alt+A in 3D MAX, so the alignment tool can be used.
Clear: Clear all combination keys in the input box
Delete: Delete the last combination key
Windows+: Upon clicking, you can continue to input with other key combinations.
For example, if you need to set Windows+Shift+S, you can click Windows+, and then manually press Shift+S to complete the setting.
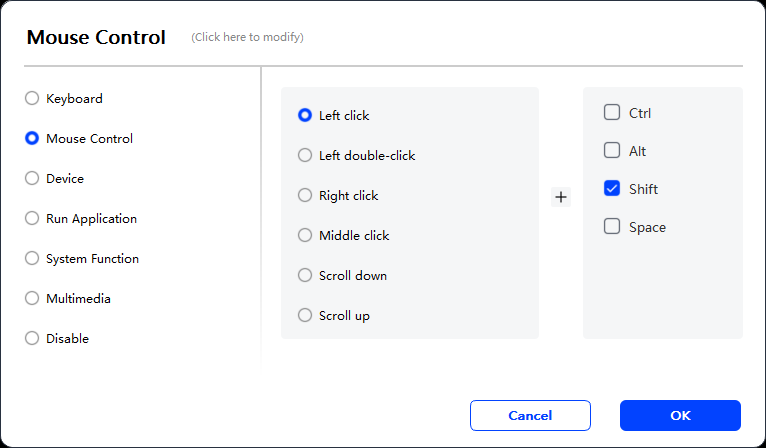
Mouse Control:
Set mouse and key combination. For example, if you select Shift and Left Click, you can execute the assigned shortcut command if the software supports this combination key.
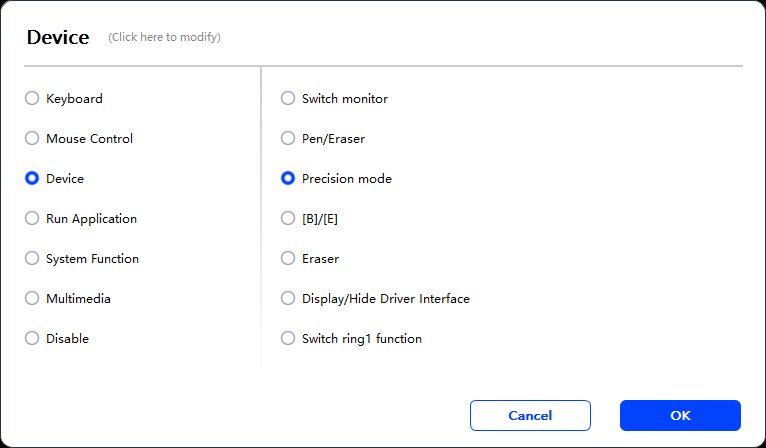
Device:
Execute selected function.
Precision mode: It limits the Work Area to a small range. This function allows you to draw more precisely in the area.
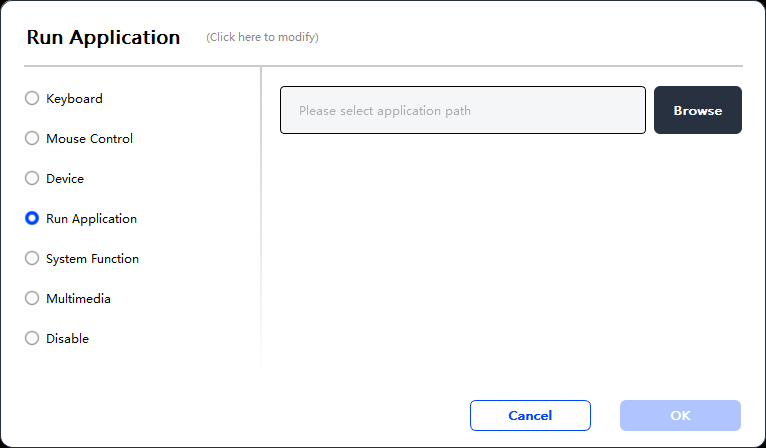
Run Application:
Run the selected application. For example, if you choose to run Photoshop, press the key, and the computer will open and run the app.
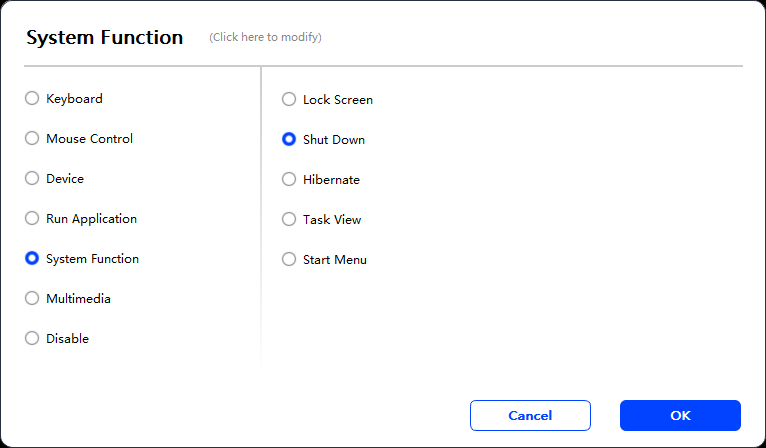
System Functions:
Executes the selected system function. For example, select Shut Down, press the key, and the computer will automatically shut down.
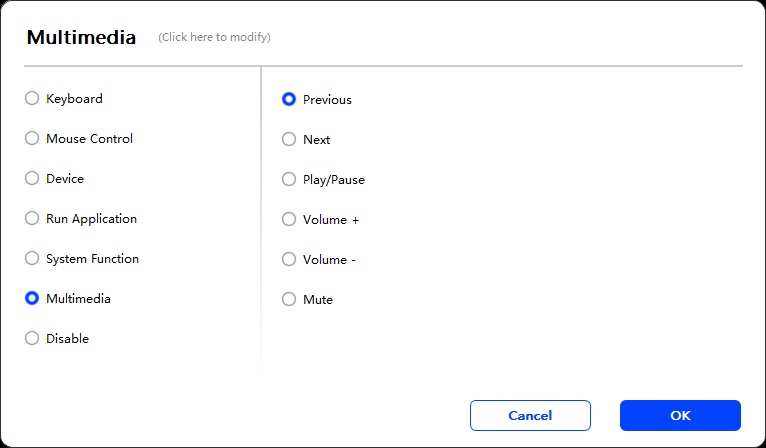
Multimedia:
Executes the selected multimedia function. For example, select Previous, press the key, and the computer will play the previous song.
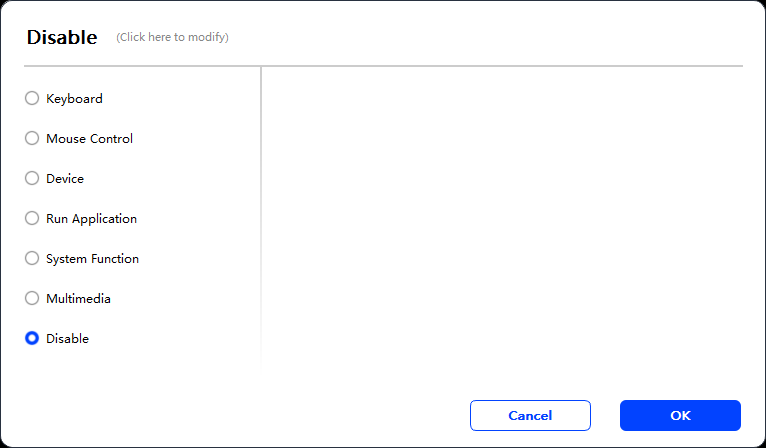
Disable:
Upon the setting of no function, nothing will happen after pressing the key.
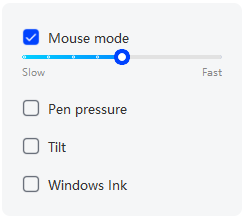
Mouse mode:
When you remove your pen, the cursor will stay where you left, which is like operating a mouse. Select the mode and you can adjust the speed of the cursor on your device. If no mode is selected, the pen mode will be applies by default.
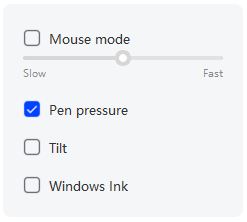
Pen Pressure:
Upon unchecking, no stylus pressure effect will be displayed
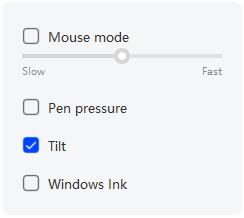
Tilt:
Upon unchecking, there will be no tilt effect
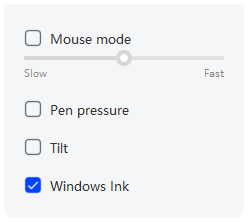
Windows Ink (for Windows only):
Windows supports handwriting function. If you need to use this function in Microsoft Office/Whiteboard or other software, please do not turn it off.
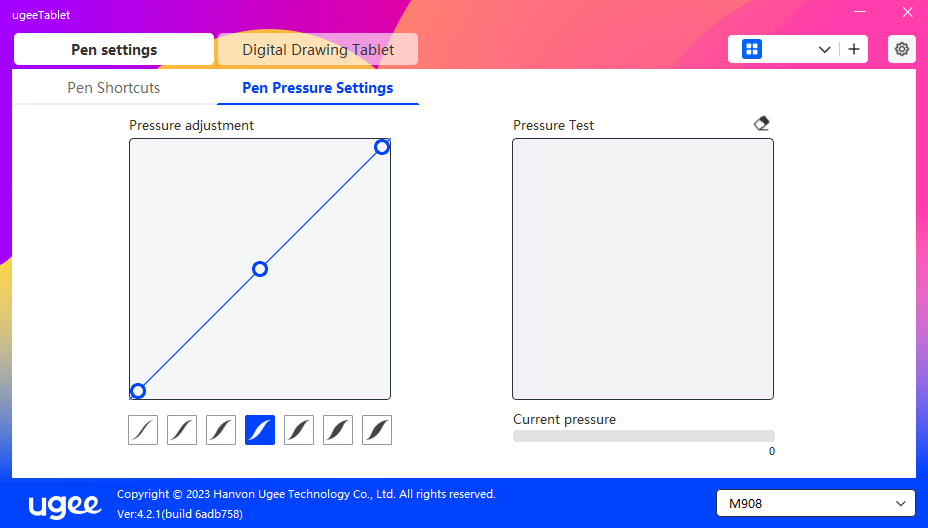
6.2.2 Pen Pressure Settings
Pressure sensitivity can be adjusted by modifying the Pen Pressure curve or moving the slider on the progress bar.
Test your current pen pressure with Pressure Test.
6.3 Digital drawing tablet
6.3.1 Work Area Settings
Go to "Work Area" and define the mapping between the working area of the device and the display area of the screen.
6.3.1.1 Screen
If multiple monitors are used in copy mode, the Work Area of the device will be mapped to all monitors. When the pen moves in the Work Area, the cursor on all monitors will move at the same time.
If multiple monitors are used in extended mode, select one of the monitors on the tabs to map the working area of device.
There are two available options to set the monitor mapping area:
(1) Dragging Four Sides: Move the cursor to the middle or ends of the four sides, then press and hold the left mouse button to drag the four sides;
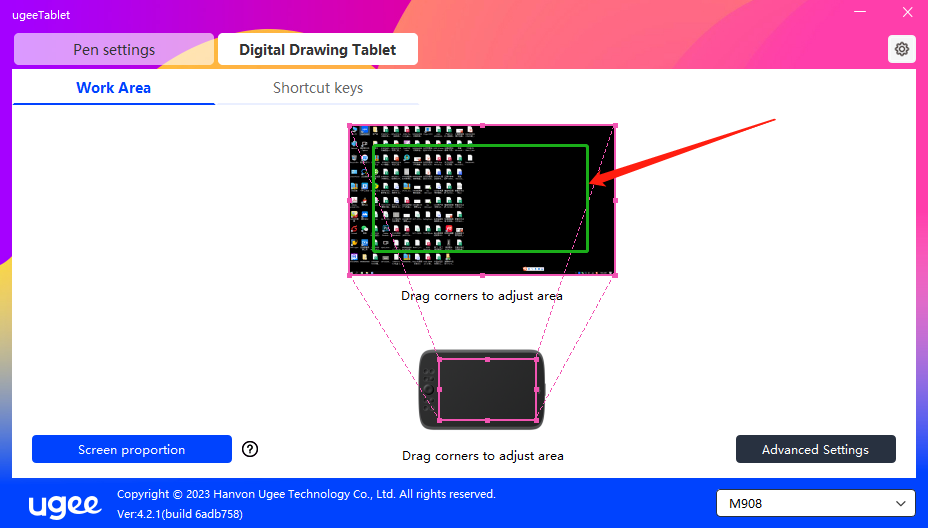
(2) Screen Area Selection: Click Advanced Settings, then choose Screen Area Selection. Click the upper left corner and lower right corner according to prompts from the bottom of the computer monitor, and select the mapping display area of the screen.
6.3.1.2 Digital drawing Tablet
You can set the Work Area of current device. The driver enables you to set the Work Area of the device in the following ways:
(1) Dragging Four Sides: Move the cursor to the middle or ends of the four sides, then press and hold the left mouse button to drag the four sides.
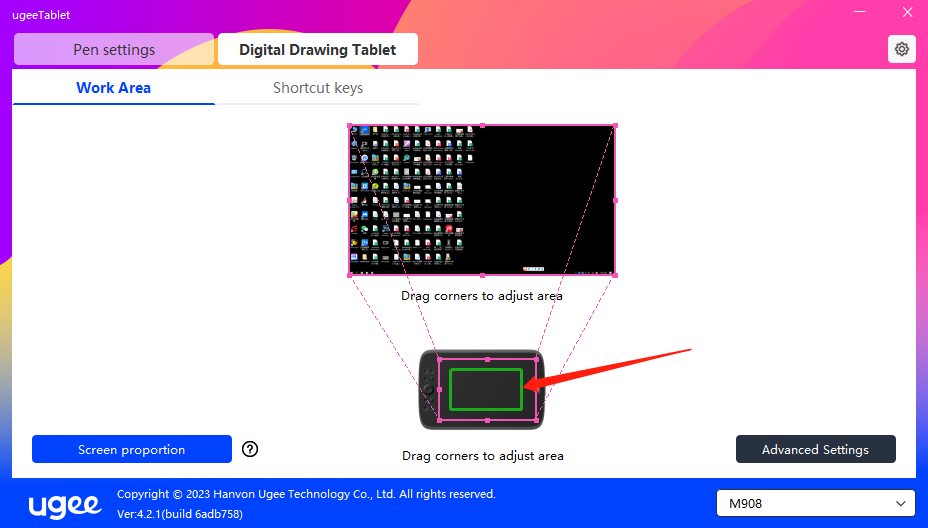
(2) Handwriting Area Selection: Click Advanced Settings, then choose Select Handwriting Area. Click the upper left corner and lower right corner of the device using the stylus to select the handwriting area according to the prompts from the bottom of the computer monitor.
6.3.1.3 Screen proportion
Based on the screen proportion, you should make the working area of the device have the same proportion as that of the selected monitor's entire display area. For example, if the screen proportion is 16:9, clicking the Screen proportion will adjust the working area to 16:9.
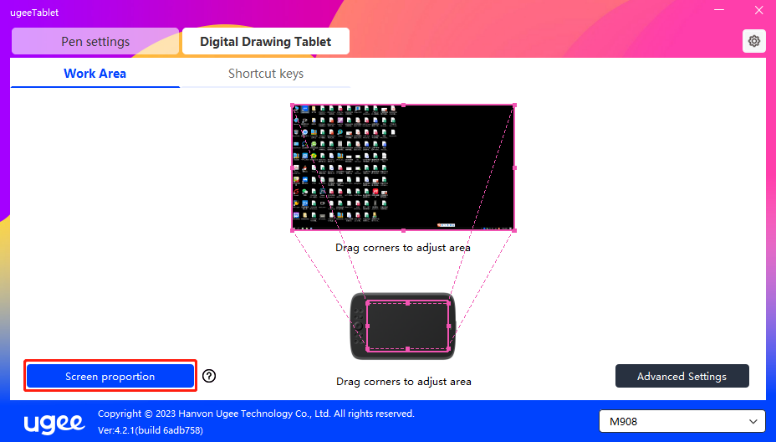
Note: Select Screen proportion and draw a circle on the device, then a circle will be displayed on the screen. But part of the device's working area may not be available. If the Screen proportion is not selected, an ellipse may be displayed on the screen.
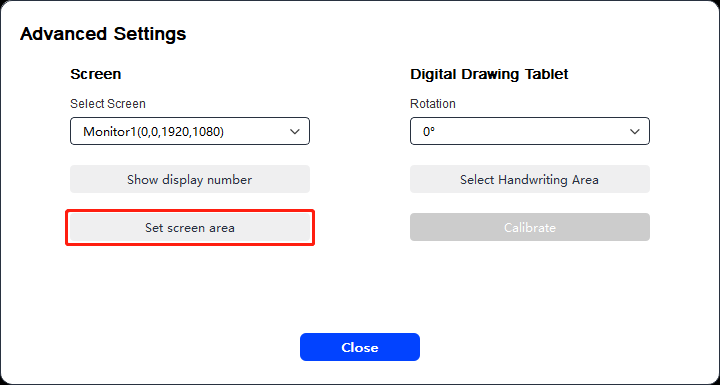
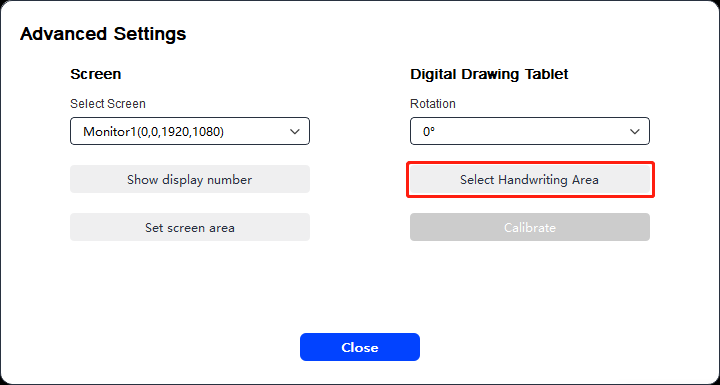
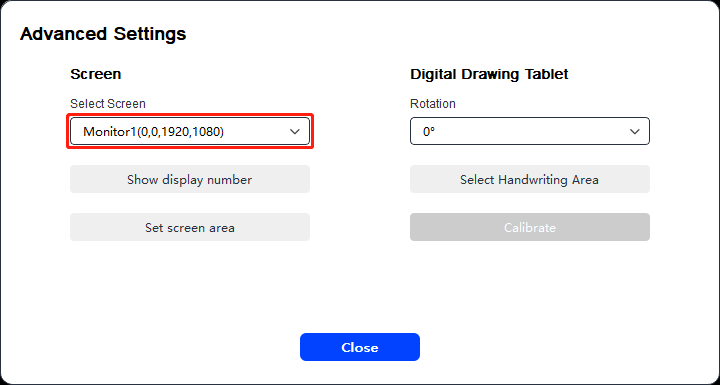
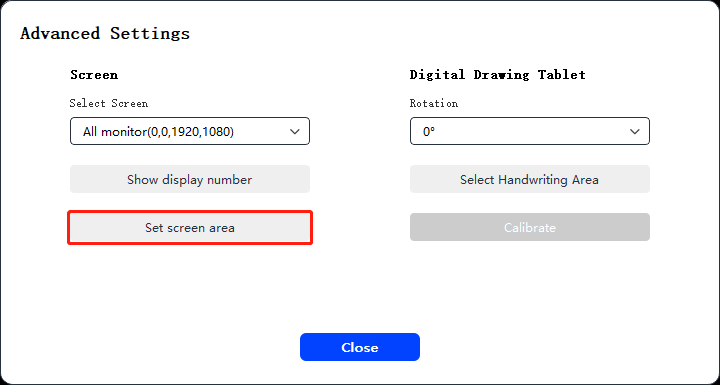
6.3.1.4 Advanced Settings
Select Screen:
When the computer is connected to a second screen, you can pull down to select the target screen to be mapped by the device.
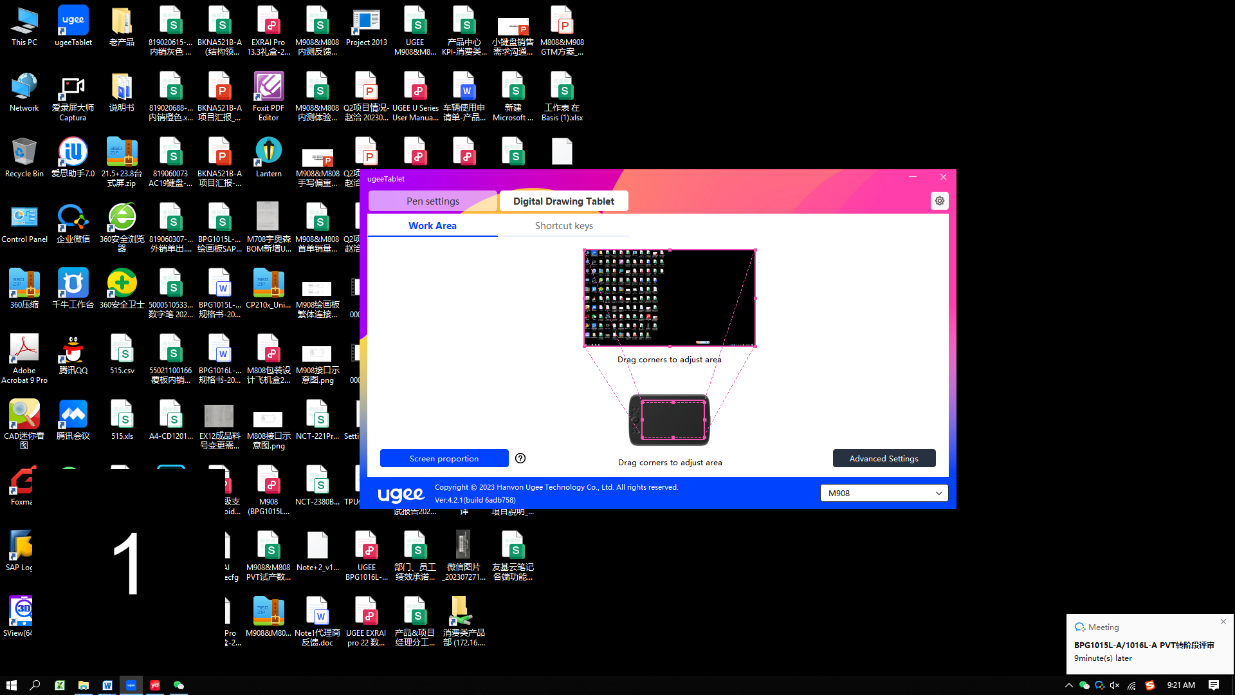
Show monitor number:
Identify all connected monitors. The monitor number will be displayed in the lower left corner of each monitor.
Set Screen Area:
You can manually select the working area of the screen according to the prompts from the bottom of the computer monitor. For details, see the Screen Area Selection setting in 6.3.1.1.
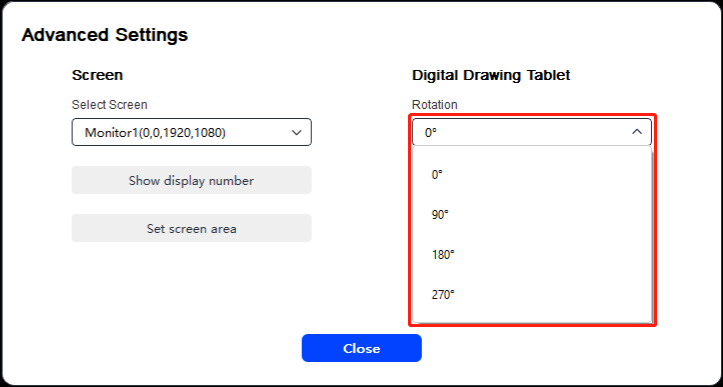
Rotation settings:
You can set the device to 0°, 90°, 180° or 270°. Rotate the device to the corresponding direction after setting rotation.
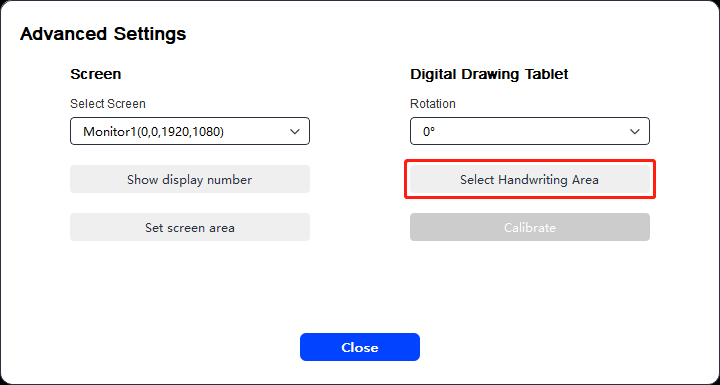
Select Handwriting Area:
You can manually select the work area for handwriting according to the prompts. For details, see the Handwriting Area Selection setting in 6.3.1.2
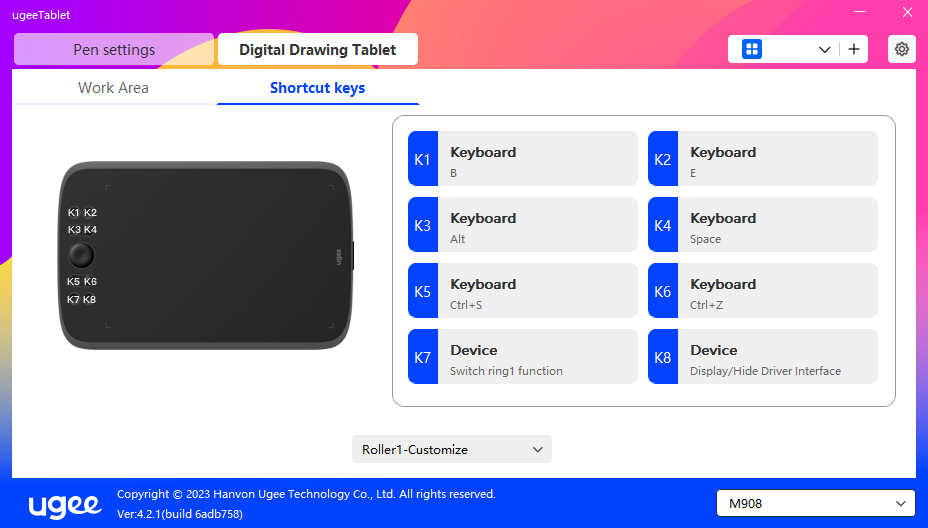
6.3.2 Shortcut Key Setting
The position and number of keys will differ due to product model. M908 is used here for illustrative purposes.
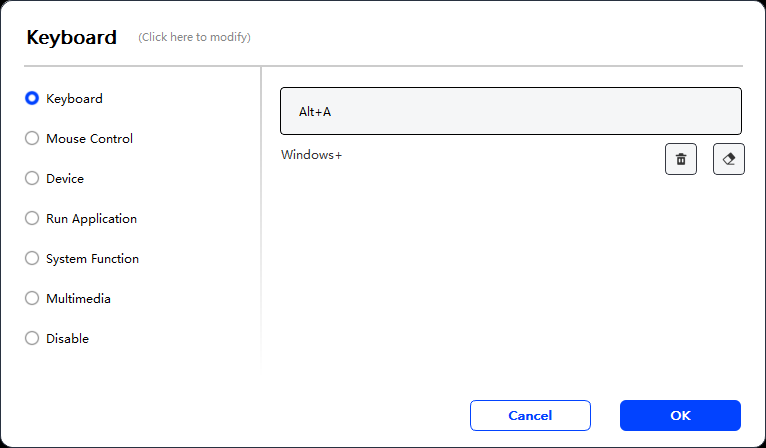
Upon selecting and pressing the target key, a pop-up window will show up, and you can customize key functions. You can select 7 types of shortcut keys, such as keyboard, mouse control, device, run application, system function, multimedia, and disable.
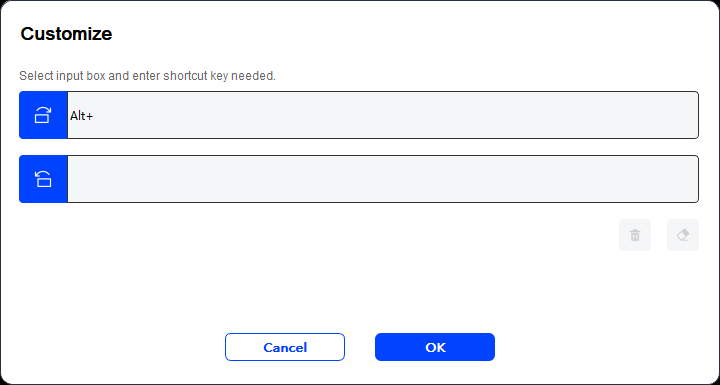
Keyboard:
Set keyboard shortcut, for example, set it as Alt+A in 3D MAX, so the alignment tool can be used.
Clear: Clear all combination keys in the input box
Delete: Delete the last combination key
Windows+: Upon clicking, you can continue to input with other key combinations.
For example, if you need to set Windows+Shift+S, you can click Windows+, and then manually press Shift+S to complete the setting.
Mouse Control:
Set mouse and key combination. For example, if you select "Shift" and "Left Click", you can execute the assigned shortcut command if the software supports this combination key.
Device:
Execute selected function.
Precision mode: It limits the Work Area to a small range. This function allows you to draw more precisely in the area.
Run Application:
Run the selected application. For example, if you choose to run Photoshop, press the key, and the computer will open and run the app.
System Functions:
Executes the selected system function. For example, select Shutdown, press the key, and the computer will automatically shut down.
Multimedia:
Executes the selected multimedia function. For example, select Previous, press the key, and the computer will play the previous song.
Disable:
Upon the setting of no function, nothing will happen after pressing the key.
Wheel (Only M908):
Some device models are equipped with a roller function. The roller button will be displayed on the page of Shortcut Keys, which can be clicked to set the button's value.
You can adjust the following four parameters:
(1) Zoom: zoom canvas
(2) Scroll: scroll canvas vertically
(3) Brush size: adjust brush size
(4) Rotate: rotate canvas
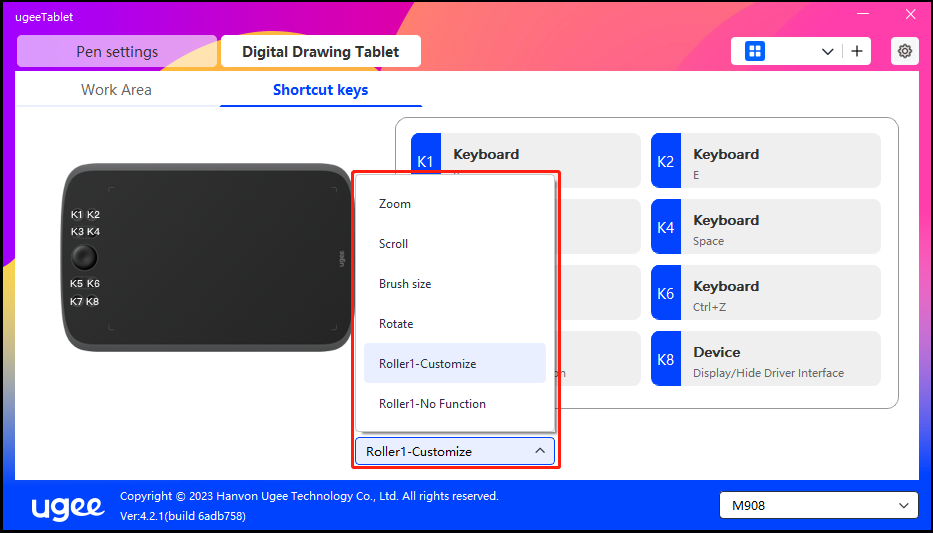
Additionally, you can have the key value set as no function or customize the key value. Upon setting the clockwise and counterclockwise rotation, the key value can be customized respectively.
6.4 Driver Settings
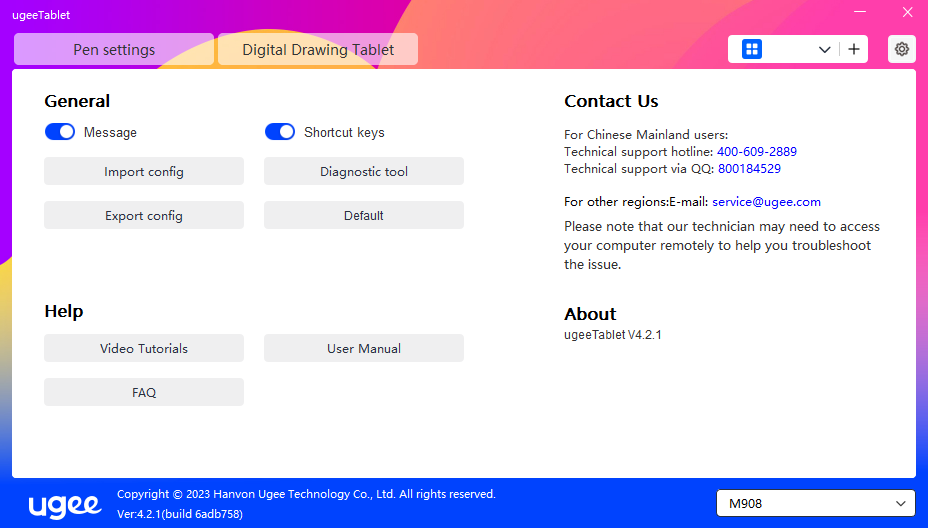
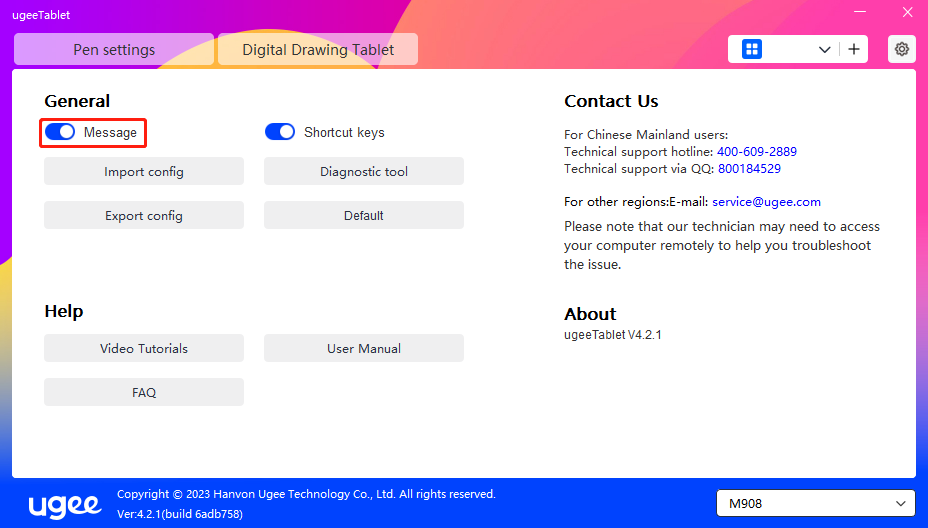
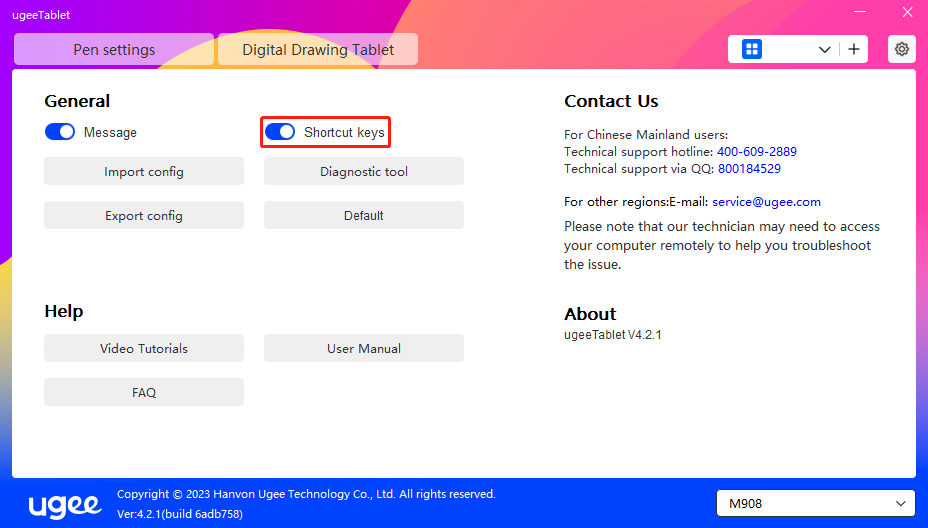
Prompt Message:
In the off state, the key status will not be displayed at the bottom of the screen as the device and stylus keys are being used.
Enable Shortcut Keys:
In the off state, the functions of all keys on the device are disabled.
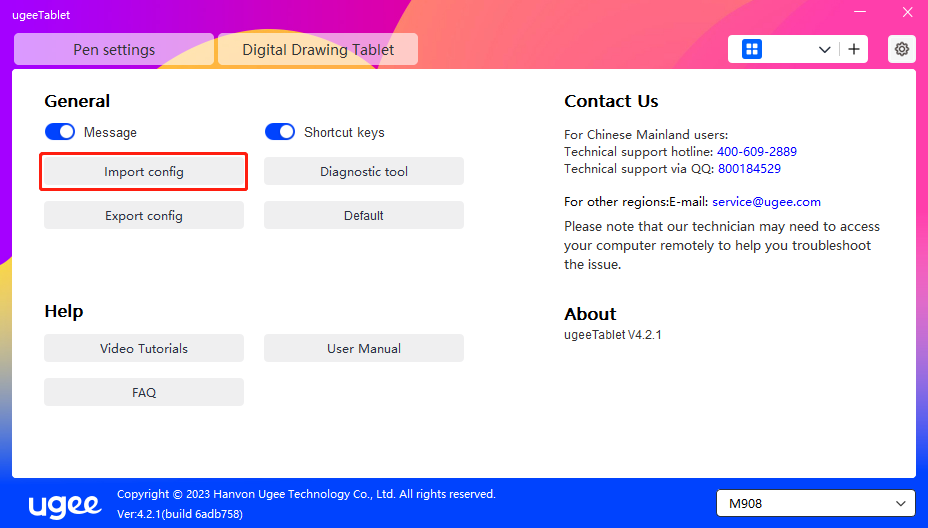
Import config:
You can import configured shortcut keys and other functions.

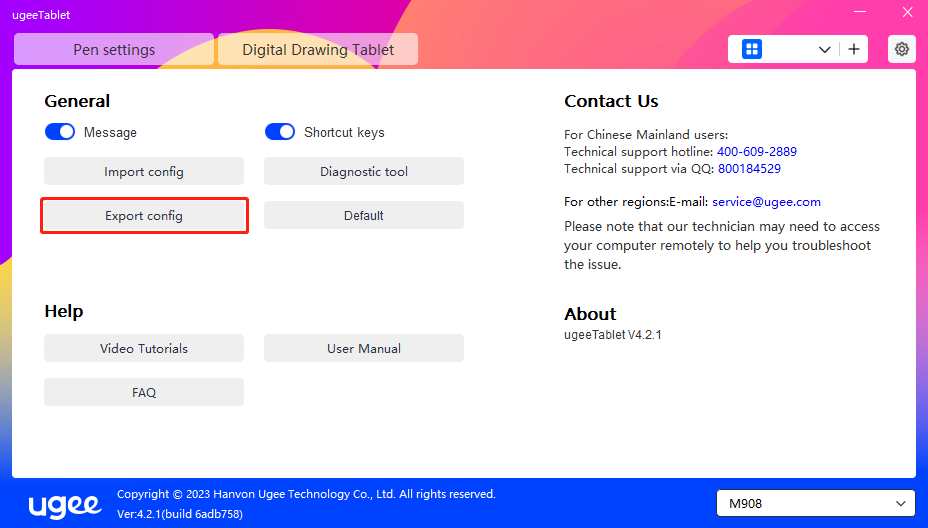
Export config:
Export saved settings in a configuration file. A pop-up window will appear to notify you when the configuration file is exported successfully.
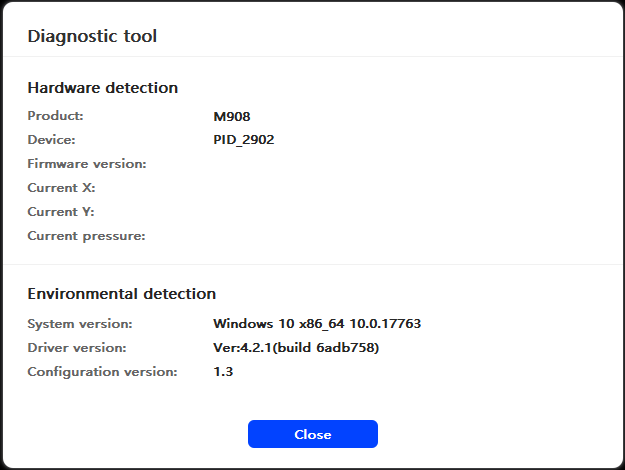
Diagnostic tool:
If you encounter any issues while using the driver, please use the diagnostic tool to check hardware/environmental data for troubleshooting. If you approach our customer/technical support, this data will also be helpful for our staff to assist you.
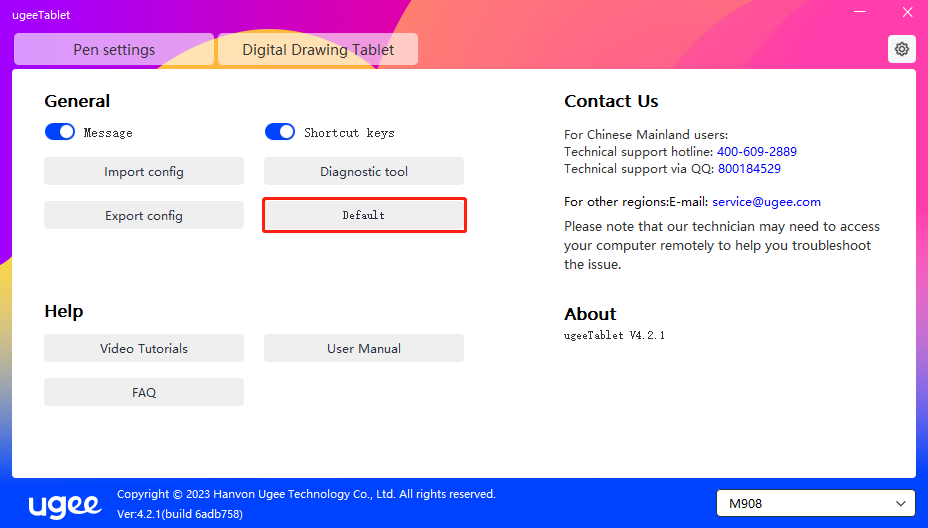
Default:
Upon clicking, the values of shortcut keys, work area, display settings, and other settings will all be restored to the default values.
Video Tutorials:
Upon clicking, you will be directed to the Video Tutorials page through the computer's browser.

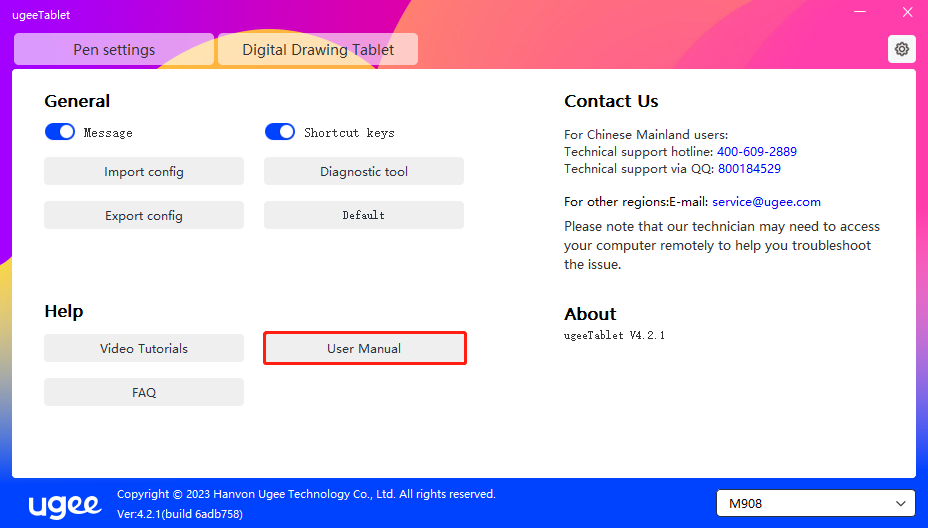
View User Manual:
Upon clicking, you will be directed to the Search Model page of the official website through the computer's browser
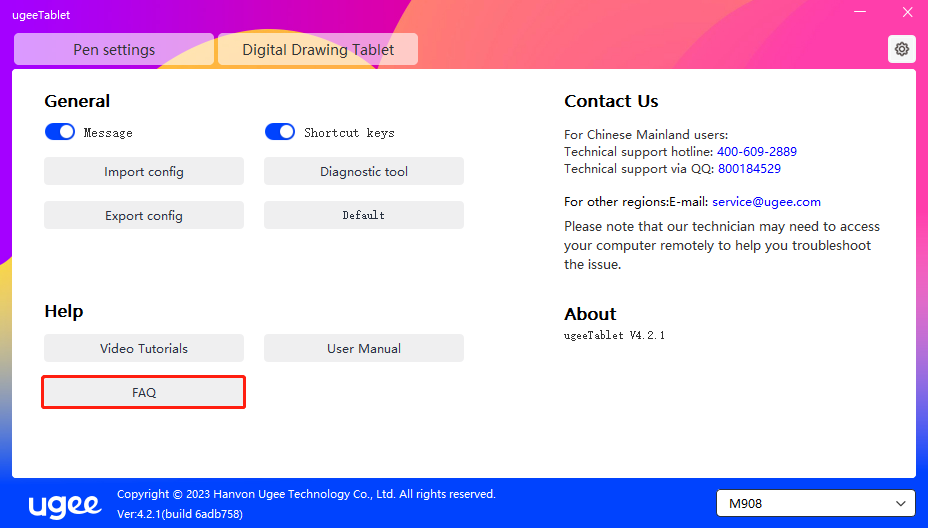
FAQ:
Upon clicking, you will be directed to the FAQ link on the official website through the computer's browser
6.5 Applications and Others
6.5.1 Add Application
Click the "+" icon on the upper right corner to add application.
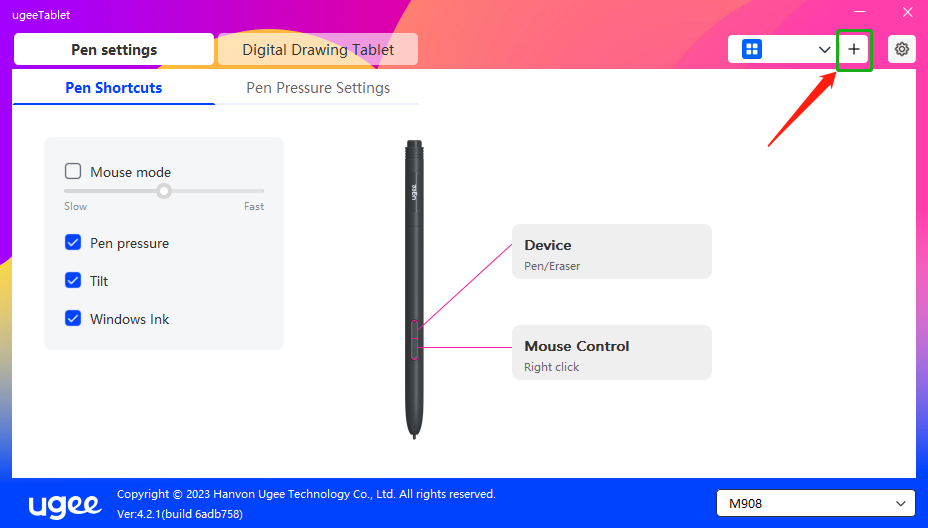
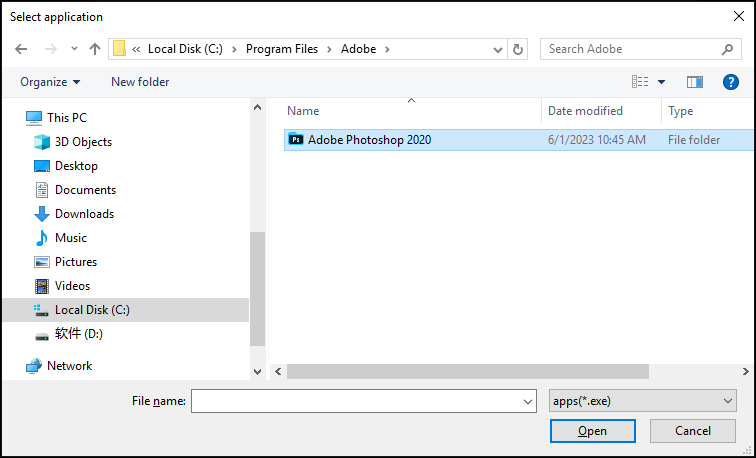
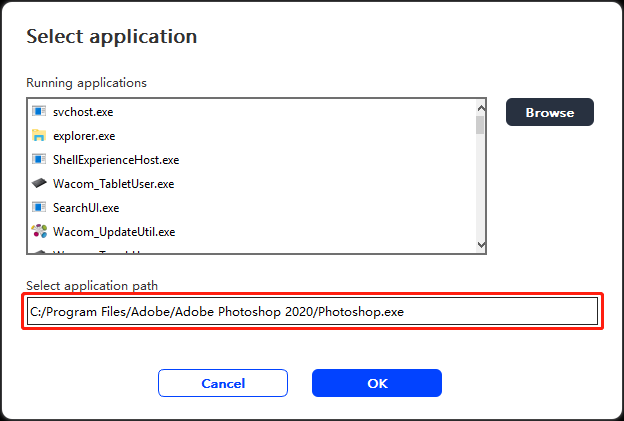
Select the application from the list of installed applications or click "Browse" and select the application path.
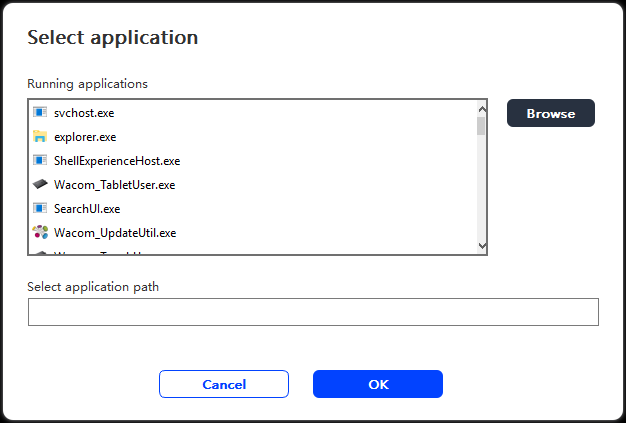
Next, click OK to add selected application.
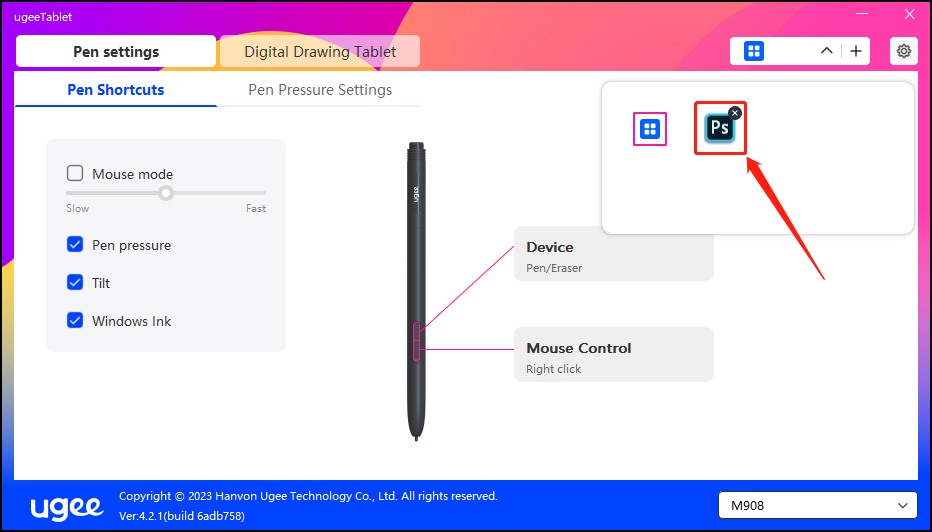
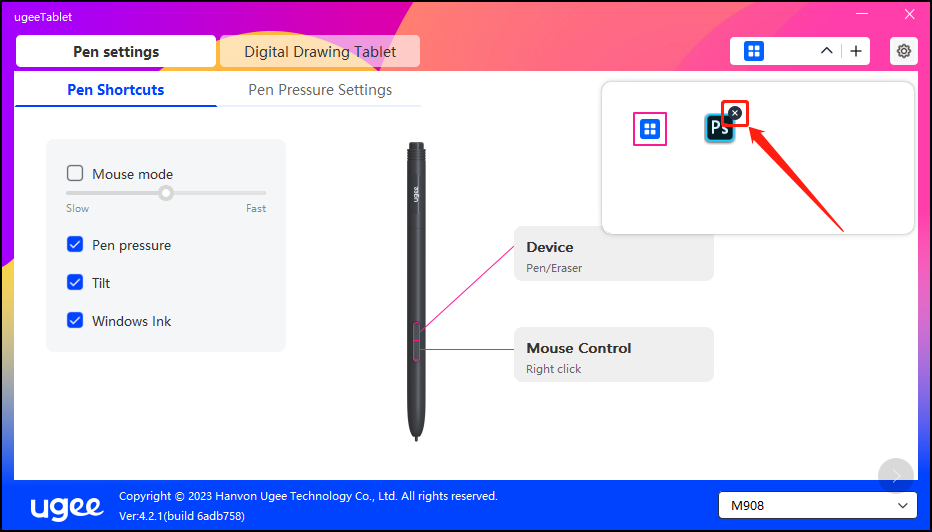
6.5.2 Delete Application
Click on the drop-down menu and select the application. Then click on the "x" on the top right corner to delete the application.
7.1 Windows
Go to Start -> Settings -> Apps -> Apps & Features, find "ugeeTablet" and then left-click "Uninstall" as per prompts.
7.2 Mac OS
Go to Go to -> Application and locate ugeeTablet. Click on "UgeeTabletUninstall" and follow the prompts to uninstall.
7.3 Linux
Deb: Enter command "sudo dpkg -r ugee-pentablet" and execute the command.
Rpm: Enter command "sudo rpm -e ugee-pentablet" and execute the command.
Tag.gz: Unzip file. Enter command "sudo". Drag uninstall.sh to the window and execute command.
8.1 Pen pressure seems to be disabled
Check if the drawing software supports pen pressure.
Please download the latest driver from ugee website, and check if the pen pressure is normal.
Before installing the driver, turn off your antivirus and graphics software.
Uninstall drivers for other drawing displays before installation.
Restart your computer after the installation is completed;
If the pen pressure is normal (Windows: ensure Windows Ink is enabled in the pen settings of the driver), restart the drawing software for testing.
8.2 Delay and stagnation in painting
Check if the computer meets the recommended configuration (CPU&GPU) requirements for the drawing software installed, and optimize related functions via Settings according to the useful FAQs posted on the official website of the drawing software in use.
8.3 My computer doesn't recognize the device
Check if your computer's USB port works normally; if not, use another USB port.
8.4 My stylus is not working
Check if it is the matching stylus for the device.
Install driver and check if the pen settings are functioning properly.If you encounter an issue with your product, please check our FAQs at https://www.ugee.com/faq to see if then can help.
If you need any further assistance, please contact us at:
Website: www.ugee.com
Email: service@ugee.com
Please select your country/region
North America
South America
Oceania
Europe